
Related Manuals for Vemco VR2AR


Summary of Contents for Vemco VR2AR
- Page 1 Requires the use of the latest VUE software www.vemco.com 15 March 2019 DOC-5563-11...
- Page 2 IMPORTANT SAFETY INFORMATION At VEMCO, we make every effort to ensure all of our products are as safe as possible. However, some hazards are unavoidable when deploying equipment underwater. IMPORTANT Throughout this document, read all warnings and cautions before proceeding with next steps in procedures and using the product.
- Page 3 4. If a receiver or acoustic release shows any signs of internal pressure or breach, do NOT attempt to open it. Handle it very gently and store it in an isolated location, then call VEMCO Customer Support (see section for contact information).
- Page 4 Important points to consider in a deployment plan and the most common attachment method Section 5: Maintenance How to care for the VR2AR, including replacing the battery, and how to prepare it for storage Section 6: Additional Information Additional information about the VR2AR that is good to know but not mandatory for basic operations...
-
Page 5: Table Of Contents
Table of Contents Introduction ................ 1 System Overview ........................ 1 VR2AR / VR2AR-X Case ....................2 Getting Started ..............5 Connect Battery ........................5 Testing ..........................6 2.2.1 In-Air Test ........................6 2.2.2 In-Water Test ......................7 VUE Communication .............. 8 Installing the VUE software .................... - Page 6 What does the “Hide this alert in future” mean? ............52 7.1.5 7.1.6 How do I open the Options window? ................. 52 I don’t want VUE to disconnect from the VR2AR after 30 inactive minutes. How do I 7.1.7 change that? ........................... 53 7.1.8 What is the Release Test? ..................
- Page 7 Index ..........................63 WARNING If the VR2AR / VR2AR-X is not used in the manner specified in this manual, then the manufacturer's warranty protection may be voided. © (2019) AMIRIX Systems Inc. All rights reserved. The information contained herein includes information which is confidential and proprietary to AMIRIX Systems Inc.
-
Page 8: Introduction
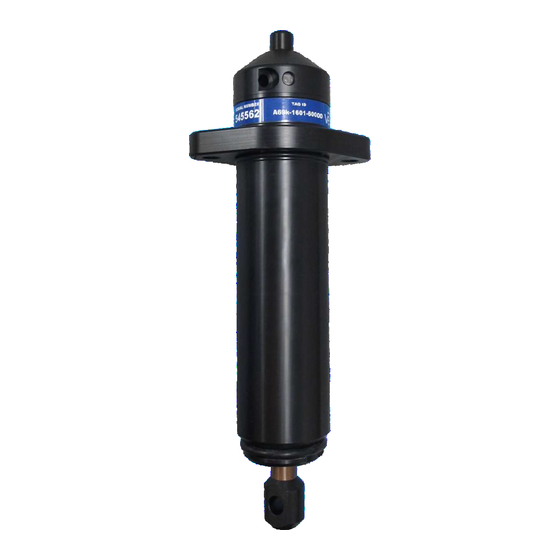
69 kHz. The VR2AR is housed in a corrosion resistant cylindrical plastic high pressure case. The case incorporates an integral hydrophone at one end of the case and a replaceable mooring lug at the other end. -
Page 9: Vr2Ar / Vr2Ar-X Case
The case dimensions are found in section 6.5. A crucial part of the VR2AR is the hydrophone, located at the top of the receiver. The hydrophone is similar to a microphone – it “listens” for sounds and transfers them to the electronics inside the receiver. The VR2AR’s hydrophone also acts as a speaker and transmits a unique ID code at a user-set interval. - Page 10 The VR2AR is shipped closed. The case only needs to be opened to power the unit. Because the VR2AR is often shipped with the battery installed but not connected, the first task is usually to open the case and either connect or install the battery.
- Page 11 VEMCO - VR2AR / VR2AR-X Manual 15 March 2019...
-
Page 12: Getting Started
Getting Started After the VR2AR has been removed from the packaging and inspected for any damage that may have occurred during shipping, power and test the unit to ensure you can communicate with the receiver and it is working properly. The VR2AR was shipped with the batteries installed but NOT connected. -
Page 13: Testing
2.2 Testing Before deploying a VR2AR, it is wise to test it with a tag and a VR100-200 receiver to verify that it is operating properly. This test also creates a VRL file containing all the configuration information for this receiver –... -
Page 14: In-Water Test
5 meters from the receiver for testing purposes. In-water tests are often performed to establish an ideal range for the VR2AR receivers in the environment in which they are moored. Details of conducting a Range Test are found at www.vemco.com/customer-service/?cs-tutorials. -
Page 15: Vue Communication
Bluetooth connection. 3.1 Installing the VUE software VUE software is used to communicate with the VR2AR receiver, allowing studies to be setup and data to be offloaded. The software requires either Windows VISTA, Windows 7, 8, or 10. -
Page 16: Connecting With Bluetooth
2. Observe the Bluetooth icon at the bottom of the window. In most cases, it will look like the Bluetooth icon shown at right, indicating that you’re ready to communicate with VEMCO Bluetooth equipment, like a VR2Tx or VR2AR. If VUE is not able to perform Bluetooth red “X”... -
Page 17: Activate Wireless Feature
Bright, red flash every second The flash pattern in a VR2AR indicates the mode (state) the receiver is in at the time. A bright, long red flash once a second indicates that the VR2AR is now ready for wireless communication but is not yet in communication with VUE. -
Page 18: Establish Bluetooth Communication
3.4 Establish Bluetooth communication After the VR2AR has been activated (section 3.3), it is ready for wireless communication with the VUE software. The VR2AR must be within communication range of the Bluetooth USB adapter, which is typically 10 meters (32 feet) but can vary based on physical and wireless obstructions/interference. - Page 19 Verify the receiver you are communicating with is the intended unit, particularly before initializing and erasing receiver memory files, or data could be lost. Communication can occur with any VR2AR with Bluetooth® wireless technology activated within a 10 meter range (typical range in air).
-
Page 20: Select Transmitter Options
90 seconds This profile determines how Sync Tag: transmits randomly between often the VR2AR 540 to 660 seconds; nominal is 600 will transmit its ID. seconds (10 minutes) Continued… VEMCO - VR2AR / VR2AR-X Manual 15 March 2019... - Page 21 If the Transmit Profile reports “Disabled” as the profile, then the transmit feature has been disabled and the ID will not be transmitted. Always verify the Transmit Profile is correct before deploying the VR2AR. VEMCO - VR2AR / VR2AR-X Manual 15 March 2019...
-
Page 22: Select Logging Options
Normal Diagnostics Mode for a period of 14 days. In Fast Diagnostics Mode, diagnostic data are logged once per minute in the VR2AR memory. This mode stays active for 14 days following activation. The following instantaneous samples are collected and logged every minute: •... - Page 23 14 days. Each 14-day usage of Fast Diagnostics Mode will consume 0.24 MB (1.49% of 16 MB or 0.74% of 32 MB) of VR2AR memory. The VR2AR will continue to log Normal Diagnostics records while Fast Diagnostics Mode is enabled.
-
Page 24: Create Watch Table
Index number between 1 and 128. When completed, this list is sent to the receiver through Bluetooth communication and accessed using the VR100 while the VR2AR is deployed. How to enter the tag information is explained in the steps below. The instructions for how to access the Watch Table using the VR100 are found in the VR100 documentation. -
Page 25: Acoustic Release In Vue
3.8 Acoustic Release in VUE The mooring lug on the VR2AR can be released while the receiver is in Bluetooth communication with VUE. Under the gear shaped Device Options, select Acoustic Release. A window will open requiring you to confirm the release before the command will be sent to the receiver. -
Page 26: Record Mode
These events were chosen so that a VR2AR receiver would always be deployed in Record Mode. The only way a VR2AR wouldn’t be in Record Mode is if the memory was full or the battery was removed (see section 5.1). - Page 27 STEP 3 Select one of the three options displayed. • ERASE: when the data stored in the VR2AR has already been offloaded and you wish to erase the data and begin a new study. • OFFLOAD: when the data has not been offloaded from the VR2AR, or if there is any uncertainty about the data being offloaded.
-
Page 28: Offload Data
3.10 Offload Data After data has been collected by a VR2AR, either during testing while in air or while in the water, that data must be offloaded to be accessed and viewed. Data can only be offloaded from a VR2AR receiver while it is in communication with VUE software through Bluetooth®. -
Page 29: Disconnect Communication With Receiver
3.11 Disconnect communication with receiver Click the “Close View” button (red box with white X) to disconnect the communication between the VR2AR and VUE software. A window will appear to confirm that you want to close the VR2AR View window. -
Page 30: Deployment
Deployment How a VR2AR receiver is deployed is driven by the environment it is being deployed in and the type of study being performed. Some important points to keep in mind when designing a deployment plan for your VR2AR receivers are explained here. The common method for attaching a VR2AR to a mooring line is also given, along with the dimensions of the VR2AR cases. -
Page 31: Spacing
4.2 Mooring Line Attachment A common method used to attach a VR2AR receiver to a mooring line is to thread the rope through one of the holes in the float attachment bracket, wrap it around the circumference of the receiver, and up through the other hole in the float attachment bracket, as shown below. -
Page 32: Acoustic Release
4.3 Acoustic Release More VR100-200 The VR2AR release mechanism is a push-off pin that is controlled by a DC commands are found in motor using a titanium shaft. The exterior of the shaft is copper to reduce bio- the VR100 Acoustic fouling. -
Page 33: Re-Arming Acoustic Release
4.4 Re-arming Acoustic Release The mooring lug in the end of the VR2AR must be installed before the VR2AR is deployed. Mooring lug replacements are available from VEMCO. Follow the steps below to install a mooring lug in a VR2AR:... - Page 34 RECOMMENDED: Spread a thin coat of Molykote 55 O-ring grease around the copper sleeve and inside the threaded hole on the mooring lug. Also spread a thin coat around the threaded rod inside the VR2AR and on the seal at the lip of the hole. Always wear protective gloves when handling O-ring grease!
- Page 35 Push the Retaining O-ring over the edge of the case so it sits in the groove. Check the circumference of the case to verify the O-ring is securely in the groove. VEMCO - VR2AR / VR2AR-X Manual 15 March 2019...
-
Page 36: Maintenance
It is vitally important that the electronics inside the receiver case do not come in contact with any water or the receiver will be damaged. For this reason, VEMCO recommends the VR2AR be opened in a controlled environment and not in the field or on the deck of a boat. STEP 2... - Page 37 STEP 3 Hold the body of the VR2AR securely in place. A strap wrench on the body of the VR2AR can help with gripping the receiver. Insert the steel rod into the Bluetooth Activator Hole on the end of the receiver and hold on to the rod –...
-
Page 38: Disconnecting And Removing Battery
STEP 6 Place the outer cylinder and internal casing/end-cap on a stable surface and prevent them from rolling – particularly the internal casing/end-cap. (VR2AR model shown) Threads End-cap Metal Internal Casing Mooring Outer Cylinder Disconnecting and Removing Battery 5.1.2 STEP 1... -
Page 39: Install Battery
VEMCO for instructions. NOTE: If the VR2AR was in Recording mode (i.e. as Study had been initialized; see section 3.9) when the battery was disconnected, then it will immediately return to recording detections after the battery has been replaced. -
Page 40: Close The Vr2Ar Case
Close the VR2AR Case 5.1.4 Before deploying or storing a VR2AR receiver, the case must be properly closed and sealed to prevent damage to the electronics. Even humidity in the air can, over time, cause damage to the electronics so it’s very important to keep the case sealed with a functioning desiccant pack inside. - Page 41 Bluetooth Activator Hole. Hold the body of the VR2AR securely in place. A strap wrench on the body of the VR2AR can help with gripping the receiver. Apply pressure to the rod so it turns in a clockwise direction when you are facing the hydrophone.
-
Page 42: Resetting The Battery Usage Indicator
Bluetooth communication. Once VUE has connected to the VR2AR receiver, it will determine if a BUI reset is required, and display the following dialog box. To reset the BUI, click Reset. The reset dialog box disappears, and the receiver and VUE software are now synchronized with a new date for battery replacement. -
Page 43: O-Ring Care
5.2 O-ring Care O-rings located in the end-cap of the VR2AR case are crucial to the watertight seal of the receiver. Each time an O-ring is disturbed, for any reason, it must be checked before the unit is sealed again. Something as simple as a stray hair could be the difference between a successful study and a damaged receiver. -
Page 44: Clean O-Ring Surfaces
An O-ring surface is any surface the O-ring touches. The VR2AR has three, the two grooves the O-rings sit in and the smooth area inside the Outer Cylinder that sits between the threads and the end of the cylinder. -
Page 45: Install O-Ring
AA battery. operating temperature specified in section 9.3. It is strongly suggested that the VR2AR not be initialized prior to storage (Do not erase data) and a backup of all offloaded data is made immediately. VEMCO - VR2AR / VR2AR-X Manual... -
Page 46: Additional Information
6.1.1 A VR2AR receiver with 16 MB of memory can store more than 1.6 million detections. How long it takes to fill the memory depends on how frequently the data are received and if any additional data is being logged (see section 3.6,... -
Page 47: Status Light Flashes
If you see the long light followed by more flashes, then contact VEMCO for instructions. When the transmit feature is enabled in the VR2AR, the status light will flash a quick flash for each ping sent and a longer green flash to indicate that the pings were recorded in the VR2AR memory. -
Page 48: Set Local Options
To enable a query, select “Always Ask” and that query will be enabled the next time that feature is used. For example, if “Confirm before closing VR2AR” is selected, then a query will open the next time Bluetooth communication with a VR2AR is closed. -
Page 49: Batteries
As the graph illustrates, the battery voltage reported by a receiver may be at the correct level for proper operation even when the battery is close to the end of its life. The voltage value reported by a VR2AR indicates the battery is at the proper voltage at that moment but does not give any indication of the remaining life of the battery. -
Page 50: Battery Life
The VR2AR/VR2AR-X is usually shipped with the batteries inside the VR2AR but not connected – the /VR2AR-X is not shipped powered. The D/DD-cell battery life is consumed from the time the battery is connected so always disconnect the battery when the receiver is not being used for an extended period of time. -
Page 51: Case External Dimensions
6.5 Case External Dimensions The dimensions of the VR2AR/VR2AR-X cases can be useful when designing a mooring plan or mooring equipment. The dimensions, in inches, of the cases are shown in the drawing below. VR2AR 6.5.1 VEMCO - VR2AR / VR2AR-X Manual... -
Page 52: Vr2Ar-X
VR2AR-X 6.5.2 VEMCO - VR2AR / VR2AR-X Manual 15 March 2019... -
Page 53: Update Firmware
6.6 Update Firmware Firmware refers to the internal software that operates a VR2AR receiver. It is not to be confused with VUE, the PC software used to communicate with the receiver. Firmware updates are rare and will occur to either deal with a hardware change or occasionally for a significant addition to functionality. - Page 54 VR2AR tab. A window titled “Select Firmware File” will appear. Select the most recent firmware file that matches your model of VR2AR. VUE software will not let you install a firmware file for the incorrect model type. Click the “Open” button to continue.
-
Page 55: Map Updating
6.7 Map Updating WARNING Occasionally, VEMCO releases a new coded map. Updating the map in the VR2AR Setting up a receiver is as simple as starting a new study with the new map selected. Follow the basic with an incorrect map steps below to start a study with the new map. - Page 56 10. Verify that the map listed in the receiver information is the new map you selected. 11. Close the communication connection with the VR2AR by clicking the red box with the white “X” (Close View) on the left side of the receiver ribbon.
-
Page 57: Common Questions
If a VR2AR receiver is deployed without being initialized, the receiver will detect tags but will not necessarily have the correct clock setting or map configuration required for proper data detection. -
Page 58: What Date/Time Format Is My Data Stored In The Receiver And Displayed In Vue
The RLD data file (VR2AR-RLD_545565_20141216_1.VRL) is only used by VEMCO for diagnostic purposes, and should be archived in case it is required by our Support Department. What Date/Time format is my data stored in the receiver and 7.1.4 displayed in VUE? All detection data and events are stored in the receiver in UTC (Coordinated Universal Time). -
Page 59: What Does The "Hide This Alert In Future" Mean
(see arrow in picture at right). The Options window contains the following tabs: Display, Offload, Export, Devices, and Other. These are described in detail in the VUE manual. VEMCO - VR2AR / VR2AR-X Manual 15 March 2019... -
Page 60: I Don't Want Vue To Disconnect From The Vr2Ar After 30 Inactive Minutes. How Do I Change That
How do I change that? When no user activity occurs between VUE and a VR2AR for 30 minutes, VUE will disconnect the Bluetooth connection to conserve the receiver’s battery. If you do not want this to occur, open the Options window (section 7.1.6);... -
Page 61: Vr2Ar Related Questions
In most cases greater transmission power output (dB) results in greater range. For example, in good conditions a V7/VR2AR range test could yield a range of 300-400 m and a V16/VR2AR test could yield ranges of 800-1200 m. There are some exceptions where high power and a reflective and low noise environment may cause detection breakdowns. -
Page 62: Troubleshooting
I cannot connect to my VR2AR receiver 8.1.1 First confirm that your Bluetooth connection between VUE and your VR2AR receiver is functional. If this Bluetooth connection is functioning correctly, try replacing the D-cell battery in the VR2AR with a new battery. - Page 63 “Power ON” event, and your current battery is still good, click No. The reset dialog box disappears, and the receiver and VUE software are now synchronized with a new date for battery replacement. Your receiver is now ready for use. VEMCO - VR2AR / VR2AR-X Manual 15 March 2019...
-
Page 64: Vr2Ar Case Related Troubleshooting
I think the case might be pressurized 8.2.2 When handled correctly, the VR2AR pressure case and seal have a static depth rating of 500 meters (730 psi). If the receiver experiences a pressure greater than this, then water may enter the case. NOTE: Physical shocks to the receiver, such as bumping into a solid object, when it is at any depth can result in a considerably higher pressure on the casing than just the depth pressure. -
Page 65: Appendices
Appendices 9.1 Cleaning Instructions Clean the VR2AR with a damp cloth and mild detergent. Do not use solvents. Do not use a scraper or abrasive cleaner on the LED window or the seal surfaces. 9.2 Contact Information VEMCO 20 Angus Morton Drive... -
Page 66: Vr2Ar Specifications
Physical shocks to the receiver, such as bumping into a solid object, when it is at any depth can result in a considerably higher pressure on the casing than just the depth pressure and water may enter the VR2AR case. If the O-rings or their mating surfaces are dirty or damaged, then water may also enter the receiver case. -
Page 67: Vr2Ar-X Specifications
Physical shocks to the receiver, such as bumping into a solid object, when it is at any depth can result in a considerably higher pressure on the casing than just the depth pressure and water may enter the VR2AR–X case. If the O-rings or their mating surfaces are dirty or damaged, then water may also enter the receiver case. - Page 68 VEMCO’s liability, and the Buyer’s exclusive remedy under this warranty, as to a defect in material or workmanship, is limited to the repair of such defect in the accessory, equipment or part in which the defect appears or, at VEMCO’s option, to the replacement of such accessory, equipment or part with a similar item free from defect. As to any item repaired by VEMCO or furnished as a replacement by VEMCO, VEMCO’s liability and the Buyer’s exclusive remedy to the repair or replacement of such item for any further defect in material or workmanship,...
- Page 69 Firmware: A computer program that is contained as a read-only memory in a hardware device. This program controls the hardware device and may be able to be upgraded, depending on the design of the product. The VR2AR firmware can be upgraded if there is a design change.
- Page 70 Firmware Update, 43 Start a Study, 17 Grease Study Configuration, 18 O-rings, 35 Suppressed pop-up queries, 39 Re-arming mooring lug, 25 VRL file types, 47 Initialize Study, 17 Watch Table Creation, 15 VEMCO - VR2AR / VR2AR-X Manual 15 March 2019...
Need help?
Do you have a question about the VR2AR and is the answer not in the manual?
Questions and answers