Table of Contents
Advertisement
Advertisement
Table of Contents
Troubleshooting

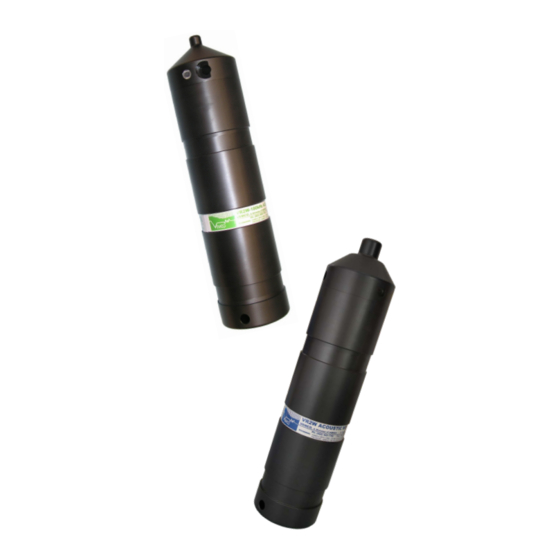
Related Manuals for Vemco VR2W


Summary of Contents for Vemco VR2W
- Page 1 How to use the VR2W family of receivers. www.vemco.com 7 Apr 2014 DOC-4400-18...
- Page 2 Getting to know the VR2W receivers Section 2: Getting started Getting the VR2W ready, including powering the VR2W, opening and closing the case, and initial tests Section 3: Communication Talking to the VUE software, and how to use VUE with a VR2W...
-
Page 3: Table Of Contents
1 Introduction ................ 1 System Overview ........................1 VR2W Case ........................... 2 Case parts ..........................3 2 Getting Started ..............4 Open the VR2W Case ......................4 Install Battery ......................... 7 Close the VR2W Case ......................9 Testing ..........................11 2.4.1 In-Air Test ........................ - Page 4 How long will my VR2W battery last?................41 7.2.3 Does receiver orientation matter? ................41 7.2.4 At low tide my VR2W receiver will be exposed to direct sunlight, does this matter? .. 41 8 Troubleshooting ..............42 VUE related troubleshooting ....................42 8.1.1 Bluetooth Troubleshooting ..................
- Page 5 The VR2W-xxxx-110/111 has been tested and found to comply with the limits for a Class B digital device, pursuant to Part 15 of the FCC Rules. These limits are designed to provide reasonable protection against harmful interference in a residential installation.
-
Page 6: Introduction
(single Lithium cell). The VR2W records the tag code number, the date/time of valid detections, and sensor data if the tag received is equipped with a sensor. This information is stored in the VR2W memory until it is downloaded from the receiver using Bluetooth wireless communication and a PC running VUE software. -
Page 7: Vr2W Case
(section 9.1). A crucial part of the VR2W is the hydrophone, located at the top of the receiver. The hydrophone is similar to a microphone – it “listens” for sounds and transfers them to the electronics inside the receiver. Be very careful not to bump the hydrophone or damage may occur that may prevent the receiver from detecting tags. -
Page 8: Case Parts
Case parts The VR2W is shipped closed, as shown below. The battery may be installed in the case but not connected. The case only needs to be opened when the battery must be connected or replaced. Connecting the battery is explained in Section 2, along with opening and closing the receiver case. -
Page 9: Getting Started
It is vitally important that the electronics inside the receiver case do not come in contact with any water or the receiver will be damaged. For this reason, VEMCO recommends the VR2W be opened in a controlled environment and not in the field or on the deck of a boat. STEP 2... - Page 10 STEP 3 Insert one steel rod into the hole that runs through the diameter of the case near the flat end of the VR2W. Position it so most of the rod is on the left side of the receiver as shown.
- Page 11 STEP 6 Slide the end-cap and cylinder apart until the battery compartment has cleared the cylinder. Be very careful not to damage the threads on the end-cap or the VR2W won’t close and seal properly. Outer Cylinder End-cap Battery Compartment...
-
Page 12: Install Battery
With the case open, you can install the new battery. If there is a used battery in the receiver, use the instructions found in Section 5.1.1 to remove the battery before inserting the new one. Some VR2W receivers are shipped with the battery inside the receiver but not connected. If this is the case for your... - Page 13 Connect the two battery connector halves together until a “click” is heard and the VR2W receiver’s light begins flashing. NOTE: If the VR2W was in Recording mode (i.e. as Study had been initialized) when the battery was disconnected, then it will immediately return to recording detections after the battery has been replaced.
-
Page 14: Close The Vr2W Case
Important information about storing a VR2W is found in section 5.3. STEP 1 Make sure the serial number around the outer cylinder matches the serial number on the internal casing. - Page 15 Insert one steel rod into the hole that runs through the diameter of the case near the flat end of the VR2W. Position the rod so the majority of the rod is on the right side of the case. This helps brace the receiver while the case is being closed.
-
Page 16: Testing
In-Air Test 2.4.1 The VR2W can detect coded pingers in air, but at a much reduced range compared to their range capabilities in water. Perform air tests away from electrical noise sources such as motors, PC screens, or fluorescent lights. -
Page 17: Communication
VR2 receiver. For example, to offload 2 MB of data requires 3.3 minutes for the VR2W to accomplish but it would have taken the VR2 more than 75 minutes. A comparison table is located in section 6.1.2 for more information. - Page 18 If you are opening a database created by an earlier version of VUE (version 1.4.4 or older), you will receive a warning that the database will be converted to the new version of VUE and will no longer be compatible with older versions of the software. VEMCO - VR2W Manual...
-
Page 19: Activate Wireless Feature
The flash pattern in a VR2W indicates the mode (state) the receiver is in at the time. A bright, long flash once a second indicates that the VR2W is now ready for wireless communication but is not yet in communication with VUE. -
Page 20: Establish Communication
Establish communication After the VR2W has been activated (section 3.2), it is ready for wireless communication with the VUE software. The VR2W must be within communication range of the Bluetooth USB adapter, which is typically 10 meters (32 feet) but can vary based on physical and wireless obstructions/interference. - Page 21 Verify the receiver you are communicating with is the intended unit, particularly before initializing and erasing receiver memory files, or data could be lost. Communication can occur with any VR2W with Bluetooth® wireless technology activated within a 10 meter range (typical range in air).
-
Page 22: Record Mode
These events were chosen so that a VR2W receiver would always be deployed in Record Mode. The only way a VR2W wouldn’t be in Record Mode is if the memory was full or the battery was removed (see section 5.1). - Page 23 STEP 3 Select one of the three options displayed. • ERASE: when the data stored in the VR2W has already been offloaded and you wish to erase the data and begin a new study. • OFFLOAD: when the data has not been offloaded from the VR2W or if there is any uncertainty about the data being offloaded.
-
Page 24: Offload Data
Offload Data After data has been collected by a VR2W, either during testing while in air or while in the water, that data must be offloaded to be accessed and viewed. Data can only be offloaded from a VR2W receiver while it is in communication with the VUE software through Bluetooth®. -
Page 25: Disconnect Communication With Receiver
2. Has all the data been offloaded from the VR2W? If you are updating from a firmware version older than 3.0, then all the data in the receiver will be erased. Updating from a version more recent than 3.0 should not erase the data, but please take the precaution of offloading all data before updating. - Page 26 STEP 2 Assuming all data has been offloaded from the VR2W and is safely stored on your PC, click “OK” to acknowledge this warning and continue. STEP 3 Keep Bluetooth Activation Key in VR2W. Verify that the Bluetooth activation key is still in the receiver, or place it in the receiver if it had been removed.
- Page 27 Step 1 in the previous section to prepare for the update. Once the preparations are completed, select “Install Firmware” on the VR2W tab. A window titled “Select Firmware File” will appear. Select the most recent firmware file that matches your model of VR2W (based on operating frequency).
-
Page 28: Deployment
Deployment How a VR2W is deployed is driven by the environment it is being deployed in and the type of study being performed. Some important points to keep in mind when designing a deployment plan for your VR2W receivers are explained here. The common method for attaching a VR2W to a mooring line is also given, along with the dimensions of the VR2W cases. -
Page 29: Mooring Line Attachment
Mooring Line Attachment The common method used to attach a VR2W receiver to a mooring line is to use five cable ties (zip tie or tie- wrap) with the following characteristics: Non-reusable lashing cable ties Suggested minimum: • 388 mm (15.25") long •... - Page 30 Trim the cable ties so there is no excess cable tie material and no sharp edges. IMPORTANT: Cut the cable ties when removing a VR2W from the mooring line. DO NOT re-use cable ties. Use only new cable ties when deploying a VR2W receiver.
-
Page 31: Maintenance
Maintenance Battery Replacement Replacing a battery in the VR2W requires four basic steps: 1. Opening the case (section 2.1) 2. Removing the battery 3. Inserting the battery (section 2.2) 4. Closing the case (section 2.3) Most of these topics were covered when we first setup the receiver. The only remaining topic to cover is how to disconnect and remove the battery. -
Page 32: O-Ring Care
O-ring Care O-rings located in the end-cap of the VR2W case are crucial to the watertight seal of the receiver. Each time an O-ring is disturbed, for any reason, it must be checked before the unit is sealed again. Something as simple as a stray hair could be the difference between a successful study and a damaged receiver. -
Page 33: Clean O-Ring Surfaces
An O-ring surface is any surface the O-ring touches. The VR2W has three, the two grooves the O-rings sit in and the smooth area inside the Outer Cylinder that sits between the threads and the end of the cylinder. - Page 34 O-ring, we recommend it be replaced rather than risk damage to the receiver and therefore your data. O-rings can be purchased for VEMCO or locally. The replacement O-rings must be PARKER #2-143 O-RING, 70 Bn NITRILE.
-
Page 35: Install O-Ring
Be sure to store the VR2W in a safe location where the case will not be damaged. Also be sure the temperature of the receiver during storage does not exceed the operating temperature specified in section 9.4. -
Page 36: Additional Information
For example, if a valid detection is received every 20 seconds then it will require approximately 365 days to fill the 16 MB VR2W memory. It will take less time if the detections are received more frequently, as illustrated in the table below. -
Page 37: Time Required To Offload Memory
LED Flashes The red Status Light on the side of the VR2W case flashes based on the task being performed or the status of the receiver. The flashes can be interpreted using the table below. The Status Light is an LED (Light Emitting Diode) and has been referred to as such in past documentation. -
Page 38: Set Local Options
To enable a query, select “Always Ask” and that query will be enabled the next time that feature is used. For example, if “Confirm before closing VR2W” is selected, then a query will open the next time a VR2W is closed. -
Page 39: Battery
As the graph illustrates, the battery voltage reported by a receiver may be at the correct level for proper operation even when the battery is close to the end of its life. The voltage value reported by a VR2W indicates the battery is at the proper voltage at the moment but does not give any indication of the remaining life of the battery. -
Page 40: Battery Life
The VR2W is usually shipped with the battery inside the VR2W but not connected – the VR2W is not shipped powered. Battery life is consumed from the time the battery is connected so always disconnect the battery when the receiver is not being used for an extended period of time. The battery must be connected before the VR2W can be initialized. -
Page 41: Case External Dimensions
Case External Dimensions The dimensions of the VR2W case can be useful when designing a mooring plan or mooring equipment. The dimensions, in inches, of the two case types are shown in the drawings below. VR2W-69kHz 0.391” diameter attachment hole... -
Page 42: Map Updating
Map Updating WARNING Occasionally, VEMCO releases a new coded map. Updating the map in the VR2W is Setting up a receiver as simple as starting a new study with the new map selected. Follow the basic steps with an incorrect map below to start a study with the new map. - Page 43 10. Verify that the map listed in the receiver information is the new MAP-113. 11. Close the communication connection with the VR2W by clicking the red box with the white “X” (Close View) on the left side of the receiver ribbon.
-
Page 44: Common Questions
Why does VUE create two .vrl file types? 7.1.3 When a VR2W is offloaded, VUE creates a detection file and an RLD data file. Both files have the “.vrl” extension. VUE only imports the detection vrl file (e.g., VR2W180_300000_20120120_1.vrl or VR2W_300000_20120120_1.vrl ). -
Page 45: What Date/Time Format Is My Data Stored In The Receiver And Displayed In Vue
(circled in picture at right) and clicking the “Options” button at the bottom of the menu box (see arrow in picture at right). The Options window contains the following tabs: Display, Offload, Export, Devices, and Other. These are described in detail in the VUE manual. VEMCO - VR2W Manual... -
Page 46: Vr2W Related Questions
In most cases greater transmission power output (dB) results in greater range. For example, in good conditions a V7-VR2W range test could yield a range of 300-400 m and a V16-VR2W test could yield ranges of 800-1200 m. There are some exceptions where high power and a reflective and low noise environment may cause detection breakdowns. -
Page 47: Troubleshooting
Here are some things to check if VUE does not detect a Bluetooth® adapter: 1. Is the VEMCO-supplied Bluetooth® adapter installed in a functional USB 2.0 High-Speed port on your PC? If nothing happens when the adapter is plugged in, try a different USB port. VUE may work with other adapters;... -
Page 48: I Cannot Connect To My Vr2W Receiver
Open the Control Panel. If your Control Panel is set to Classic View, select Bluetooth Devices. If your Control Panel is set to Category View, select Network & Internet Connections category, then Bluetooth Devices. If a VR2W is listed there, highlight it, remove it and try communicating to VUE again. -
Page 49: Vr2W Case Related Troubleshooting
This can be identified by its increased weight and a sloshing sound when the case is moved. The VR2W case will also be very difficult to open, if at all possible. -
Page 50: Appendix
Appendix VR2W Metal/PVC Casing The VR2W receiver is housed in a black plastic high pressure case as shown in the photo below. The outer cylinder is removed from the receiver to install the D-cell Lithium battery, revealing the internal casing protecting the electronics. - Page 51 The two connector halves should lock together with a little click. Close the VR2W Case The procedure for closing the VR2W with metal/PVC internal casing is very similar to the procedure with a plastic internal casing. The only difference is the placement of the desiccant pack. That difference is covered here but the rest of the steps required to close the case are found in section 2.3.
-
Page 52: Cleaning Instructions
Cleaning Instructions Clean the VR2W with a damp cloth and mild detergent. Do not use solvents. Do not use a scraper or abrasive cleaner on the LED window or the seal surfaces. Contact Information Product manufactured by VEMCO Division AMIRIX Systems Inc. -
Page 53: Vr2W Specifications
VR2W case. If the O-rings or their mating surfaces are dirty or damaged, then water may also enter the receiver case. If you are suspicious that water has entered the receiver, then follow the suggestions in the Appendix for troubleshooting a pressurized case. -
Page 54: Warranty And Disclaimer
VEMCO’s liability, and the Buyer’s exclusive remedy under this warranty, as to a defect in material or workmanship, is limited to the repair of such defect in the accessory, equipment or part in which the defect appears or, at VEMCO’s option, to the replacement of such accessory, equipment or part with a similar item free from defect. As to any item repaired by VEMCO or furnished as a replacement by VEMCO, VEMCO’s liability and the Buyer’s exclusive remedy to the repair or replacement of such item for any further defect in material or workmanship,... -
Page 55: Glossary
Firmware: A computer program that is contained as a read-only memory in a hardware device. This program controls the hardware device and may be able to be upgraded, depending on the design of the product. The VR2W firmware can be upgraded if there is a design change. -
Page 56: Index
O-rings Replacement, 26 Cleaning surfaces, 28 Specifications, 48 Installing, 30 Case Removing, 27 Closing, 9 Quick VR2W facts, 1 External Dimensions, 36 Record mode, 17 Inside, 6 Indicator, 18 Introduction, 2 Status Light (LED) Opening, 4 Flash meanings, 3, 32...
Need help?
Do you have a question about the VR2W and is the answer not in the manual?
Questions and answers