Vemco VR2Tx User Manual
Hide thumbs
Also See for VR2Tx:
- Quick manuals (2 pages) ,
- User quick reference manual (2 pages) ,
- Quick manual (2 pages)

Subscribe to Our Youtube Channel
Related Manuals for Vemco VR2Tx


Summary of Contents for Vemco VR2Tx
- Page 1 Requires the use of the latest VUE software www.vemco.com 15 March 2019 DOC-5397-11...
- Page 2 IMPORTANT SAFETY INFORMATION At VEMCO, we make every effort to ensure all of our products are as safe as possible. However, some hazards are unavoidable when deploying equipment underwater. IMPORTANT Throughout this document, read all warnings and cautions before proceeding with next steps in procedures and using the product.
- Page 3 If a receiver or acoustic release shows signs of damage or heavy biofouling, handle with extreme caution, and use all necessary protective equipment. WARNING If the VR2Tx is not used in the manner specified in this manual, then the manufacturer's warranty protection may be voided.
- Page 4 Getting to know the VR2Tx receiver Section 2: Getting started Getting the VR2Tx ready, including powering the VR2Tx, opening and closing the case, and initial tests Section 3: Communication Talking to the VUE software, and how to use VUE with a VR2Tx...
-
Page 5: Table Of Contents
Table of Contents 1 Introduction ................ 1 System Overview ........................ 1 VR2Tx Case ........................3 2 Getting Started ..............4 Open the VR2Tx Case ......................4 Install Battery ........................7 Close the VR2Tx Case ......................9 Testing ..........................11 2.4.1 In-Air Test ......................... - Page 6 VR2Tx related questions ....................49 7.2.1 How much detection range can I expect? ..............49 7.2.2 How long will my VR2Tx battery last? ............... 49 7.2.3 Does receiver orientation matter? ................49 8 Troubleshooting ..............50 VUE related troubleshooting ..................... 50 8.1.1...
-
Page 7: Introduction
VR2Tx case. If the O-rings or their mating surfaces are dirty or damaged, then water may also enter the receiver case. If you are suspicious that water has entered the receiver, then follow the suggestions in section 8.2.2 for troubleshooting a pressurized case. - Page 8 5°C to +40 °C; Water must not freeze. temperature Maximum Depth 500 meters (730 psi) Software Latest VEMCO User Environment (VUE) software In air: Bluetooth communication with VUE software Communication In water: Acoustic communication with a VR100-200 using a transponding hydrophone...
-
Page 9: Vr2Tx Case
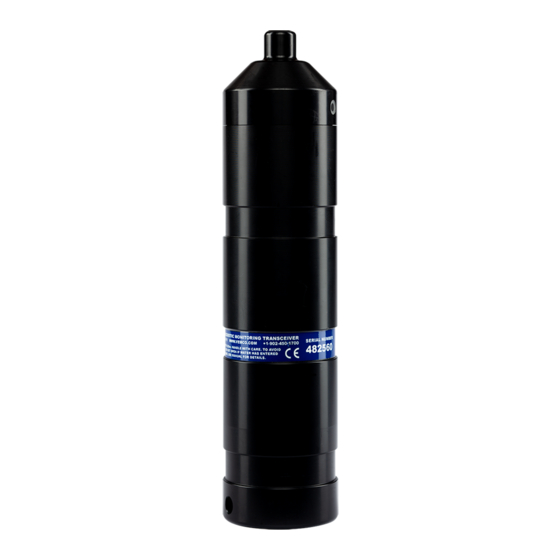
The case dimensions are found in section 6.5. A crucial part of the VR2Tx is the hydrophone, located at the top of the receiver. The hydrophone is similar to a microphone – it “listens” for sounds and transfers them to the electronics inside the receiver. The VR2Tx’s hydrophone also acts as a speaker and transmits a unique ID code at a user-set interval. -
Page 10: Getting Started
D-cell Lithium battery inside the case but not connected to the receiver, or with no battery inside the case. In either case, the VR2Tx case must be opened to power the receiver. 2.1 Open the VR2Tx Case Two steel rods are necessary to properly open and close the VR2Tx case. - Page 11 STEP 3 Insert one steel rod into the hole that runs through the diameter of the case near the flat end of the VR2Tx. Position it so most of the rod is on the left side of the receiver as shown.
- Page 12 STEP 6 Slide the end-cap and cylinder apart until the battery compartment has cleared the cylinder. Be very careful not to damage the threads on the end-cap or the VR2Tx won’t close and seal properly. Outer Cylinder End-cap Battery Compartment...
-
Page 13: Install Battery
With the case open, you can install the new battery. If there is a used battery in the receiver, use the instructions found in Section 5.1.1 to remove the battery before inserting the new one. Some VR2Tx receivers are shipped with the battery inside the receiver but not connected. If this is the case for your receiver, then move to Step 7 in the instructions below to power your VR2Tx. - Page 14 Connect the two battery connector halves together until a “click” is heard and the VR2Tx receiver’s light begins flashing. NOTE: If the VR2Tx was in Recording mode (i.e. as Study had been initialized) when the battery was disconnected, then it will immediately return to recording detections after the battery has been replaced.
-
Page 15: Close The Vr2Tx Case
2.3 Close the VR2Tx Case Before deploying or storing a VR2Tx receiver, the case must be properly closed and sealed to prevent damage to the electronics. Even humidity in the air can, over time, cause damage to the electronics so it’s very important to keep the case sealed, with a functioning desiccant pack inside, as much as possible. - Page 16 Insert one steel rod into the hole that runs through the diameter of the case near the flat end of the VR2Tx. Position the rod so the majority of the rod is on the right side of the case. This helps brace the receiver while the case is being closed.
-
Page 17: Testing
In-Air Test 2.4.1 The VR2Tx can detect coded pingers in air, but at a much reduced range compared to their range capabilities in water. Perform air tests away from electrical noise sources such as motors, PC screens, or fluorescent lights. -
Page 18: In-Water Test
– 5 meters is suggested. In-water tests are often performed to establish an ideal range for the VR2Tx receivers in the environment in which they are moored. Details of conducting a Range Test are found at www.vemco.com/customer-service/?cs-tutorials. -
Page 19: Communication
(typical range is 10 meters). 3.1 Installing the VUE software VUE software is used to communicate with the VR2Tx receiver, allowing studies to be setup and data to be offloaded. The software requires either Windows VISTA, Windows 7, 8, or 10. -
Page 20: Connecting With Bluetooth
2. Observe the Bluetooth icon at the bottom of the window. In most cases, it will look like the Bluetooth icon shown at right, indicating that you’re ready to communicate with VEMCO Bluetooth equipment, like a VR2Tx or VR2AR. If VUE is not able to perform Bluetooth red “X”... -
Page 21: Activate Wireless Feature
Bright flash every second The flash pattern in a VR2Tx indicates the mode (state) the receiver is in at the time. A bright, long red flash once a second indicates that the VR2Tx is now ready for wireless communication but is not yet in communication with VUE. -
Page 22: Establish Bluetooth Communication
3.4 Establish Bluetooth communication After the VR2Tx has been activated (section 3.3), it is ready for wireless communication with the VUE software. The VR2Tx must be within communication range of the Bluetooth USB adapter, which is typically 10 meters (32 feet) but can vary based on physical and wireless obstructions/interference. - Page 23 Verify the receiver you are communicating with is the intended unit, particularly before initializing and erasing receiver memory files, or data could be lost. Communication can occur with any VR2Tx with Bluetooth® wireless technology activated within a 10 meter range (typical range in air).
-
Page 24: Select Transmitter Options
Range Test (90s): transmits at a fixed descriptions at right. rate of 90 seconds This profile determines how Sync Tag: transmits randomly between often the VR2Tx will 540 to 660 seconds; nominal is 600 transmit its ID. seconds (10 minutes) Continued… VEMCO - VR2Tx Manual... - Page 25 If the Transmit Profile reports “Disabled” as the profile, then the transmit feature has been disabled and the ID will not be transmitted. Always verify the Transmit Profile is correct before deploying the VR2Tx. VEMCO - VR2Tx Manual 15 March 2019...
-
Page 26: Select Logging Options
The VR2Tx has two options for logging diagnostic information: Normal Diagnostics Mode and Fast Diagnostics Mode. Normal Diagnostics Mode (always active) By default, diagnostic data are logged once per hour in the VR2Tx memory. Normal Diagnostics Mode is always active and includes the following data: •... - Page 27 14 days. Each 14-day usage of Fast Diagnostics Mode will consume 0.2 MB (1.24% of 16 MB or 0.62% of 32 MB) of VR2Tx memory. The VR2Tx will continue to log Normal Diagnostics records while Fast Diagnostics Mode is enabled.
-
Page 28: Create Watch Table
Index number between 1 and 128. When completed, this list is sent to the receiver through Bluetooth communication and accessed using the VR100 while the VR2Tx is deployed. How to enter the tag information is explained in the steps below. The instructions for how to access the Watch Table using the VR100 are found in the VR100 documentation. - Page 29 By default, the file will be saved in the …\Documents\Vemco\VUE folder. This exported file can be opened and printed so a copy of the Index numbers and associated tags can be taken into the field...
-
Page 30: Record Mode
These events were chosen so that a VR2Tx receiver would always be deployed in Record Mode. The only way a VR2Tx wouldn’t be in Record Mode is if the memory was full or the battery was removed (see section 5.1). - Page 31 STEP 3 Select one of the three options displayed. • ERASE: when the data stored in the VR2Tx has already been offloaded and you wish to erase the data and begin a new study. • OFFLOAD: when the data has not been offloaded from the VR2Tx or if there is any uncertainty about the data being offloaded.
-
Page 32: Offload Data
3.9 Offload Data After data has been collected by a VR2Tx, either during testing while in air or while in the water, that data must be offloaded to be accessed and viewed. Data can only be offloaded from a VR2Tx receiver while it is in communication with the VUE software through Bluetooth®. -
Page 33: Disconnect Communication With Receiver
Disconnect communication with receiver 3.10 Click the “Close View” button (red box with white X) to disconnect the communication between the VR2Tx and the VUE software. A window will appear to confirm that you want to close the VR2Tx View window. -
Page 34: Deployment
Deployment How a VR2Tx is deployed is driven by the environment it is being deployed in and the type of study being performed. Some important points to keep in mind when designing a deployment plan for your VR2Tx receivers are explained here. The common method for attaching a VR2Tx to a mooring line is also given, along with the dimensions of the VR2Tx cases. -
Page 35: Mooring Line Attachment
4.2 Mooring Line Attachment The common method used to attach a VR2Tx receiver to a mooring line is to use five cable ties (zip tie or tie- wrap) with the following characteristics: Non-reusable lashing cable ties Suggested minimum: • 388 mm (15.25") long •... - Page 36 STEP 6 Wrap a third cable tie around the VR2Tx receiver and the rope so the cable tie occupies the top half of the lower groove in the VR2Tx body. The bottom half of the groove is already occupied by the cable tie from Step 5 Latch the cable tie so the head of the cable tie is over the rope.
-
Page 37: Maintenance
Maintenance 5.1 Battery Replacement Replacing a battery in the VR2Tx requires four basic steps: 1. Opening the case (section 2.1) 2. Removing the battery 3. Inserting the battery (section 2.2) 4. Closing the case (section 2.3) Most of these topics were covered when we first setup the receiver. The only remaining topic to cover is how to disconnect and remove the battery. -
Page 38: Resetting The Battery Usage Indicator
Bluetooth communication. Once VUE has connected to the VR2Tx receiver, it will determine if a BUI reset is required, and display the following dialog box. To reset the BUI, click Reset. The reset dialog box disappears, and the receiver and VUE software are now synchronized with a new date for battery replacement. -
Page 39: O-Ring Care
5.2 O-ring Care O-rings located in the end-cap of the VR2Tx case are crucial to the watertight seal of the receiver. Each time an O-ring is disturbed, for any reason, it must be checked before the unit is sealed again. Something as simple as a stray hair could be the difference between a successful study and a damaged receiver. -
Page 40: Clean O-Ring Surfaces
An O-ring surface is any surface the O-ring touches. The VR2Tx has three, the two grooves the O-rings sit in and the smooth area inside the Outer Cylinder that sits between the threads and the end of the cylinder. - Page 41 O-ring, we recommend it be replaced rather than risk damage to the receiver and therefore your data. O-rings can be purchased for VEMCO or locally. The replacement O-rings must be PARKER #2-143 O-RING, 70 Bn NITRILE.
-
Page 42: Install O-Ring
VR2Tx. Be sure to store the VR2Tx in a safe location where the case will not be damaged. Also be sure the temperature of the receiver during storage does not exceed the operating temperature specified in section 9.3. -
Page 43: Additional Information
Time required to fill memory 6.1.1 A VR2Tx receiver with 16 MB of memory can store more than 1.6 million detections. How long it takes to fill the memory depends on how frequently the data are received. For example, if a valid detection is received every 20 seconds then it will require approximately 365 days to fill the 16 MB VR2Tx memory. -
Page 44: Status Light Flashes
6.2 Status Light Flashes The Status Light (LED) on the side of the VR2Tx case flashes based on the task being performed or the status of the receiver. The flashes can be interpreted using the table below. Status Light Flash meanings... -
Page 45: Battery
As the graph illustrates, the battery voltage reported by a receiver may be at the correct level for proper operation even when the battery is close to the end of its life. The voltage value reported by a VR2Tx indicates the battery is at the proper voltage at the moment but does not give any indication of the remaining life of the battery. -
Page 46: Battery Life
Approximate Battery Life VR2Tx-69kHz receiver. 14 months Larger amounts of battery life are consumed while the VR2Tx is ready for Bluetooth communication or is communicating with the PC than during the receiver’s Record mode. For this reason, the VR2Tx exits Bluetooth mode as soon as the Receiver tab in the VUE software is closed (section 3.10). -
Page 47: Case External Dimensions
6.5 Case External Dimensions The dimensions of the VR2Tx case can be useful when designing a mooring plan or mooring equipment. The dimensions, in inches, of the case are shown in the drawing below. VR2Tx-69kHz 0.391” diameter attachment hole Dimensions are in inches... -
Page 48: Update Firmware
2. Have all the data been offloaded from the VR2Tx? If you are making a major update (e.g. from version 1.x.x to 2.x.x), then all the data in the receiver will be erased. Making a smaller update (e.g. from 1.x.2 to 1.x.3) should not erase the data, but please take the precaution of offloading all data before updating. - Page 49 STEP 4 Wait while the firmware is loaded into the VR2Tx. The status of the update is shown at the bottom of the screen. Click “OK” when the firmware is installed (see below). STEP 5...
-
Page 50: Map Updating
6.7 Map Updating WARNING Occasionally, VEMCO releases a new coded map. Updating the map in the VR2Tx Setting up a receiver is as simple as starting a new study with the new map selected. Follow the basic with an incorrect map steps below to start a study with the new map. - Page 51 10. Verify that the map listed in the receiver information is the new map you selected. 11. Close the communication connection with the VR2Tx by clicking the red box with the white “X” (Close View) on the left side of the receiver ribbon.
-
Page 52: Common Questions
If a VR2Tx receiver is deployed without being initialized, the receiver will detect tags but the receiver will not necessarily have the correct clock setting or map configuration required for proper data detection. -
Page 53: What Date/Time Format Is My Data Stored In The Receiver And Displayed In Vue
The RLD data file (VR2AR-RLD_545565_20141216_1.VRL) is only used by VEMCO for diagnostic purposes, and should be archived in case it is required by our Support Department. What Date/Time format is my data stored in the receiver and 7.1.4 displayed in VUE? All detection data and events are stored in the receiver in UTC (Coordinated Universal Time). -
Page 54: What Does The "Hide This (Window) In Future" Mean
(see arrow in picture at right). The Options window contains the following tabs: Display, Offload, Export, Devices, and Other. These are described in detail in the VUE manual. VEMCO - VR2Tx Manual 15 March 2019... -
Page 55: Vr2Tx Related Questions
In most cases greater transmission power output (dB) results in greater range. For example, in good conditions a V7-VR2Tx range test could yield a range of 300-400 m and a V16-VR2Tx test could yield ranges of 800-1200 m. There are some exceptions where high power and a reflective and low noise environment may cause detection breakdowns. -
Page 56: Troubleshooting
I cannot connect to my VR2Tx receiver 8.1.1 First confirm that your Bluetooth connection between VUE and your VR2Tx receiver is functional. If this Bluetooth connection is functioning correctly, try replacing the VR2Tx battery in the VR2Tx with a new battery. - Page 57 “Power ON” event, and your current battery is still good, click No. The reset dialog box disappears, and the receiver and VUE software are now synchronized with a new date for battery replacement. Your receiver is now ready for use. VEMCO - VR2Tx Manual 15 March 2019...
-
Page 58: Vr2Tx Case Related Troubleshooting
This can be identified by its increased weight and a sloshing sound when the case is moved. The VR2Tx case will also be very difficult to open, if at all possible. -
Page 59: Appendices
Appendices 9.1 Cleaning Instructions Clean the VR2Tx with a damp cloth and mild detergent. Do not use solvents. Do not use a scraper or abrasive cleaner on the LED window or the seal surfaces. 9.2 Contact Information VEMCO 20 Angus Morton Drive... -
Page 60: Vr2Tx Specifications
VR2Tx case. If the O-rings or their mating surfaces are dirty or damaged, then water may also enter the receiver case. If you are suspicious that water has entered the receiver, then follow the suggestions in the Appendix for troubleshooting a pressurized case. -
Page 61: Warranty And Disclaimer
VEMCO’s liability, and the Buyer’s exclusive remedy under this warranty, as to a defect in material or workmanship, is limited to the repair of such defect in the accessory, equipment or part in which the defect appears or, at VEMCO’s option, to the replacement of such accessory, equipment or part with a similar item free from defect. As to any item repaired by VEMCO or furnished as a replacement by VEMCO, VEMCO’s liability and the Buyer’s exclusive remedy to the repair or replacement of such item for any further defect in material or workmanship,... -
Page 62: Glossary
Firmware: A computer program that is contained as a read-only memory in a hardware device. This program controls the hardware device and may be able to be upgraded, depending on the design of the product. The VR2Tx firmware can be upgraded if there is a design change. -
Page 63: Index
Replacement, 30 O-rings Specifications, 52 Cleaning surfaces, 33 Case Installing, 35 Closing, 9 Removing, 32 External Dimensions, 40 Quick VR2Tx facts, 2 Inside, 6 Record mode, 23 Opening, 4 Indicator, 24 Parts, 3 Status Light Visible differences, 3 Flash meanings, 37...
Need help?
Do you have a question about the VR2Tx and is the answer not in the manual?
Questions and answers