Table of Contents
Advertisement
Quick Links
Advertisement
Table of Contents

Related Manuals for Union Community Virdi AC-2100


Summary of Contents for Union Community Virdi AC-2100
- Page 1 AC-2100.User Guide Version Eng-1.06 Copyright 2000 By Union Community Co., LTD.
-
Page 2: Revison History
AC-2100 User Guide < Revison History> Version Date Description Firmware Version 1.00 2009-08-20 Initial Release 10.51.00 1.01 2009-10-29 Change the menu key 10.51.01~ - Menu : F2~ F3~ <Multi Fn-Key > added 1.02 2010-03-08 (P.34) 10.51.03~ <Print Out> added (P.35) <Time Sync>... -
Page 3: Terminology Description
AC-2100 User Guide < Terminology Description > Admin, Administrator - As a user who can access using terminal menu mode, the administrator has rights change operating environment through registration/modification/deletion of terminal users. - In case no registered administrator is available, anyone can access the terminal menu change... - Page 4 AC-2100 User Guide - This function allows the input of only real fingerprints and blocks the input of imitation fingerprints produced using rubber, paper, film and silicone. UNIONCOMMUNITY Co., Ltd. / 3F Hyundai Topix Bldg. 44-3 Bangi-dong Songpa-gu Seoul, Korea (138-050) Tel : 02-6488-3000 , Fax : 02-6488-3099, E-Mail :sales@unioncomm.co.kr http://www.unioncomm.co.kr...
-
Page 5: Table Of Contents
AC-2100 User Guide Table of Contents < Revison History>....................2 < Terminology Description > ................... 3 Table of Contents....................5 1. Check before Device Use ..................7 1.1. Cautions for Safety ..................7 1.2. Terminal Component Name ................ 8 1.3. Information on Button Required during Operation ........8 1.4. - Page 6 AC-2100 User Guide 3.7. Extra Function ................... 46 3.7.1. Terminal Lock Setting ................. 46 3.7.2. Card Number Inquiry ................47 3.7.3. Sensor Monitor Input Port Setting ............47 3.8. Device Setting.................... 49 3.8.1. System Configuration ................. 49 3.8.2. Card Reader Setting................50 3.8.3.
-
Page 7: Check Before Device Use
AC-2100 User Guide 1. Check before Device Use 1.1. Cautions for Safety Warning Do not operate the device with wet hand, and do not Do not place the device let liquid such as water to near fire. flow into the device. ->... -
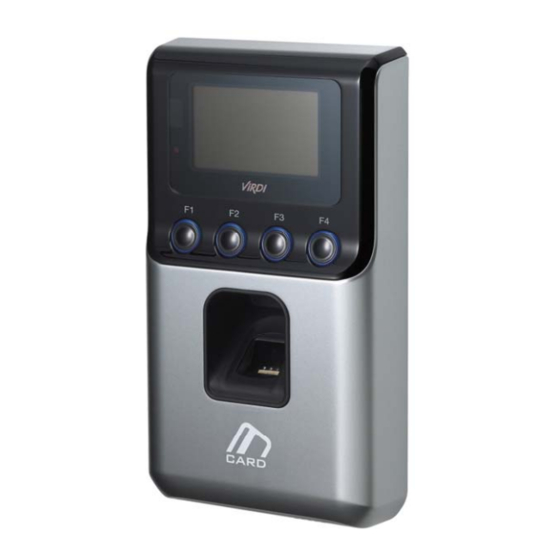
Page 8: Terminal Component Name
AC-2100 User Guide 1.2. Terminal Component Name 1.3. Information on Button Required during Operation - Change to office start mode - At menu mode, used as [ESC] or move to left [] button, used as [ESC] button if pressed down for longer then 2 seconds: [ESC~] - Change to office leave mode - At menu mode, used as move up or increase [↑] button... -
Page 9: Information On Led Signal Displayed During Operation
AC-2100 User Guide - Change to return to office/access mode - At menu mode, used as [ENT] or move to right [] button used as [ENT] button if pressed down for longer than 2 seconds: [F4~] 1.4. Information on LED Signal Displayed during Operation Power Light on: Normal ●... - Page 10 AC-2100 User Guide - Authentication failure 2009/08/25 16:58 - Fingerprint input failure In case the finger is removed too early before the fingerprint is entered 2009/08/25 16:58 - Unregistered card input - In case 1:N authentication is attempted when authentication priority is SN and a user with 1:N authentication permission is not available in the 2009/08/25 16:58 terminal...
-
Page 11: Information On Lcd Icon Displayed During Operation
AC-2100 User Guide - In case terminal is in lock state - In case it is not meal service hour when setting as meal service management 2009/08/25 16:58 - When upgrading terminal program (Do not switch off terminal power while this message is displayed.) 2009/08/25 16:58 1.6. -
Page 12: Proper Fingerprint Registration And Input Method
AC-2100 User Guide 1.9. Proper Fingerprint Registration and Input Method Proper fingerprint input method If possible, use the index finger and enter fingerprint as if you are making a thumbprint. Just touching a finger to the fingerprint input window is not the proper way for registration/input. - Page 13 AC-2100 User Guide This product is a fingerprint recognition system. If a fingerprint is damaged or weak, it cannot be used. If that happens, use a password for operation. If your hand is too dry, breathe into it for a while to ensure smooth operation.
-
Page 14: Product Introduction
AC-2100 User Guide 2. Product Introduction 2.1. Product Features Access control system using network (LAN) - As communication between fingerprint recognition device authentication server is done using UTP cable and TCP/IP protocol, existing local area network can be used for good scalability. 10/110 Mbps auto detect provides fast speed and allows easy management and monitoring through a network. -
Page 15: Configuration Figure
AC-2100 User Guide nearly limitless processing is possible. Provides various registration and authentication methods There are 4 registration and authentication methods available for general users. The registration and authentication method must be chosen before registering a user or administrator. Fingerprint registration Fingerprint authentication Card registration... -
Page 16: Connection With Pc Server (Access, Time & Attendance And Meal Service Management)
AC-2100 User Guide 2.2.2. Connection with PC server (Access, Time & Attendance and Meal Service Management) TCP/IP TCP/IP Fingerprint Recognition Server TCP/IP (Static IP) Internet / UDB Server WAN / LAN Database (MDB or MSSQL) Remote Administrator TCP/IP Program (User and Terminal Setting Management) Meal Service TCP/IP... -
Page 17: Product Specifications
AC-2100 User Guide 2.3. Product Specifications Classification Specification Remarks 32Bit RISC CPU(266MHz) 8M SDRAM 100 User MEMORY 4M FLASH 100 Finger 5,119 Log Fingerprint Sensor Optical Authentication Speed Within 1 second Scan Area / Resolution 13 * 15mm / 500 DPI FRR / FAR 0.1% / 0.001% Authentication... -
Page 18: Environment Setting
AC-2100 User Guide 3. Environment Setting 3.1. Items to Check before Setting Environment 3.1.1. Entering Menu If [F3] button is pressed for longer than 2 seconds, the following administrator authentication screen is displayed. <Verify Admin> Input Admin card or fingerprint [ESC] If administrator authentication with card or fingerprint according to the registered authentication method succeeds, the system enters the menu as... -
Page 19: Saving After Completion Of Environment Setting
AC-2100 User Guide After checking the setting value, press [ENT] button to continue setting. To move to the upper menu during setting, press [ESC] button. In case that the [←][↑][↓][→] buttons are the only buttons displayed ( [ESC] and [ENT] buttons are not displayed ), pressing down [F1] button for longer than 2 seconds replaces [ESC] button function while pressing down [F4] button for longer than 2 seconds replaces [ENT] button. -
Page 20: Menu Configuration
AC-2100 User Guide 3.2. Menu Configuration 1.User 1. Add 2. Delete 3. Modify 4. Add admin 5. Delete All 2.Network 1. Terminal ID <Terminal ID> <Verify Mode>:NS/SN/NO/SO 2.IP Address <Network Type> <IP Address> <Subnet Mask> <Gateway> 3. Server IP <Server IP> <Server Port>... - Page 21 AC-2100 User Guide 4.Terminal Info T-ID=0001 Ver=10.50.00 Application=Access Language=ENG Verify Mode=SN Network Type=Static Mac-Address=000265101234 IP Address=192.168.0.3 Gateway=192.168.0.1 Subnet Mask=255.255.255.0 Server IP=192.168.0.2 Svr-Port=2201 Card Reader=RF|SC|Wiegand CDR Version= Card Format=0 1:1 Level=3 1:N Level=4 All Admin=0 All User=0 Max User=100 1:N User=0 1:N FP=0 MAX 1:N FP=100 All FP=0...
-
Page 22: User Control
AC-2100 User Guide 3.3. User Control 3.3.1. User Registration If “1.User” in the main menu is selected, the following screen is displayed. 1. Add To register a new user, select “1.Add”. 2. Delete 3. Modify 4. Add Admin 5. Delete All [ESC] [ ] [ ][ENT] ↑... - Page 23 AC-2100 User Guide <1:1 Level> Recommended setting: ‘0’ 1 2 3 4 5 6 7 8 9 [ESC] [↑] [↓][ENT] This menu determines the authentication level for each user to be registered. The authentication level for each registered user can be set differently by changing this value.
- Page 24 AC-2100 User Guide is recommended. 3.3.1.2. Registration with “2. Card” Both registration and authentication are made only using card. ◆ At default screen [F3~] [1.User] [1.Add] User ID [F4~] [2.Card] Card reading ◆ <Add Card> Place a card to be registered. To cancel registration and escape, press [ESC] button.
-
Page 25: User Deletion
AC-2100 User Guide For the registration of a user, fingerprint registration (Refer to Registration with “1. FP”) is done after card registration is completed (Refer to Registration with “2.Card”). 3.3.2. User Deletion ◆ At default screen [F3~] [1.User] [2.Delete] User ID [F4~] ◆ If “1.User”... - Page 26 AC-2100 User Guide 1. Add Select [3.Modify] to modify a user. 2. Delete 3. Modify 4. Add Admin 5. Delete All [ESC] [↑] [↓][ENT] Input ID [MOD] After entering the ID of a user to be modified, ID : 0001 press down [ENT] button for a longer period of [←] [↑] [↓] [→] time.
- Page 27 AC-2100 User Guide <Add FP> Enter fingerprint by referring to “1.9. Proper Input your Fingerprint Registration and Input Method” Fingerprint When the fingerprint sensor is lighted, place the finger on the fingerprint input window. If the “ppik” buzzer sound is heard, wail for 2~3 seconds until the light is switched off, and then remove the finger.
- Page 28 AC-2100 User Guide The following are the LCD messages displayed during the registration process. Modification Completed! In case of registration success Modification Failed! In case of registration failure Already registered card In case of trying to register an already registered card Excess of the limit In case 10 cards are already registered in the...
-
Page 29: Administrator Registration
AC-2100 User Guide [1] In case of selecting 1:1 Level change: Refer to [1] In case of selecting authentication level change of 3.3.3.1. [2] In case of selecting Add FP: Refer to [2] In case of selecting Add FP of 3.3.3.1. -
Page 30: Network Setting
AC-2100 User Guide 1. Add Select [5] to delete all users. 2. Delete 3. Modify 4. Add Admin 5. Delete All [ESC] [↑] [↓][ENT] Delete All? Select [1] to delete all users and [2] to cancel 1.Yes deletion. 2.No [ESC] [↑] [↓][ENT] After selecting “1.Yes”... -
Page 31: Ip Setting
AC-2100 User Guide This value must be identical to the ID of a door set at the server program. An 8- digit number is entered. Press down [ENT] button for a longer period of time to move to the next menu. 3.4.1.2. - Page 32 AC-2100 User Guide ◆ At default screen [F3~] [2.Network] [2.IP Address] ◆ 3.4.2.1. Connection Type Setting <Network Type> Select [0] to acquire static IP and [1] to acquire 0: Static dynamic IP. 1:DHCP [ESC] [↑] [↓][ENT] This item selects a type for connecting a terminal to a server. The default value is ‘0’...
-
Page 33: Server Ip Setting
AC-2100 User Guide 3.4.2.4. Gateway Setting < Gateway > After moving to the position of a digit to 192.168.000.001 change using [←][→] button, change the [←] [↑] [↓] [→] value using [↑][↓] button. The gateway IP address of the network which the terminal is connected to is entered. -
Page 34: Wireless Lan Setting
AC-2100 User Guide time to move to the upper menu. 3.4.4. Wireless LAN Setting ◆ On the basic screen [F3~] [2.Network] [4.Wireless LAN] ◆ 3.4.4.1. Setting to use wireless LAN 1.Disabled Default: 1. Disabled 2.Scan AP 3.Current Status [ESC] [↑] [↓][ENT] This menu only appears if WiFi module is inserted, and it sets up whether a terminal uses wired LAN or wireless LAN. - Page 35 AC-2100 User Guide 1. Application Select [1] to set the operation mode of the terminal. Verify Option Set Doorlock Sound Control 5. LCD Setting 6. Time Setting [ESC] [↑] [↓][ENT] ◆ At default screen [F3~] [3.Option] [1. Application] ◆ <Application>...
- Page 36 AC-2100 User Guide <F3 Time>, <F4 Time> and <Access Time>. As shown in the following example, these hours must be overlapped. (Example) Start Time=06:00~09:59, Leave Time=17:00~22:00 <Start Time> <Leave Time> 06:00~09:59 17:00~22:00 Press [ENT] button to continue setting. <Multi Fn-Key > Default Setting: ‘2.No’...
-
Page 37: Authentication Method Setting
AC-2100 User Guide fails and “Duplicated!” message is displayed. Press [ENT] button to continue setting. <Print Out> Default setting: ‘2.No’ 1.Yes 2.No [ESC][↑][↓][ENT] This menu is to set up if the authentication result is needed for printing. If you set up ‘1’, the printer connected by RS232 prints out terminal ID, user ID, date and time and authentication mode. - Page 38 AC-2100 User Guide message is displayed on the LCD screen. However, if the user’s message is not available, the ID is displayed instead. (Example) OK!<0001> Press [ENT] button to continue setting. 3.5.2.2. Setting to Determine Whether to Allow Authentication Only using Card ◆...
-
Page 39: Door Setting
AC-2100 User Guide [ENT] [ENT] ◆ <Blocking Time> Default setting: 00000 (Unit: Second) (0~86400):00000 [ESC][↑][↓][ENT] This function prevents a same user from getting authenticated again within a certain time. If the value is set for ‘0’, there is no use but if it is greater than ‘0’, the re-authentication will be permitted only after the time. - Page 40 AC-2100 User Guide lock is not connected. After selecting a setting value, press down [F4] button for a longer period of time to continue setting. 3.5.3.2. Door Open Status Check ◆ At default screen [F3~] [3.Option] [3.Set Doorlock] [F4~] ◆ <Door Monitor>...
-
Page 41: Volume Setting
AC-2100 User Guide normal door operation. To use this function, the lock must have a monitoring function that checks the opening/locking of the door. Also, the monitoring pin of the lock must be connected to the terminal. In addition, the door open state check in the previous item must be set to ‘1’... -
Page 42: Lcd Setting
AC-2100 User Guide <Beeper Volume> Default setting: ‘2’ [ESC][←][→][ENT] This option sets the volume level of the terminal buzzer. If it is set to ‘0’, no buzzer sound is heard. ‘1’ produces low buzzer sound while ‘3’ produces high buzzer sound. Press [ENT] button to continue setting. -
Page 43: Time Setting
AC-2100 User Guide <LCD Backlight> Default setting: ‘2.Off’ 1.On 2.Off [ESC][↑][↓][ENT] This option sets the on/off state of the terminal LCD backlight. If it is set to ‘1.On’, the LCD backlight is always on. If it is set to ‘2.Off’, the LCD backlight is off except during key or card operation. - Page 44 AC-2100 User Guide ◆ At default screen [F3~] [3.Option] [6.Time Setting] ◆ <Time Sync> Default Setting: ‘0. Auto’ 0. Auto 1. Manual [←] [↑] [↓] [→] This menu is to set up the terminal time synchronization with the Server. ‘0. Auto’...
-
Page 45: Terminal Information Inquiry
AC-2100 User Guide If [F4] button is pressed down for a longer period of time, the current time of the terminal is changed and the system moves to the upper menu. To cancel the input, press down [F1] button for a longer period of time to leave from the current menu. -
Page 46: Extra Function
AC-2100 User Guide 1:N FP The total number of fingerprints allowed for 1:N authentication The maximum number of fingerprints allowed for registration in a terminal (100) MAX 1:N FP In case there are 50 registered users and each of them registered 2 fingerprints, the total number of registered fingerprints is 100. -
Page 47: Card Number Inquiry
AC-2100 User Guide < > If ‘1.Yes’ is selected, the door opens. Open Door 1.Yes 2.No [ESC][↑][↓][ENT] ※ To use this function, “Allow administrator access” item must be checked in the terminal option of the server program. After selecting a setting value, press [ENT] button to move to the upper menu. 3.7.2. - Page 48 AC-2100 User Guide value of Door_Monitor_0 port is changed. In such a case, the pre-set pop-up message saved in the server is displayed. The sensor monitor1 port uses the same port as the door monitor pin. Therefore, if Menu3.Option3.Set Doorlock<Door Monitor> is set to ‘1’ or ‘2’, this port is set to ‘0.None’...
-
Page 49: Device Setting
AC-2100 User Guide 3.8. Device Setting If “6.Device” is selected at the main menu, the following screen is displayed. 1.System Config After selecting a menu to change by pressing 2.Card Reader [↑][↓] key, press [ENT] button. 3.FP-Sensor 4.Wiegand 5.Initialize [ESC][↑][↓][ENT] In most cases, device settings do not require change after installation. -
Page 50: Card Reader Setting
AC-2100 User Guide If the language setting is changed, messages displayed on the screen are expressed using the changed language. 3.8.2. Card Reader Setting ◆ At default screen [F3~] [6.Device] [2.Card Reader] ◆ <Card Reader > Default setting: ‘0’ 0.RF/SC/Wiegand 1.SmartCard [ESC][↑][↓][ENT]... - Page 51 AC-2100 User Guide fingerprint in the fingerprint input window, this function sets the level of correspondence that can be considered as the identical fingerprint. A higher authentication level provides a higher security level. However, a higher security level may lead to a higher authentication denial rate. In case of 1:1 authentication level, this function is used to locate the fingerprint registered with ID ‘1234’...
-
Page 52: Wiegand Output Setting
AC-2100 User Guide This menu sets the LFD level that can prevent the input of imitation fingerprints. A higher LFD level strengthens the function for preventing the input of imitation fingerprints made using materials such as rubber, paper, film and silicone. However, a higher LFD level may also prevent the input of real fingerprints if they are too dry. -
Page 53: Terminal Initialization
AC-2100 User Guide 2.34bit As “Sitecode[1byte] + User ID[3bytes]” is sent, the user ID is set using less than 7 digits. However, if the user ID consists of 8 digits, Sitecode is ignored and only “User ID[4bytes] is sent. Transmission example) SiteCode:001, UID:123456 ... - Page 54 AC-2100 User Guide All terminal’s setting values except MAC (physical) address are initialized but the users and authentication records are not deleted. If initialization is completed successfully, “ppiririck” buzzer sound is heard and the system moves to the upper menu. 3.8.5.2.
-
Page 55: External Device Setting
AC-2100 User Guide 1.Export Log DB Backup Menu 2.Export User 3.Import User 4.Upgrade [ESC][↑][↓][ENT] Export Log This menu is for exporting saved log data on AC2100 to USB. Location of data is USB Top Folder -> AC2100 Folder -> 00000000 (8 digits of terminal ID) Folder ->... - Page 56 AC-2100 User Guide <External Device> Default: ‘0.None’ 0.None 1.Wiegand Card 2.Dummy FP [ESC][↑][↓][ENT] Set up when a slave reader that uses a card or fingerprints is connected to a terminal and is used as an ancillary authentication device. If it connects a Wiegand card reader, it should be set as ‘1” and if it connects SR100, it should be set as ‘2’.
-
Page 57: How To Use Terminal
AC-2100 User Guide 4. How to Use Terminal 4.1. In Case of Operating as [0.Access Ctrl] - Set as Menu 3.Option 1. Application [0.Access Ctrl] 4.1.1. Authentication Mode - Authentication is done after changing to a desired authentication mode such as F1, F2, F3 and F4 by pressing the function keys. -
Page 58: Authentication Using Card
AC-2100 User Guide When you place the finger on the fingerprint sensor, the fingerprint input window is lighted in red along with ppik” sound. Leave the finger until the light is switched off. 2009/08/25 16:58 ▼ Upon authentication success, the voice message “You are authorized”... -
Page 59: In Case Of Operating As [1.T&A Ctrl]
AC-2100 User Guide In case of trying to authenticate during a time not allowed for access even though the registration is valid 2009/08/25 16:58 ▶ If a user registered with [Card and FP] places the card on the default screen, “ppik” sound is heard and the following additional fingerprint input procedure is required for authentication. -
Page 60: Fingerprint Authentication
AC-2100 User Guide mode change for hours not set as office start/leave time. 4.2.2. Fingerprint Authentication - Change time & attendance mode by pressing the function keys. - Enter fingerprint. 4.2.3. Authentication Using Card - Change time & attendance mode by pressing the function keys. - Place card.
Need help?
Do you have a question about the Virdi AC-2100 and is the answer not in the manual?
Questions and answers