Table of Contents

Related Manuals for Chattanooga Intelect Focus Shockwave


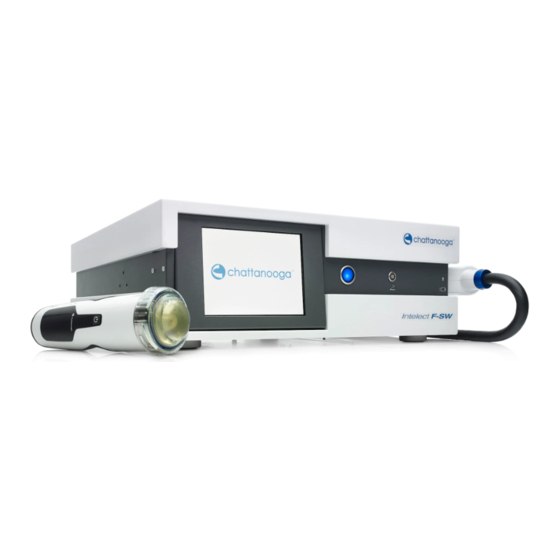
Summary of Contents for Chattanooga Intelect Focus Shockwave
- Page 1 Chattanooga Intelect F-SW TT.#### Part No. 26933.0012 Published: October 2018 Original language: German Publisher: Focus Shockwave STORZ MEDICAL AG Lohstampfestr. 8 Operating Manual CH-8274 Tägerwilen Switzerland 29097.0002...
-
Page 2: Table Of Contents
Table of Contents General Safety Information Instructions for safe use 1.1.1 Intended use and operational safety . 1.1.2 Safety during treatment of the patient. Warning against damage to equipment and the device Manufacturer‘s responsibility Owner‘s responsibility Principles Physical principles 2.1.1 Indications . - Page 3 Operation User interface Overview of menu functions Starting the instrument Setting the treatment parameters F-SW Energy display task Storing the treatment parameters Loading treatment parameters 5.7.1 Pre-programmed indications from the manufacturer . 39 5.7.2 In-house applications . . 41 Patient record Visual analogue scale (VAS) 5.10 Data transfer...
- Page 4 Repair Service life Status messages and trouble-shooting Status messages Trouble-shooting Accessories Technical Specifications 9.1 Technical Specifications Type plate Chattanooga Intelect F-SW Conformity with directives Conformity with standards 9.5 Certificates Symbols and labels Warranty and Service 10.1 Warranty for the control device 10.2 Warranty for the F-SW handpiece and the C-ACTOR Handpiece 10.3...
- Page 5 Preface Warning notes This manual contains warnings, safety instructions and specific operating instructions in accordance with liability regulations. DANGER refers to a situation of acute danger which, if not avoided, could lead to serious or fatal injury. DANGER! The source of the danger is stated here. These are the possible consequences! •...
- Page 6 Safety signs and other symbols used in this manual Symbol Name General warning sign Electrical warning sign Wear hearing protection! WEEE (waste electrical and electronic equipment) Device serial number CE mark Electromagnetic interference may occur in the vicinity of instruments marked with this symbol. Table 1-1 13 610 02 1018...
-
Page 7: General Safety Information
Before using the device, the user must make sure it is functioning safely and that it is in proper condition. • It is essential to perform the functional checks after switching on the Chattanooga Intelect F-SW before starting treatment. Read about this in c 5.15 f... - Page 8 Nevertheless, we recommend wearing suitable ear protection during treatment in order to minimise exposure to noise. Protection against explosion Do not use the Chattanooga Intelect F-SW in potentially explosive environments, i.e. in the presence of a flammable anaesthetic mixture with air or with oxygen or nitrous oxide.
-
Page 9: Safety During Treatment Of The Patient
Chattanooga Intelect F-SW must be tested in that particular environment to ensure operation according to technical specification. If the Chattanooga Intelect F-SW is connected to a 240 V mains supply with a mains frequency of 60 Hz, the mains supply must be balanced... - Page 10 • Make sure that no cables are crushed or sheared. Disposal • Comply with national disposal regulations when disposing of the Chattanooga Intelect F-SW or individual components. • Comply with the relevant information in the operating manuals for the additional devices.
-
Page 11: Manufacturer's Responsibility
No modifications are to be made to this device without the permission of the manufacturer. STORZ MEDICAL AG as the manufacturer of the Chattanooga Intelect F-SW is only responsible for effects on the safety, reliability and performance of its product if: –... -
Page 12: Principles
Principles Physical principles The Chattanooga Intelect F-SW is a universal, compact shock wave unit that can be used for treatment involving medium- to high-energy electromagnetically generated shock waves - focused shock waves – referred to below as F-SW. F-SW waves have a short pulse length and are concentrated on areas a few millimetres in diameter, allowing pulse waves to be applied to a tightly localised area, even in deeper tissue layers. - Page 13 – Spastic muscle paralyses (caused by infantile cerebral palsy or stroke for exam- ple) * A sound knowledge of trigger point therapy and trigger point shock wave therapy (TrST) is required for therapeutic application of the Chattanooga Intelect F-SW in the field of trigger point shock wave therapy. 13 610 02 1018...
-
Page 14: Contraindications
2.1.2 Contraindications CAUTION ! The contraindications listed here are examples. No claims are made regarding the completeness or unlimited validity of this list of contra- indications. No patient treatment is allowed under the following circumstances: – Air-filled tissue (in particular lung tissue) in the treatment area –... -
Page 15: Preconditions For Operation
2.2.2 Training of the operator Operators of the Chattanooga Intelect F-SW must have been adequately trained in using this system safely and efficiently before they operate the device described in this handbook. An introduction to the principles of operation will be provided by your dealer with reference to this operating manual and will be documented in the system logbook. -
Page 16: System Description
Control and functional elements 1 Monitor 3 Connection for foot switch 2 Power indicator 4 F-SW handpiece connection Fig. 3-1 Front view of Chattanooga Intelect F-SW 7 Water supply connection 1 Potential equalisation connection 8 not used 2 not used... -
Page 17: F-Sw Handpiece And Optional C-Actor Handpiece
NOTE The following instruments can be connected to the USB connection: – USB memory stick which supports the USB V1.1 protocol – USB mouse – USB keyboard The connected instruments must be approved as medical products in accordance with EN IEC 60601. F-SW handpiece and optional C-ACTOR handpiece Focused shock waves with a short wavelength that are concentrated on a focal zone outside the handpiece are administered over the F-SW handpiece or the C-ACTOR... -
Page 18: Use Of Stand-Off Devices
Use of stand-off devices The penetration depth of the shock wave can be adjuted by using different stand-off devices. without stand-off device with stand-off device I with stand-off device II Fig. 3-4 F-SW handpiece or C-ACTOR handpiece Depth of Therapeutically effective focal zone penetration depth 5 MPa 50 mm... - Page 19 Depth of Therapeutically effective focal zone penetration depth 5 MPa 30 mm 20 - 40 mm 0 - 65 mm 15 mm 0 - 50 mm 5 - 25 mm 0 mm 0 - 35 mm 0 - 10 mm Fig.
-
Page 20: Installation Instruction
Installation Instruction Scope of supply The standard scope of supply of the Chattanooga Intelect F-SW: – Chattanooga Intelect F-SW – F-SW SEPIA LT handpiece – Handpiece holder – Mains cables – Gel bottle – Silicone oil bottle – Water bag –... -
Page 21: Handpiece Holder Installation
The handpiece holder can be mounted on the right as well as on the left side. • Use a 2.5 mm Allen key for installation. • Screw the handpiece holder onto the right side wall of the Chattanooga Intelect F-SW, as shown in the picture below. -
Page 22: Connecting Power Supply Cables
Fig. 4-9 Holding arm attached 4.4.2 Connecting power supply cables • Connect the Chattanooga Intelect F-SW via the mains cable to the mains connec- tor (Fig. 3-2/3). 4.4.3 Handpiece connection • Connect the connector of the F-SW handpiece to the handpiece connection provided on the Chattanooga Intelect F-SW and secure it using the black locking screw. -
Page 23: Connecting The Optional Foot Switch
The Chattanooga Intelect F-SW features a potential equalisation connection. • Connect one end of the potential equalisation cable to the PE connection on the Chattanooga Intelect F-SW and the other end to your PE connection. CAUTION! The potential equalisation connection on the Chattanooga Intelect F-SW must be connected in accordance with the relevant national regulations. -
Page 24: Transport
Fig. 4-11 Transporting the device • Set the device slantly down in order to avoid squeezing the fingers. Compatibility The Chattanooga Intelect F-SW is allowed to be operated with the following accesso- ries: – Handpiece F-SW SEPIA LT Art. no. 19000 –... -
Page 25: Operation
The Chattanooga Intelect F-SW is operated using a colour TFT LCD monitor with touch screen function and graphical user interface. User interface The user interface of the Chattanooga Intelect F-SW is divided into various areas for displaying different information. The individual controls are arranged in function groups (see picture below): ... - Page 26 Navigation bars: The top and bottom navigation bars (Fig. 5-12/1 to Fig. 5-12/3 and 3, Fig. 5-12/6 to Fig. 5-12/8) contain control buttons that you can use for navigating through the menus: Parameter entry screen: Open the sub-menu Jump to the “Load configuration” sub-menu (call up saved parameter configurations or patient records) Main and sub-menu:...
- Page 27 Parameter display: The treatment parameters are displayed in the parameter display field (Fig. 5-12/9) in the following sequence: F-SW Actual energy level in mJ/mm or in MPa Nominal number of shocks or nominal total energy Actual frequency Actual number of shocks Actual total energy in J After the first start-up of the unit as well as after operating mode change, configuration loading and parameter change, the display flashes and must be...
- Page 28 Fig. 5-14 List of sub-menu items 13 610 02 1018...
-
Page 29: Overview Of Menu Functions
Overview of menu functions Parameter entry screen Main menu 1st sub-menu 2nd sub-menu Menu Reset counter Save configuration Save configuration Keyboard Load configuration Load configuration Keyboard In-house applications Orthopaedic indications Urological indications Setup Setup Info Language Language Time Touch screen calibration Drain the water circuit Fill the water circuit Bleed the water circuit... - Page 30 Parameter entry win- - Determining the treatment parameters Main menu Reset counter - Resetting the actual values in the selected operating mode (treatment shock counter, total energy, close patient record) Save configuration - Saving indication-specific (preceded by *) or patient-specific treatment parameters Load configuration - Loading already stored treatment parameters, opening the...
- Page 31 Warning history - List of the last 100 warning and error messages Language - Setting the language Time - Setting the date and time Touch screen calibration - This function makes it possible to recalibrate the touch screen, i.e. for correct recognition of the touch coordi- nates Draining the water circuit - The corresponding sequences for emptying or filling the...
-
Page 32: Starting The Instrument
Warm-up phase Once a day, the Chattanooga Intelect F-SW starts a warm-up phase lasting about 3 minutes, the progress of which is shown in the progress indicator. The water circuit is bled. • Check that the F-SW handpiece is correctly positioned in the holder and that no stand-off is fitted. - Page 33 Load test A load test is performed once a day when the Chattanooga Intelect F-SW is switched on for the first time. This test takes place after the warm-up phase. • When prompted to do so, briefly touch the trigger button on the F-SW handpiece or the foot switch.
-
Page 34: Setting The Treatment Parameters
Setting the treatment parameters Once the unit has been started, the display automatically shows the last setting. • Touch the flashing parameter display or one of the parameter selection fields to confirm the operating mode. • Select the line of the parameter that you would like to change. •... - Page 35 C-ACTOR Energy flux density in mJ/mm Maximum frequency 1,24 3 Hz 1,14 3 Hz 1,02 3 Hz 0,88 3 Hz 0,76 4 Hz 0,69 4 Hz 0,56 4 Hz 0,45 5 Hz 0,33 6 Hz 0,25 6 Hz 0,13 7 Hz 0,08 8 Hz 0,05 8 Hz 0,03...
-
Page 36: F-Sw Energy Display Task
F-SW Energy display task To make sure that the energy level is correctly displayed at all times, the system inclu- des a self monitoring function. Therefore, during shockwave release the system constantly compares the nominal energy value with the actual energy value. If these values do not match the energy level is displayed in grey and turns white as soon as the required set value is reached. -
Page 37: Storing The Treatment Parameters
Storing the treatment parameters • Touch the “Menu” button. • Select the “Save configuration” function as shown in the picture below (1) to save the current setting of the treatment parameters. • Touch the “OK” button. Fig. 5-20 Storing the treatment parameters A list with a total of 100 memory locations appears on the touch screen display in the “Save configuration”... - Page 38 • To rename the configuration, touch the button again that has already been se- lected. This activates the keyboard window. Fig. 5-22 Keyboard window You can save your parameter setting either as an indication or under a patient’s name. • To save the parameters as an indication, place an “*” before the name of the indication or leave it in place (“*Indication name”).
-
Page 39: Loading Treatment Parameters
Loading treatment parameters The alphabetical list of treatment parameters that have already been stored or of the patient record can be opened either directly from the parameter entry screen or from the main menu screen. • If you are in the parameter entry screen, touch the “Configuration” button (Fig. 5-18). - Page 40 Prior to loading an indication, you can view further information on the selected indica- tion. • To accomplish this, touch “Note.” The treatment notes will be displayed. To load the indication, touch “Back” to return to the previous screen. • Touch “Load”. The indication has been loaded successfully when the loaded indication is displayed on the grey status bar (see picture below).
-
Page 41: In-House Applications
5.7.2 In-house applications • Touch the “In-house application” button (see picture below). • Touch “OK”. Fig. 5-26 In-house applications • Touch the button for the indication required (see picture below). Fig. 5-27 In-house indications If additional information for the selected indication has been saved, this can be accessed by touching “Note”. -
Page 42: Patient Record
• Save the text by touching “OK”. • Touch the “Back” button to view the list of in-house applications. • Touch the “Load” button. The highlighted indication will be loaded. The indication has been loaded successfully when the loaded indication is displayed on the grey status bar. •... - Page 43 A patient record consists of treatment details and a table of treatment parameters that is created by the instrument automatically. Each time a patient is accessed, a new treatment with the current date is saved to his or her patient record. Fig.
-
Page 44: Visual Analogue Scale (Vas)
Visual analogue scale (VAS) The visual analogue scale in the patient record can be used for assessing the progress of the therapy. The VAS measures the patient’s subjective pain sensation on a scale from 0 to 10, within which the patient can classify his or her pain intensity. The starting point (0) stands for “no pain”... -
Page 45: Data Transfer
5.10 Data transfer Using this function, treatment data can be exported onto a USB memory stick in a format that can be opened in Excel. Also, operating data can be saved (backup) or restored following a repair or if the instrument is replaced. •... - Page 46 Fig. 5-36 Establishing the USB connection The data is transferred once the USB connection has been established. The export file name of the patient record is protocol_name.csv. All data is exported if no patient record or no indication has been opened. The export file name of the record data is protocol_DateTime.csv.
- Page 47 Restoring the settings The system is restored to the data status of the last backup using the “Restore settings” function. • Select the “Data transfer” / “Restore settings” function in the 1st sub-menu (Fig. 5-34/3). • Connect the memory stick with the backup file to the USB port as soon as you are prompted to do so and confirm by touching “OK”.
-
Page 48: Software Updates
5.11 Software updates 5.11.1 Loading the software onto the USB stick 5.11.1.1 Extracting the software using Windows • Save the ZIP file onto your computer’s hard disk. • Right-click on the ZIP folder icon. • In the shortcut menu that appears, select the “Explorer” item. Fig. -
Page 49: Extracting The Software With Winzip
5.11.2 Extracting the software with WinZip • Connect the USB stick to your computer. • Save the ZIP file onto the USB stick. Fig. 5-40 Zip file saved on USB stick • Right-click on the ZIP file icon. • In the shortcut menu, select the WinZip icon. •... -
Page 50: Updating The Software On The Instrument
Updating the software on the instrument • Select the “Update software” function in the “Setup” menu. • Connect the USB stick to the USB port of the Chattanooga Intelect F-SW as soon as you are prompted to do so and confirm by touching “OK” . -
Page 51: Autofrequency" Function
5.13 “Autofrequency” function If the “Autofrequency” function is activated, the frequency is automatically increased to the maximum possible setting when the energy level is reduced in F-SW mode (see 5.4 s , Table 5 -1). chapter etting the treatMent paraMeters •... -
Page 52: Start-Up
5.14 Start-up 5.3 s Switch the instrument on as described in chapter tarting the instruMent • Check that there are no bubbles in the F-SW handpiece. • If bubbles are visible under the coupling diaphragm, proceed as follows: Position the handpiece in the handpiece holder. No stand-off should be attached Fig. - Page 53 The trigger button functions as an on/off switch when it is pressed briefly (< 1.5 s). Pressing it for longer (> 1.5 s) causes it to function as a tip switch, i.e. the shocks will continue until the button is released. NOTE If a nominal shock wave value of less than 1000 shock waves is selected (e.g.
-
Page 54: Functional Checks
5.15 Functional checks Perform the following functional checks after the system has been installed: • Check the control unit and handpieces for damage. • Start the Chattanooga Intelect F-SW (see 5.14 s chapter tart • Set the energy level in F-SW mode to 0.2 mJ/mm •... -
Page 55: Treatment
• Apply a sufficient amount of coupling gel to the patient’s skin in the treatment area and to the F-SW coupling diaphragm or the coupling cushion. 5.18 Switching off the device • Switch off the Chattanooga Intelect F-SW using the main switch. 13 610 02 1018... -
Page 56: Cleaning, Maintenance And Overhaul
• No cleaning and maintenance work is to be carried out while the device is being used on the patient. Cleaning the device Regular cleaning of the system ensures perfect hygiene and operation of the Chattanooga Intelect F-SW. CAUTION! Electrical hazard! Disconnect the device and the accessories from the mains before starting any cleaning and overhauling work! •... -
Page 57: Cleaning The Handpiece
Cleaning the handpiece 6.2.1 Changing the stand-off device NOTE To change the stand-off device, apply a drop of silicone oil to the coup- ling diaphragm as a coupling medium. • Screw the stand-off device firmly onto the handpiece using the clamping ring. 1 stand-off device 2 clamping ring To attach the... -
Page 58: Reprocessing Of The Handpiece And The Stand-Off Devices
NOTE The stand-off has a limited service life. It should be replaced if there are vis- ible changes in the material (discolouration, tarnishing, streaks, gas bubbles), deformation of the surface in the coupling area or leaks. The stand-off device should be replaced at least every 12 months. 6.2.2 Reprocessing of the handpiece and the stand-off de- vices... -
Page 59: Cleaning The Optional Foot Switch
ATTENTION Cleaning agents and disinfectants may impair the characteristics of the coupling diaphragm. • Do not use vegetable-based soap solutions or vegetable oils. • Do not use agents containing any of the following: – Aniline – Dimethylformamide – Ethyl acetate –... -
Page 60: Water Renewal
• Activate “Bleed water circuit” operating mode in the “Setup” menu (see picture below). Fig. 6-53 Water renewal • Connect the water bag to the Chattanooga Intelect F-SW as soon as the message appears (see picture next side). 13 610 02 1018... - Page 61 Fig. 6-54 Draining the water circuit I The “Please wait” message and a progress indicator appear on the display. • Allow the remainder of the water to drain out of the handpiece by holding the F-SW handpiece vertically above the instrument as soon as you are prompted to do so.
-
Page 62: Filling The Water Circuit
6.4.2 Filling the water circuit • Make sure that the instrument is standing on a smooth, horizontal surface. • Rinse out the water bag. • Use only deionised water (in compliance with VDE 0510, e.g. water for batteries or clothing irons) to rinse or fill the water bag. •... - Page 63 Fig. 6-59 Filling the water circuit I • At the same time, hold the water bag above the instrument so the water can flow out optimally. Hook the bag onto an infusion stand if necessary. • Touch “OK”. A progress display with the message “Please wait” appears on the display. •...
-
Page 64: Bleeding The Water Circuit
Fig. 6-61 Venting the water circuit • Wait for the message to disappear, then return to the parameter entry screen by touching the “Menu exit” button. • Check that there are no bubbles under the coupling diaphragm of the F-SW hand- piece. -
Page 65: Fuse Replacement
Fuse replacement The mains fuse holder is located on the rear panel of the Chattanooga Intelect F-SW. • Push the clip of the mains fuse holder to the right and take the holder off the housing. Fig. 6-62 Mains fuse holder •... -
Page 66: Disposal
The average expected service life (MTTF) in accordance with IEC 60601-1:2005 + A1:2012 / EN 60601-1:2006 + A1:2013 is – 15,000 operating hours for the Chattanooga Intelect F-SW – 5 million shocks for the F-SW SEPIA LT handpiece – 5 million shocks for the C-ACTOR SEPIA LT handpiece Exceeding the service life can be expected to result in a failure of the device and accessories. -
Page 67: Status Messages And Trouble-Shooting
Status messages and trouble-shooting Status messages CAUTION! Malfunction of the device or its components Various injuries are possible! • Immediately comply with all status and error messages which appear during the treatment. Specified number of shock Acknowledge message, waves reached further treatment is possible. Acknowledge message, Shock wave safety stop further treatment is possible. - Page 68 Acknowledge message, F-SW: therapy head further treatment is possible once overtemperature the therapy head temperature has returned to permitted values. Restart the instrument. F-SW: water temperature Inform your Service centre if the fault sensor failure continues. Shock wave limit for current Shock wave limit for handpiece reached.
-
Page 69: Trouble-Shooting
Trouble-shooting CAUTION! Unplug the mains cable from the device before you carry out any maintenance work! Fault description Possible cause Corrective action Instrument does not Power failure Check the power supply. work Defective mains fuse Replace the fuses. Defective mains plug Replace the mains cable. -
Page 70: Accessories
Accessories Produkt Description Part Number Handpiece F-SW SEPIA LT 19000 Handpiece C-ACTOR SEPIA LT 29204.0001 Water bag 4600 Silicone oil 4700 Gel bottle 22601 Stand-off I 30 mm 19000 Stand-off II 15 mm 19200 Closing ring 19300 Handpiece holder set 13-27268 User manual 13-00061... -
Page 71: Technical Specifications
Technical Specifications Technical Specifications Chattanooga Intelect F-SW F-SW: Single shock, F-SW operating mode continuous shock 1 – 8 Hz F-SW: Single shock, C-ACTOR operating mode continuous shock 1 – 8 Hz F-SW energy selection in steps from 0.01 to 0.55 mJ/mm C-ACTOR energy selection 0.03 –... - Page 72 Shock wave source of the F-SW handpiece Generation method electromagnetic Focusing method parabolic reflector Energy settings minimum typical maximum Energy flux density (mJ/mm 0.10 0.35 0.55 Peak positive acoustic pressure [MPa] Peak negative acoustic pressure [MPa] Axial focus size (-6dB focal zone) [mm] Lateral focus size (-6dB focal zone) [mm] Focus volume [cm 0.87...
- Page 73 Shock wave source of C-ACTOR handpiece Erzeugungsart electromagnetic Focusing method parabolic reflector Energy settings minimum typical maximum Energy flux density (mJ/mm 0.25 0.76 1.24 Peak positive acoustic pressure [MPa] Peak negative acoustic pressure [MPa] Axial focus size (-6dB focus zone) [mm] Lateral focus size (-6dB focus zone) [mm] Focus volume [cm 0.04...
- Page 74 Essential performance: Equipment safety (“essential performance“) according to IEC/EN 60601-1, 3rd edition: – The ME Equipment shall be free from incorrect display of energy levels. – The ME Equipment shall be free from unintended shock wave release. NOTE When the medical product is distributed to third parties, the following must be observed: –...
-
Page 75: Type Plate Chattanooga Intelect F-Sw
Type plate Chattanooga Intelect F-SW Fig. 9-1 Type plate Chattanooga Intelect F-SW Conformity with directives This medical product bears the CE mark in accordance with the Medical Device Directive (MDD) 93/42/EEC. Conformity with standards This device complies with the applicable standards CAN/CSA-C22.2 NO. - Page 76 Guidelines and manufacturer's declaration – emitted electromagnetic interference The Chattanooga Intelect F-SW model is intended for operation in the electromagnetic environment specified below. The customer or the user of the Chattanooga Intelect F-SW should ensure that it is used in such an environment.
- Page 77 Resistance to emitted electromagnetic interference The Chattanooga Intelect F-SW model is intended for operation in the electromagnetic environment specified below. The customer or the user of the Chattanooga Intelect F-SW should ensure that it is used in such an environment.
- Page 78 Resistance to emitted electromagnetic interference The Chattanooga Intelect F-SW model is intended for operation in the electromagnetic environment specified below. The customer or the user of the Chattanooga Intelect F-SW should ensure that it is used in such an environment.
- Page 79 The Chattanooga Intelect F-SW is intended for use in an electromagnetic environment in which radiated HF disturbances are controlled. The customer or the user of the Chattanooga Intelect F-SW can help prevent electromagnetic interference by maintaining a minimum distance between portable and mobile HF communications equipment (transmitters) and the Chattanooga Intelect F-SW as recommended below, according to the maximum output power of the communications equipment.
-
Page 80: Certificates
Certificates Fig. 9-2 Declaration of conformity 13 610 02 1018... -
Page 81: Symbols And Labels
Symbols and labels The following symbols and labels are attached to the Chattanooga Intelect F-SW: Label Notation foot switch connection F-SW handpiece connection Applied part of type B Table 9 -3 Symbols attached to the front side 13 610 02 1018... - Page 82 Label Notation Potential equalisation USB-connecton It is essential to comply with the operating manual! Type plate Table 9 -4 Labels and symbols attached to the rear side 13 610 02 1018...
- Page 83 Label Notation fuse Applied part of type B CSA certification manufacturer CE mark (in compliance with Medical Device Directive (MDD) 93/42/EEC) DataMatrix according to GS1 standards Unique Device Identification (UDI): Human Readable Interpretation (HRI) (01) Global Trade Item Number (GTIN) (21) Application Identifier (AI): Serial Number (SN)
-
Page 84: Warranty And Service
Warranty and Service 10.1 Warranty for the control device During the two-year warranty period from the date of delivery of the product to the end customer, defects will be remedied at no charge to the customer upon the customer furnishing adequate proof that the defect is due to defects in material or workmanship. -
Page 85: Warranty For The F-Sw Handpiece And The C-Actor Handpiece
10.2 Warranty for the F-SW handpiece and the C-ACTOR Handpiece The F-SW handpiece and the C-ACTOR handpiece are wear parts. We will replace new handpieces that have performed up to 1 million pulses at no charge to the cus- tomer upon the customer furnishing adequate proof that the defect is due to defects in material or workmanship. - Page 86 T: +34 934 803 202 T: +41 (0) 21 695 2360 F: +27 (0) 86 6098891 F: +34 934 733 667 F: +41 (0) 21 695 2361 E: chattanooga.saf@DJOglobal.com E: ventas@DJOglobal.com E: info@compex.ch UK & IRELAND: UNITED STATES: T: +44 (0)1483 459 659...
Need help?
Do you have a question about the Intelect Focus Shockwave and is the answer not in the manual?
Questions and answers