Table of Contents
Advertisement
Quick Links
Download this manual
See also:
Owner's Manual
Advertisement
Chapters
Table of Contents

Related Manuals for HITEC Eclipse 7


Summary of Contents for HITEC Eclipse 7
- Page 1 SYSTEM INSTRUCTION MANUAL FOR AIRCRAFT GLIDERS HELICOPTERS - 7 CHANNELS - 7 MEMORIES - PROGRAMMABLE FM SHIFT www.hitecrcd.com...
-
Page 2: Table Of Contents
TABLE OF CONTENTS Introduction to the Eclipse 7 System PMX1 to PMX5 - Programmable Mixes 1, 2, 3, 4, & 5 About this manual Eclipse 7 System Options: LAND - Landing Function FLPT - Flap Trim Function Flying Safety E->F - Elevator... -
Page 3: Introduction To The Eclipse 7 System
For those learning to fly, the transmitter has "buddy-box" capability (a second transmitter may be connected for training by an instructor pilot with an optional trainer cord). The Eclipse 7 menus even have the advanced "flight condition" settings found in other radios costing hundreds of dollars more in all its menus!! -
Page 4: Flying Safety
Model Setup Functions Flying Safety determine the cause of the problem. We recommend that you range-check your system before each flying To ensure your own safety and the safety of others, session. Have an observer verify that the system works please observe the following precautions: with the transmitter about 30 paces away with the Charge the Batteries! -
Page 5: Radio Installation Notes
30 paces from Hitec FM system, as well as to any Futaba FM the model without losing control or seeing "jitter" in the transmitter (if Hitec cord #58310 is used). -
Page 6: Other Adjustments
If you wish to change the mode of the transmitter, say top left of the transmitter case) and switching back and from Mode 2 to Mode 1, return the radio to Hitec for forth while leaving the control sticks and trims alone, conversion. -
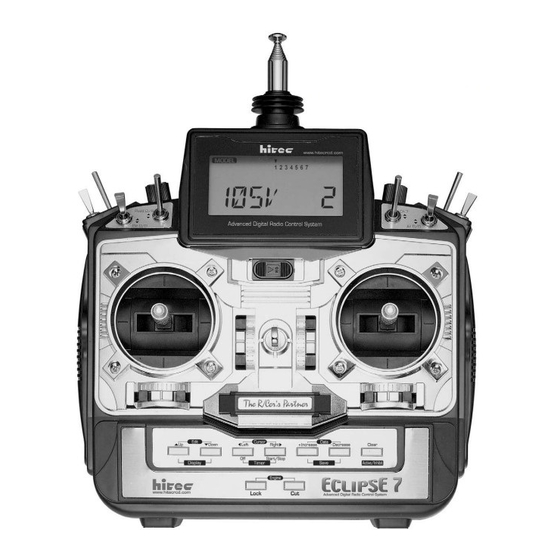
Page 7: Eclipse 7 Controls And Switch Assignments Mode I
Model Setup Functions Eclipse 7 "Mode 2" Controls and Switch Assignments This figure shows the assignments for a Mode 2 system as supplied by the factory in North America. Note that some of the functions will not operate until activated in the mixing menus. -
Page 8: Transmitter Input Buttons
Model Setup Functions Transmitter Input Buttons The buttons are used for different things as follows: 1. The Edit/Display Up & Down buttons (1)allow you to move up and down within the model menus, and move within the regular display. 2. The Cursor Left/Right buttons (2)allow you to select options within a particular function, and control the timer function. -
Page 9: Warning Displays
Model Setup Functions Pressing the Up button The operating time is still shown on the right. If you reset again gives the Model this each time you charge the system, you will have a Name display. If you've good idea of how long you can safely operate. named your model, it will WHEN THE BEEPER SOUNDS, LAND YOUR MODEL AS appear here so you can be... -
Page 10: Modl - Model Select
THE OLD SETTINGS IN THE SLAVE MODEL MEMORY, MODL - Model Select SO BE SURE YOU'RE IN THE CORRECT MODEL Your Eclipse 7 system can store up to seven independ- BEFORE YOU COPY MODEL! ent sets of model data in its memory. The Model Select 5. -
Page 11: Model Name
(PPM receivers are also referred to as "FM" to three numbers following. The letters may be used to receivers.) The Eclipse 7 FM is not compatible with abbreviate the model's name, and the numbers may be PCM receivers, only with FM. Hitec/RCD and Futaba... -
Page 12: Time -Timer Function Setup
The model select (M.SEL) menu will be displayed. brand F. P represents positive shift and will work with 2. Press the Up or Down brands A and J. The Eclipse 7 will not work with any arrow key until you get into PCM receivers. -
Page 13: Aircraft (Acro) Menu Functions
AIRCRAFT (ACRO) MENU FUNCTIONS This section describes the menu functions for fixed-wing aircraft, provides a detailed setup example, and then describes the functions individually. Functions relating specifically to gliders and helicopters may be found in the following sections. Voltage/Timer Display ACRO Functions Map (see right) Normal Display Mode... - Page 14 9. Repeat two more times to fill out the remaining two key. Each press switches from Reversed to Normal and letters. If you like, you can hit the right cursor button one from Normal to Reverse. In the display, N for Normal is chosen when the little triangle is above the channel more time and select a number between 0 and 199 for further identification.
- Page 15 (sideways mounting is not recommended). due to humidity and other factors. 32. The Eclipse 7 provides a special throttle trim function This way you won't run out of subtrim authority. Remove all the arms that are in the way or interfere with your which allows the throttle trim lever to work at low throttle pushrods.
- Page 16 36. When you reach the EPA menu, you'll see the screen letters "R/D" should appear next to the flashing percent sign. [Notice that the Eclipse 7 transmitter thinks of throt- as shown. The channel indicator is above numeral 1 for...
- Page 17 proportional. 48. Aileron Dual Rate setting. You can use the dual rate function to reduce the aileron and elevator travel in 58. With landing mode on, it is possible to lose some flight by flipping switches. Dual rates are typically used to aileron effectiveness.
-
Page 18: Airplane Model Function Descriptions
Dual rates are invok- crash. ed by flipping the dual rate switches on the transmitter. The Eclipse 7 has three dual rate switches, one each for... -
Page 19: And Switch Assignments
Eclipse 7 Aircraft Controls and Switch Assignments This figure shows the assignments for a Mode 2 system as supplied by the factory for the North American version. Note that some of the functions will not operate until activated in the mixing menus. -
Page 20: Exp - Exponential
(like dual rates), and yet have full motion two Edit Up / Down keys simultaneously. at full stick deflection. The Eclipse 7 allows you to have FLT.C - Flight Condition Menu two different values of exponential, chosen by the same... -
Page 21: Strm- Subtrim Settings
Flight conditions are a very unusual feature for the Dual Rate switches does not matter. a system in the class of the Eclipse 7 and they are 8. Again use the Edit Up Down keys to get to the Expo normally found only on systems costing far more. -
Page 22: Rev - Servo Reversing
PMX1 to PMX5 - Programmable Mixes 1, 2, 3, 4, & 5 each side of the master channel's control's motion by Your Eclipse 7 system contains FIVE separate program- moving the master channel's control back and forth. mable mixers (PMX1 - PMX5) with unique capabilities. -
Page 23: Land - Landing Function
use the Data +Increase or -Decrease key to change the the recommended starting value. Be careful as this has percentage for the mixer. Verify that you get the proper a very powerful effect on the model's trim. Press the motion of the slave channel when you move the master. Active/Inhibit (Clear) key if you wish to reset to 0%. -
Page 24: A->R - Aileron Rudder Mixing
Setting Up E F Mixing 1. Press one of the Up Down Edit buttons until the E->F window appears. The default is for the function to be inhibited. To activate, press the Active/ ON or OFF depends on Flt. Mode switch setting Inhibit (Clear) key. -
Page 25: Vtal - V-Tail Mixing
motion has occurred. Therefore, you should keep the 2. Press one of the Up Down Edit buttons repeatedly to travel settings at 50% or below and adjust the control select the ELVN window. linkages to get the travel you desire. Note that you can 3. -
Page 26: Flpn - Flaperon Mixing
-Decrease keys. 50% is a good starting point. Press This will also change the travel for the left stick motion. Active/Inhibit (Clear) key if you wish to reset to 0%. 5. If the left (CH6) flaperon moves correctly with aileron 8. -
Page 27: Aircraft Flight Trimming Chart
Aircraft Flight Trimming Chart The following chart may be used to systematically set up and trim a model for straight flight and aerobatic maneuvers. Please note that for best results, trimming should be done in near-calm conditions. Before you decide to make a change, be sure to try the test several times before making adjustments. -
Page 28: Glider (Glid) Menu Functions
(model type GLID). Descriptions of the other functions are contained in the Voltage/Timer Display aircraft (ACRO) section. There are two different glider modes in the Eclipse 7 Normal Display Mode system. You set them up in the Model Setup menus (see page 10). 4WNG Press both refers to a glider with four wing servos. -
Page 29: Eclipse 7 Glider Controls
Eclipse 7 Glider Controls and Switch Assignments This figure shows the assignments for a Mode 2 system as supplied by the factory for the North American version. Note that some of the functions will not operate until activated in the mixing menus. -
Page 30: Competition Glider Quick Setup Instructions
Competition Glider Quick Setup Instructions with two ailerons and two The following example shows how the Eclipse 7 may be flaps. Press the Up arrow programmed for the "typical" high-performance six-servo until you see the word Flashing sailplane, shown below. Six servos are used for right and "WING"... - Page 31 which have hinging that prevents motion in one direction. the Camber knob (VR1 knob) goes into both positive and negative camber from the neutral point, unless you set We suggest that you set the mixing rate to 50% on all four settings.
-
Page 32: Glider Model Function Descriptions
31. If desired, add aileron- needed to trim. Press the Cursor Right key once to get to the elevator setting menu (a small triangle appears rudder coupling (A->R) for coordinated turns. This over the number 2). Set the desired number with the Data +Increase or -Decrease keys. -
Page 33: Vtal - V-Tail Programming
causes the fuselage of the model to yaw away from the 6. Make sure that the up travel for the second aileron desired turn direction, exactly the wrong thing to have (CH5) stays at 100% by holding the aileron stick to the happen. -
Page 34: Crow - Crow Mixing (Airbrakes)
Setting Up Flap->Elevator Mixing 3. Make sure CROW is ON by moving the Gear switch forward. Verify by looking at the flashing indicator. 1. Get to the flap->elevator mixing function by locating the F->E menu with the Up Down Edit keys. The default is 4. -
Page 35: S.tm1, 2 - Speed Flap Trim Offsets
the amount of travel that you'd like at full crow, but this is and then press the Active/Inhibit (Clear) key to turn it on. better done in the Crow menu as given in the previous Either the 'Off' or the 'On' display will be flashing, step. -
Page 36: Dfl.t - Dual Flap Trim (4Wng Only)
to neutralize them relative to each other. If you inhibit this Using Aileron->Flap Mixing 1. Turn on Aileron->Flap mixing by locating the A->F function, they'll return to their original positions. menu with the Up Down Edit keys. The default is for it Sailplane Trimming and Adjusting to be inhibited (Inh). -
Page 37: Sailplane Trimming Chart
SAILPLANE TRIMMING CHART To test for ... Test Procedure Observations Adjustments 1. Model Control Neutrals Fly the model straight and Adjust the transmitter trims for Change electronic subtrims level hands-off straight & level flight, and/or adjust clevises to center no camber control. transmitter trims. -
Page 38: And Switch Assignments
Eclipse 7 Helicopter Controls and Switch Assignments This figure shows the assignments for a Mode 2 system as supplied by the factory for North America. Note that some of the functions will not operate until activated in the mixing menus. -
Page 39: Eclipse 7 Helicopter (Heli) Programming
Eclipse 7 Helicopter (HELI) Programming This section describes how to use the Eclipse 7 helicopter functions (model type HELI). Descriptions of the other functions, such as endpoints, dual rates, expo, etc., are contained in the aircraft (ACRO) section. The HELI menu provides three flight conditions in addition to the normal one (NOR). - Page 40 both Data keys to "Save" 180' swash types, please use the swashplate (SWAH) the setting. This is how menu, page 44, to adjust these responses. you select the type of mo- DOWN Flashing Right Aileron: Down Elevator: del you wish to use, either swashplate tilted swashplate tilted towards chopper's...
-
Page 41: Menu Descriptions - Helicopter
22. Aerobatic Setups and Flight Conditions. Your Eclipse 7 system has three built-in flight condition menus for helicopters. Menu Descriptions - Helicopter in addition to the normal (NOR) hovering mode. -
Page 42: R->T - Rudder Throttle Mixing
rudder stick to the left side (display shows L/U), and These conditions are activated whenever the model press the Data Decrease key. Continue reducing the memory is chosen to be HELI type. percentage until you reach about 10%. If for some These flight conditions are switched on as follows: reason you want a 0% setting, press the Active/ Inhibit NOR: ON when Flt. -
Page 43: Thcv - Throttle Curve
window appears. The default is for the function to be appear over the number 1 in the display, and a value of inhibited. To activate the throttle hold function, press the 0% should be shown. Press the Data +Increaseor Data -Decrease key. This will cause the INH display -Decrease key to change the setting to your desired to change to a -4% value with an ON or OFF display, value. -
Page 44: Rvmx - Revolution Mixing
1 servo at a time, and is sometimes referred to as CCPM to 3. Otherwise, you can (Collective & Cyclic Pitch Mixing). The Eclipse 7 contains change this setting with the settings for 120' and 180' swashplates. Consult your Data +Increase or model's setup instructions to find out which you need. -
Page 45: Hovering Throttle Adjustment Knob
or other conditions. reversed in front of the percentage value. Now the To change the hovering swash should properly respond to collective. If you've Full throttle setting, simply done the wrong thing, you can reset the percentage by turn the Hovering throttle pressing the Active/Inhibit (Clear) key. -
Page 46: Glossary
GLOSSARY The abbreviations used with the Eclipse 7 are defined below alphabetically. Related pages are given in parenthesis following the definition. ACRO Acrobatic aircraft menu (13) FLPN Flaperon function gives the ailerons Programmable mixer. Mixing between ADIF Aileron differential. Makes aileron move a flap function. -
Page 47: Glid Model Data Recording Sheet
GLID Model Data Recording Sheet Make copies before using Model Name ___ ___ ___ ___ -__ __ __ Memory No. 1 . 2 . 3 . 4 . 5 . 6 . 7 MENU FUNCTION CH 1 CH 2 CH 3 CH 4 CH 5 CH 6... - Page 48 Austria, Belgium, Denmark, Finland, France, Germany, Greece, Iceland, Ireland, The Netherland, Italy, Spain, Norway, Portugal, United Kingdom, Luxembourg, Sweden, Switzerland www.hitecrcd.com...
Need help?
Do you have a question about the Eclipse 7 and is the answer not in the manual?
Questions and answers