Table of Contents
Advertisement
Quick Links
Advertisement
Table of Contents

Related Manuals for HITEC HG3XA


Summary of Contents for HITEC HG3XA
- Page 1 Operation Manual 3-Axis Stabilization System for Fixed Wing Model Aircraft...
-
Page 2: Table Of Contents
HG3XA. · Ensure sufficient power input. · Limit the use of this HG3XA to its intended purpose and · NOTE: Use of a gyro system involves constant control according to the guidelines set forth in this manual. -
Page 3: Hg3Xa Overview
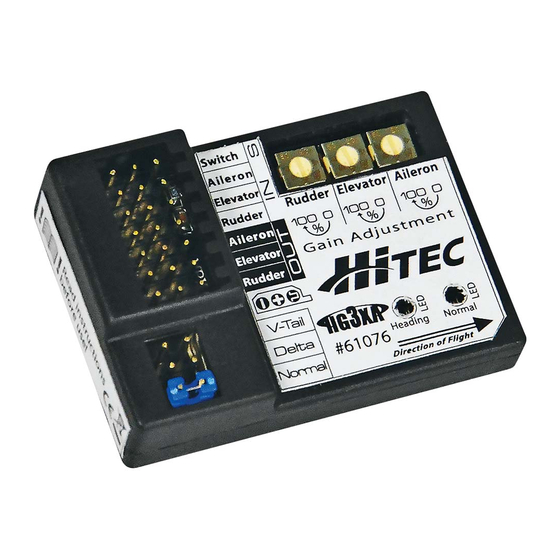
11 g Features Your HG3XA makes it possible to toggle between three Users of the HG3XA also enjoy specialty optimization for 3D different flight modes while your model is airborne, “Off” flight, independent gyro adjustment and gyro reversing for mode, “Standard” mode and “Heading Hold” mode. -
Page 4: Before Use
Before Use Prior to operating your HG3XA for the first time, please review adjustment has been saved, the blue LED will flash again. the instructions and reminders below and confirm that any Note: Failure to reset will engage Heading Hold mode rules for use have been met. -
Page 5: Model Selection
Model Selection The HG3XA uses a 3-bit jumper (J 1-2-3) for model type the table according to your type of aircraft. “0” signi es open selection. Adapt the adjustments J1, J2, and J3 as speci ed in and “1” denotes closed for the selected aircraft. -
Page 6: Gyro Direction Adjustment
Gyro Direction Adjustment Make sure the gyro system is facing the direction of forward ight prior to take o or you may lose control of your airborne model, causing it to crash in worst case scenarios. If necessary, deactivate the gyro. To determine if the Gyro Direction is correct, switch on the Note: Right/left correspond to the view from standing behind transmitter and Model (remembering to remove the propeller... - Page 7 1. Remove the jumper from the HG3XA. 2. Switch on the transmitter and then your model. 3. If the blue and red LED flash once, the HG3XA is in reverse. 4. Reverse Setting Menu: a. The LEDs start to flash in a rotary pattern after one second.
-
Page 8: Warranty And Service
TWO YEAR LIMITED WARRANTY CONSEQUENTIAL DAMAGES FOR BREACH OF ANY EXPRESS For a period of two years from the date of purchase HITEC RCD OR IMPLIED WARRANTY RELATING TO THIS PRODUCT, USA, INC. shall REPAIR OR REPLACE, at our option, defective EXCEPT TO THE EXTENT PROHIBITED BY APPLICABLE LAW. - Page 9 Phone: (858) 748 - 8440 E-mail: service@hitecrcd.com Web: www.hitecrcd.com...
Need help?
Do you have a question about the HG3XA and is the answer not in the manual?
Questions and answers