Table of Contents
Advertisement
Advertisement
Table of Contents

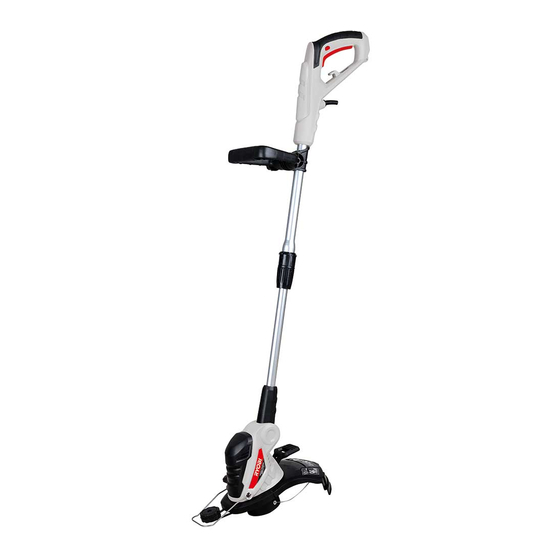
Summary of Contents for Ryobi RLT-552
-
Page 2: Specifications
THANK YOU FOR BUYING A RYOBI GRASS TRIMMER Your new grass trimmer has been engineered and manufactured to Ryobi’s high standard of dependability, ease of operation and operator safety. Properly cared for, it will give you years of rugged, trouble free performance. If you use your grass trimmer properly and only for what it is intended, you will enjoy years of safe, reliable service. -
Page 3: Important Safety Instructions
IMPORTANT SAFETY INSTRUCTIONS The purpose of safety rules is to attract your SPECIFIC SAFETY INSTRUCTIONS attention to possible dangers. The safety symbols Read all these instructions before attempting to and the explanations with them, require your operate this product and save these instructions. careful attention and understanding. -
Page 4: Using The Grass Trimmer
IMPORTANT SAFETY INSTRUCTIONS Do not switch on the tool in enclosed or poorly If the user is tired or unwell, or has taken medicine, ventilated spaces or in the presence of inflammable drugs alcohol or any substances which may slow and /or explosive substances such as liquid, gases his reflexes and compromise his judgement;... -
Page 5: General Safety Rules
IMPORTANT SAFETY INSTRUCTIONS GENERAL SAFETY RULES Do not use a power tool while you are tired or WARNING! Read all instructions Failure to follow under the influence of drugs, alcohol or all instructions listed below may result in electric medication. A moment of inattention while shock, fire and/or serious injury. - Page 6 IMPORTANT SAFETY INSTRUCTIONS d) Store idle power tools out of the reach of g) Use the power tool, accessories and tool bits children and do not allow persons unfamiliar etc., in accordance with these instructions and with the power tool or these instructions to in the manner intended for the particular type of operate the power tool.
- Page 7 DESCRIPTION 1. Auxiliary handle 8. Grass deflector 2. Trigger safety lock button 9. Filament line 3. Switch trigger 10. Double line spool 4. Power cable retainer 11. Flower bed guard 5. Power cable 12. Edger wheel 6. Handle rotation locking catch 13.
-
Page 8: Packing Contents
UNPACKING CAUTION. This packaging contains If any parts are found to be missing, the machine sharp objects. Take care when and its accessories should be returned together in unpacking. Remove the machine, their original packaging to the retailer. Do not throw together with the accessories supplied, from the the packaging away, keep it safe throughout the packaging. -
Page 9: Attaching The Auxiliary Handle
ASSEMBLY ATTACHING THE AUXILIARY HANDLE The auxiliary handle has 4 parts (Fig.3): • Fixing bolt • Handle • Washer • Locking knob Place the handle onto the fixing point on the shaft and slide the fixing bolt through the centre hole. Attach the washer and tighten with the locking knob, Fig.4 Fig. -
Page 10: Operation
OPERATION WARNING. Do not allow familiarity with products to make you careless. Remember that a careless fraction of a second is sufficient to inflict severe injury. WARNING. Always wear eye protection with side shields marked to comply with ANSI Z87.1. Failure to do so could result in objects being thrown into your eyes, resulting in possible serious injury. - Page 11 OPERATION ADJUSTING THE SHAFT LENGTH (FIG.8) Unplug the string trimmer. Set the trimmer on a flat surface and loosen the lower part of the centre collar. This will allow the lower part of the shaft to be extended or retracted . For trimming, adjust the handle upward.
-
Page 12: Trimming And Edging
OPERATION ADJUSTING THE FLOWER GUARD Lift the flower guard up when edging and put it down before trimming, as shown in Figure 13. Before trimming or edging make sure the flower guard is locked firmly in position. EDGING Rotate the motor head using the instructions in the “Adjusting the angle of the trimmer head”... -
Page 13: General Maintenance
OPERATION Watch out for kickbacks in the events of impact Cut all grass from top to down. This will prevent with hard objects. grass from wrapping around the shaft housing and string head which could cause damage from After finishing the cutting operation, keep the head overheating. -
Page 14: Storing The Trimmer
MAINTENANCE STORING THE TRIMMER Store it in a place that is inaccessible to children. Unplug the trimmer. Keep away from corrosive agents such as garden Depress telescopic tube adjustment coupler and chemicals and de-icing salts. set at shortest setting. Clean all foreign material from the trimmer. SYMBOLS Indicates danger, warning or caution. - Page 15 NOTES...
- Page 16 NOTES...


Need help?
Do you have a question about the RLT-552 and is the answer not in the manual?
Questions and answers