Table of Contents
Advertisement
Advertisement
Table of Contents

Subscribe to Our Youtube Channel
Related Manuals for Graco MILESTONE LX


Summary of Contents for Graco MILESTONE LX
- Page 1 MILESTONE LX ™ ALL-IN-ONE CAR SEAT USER MANUAL 使用說明書 *適用體重於0kg以上,36kg以下的孩童。 *此兒童保護裝置僅適用符合CNS 3972或等效標準之3點式車輛安全帶之車輛座椅使用。 *符合歐洲ECE-R44/04安全標準認證。 注意:請務必在詳細閱讀及清楚理解本說明書的指示後,再安裝或使用本兒童保護裝置。 IMPORTANT - Please read the user manual before use and use this product correctly. NWL0000860292A...
-
Page 2: Table Of Contents
目錄 Index 警告 Warning......................2~6 各部位名稱 Parts list ....................7 孩童的乘坐條件 Riding condition for child..............8 後向安裝 Rear-Facing ....................9 後向安裝方式 Install the Rear-Facing ............10~12 前向安裝 Forward-Facing ..................13 前向安裝方式 Install the Forward-Facing ............ 14~17 使用時的確認 Verification of use ..............18~21 輔助座椅模式... -
Page 3: 警告 Warning
警告 WARNING Read this User Manual completely BEFORE first use 請務必在使用本兒童保護裝置之前,先詳閱 of your car seat! 本說明書! Keep this User Manual always with the car seat. Provi- 請將本說明書與兒童保護裝置放在一起,座 sions are made on the rear of the seat shell. Plan to 椅靠背後方設有說明書收納處。由於攸關孩 spend some time getting to know your car seat-time 童的安全,請務必撥冗瞭解本兒童保護裝置... - Page 4 警告 WARNING DO NOT ever take a baby out of the car seat for any 車輛行進時,無論任何理由皆不得將孩童抱 reason while vehicle is in motion. If your baby needs 離本兒童保護裝置。若孩童哭鬧或需要安撫 attention, find a safe place and pull off the road. 照料時,請先將車輛停在路邊安全的地方後 再處理。 Do store your car seat in a safe place when not being used.
- Page 5 警告 WARNING After an accident, the car seat must be replaced. You 若本產品於意外中遭受劇烈撞擊,切勿繼續 may not see any damage, but after a serious crash a 使用,應立即更換兒童安全座椅,意外可能 car seat can be too weak to protect again. 導致產品無法提供完整的保護效果。 Please contact child restraint manufacturer in the event 若有疑問,請洽兒童保護裝置製造商或供應...
- Page 6 警告 WARNING Failure to follow these instructions and child restraint’s 若未依據說明書和兒童保護裝置標籤的指示 labels can result in child striking the vehicle’s interior 操作,可能會導致兒童在緊急煞車或碰撞事 during a sudden stop or crash. 故中,因搖晃撞擊車輛而受傷。 No car seat can guarantee protection from injury in 沒有一張兒童保護裝置可以保證孩童在任何 every situation, but proper use helps reduce the risk of 情況下能免受傷害,但正確地使用本兒童保...
- Page 7 性能之整體構成要件。 required components in the child restraint system . DO NOT use another manufacturers seat cover with 請勿使用其他製造商的椅套。若需要更換零 this child restraint. See your retailer for Graco replace- 件,請洽詢您的 Graco 零售商。 ment parts only. 切勿使用本說明書以外之任何組件安裝配置 DO NOT use in any configuration not shown in the 於本產品上。...
-
Page 8: 各部位名稱 Parts List
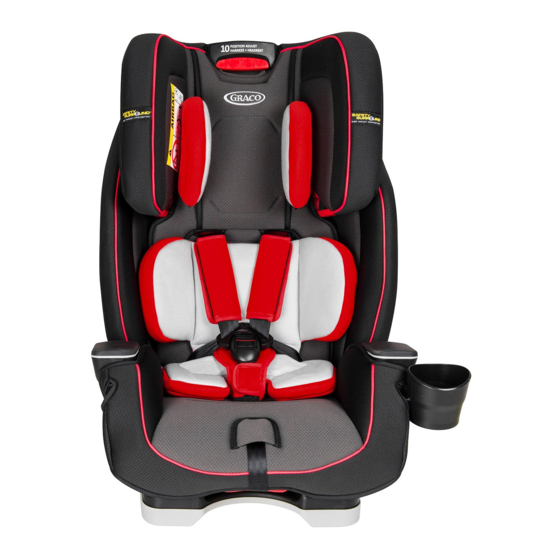
※本說明書所使用的插圖、組裝等,為求簡單明瞭,並非與實品完全相同。請以實際物品為主。 各部位名稱 Parts List ※For a concise approach, the images or assembly used in this User Manual may not be identical to the real product, so please check with the real product for reference. 高度調節鈕 護頭枕 Headrest/Harness Adjustment Handle Headrest 可拆護頭枕... -
Page 9: 孩童的乘坐條件 Riding Condition For Child
孩童的乘坐條件 Riding condition for child [後向安裝 Rear-Facing ] 質量等級0+ / 適用體重:0kg起~13kg以下 Group 0+ / Weight: from 0kg to 13kg ※體重未滿9公斤前,必須使用後向安裝 ※0-9 kg MUST be rear-facing. [前向安裝 Forward-Facing] 質量等級 I / 適用體重:9kg以上~18kg以下 Group I / Weight: from 9kg to 18kg [輔助座椅模式 Booster Mode] 質量等級... -
Page 10: 後向安裝 Rear-Facing
後向安裝 Rear-Facing 質量等級 0+ ●適用體重:0kg起~13kg以下 ●安全座椅必須採用後向安裝。 ●確實將汽車安全帶繞過後向安裝的安全帶溝槽(藍 色標籤指示的部位)。 ●將安全座椅牢牢固定於汽車座椅上。 ●安全帶必須正好落在兒童肩膀之最高處或略低的位 置。 Group 0+ •Weight:from 0kg to 13kg •Car seat must be rear-facing in the vehicle seat. •Make sure vehicle seat belt is routed through the rear-facing belt path, marked with a blue label. •Install this car seat tightly in your vehicle. -
Page 11: 後向安裝方式 Install The Rear-Facing
後向安裝方式 Install the Rear-Facing ❶按壓座椅的前後向調整把手,調整座椅的傾斜角度。 Push the Recline Handle to recline the Car Seat. ❷將安全座椅傾斜角度調整至第 1 段或第 2 段的位置。 Place the car seat in recline position 1 or 2. ❸將底座平放在車輛座椅上,然後往後推直至安全座椅的前端碰到汽車座椅的椅背。 Place the base flat on the vehicle seat. Push it back until the front of the car seat touches the vehicle seat back. - Page 12 後向安裝方式 Install the Rear-Facing ❹解開安全座椅椅墊背面的固定扣(4處)。 Unsnap the pad from back (4 locations). ❺將坐墊往前拉出至露出塑膠骨架結構。 Pull lower seat pad forward to expose the plastic shell. ❻將汽車腰部安全帶穿過後向安全帶溝槽(藍色標籤指示的部位)後扣緊。確認安全帶順平沒有扭 曲反折,並請確實將安全帶扣入相應的固定插扣。。 Thread vehicle lap seat belt through the rear-facing belt path (marked with a blue label) and buckle it.
- Page 13 後向安裝方式 Install the Rear-Facing 注意 CAUTION ❼將汽車肩部安全帶穿過座椅背面之藍色標籤指示的後向肩帶導向器。確認安全帶順平沒有扭曲反 折。Thread the shoulder belt through the rear-facing shoulder belt guide on the back of the seat marked with blue labels.The seat belt should lay as flat as possible and not be twisted. 某些汽車安全帶可能於穿過安全座椅的椅背時長度略為不足,此時請先將座椅靠背向汽車座 椅前傾(如圖示),以利汽車安全帶繞過椅背崁入肩帶導向器內,完成後再將安全座椅放回正...
-
Page 14: 前向安裝 Forward-Facing
前向安裝 Forward-Facing 質量等級 I ●適用體重:9kg以上~18kg以下,安全座椅必須採 用前向安裝。 ●確實將汽車安全帶繞過前向安全帶溝槽(亮紅色標 籤指示的部位)。 ●將安全座椅牢牢固定於汽車座椅上。 ●肩帶必須正好位於兒童的肩膀上或略高的位置。 Group I •Weight:from 9kg to 18kg, must be forward- facing in the vehicle seat. •Make sure vehicle seat belt is routed through the forward-facing belt path, marked with a bright red label. -
Page 15: 前向安裝方式 Install The Forward-Facing
前向安裝方式 Install the Forward-Facing ❶按壓座椅的前後向調整把手,調整座椅的傾斜角度。 Push the Recline Handle to recline the Car Seat. ❷將安全座椅傾斜角度調整至第3 段的位置。 Place the car seat in recline position 3. ❸將底座平放在車輛座椅上,然後往後推,直至安全座椅的背面碰到汽車座椅的椅背。 Place the base flat on the vehicle seat. Push it back firmly until the back of the car seat touches the vehicle seat back. - Page 16 前向安裝方式 Install the Forward-Facing ❹將汽車安全帶穿過前向安全帶溝槽(紅色標籤指示處) CAUTION 注意 後扣緊,確實將安全帶扣入相應的固定插扣,確認安全 帶順平沒有扭曲反折。 Thread vehicle seat belt through the forward-facing belt path (marked with an bright red label) and buckle it. Make sure buckle and seat belt are in line with each other. The seat belt should lay as flat as possible and not be twisted.
- Page 17 前向安裝方式 Install the Forward-Facing ❻確實朝安全座椅中央壓下,然後將汽車肩部安全帶往上拉以收緊。 Press down firmly in the center of the car seat. Pull on the shoulder belt to tighten. ❼使用五點式安全帶固定孩童。 Securing Child With 5-point Harness. 〈解開安全帶固定扣 Loosen Harness Straps〉 Ⓐ按壓固定扣解除扭,拉出肩帶。 Lift up on the harness release lever while pulling out on the harness straps. Ⓑ解開固定扣...
- Page 18 前向安裝方式 Install the Forward-Facing 〈讓孩童乘坐時 Place Your Child in the Seat〉 ❽將孩童的左右手分別穿過兩邊的肩帶。請確定孩童的背部平貼於安全座椅的椅面。 Place Harness Straps Over Child’s Shoulders Make sure their back is flat against the car seat back. 〈固定五點式安全帶 Buckle Harness Straps〉 ❾組合左右安全帶固定扣,扣入固定扣座中,直到聽到「喀嚓」聲,拉扯安全帶確定已確實扣緊。 You will hear a “click” when buckle tongues are securely attached. Pull up on each buckle tongue to make sure it is securely attached.
-
Page 19: 使用時的確認 Verification Of Use
使用時的確認 Verification of use 〈後向安裝 Rear-Facing〉 〈前向安裝 Forward-Facing〉 2.5 cm 確認肩帶正確高度 Verification of Harness Straps Height 〈後向安裝 Rear-Facing:〉 Ⓐ肩帶必須正好位於孩童的肩膀或略低的位置。 Harness straps must be at or just below the child’s shoulders. Ⓑ頭頂必須至少距離高度調節鈕紅色 2.5 公分以上。 Top of head must be at least 2.5 cm below the red headrest/harness adjustment handle. 〈前向安裝... - Page 20 使用時的確認 Verification of use 〈調整肩帶高度 Adjust the Harness Straps Height〉 ❶按壓紅色高度調節鈕,將頭枕往上或往下移動,即可調整至需要的肩帶高度。 Squeeze the red adjustment handle and move headrest up or down for the proper harness height. 〈檢查固定扣的位置 Check the Buckle Position〉 ❷固定扣座正確的位置為最靠近孩童股部卻沒有壓迫到孩童之股帶導孔。 The correct slot is the one that is closest to your child without being underneath them.
- Page 21 使用時的確認 Verification of use 〈調整固定扣座位置 Adjust the Buckle Position〉 ❸若需要調整股帶位置時,請從安全座椅正面掀起座布椅墊後,將可看見固定扣座的調整卡槽。 To Adjust, Lift the Lower Seat Pad From Front of Car Seat to Expose The Buckle Slots. ❹將固定扣座的織帶轉向側面,移動至三個調整孔位中所需的位置,並確認已將織帶轉正固定。 Turn Buckle Strap Sideways and Slide to Desired Slot, Make sure buckle strap is in one of the three positions.
- Page 22 使用時的確認 Verification of use ❻從腰部拉出鬆弛的安全帶,將兩邊的肩帶往上拉以收緊。 Pull All the Slack Out From around the Waist, Pull up on the harness strap. Do this to both sides. ❼拉緊調節帶以收緊肩帶,當無法再收緊孩童肩膀的任何一邊肩帶時,表示肩帶已完全收緊。 Tighten the Harness by Pulling the Harness Adjustment Strap, When you are not able to pinch any of the harness webbing at your child’s shoulder, the harness is tight enough.
-
Page 23: 輔助座椅模式 Booster Mode
輔助座椅模式 Booster Mode 質量等級 II、III ●適用體重:15kg以上~36kg以下 ●安全座椅必須採用前向安裝。 ●以輔助座椅模式使用時,請取下新生兒保護墊。 ●扣上汽車安全帶時,安全帶必須平貼孩童的身體, 絕對不可以扭曲。 ●請確定汽車肩部安全帶位置,務必介於孩童脖子與 肩膀外側邊緣的中間。 Group II、III •Weight:from 15kg to 36kg •Car seat must be forward-facing in the vehicle seat. •Remove infant wedge when used as a booster. •Vehicle seat belts MUSTflat against child and MUST NOT be twisted. •Make sure vehicle seat’s shoulder belt is centered between the child’s neck and edge of shoulder. - Page 24 輔助座椅模式 Booster Mode CAUTION 注意 ●切勿單獨使用汽車腰部安全帶固定孩童的身體。 ●請勿將汽車的肩部安全帶置於孩童的手臂後方或背部。 ●務必讓坐在孩童保護裝置上之孩童的身體能貼穩座椅的靠 背,以避免滑落。 ●請勿將汽車安全帶套掛在安全座椅的扶手上。 ●若孩童無法接受使用汽車安全帶,請勿使用此孩童保護裝 置。請使用其他的安全座椅。 •Never use a vehicle lap only seat belt across front of child. •DO NOT position vehicle shoulder belt under the child’s arm or back. •DO NOT allow child to slouch or slide down in the booster •DO NOT position vehicle seat belt over top of armrests.
-
Page 25: 輔助座椅的安裝方式 Install The Booster
輔助座椅的安裝方式 Install the Booster 〈收納肩部安全帶 Loosen Harness Straps〉 ❶盡可能將肩部安全帶拉鬆。 Loosen the harness straps as much as possible. ❷將頭枕抬至最高位置。 Raise the headrest to the highest position. ❸解開固定扣。 Unbuckle the buckle. 僅需要拉肩部安全帶,務必避開肩部保護墊。 Only need to pull out harness strap, and need to stay away from harness covers. 建議... - Page 26 輔助座椅的安裝方式 Install the Booster ❹取下座椅縫製品,打開五點式安全帶收納槽的蓋板。 Remove the Lower Seat Pad to Expose the Harness Storage Door. 先將固定扣保護套取下之後會更方便操作。 It is more convenient to operate after removing the Buckle Cover. 建議 Tips...
- Page 27 輔助座椅的安裝方式 Install the Booster 座椅底部 座椅底部 Interior of seat Interior of seat 〈取下固定扣座 Remove Buckle〉 ❺調整座椅的傾斜角度,找出固定金屬片,將固定金屬片向上轉,穿過椅殼和椅墊,再由正面拉出 股帶固定扣。 Recline the car seat and locate the metal retainer. Rotate the metal retainer up through the shell and pad. From the front, pull the crotch buckle out. ❻打開五點式安全帶收納槽的蓋板,將肩帶、固定扣座放入收納槽中,關上收納槽蓋板。...
- Page 28 輔助座椅的安裝方式 Install the Booster 〈收納肩帶保護套 Store Harness Covers〉 ❼將肩帶保護套收進椅背上的凹槽開口部位(如圖所示)。 Place the harness covers in the shell back openings as shown. ❽裝回椅墊,將護頭枕調整至適合孩童的位置。 Replace Seat Pad, Move the headrest back to its proper position for your child. ❾調整座椅的傾斜角度,將安全座椅調整至第 4 段的位置。 Recline the Car Seat, Place the booster seat in recline position 4. ❿前向安裝於車輛時,請將安全座椅放在配備有腰部/肩部安全帶的汽車座椅上,且安全座椅底座...
-
Page 29: 讓孩童乘坐時 Place Your Child In The Seat
讓孩童乘坐時 Place Your Child in the Seat ❶孩童乘坐時請將背部平貼座椅靠墊。 Have your child sit in the booster seat, with their back flat against the back of the booster seat. ❷將汽車的肩部安全帶穿過車輛肩部安全帶引導溝槽。 Thread Vehicle’s Shoulder Belt Through Booster Shoulder Belt Guide in the Headrest ❸請確定汽車的腰部安全帶穿過車輛安全帶溝槽(深紅色標籤指示的部位)。... - Page 30 讓孩童乘坐時 Place Your Child in the Seat ❹繫上汽車腰部安全帶,應讓汽車腰部安全帶低於孩童的骨盆位置,並調整至服貼程度。 Be sure the lap portion of the vehicle seat belt is low across your child’s hips and is adjusted snugly. ❺汽車肩部安全帶,應介於孩童脖子與肩膀外緣之間。 Vehicle seat’s shoulder belt should be centered between the child’s neck and edge of shoulder. ※請調整頭枕高度,以達到理想的肩部安全帶位置。...
-
Page 31: 附屬配件 Accessories
附屬配件 Accessories 新生兒腰部緩衝墊 body support wedge 腰部守護墊 Body Support ❶ 〈腰部守護墊 Body Support〉 若肩膀低於肩帶的最低設定時,必須使用腰部守護墊。若不使用時,請解開五點式固定扣,即可 取出腰部守護墊。 Body support must be used if shoulders are below the lowest harness setting. To remove, unbuckle the buckle and pull out the body support. ❷體重未滿5公斤的新生兒,請使用新生兒腰部緩衝墊,體重超過5公斤以上的嬰幼兒,請拆下新生 兒腰部緩衝墊。... - Page 32 附屬配件 Accessories 椅墊 新生兒臀部緩衝墊 Seat pad Infant wedge ❹ 〈新生兒臀部緩衝墊 Infant Wedge〉 Ⓐ安裝時,請先將椅墊往外拉出至露出座椅的塑膠骨架結構。 To attach, pull back seat pad to expose plastic shell. Ⓑ將新生兒臀部緩衝墊鋪在座椅上,將固定扣座面朝上,穿過新生兒臀部緩衝墊中間的孔,確認中 間的穿孔位於 3 個插扣的中心點,然後裝回椅墊。 With fastening strips facing up, thread the buckle through the center hole and place wedge on seat.
- Page 33 附屬配件 Accessories ❺ 〈置杯架 Cup Holder〉 置杯架可安裝於左右任一側。 Cup holder can be on either side. Ⓐ安裝時,請先調整椅墊至露出安裝插孔。 To attach, pull back the seat pad to expose the attachment guide. Ⓑ將置杯架插入安裝插孔至定位為止。 Slide the cup holder down the guide until it locks into place. Ⓒ不使用時,請將雙手放置杯架下方,將置杯架往上推出即可。...
-
Page 34: 選擇一個合適的車輛座椅位置 Choosing Vehicle Seat Location
選擇一個合適的車輛座椅位置 Choosing Vehicle Seat Location 〈安裝場所的要求 ●請詳閱車主手冊,瞭解適用兒童保護裝置的 Requirement of installation location〉 座椅位置。 Review your vehicle owner’s manual for seat- ①請選擇在可以將車門全部敞開、寬廣且平坦的場 ing locations. 所進行安裝作業。 Choose a spacious and flat place that all car ●為了確保嬰幼兒的乘車安全,建議將本產品 doors can be opened to proceed on the installa- 安裝於車輛後方的座位上。... -
Page 35: 危險的車輛座椅位置 Unsafe Vehicle Seat Locations
危險的車輛座椅位置 Unsafe Vehicle Seat Locations 〈請勿將本產品安裝於以下任一車輛座席位置: Never install this car seat in any of the following vehicle seating locations:〉 ❶車輛座椅為後向式或側向式的車輛座椅位置。 Rear-facing or side-facing vehicle seats. ❷使用後向模式時,正面設有安全氣囊的車輛座椅。 Rear-facing with an active front air bag. ❸使用輔助座椅模式時,僅配備有腰部安全帶的車輛座椅。 booster mode with vehicle lap only seat belt ‧使用方式錯誤時,可能會造成使用者死亡或重傷等情形。... - Page 36 危險的車輛座椅位置 Unsafe Vehicle Seat Locations 〈無法安裝本產品的車輛座椅 Vehicle seat on which this product cannot be installed〉 ‧汽車座椅與孩童保護裝置之間,不應因為汽車座椅頭枕而出現空隙。 SHOULD NOT create a gap between vehicle seat and booster seat. ‧孩童保護裝置的底座前端不得超出汽車座椅的前端,而導致呈現懸空狀態。 The front of booster seat base MUST NOT hang over front of vehicle seat. ‧若孩童無法接受使用汽車安全帶,請勿使用此孩童保護裝置。...
-
Page 37: 車輛安全帶的條件 Vehicle Seat Belt Condition
車輛安全帶的條件 Vehicle seat belt condition 〈車輛安全帶種類 Car seat belt category〉 •此兒童保護裝置僅適用符合中華民國CNS11497及ECE R44/04基準或等效標準之3點式車輛安全 帶之車輛座椅使用。 This child restraint system for vehicles is used with car seat belt fixing system, and meets the standards of CNS11497 and ECE R44/04 in Taiwan, R.O.C. This is categorized as “General Type”... - Page 38 車輛安全帶的條件 Vehicle seat belt condition 〈無法安裝本產品於以下種類的車輛安全帶: This product cannot be installed with the following seat belt:〉 •兩點式安全帶座椅。2-point seat belt. •座椅安全帶為上下共捲式。Seat belt is retracted by both top and bottom sides. •車輛的座椅安全帶為全自動裝置。Seat belt is installed with an automatic device. •配備市售賽車或跑車等特定目的的安全帶座椅。Seat belt is equipped on a special purpose seat, such as racecar or sports car.
-
Page 39: 縫製品的拆卸方法 Disassembling Method For Sewing Products
縫製品的拆卸方法 Disassembling method for sewing products 〈護頭枕套 Headrest Pad〉 若有需要,可將頭枕靠墊拆下清洗。If needed, headrest pad may be removed for cleaning. Ⓐ需拆下時,請解開護頭枕套上的固定扣,再將肩帶抽出。 To remove, unsnap the pad to pull the harness straps out. Ⓑ將位於高度調節鈕附近的塑膠固定片拉出溝槽口。 Pull the plastic tab out of the slots just below the red adjustment handle. Ⓒ取下護頭枕兩側勾環的鬆緊帶。... - Page 40 縫製品的拆卸方法 Disassembling method for sewing products 〈座椅墊 Lower Seat Pad〉 若有需要,可將座椅墊拆下清洗。If needed, lower seat pad may be removed for cleaning. Ⓐ需拆下時,先將腰側的固定扣解開。 To remove, unsnap lower seat pad from side pad. Ⓑ解開扶手上的塑膠勾環。 Undo the plastic hooks on both armrest. Ⓒ從扶手取下鬆緊帶。將座椅墊取下。 Unhook the elastic strap from both armrests. Pull the pad off. Reverse the steps to reattach the cover on the headrest.
- Page 41 縫製品的拆卸方法 Disassembling method for sewing products 〈側邊防護墊 Side Pad〉 若有需要,可將側邊防護墊拆下清洗。 If needed, side pad may be removed for cleaning. Ⓐ需拆下時,請將護頭枕調至最低段,由護頭枕後方解開側邊防護墊的鬆緊帶。。 To remove, lower headrest and unhook the pad from back. Ⓑ從後方及座椅兩側拉出塑膠固定片。 Pull the plastic tabs out from the back and sides of the seat. Ⓒ取下前向安裝安全帶溝槽勾環的鬆緊帶。將側邊防護墊取下。...
-
Page 42: 縫製品的清潔方式 Cleaning Ways For Sewing Product
縫製品的清潔方式 Cleaning ways for Sewing product 〈肩帶保護套 Harness Covers〉 清洗肩帶保護套:請使用濕布擦拭乾淨。Cleaning Harness Covers: Wipe clean with damp cloth. 〈股帶固定扣 Crotch Buckle〉 清潔股帶固定扣:Cleaning Crotch Buckle: Ⓐ調整座椅的傾斜角度,找出固定金屬片。Recline the car seat and locate the metal retainer. Ⓑ將固定金屬片向上轉,穿過椅殼和椅墊,然後從正面拉出股帶固定扣。 Rotate the metal retainer up through the shell and pad. From the front, pull the crotch buckle out. Ⓒ清潔固定扣時,請將其放入裝有溫水的杯內,輕輕攪動固定扣,並在水中按壓紅色扣鈕數次。... -
Page 43: 平日保養 Standard Maintenance
平日保養 Standard maintenance 〈座椅縫製品清洗方法 Cleaning ways for seat sewing product〉 乾洗 平 漂白 洗衣機機洗 Washing Machine No bleach No dry cleaning Flat ‧請勿與其他物品一起洗滌,因恐顏色轉染的問題發生。 注意 ‧Please do not wash it with other objects to avoid color-staining problems. ‧洗衣機機洗時,建議放入洗衣袋中,並以低速弱洗程序洗滌。 CAUTION ‧When washing with the washing machine, it is recommended that a wash bag is used and the washing mode is set to low speed delicate cycle. -
Page 44: 保管・廢棄方法 Custody‧abandon Method
保管 ・ 廢棄方法 Custody‧abandon method 〈保管方法 Custody method〉 ‧請將說明書妥善存放有說明書圖示的收納槽內(如圖所示)。 Store instruction manual in the slot with the instruction book icon as shown. ‧收藏時請將本產品以大型塑膠袋套入,放置在於灰塵少並且不會日曬的場所保管。 Put this product inside a big plastic bag and place it in a location with less dust and without sunlight for storage. - Page 45 保固事宜 〈保固事宜〉 ‧於品質保證期間內(自購買日起1年內),由於零件短少、加工不良等可歸責於本公司者、依照使用說明書及注意事項 而在正常使用狀態下故障者,根據保固規定提供免費修繕服務。 自購買日起已超過3年之產品,雖仍受理修理,但產品修理部位以外之品質,則恕不保證。 此外,已停產之產品,可能因修理所需零件已無庫存而無法修理。(零件之保有期間為停產後3年期間。即使於3年內 ,零件之顏色、布料之花樣等方面,亦有可能無法符合您所指定的,敬請見諒。) 〈售後服務事宜〉 ‧使用中發生故障等情況,或檢查中發現時,需要更換零件或修理時,各部位之固定部位發生鬆動或異音、零件缺損或 車輪轉動有異常時,以及感覺到其他異常時,請停止使用,並確認產品名稱、品番、批號(參考下圖)後,向購買的 經銷商聯絡。 品名、品番、批號 ‧聯絡時,請務必告知本產品座椅下方 之品名、品番、批號,以利溝通。 〈座椅背部〉...
- Page 46 MEMO...
- Page 47 MEMO...
- Page 48 保 證 書 〈僅適用台灣地區〉 〈保固規定〉 MILESTONE LX 1消費者請於購買時要求經銷商在本保證書上蓋章,並填上銷售 ™ 日期或將保固貼紙貼上。 產品 2本公司產品之保固期間為自購買日起一年間。 3產品在保固期間內需要維修服務時,請出示本保證書。 4產品維修前,未出示本產品保證書或保證書尚未蓋店章、未填 型號 購買日期 寫銷售日期時,即使於一年內購買,亦無法享有一年保固之免 費修繕服務。 姓名 5於品質保證期間內,由於零件短少、加工不良等製造商所引起 之原因,由製造商提供免費修繕服務(含運費)。若為消費者 地址 之責任,則計費維修。 6免費修繕服務不包含以下項目。 顧客資料 ◎非歸責於製造商責任之任何損壞與故障。 電話 ◎坐墊、縫製品等刮傷。 ◎使用者任意變更所引起。 E-mail ◎由自然災害或事故等原因所引起。 ◎框架自然劣化(塗料部分需時常保養)。 ◎錯誤的使用方法或保養不良所致。 使用時,如發生故障或強烈撞擊、不慎掉落等情況及發現有零 件需要更換時,台灣國內請向本公司維修中心聯絡,海外地區 經銷商 請洽當地代理商聯絡,我們竭誠為您服務。 確認章 ●請確認購買時之經銷商店名稱,填寫型號、購買日期。 ●本保證書不另行補發,因此請小心保管,避免遺失。 ●本保證書填寫之個人資料,僅使用於產品保固及修理事宜。 (請務必蓋章或將保固貼紙貼於此處,保證方為有效)...
Need help?
Do you have a question about the MILESTONE LX and is the answer not in the manual?
Questions and answers