
Subscribe to Our Youtube Channel
Related Manuals for Med-Mizer EX8000


Summary of Contents for Med-Mizer EX8000
- Page 1 EX8000 User Manual Revision 00 EX8000 USER MANUAL MAN-EX8000 REV00 EX8000 USER MANUAL Page 1 of 22...
-
Page 2: Table Of Contents
EX8000 User Manual Revision 00 TABLE OF CONTENTS Overview Introduction Intended Use Safety Information Specifications Options and Accessories Preparation for Use Unpacking Disassembly Assembly Operation Control Options Bed Height Adjustment Head and Knee Adjustment Foot Elevation Bed Transport Bed Deck Expansion & Retraction... -
Page 3: Overview
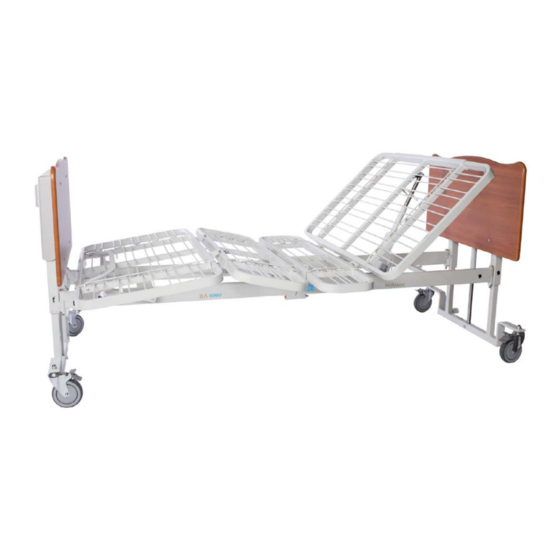
NOTICE: The information in this document is subject to change without notice. Intended Use The EX8000 Bed is intended to provide means for a single occupant to recline and sit, and to assist the occupant in moving between reclining, sitting and standing positions. - Page 4 EX8000 User Manual Revision 00 WARNING Close supervision by an adult user who has read and understands this User Manual is required when the bed is used around children or others who have not or cannot read and/or understand this User Manual.
- Page 5 Options and Accessories Safety CAUTION Use only bed accessories and bed replacement parts supplied or approved by Med-Mizer® for this bed. Third party accessories and replacement parts that are not approved by Med-Mizer® may result in personal injury or equipment damage.
-
Page 6: Specifications
EX8000 User Manual Revision 00 CAUTION Follow manufacturer’s instructions for proper use of cleaning agent. Improperly diluted or improperly applied cleaning agents can result in inadequate disinfection or a caustic burn hazard. Maintenance and Service Safety WARNING Before performing bed maintenance or service, unplug the power cord to avoid an electric shock hazard. -
Page 7: Preparation For Use
EX8000 User Manual Revision 00 End Board Panels End Board Options Headboard and Footboard Finish Options Custom Headboard and Footboards Available Preparation for Use Unpacking (If Shipped LTL/Commercial) Tools Required: Utility knife Side-cutting shears To unpack bed, footboard and headboard: 1. -
Page 8: Disassembly
EX8000 User Manual Revision 00 Disassembly Tools Required: 5/8 Wrench 5/8 Socket Ratchet handle Side Cutters 1. Lock all four caster then carefully lay entire bed on the ground, make sure to lay it on the head section side. Head... - Page 9 EX8000 User Manual Revision 00 3. Now that the wire ties have been removed, locate the two 7/16-14 x 4 ½” bolts. Using your 5/8” wrench and ratchet both will need to be removed in order to separate foot section high low mechanism.
- Page 10 EX8000 User Manual Revision 00 6. Remove the head section from the bundle and place in a safe place until bed assembly. This action will free each section from the entire bundle. 7. The foot high low mechanism is below foot section frame that the head section was removed from.
-
Page 11: Assembly
EX8000 User Manual Revision 00 Assembly Tools Required: 5/8 Wrench 5/8 Socket Ratchet handle Side Cutters 1. Place each of the four sections into place for assembly. Orient like the following. 2. Next assemble the head section deck to the head high low mechanism. Locate the 7/16-14 x 4 ½”... - Page 12 EX8000 User Manual Revision 00 3. Next place each bolt into the bushings located on the head section deck. 4. Now lift the head section deck onto the two bushings located on the head high low mechanism. MAN-EX8000 REV00 EX8000 USER MANUAL...
- Page 13 EX8000 User Manual Revision 00 5. Once the bolts are in place and fully seated onto the bushings, use the 5/8” Wrench and Ratchet to firmly tighten the 5/8” nylon nuts to the bolts. 6. Assemble the foot section deck to the high low mechanism, repeat steps 2 thru 5.
- Page 14 EX8000 User Manual Revision 00 8. You will see two more 7/16-14 x 1 ½” bolts and nuts on one of the frames. Each will need to be removed for assembly; do not discard. 9. Once the bolts are removed, locate the bolts that were removed during disassembly.
- Page 15 EX8000 User Manual Revision 00 MAN-EX8000 REV00 EX8000 USER MANUAL Page 15 of 22...
- Page 16 EX8000 User Manual Revision 00 10. Re- apply the two long bolts to the frame. These are the two nuts and bolts you just removed from the frame. Each of the frames should be lined up properly so that these can return to the holes they previously were in.
- Page 17 EX8000 User Manual Revision 00 12. Flip bed over onto its casters to its flat position and remove all remaining tie straps. Once the tie straps are removed you can now attach the hi/low actuators to the extension cable along with a plastic c-clip which can be found in your bag attached to frame.
-
Page 18: Operation
EX8000 User Manual Revision 00 Operation Control Options Hand Pendant Control Bed Height Adjustment The up arrow raises the bed, and the down arrow lowers the bed. Head and Knee Adjustment The head-up arrow raises the head section, and the head-down arrow lowers the head section. -
Page 19: Foot Elevation
EX8000 User Manual Revision 00 Foot Elevation To elevate the foot section, first raise the knee to the desired height. Manually lift the foot end of the foot section and rotate the foot support post upward. Lower the foot section placing the foot support on the bottom of the foot section. -
Page 20: Bed Deck Expansion & Retraction
EX8000 User Manual Revision 00 Bed Deck Expansion or Retraction To expand deck push the two buttons simultaneously and pull the tube, release the button until the desired width is achieved. The first locking location is 39” the second is 42” , and the final is 48”. Repeat on all four sections and both sides of bed. -
Page 21: Maintenance
Check that screws, bolts, pins and other fasteners are in Remove bed from service. Tighten loose bolts and screws. place, secured and properly tightened. Contact Med-Mizer® customer service to order missing or damaged fasteners. Inspect actuators for excessive wear and misalignment. -
Page 22: Service Part List
Med-Mizer, found to be defective. This warranty does not cover failure due to negligence, accident, abuse or installation not in accordance with the company’s instructions or failure to follow maintenance instructions.
Need help?
Do you have a question about the EX8000 and is the answer not in the manual?
Questions and answers