L-Acoustics KIVA SB15m Owner's Manual
Hide thumbs
Also See for KIVA SB15m:
- Rigging manual (20 pages) ,
- User manual (15 pages) ,
- Owner's manual (100 pages)
Table of Contents
Advertisement
Quick Links
Advertisement
Table of Contents

Related Manuals for L-Acoustics KIVA SB15m


Summary of Contents for L-Acoustics KIVA SB15m
- Page 1 KIVA owner's manual (EN)
- Page 2 Document reference: Kiva owner's manual (EN) version 1.0 Distribution date: December 17, 2018 © 2018 L-Acoustics. All rights reserved. No part of this publication may be reproduced or transmitted in any form or by any means without the express written consent of the publisher.
-
Page 3: Table Of Contents
Contents Safety................................5 Instructions..............................5 Symbols..............................6 Introduction................................ 7 How to use this manual..........................7 System components.............................8 Loudspeaker cables........................... 9 Rigging elements............................9 Mechanical safety.............................10 Inspection and preventive maintenance....................... 12 How to do preventive maintenance......................12 Mechanical system overview........................12 Mixed Kiva array with SB15m and KIBU-SB..................13 Kiva array with KIBU........................14 Kiva ceiling-mounted with KIET......................15 Kiva pole-mounted on SB15m with KIET..................16... - Page 4 Specications..............................71 APPENDIX A: Installing an inclinometer on KIBU-SB..................... 84 APPENDIX B: Recommendation for speaker cables....................85...
-
Page 5: Safety
Respect the Working Load Limit (WLL) of third party equipment. L-Acoustics is not responsible for any rigging equipment and accessories provided by third party manufacturers. Verify that the Working Load Limit (WLL) of the suspension points, chain hoists and all additional hardware rigging accessories is respected. -
Page 6: Symbols
Do not expose the product to rain or sea spray. Do not expose the product to moisture (mist, steam, humidity, condensation…) or excessive heat (direct sun, radiator…) for a long period of time. Contact L-Acoustics for advanced maintenance. Any unauthorized maintenance operation will void the product warranty. Symbols The following symbols are used in this document: This symbol indicates a potential risk of harm to an individual or damage to the product. -
Page 7: Introduction
Performing another operation exposes to hazardous situations. For advanced maintenance, contact your L-Acoustics representative. As part of a continuous evolution of techniques and standards, L-Acoustics reserves the right to change the specications of its products and the content of its document without prior notice. Please check www.l-acoustics.com... -
Page 8: System Components
System components System components Loudspeaker enclosures ® Kiva 2-way passive ultra compact WST enclosure SB15m High power compact subwoofer : 1 x 15'' SB18 High power compact subwoofer: 1 x 18'' SB18i High power compact subwoofer: 1 x 18'' installation version SB18m High power compact subwoofer: 1 x 18'' Powering and driving system... -
Page 9: Loudspeaker Cables
System components Loudspeaker cables 0.7 m / 5 m / 10 m / 25 m CH(1) CH(2) SP.7 / SP5 / SP10 / SP25 SP-Y1 SPK1 SPK2 0.7 m / 10 m / 25 m SPK3 SPK4 DO.7 / DO10 / DO25 DOSUB-LA8 Rigging elements KIBU-SB... -
Page 10: Mechanical Safety
Mechanical safety Mechanical safety Flown congurations The Kiva rigging system complies with 2006/42/EC: Machinery Directive. It has been designed following the guidelines of BGV-C1. 2006/42/EC: Machinery Directive species a safety factor of 4 against the rupture. The own deployments described in this manual achieve a safety factor of 4 or higher. - Page 11 Mechanical safety Assessing mechanical safety Mechanical safety of the rigging system Before any installation, always model the system in Soundvision and check the Mechanical Data section for any stress warning or stability warning. In order to assess the actual safety of any array conguration before implementation, refer to the following warnings: Rated working load limit (WLL) is not enough The rated WLL is an indication of the element resistance to tensile stress.
-
Page 12: Inspection And Preventive Maintenance
Inspection and preventive maintenance Inspection and preventive maintenance How to do preventive maintenance Inspect the system before any deployment and after any corrective maintenance operation. Perform preventive maintenance at least once a year. Refer to the maintenance manuals for advanced maintenance. Rigging and hardware Refer to the Mechanical system overview... -
Page 13: Mixed Kiva Array With Sb15M And Kibu-Sb
Inspection and preventive maintenance Mixed Kiva array with SB15m and KIBU-SB Refer to Rigging part inspection (p.18). Rigging rails, storage pins (p.22) Shackles (p.24) Coupling bars, locking tabs (p.19) Rigging rails, storage pins (p.22) Check that the ground runners screws are tightened. -
Page 14: Kiva Array With Kibu
Inspection and preventive maintenance Kiva array with KIBU Refer to Rigging part inspection (p.18). Shackles (p.24) Rigging axis, lodging (p.23) Ball-locking pins (p.20) Rigging check (p.26) CLICK ! Rigging axis, lodging (p.23) Back cover inspection (p.25) logo on the same side as the safety mechanism Kiva owner's manual (EN) version 1.0... -
Page 15: Kiva Ceiling-Mounted With Kiet
Inspection and preventive maintenance Kiva ceiling-mounted with KIET Refer to Rigging part inspection (p.18). inspect the screws Ball-locking pins (p.20) Rigging axis, lodging (p.23) Rigging check (p.26) CLICK ! Rigging axis, lodging (p.23) Back cover inspection (p.25) logo on the same side as the safety mechanism Kiva owner's manual (EN) version 1.0... -
Page 16: Kiva Pole-Mounted On Sb15M With Kiet
Inspection and preventive maintenance Kiva pole-mounted on SB15m with KIET Refer to Rigging part inspection (p.18). Back cover inspection (p.25) Rigging check (p.26) CLICK ! Rigging axis, lodging (p.23) logo on the same side as the safety mechanism Ball-locking pins (p.20) Rigging axis, lodging (p.23) -
Page 17: Sb18 / Sb18I / Sb18M Stacked
Inspection and preventive maintenance SB18 / SB18i / SB18m stacked Refer to Rigging part inspection (p.18). SB18 screws are tightened Ball-locking pins (p.20) SB18i screws are tightened screws are tightened tabs are not bent screws are tightened SB18m Rigging rails, storage pins (p.22) screws are tightened Coupling bars, locking tabs... -
Page 18: Rigging Part Inspection
Place the rigging part on a at surface or hold a level against it. 5. Check the moving parts. Make sure that the mechanism engages correctly. What to do next If a problem is detected, perform the authorized maintenance operations or contact your L-Acoustics representative. Kiva owner's manual (EN) version 1.0... -
Page 19: Inspection References
SB15m KR WIFOVER (Kit 2 locking tabs with slings ) Locking tabs (p.69) SB18m KR WIFOVER (Kit 2 locking tabs with slings ) *: contact your L-Acoustics representative Related tasks Rigging part inspection (p.18) Kiva owner's manual (EN) version 1.0... - Page 20 Inspection and preventive maintenance Ball-locking pins Reference pictures tether (KIET) tether (KIBU-SB) tether (KIBU) Moving parts 1. Press the push button. The ball-locking mechanism is retracted. 2. Release the button. The ball-locking mechanism is activated. Kiva owner's manual (EN) version 1.0...
- Page 21 3. Insert the pin in its storage and rigging locations. If the pin in inserted in two plates, the ball must pass between both plates and lock the pin in place. If the check fails, immediately withdraw the product from use and contact L-Acoustics. Repair kits (KR)
- Page 22 Rigging rails and storage pins Reference pictures SB15m geometry SB18m geometry KIBU-SB geometry Repair kits Contact your L-Acoustics representative for repair instructions. Rail SB15m KR SB15MJOUE (Kit 2 side rigging assemblies SB15M ) SB18m KR SB18MRAIL (Kit 2 rails for SB18M rigging assembly )
- Page 23 • Check that the tabs are not bent. KIBU-SB KIBU KIET Repair kits Contact your L-Acoustics representative for repair instructions. Rigging axis KIBU-SB KR CVKIRIGAXE (Kit 10 rigging axe & screws ) KIET KR CVKIRIGAXE (Kit 10 rigging axe & screws ) KIBU KR CVKIRIGAXE (Kit 10 rigging axe &...
- Page 24 Inspection and preventive maintenance Shackles Moving parts Drive the shackle axis in its lodging. Make sure that the end is ush with the shackle. Repair kits 12 mm shackles KIBU-SB KR CAMAN12 (Kit 4 straight shackles 12 mm ) KIBU KR CAMAN12L (KR bow shackles 12 mm (x2) ) Related tasks Rigging part inspection...
-
Page 25: Back Cover Inspection
Inspection and preventive maintenance Back cover inspection About this task In order to assess the deformation of the back cover of Kiva, inspect the back cover on every single enclosure. Take down the enclosure before inspection. Procedure — Check the rigging pin holes for signs of ovalization. The hole should t the pin with no visible gap. -
Page 26: Rigging Check
Inspection and preventive maintenance Rigging check Procedure 1. Secure one Kiva on top of a second one (logos on the left). CLICK ! • The safety clicks back into place. • Both rigging axis t in their lodgings. 2. Secure the rear rigging arm at the 0° and at the 15° position. SHLAK ! 0°... - Page 27 Inspection and preventive maintenance 4. Release the rigging arm of the top enclosure. Risk of trapping hand/ngers Carefully release the back of the enclosure until it rests on the assembly. 5. Unlock the mechanism inside the left handle of the top enclosure and slide the enclosure to the left. 6.
-
Page 28: Acoustical Check
Inspection and preventive maintenance Acoustical check Enclosure check This feature is available on: LA4X LA12X ENCLOSURE CHECK measures impedance at the reference frequencies for the connected loudspeaker family. The measured impedance is compared to the expected range allowing for fast detection of loudspeakers presenting circuit continuity issues. - Page 29 Inspection and preventive maintenance 7. Depending on the displayed results, follow the instructions in the table. result interpretation instructions measured impedance is within expected range enclosure is in working order electrically unsupported preset family only supported enclosures should be tested Not Connected if cables are connected: a.
- Page 30 Inspection and preventive maintenance Listening test enclosure preset usable bandwidth Kiva [KIVA] 80 Hz - 20 kHz SB15m [SB15_100] 40 Hz - 120 Hz SB18 / SB18i / SB18m [SB18_100] 32 Hz - 110 Hz Procedure 1. Load the preset on an LA4X / LA8 / LA12X amplied controller. 2.
- Page 31 Inspection and preventive maintenance 4. Perform the reassembly procedure. Pay close attention to the position of the diaphragm. Apply the recommended torque. 5. Repeat the listening test. Kiva owner's manual (EN) version 1.0...
-
Page 32: Loudspeaker Connection
Kiva SB15m SB18 Impedance load Kiva SB15m SB18 1 enclosure: 8 Ω 2 enclosures in parallel: 4 Ω Connecting 2-way passive enclosures or subwoofers SP on speakON output OUT1 OUT3 OUT4... - Page 33 Loudspeaker connection SP and SP-Y1 on speakON output CH(1) (OUT1) SP-Y1 CC4FP OUT1/OUT2 OUT3/OUT4 CH(2) (OUT2) same as OUT1/OUT2 CH(1) (OUT1) SP-Y1 CC4FP OUT1/OUT2 OUT3/OUT4 CH(2) (OUT2) same as OUT1/OUT2 Kiva owner's manual (EN) version 1.0...
-
Page 34: La8
LA8 can drive up to two SB15m per output, but no more than six per controller at high level. Impedance load Kiva SB15m SB18 1 enclosure: 8 Ω 2 enclosures in parallel: 4 Ω 3 enclosures in parallel: 2.7 Ω... - Page 35 Loudspeaker connection Connecting 2-way passive enclosures or subwoofers SP and SP-Y1 on speakON output CH(1) (OUT1) SP-Y1 CC4FP CH(2) (OUT2) OUT3/OUT4 OUT1/OUT2 same as OUT1/OUT2 DO and DOSUB-LA8 on CA-COM output SPK1 (OUT1) CA-COM SPK2 (OUT2) SPK3 (OUT3) SPK4 (OUT4) Kiva owner's manual (EN) version 1.0...
-
Page 36: Corrective Maintenance
Corrective maintenance Corrective maintenance Tools Before performing corrective maintenance, make sure all the tools listed are available. Reference are given for FACOM ® products in this table. Other manufacturers can be used. name reference distributor Set of 6-point 1/4" sockets R.360NANO FACOM Torque screwdriver (2 - 10 N.m) -
Page 37: Kiva
Corrective maintenance Kiva Exploded view In the exploded view, each assembly corresponds to a D/R procedure and the necessary repair kit(s). GRILL LF LOUDSPEAKER KR HPPH61 BACK COVER KR KIVARIGAR HF DIAPHRAGM HF LOUDSPEAKER KR HSBM12 KR HPBM12 Kiva owner's manual (EN) version 1.0... - Page 38 Corrective maintenance D/R - Kiva back cover Tools • torque screwdriver • screwdriver extension • 4 mm hex bit • T25 Torx bit Consumables • blue threadlocker Repair kit KR KIVARIGAR Kit KIVA back rigging assembly ×1 ×6 ×5 SE RIGKIVAR S192 S204 back cover...
- Page 39 Corrective maintenance Exploded view 3 N.m 4 mm 100 mm / 3.9 in 4 N.m 4 N.m BACK COVER KR KIVARIGAR CONNECTORS FILTER Procedure 1. Remove the back cover. Disconnect the cables. 2. Remove the lter and the speakON connectors from the back cover. Save the linking plate and the washers.
- Page 40 Corrective maintenance D/R - HF loudspeaker Tools • torque screwdriver • 4 mm hex bit Repair kits KR HPBM12 Kit HP BM12 Driver 1.5'' - 8 ohms ×1 ×4 ×4 ×4 G251 S187 S153 S158 1" HF compression driver assembly M5×15 hex spring washer Ø5 mm plain washer Ø5 mm...
-
Page 41: Sb15M
Corrective maintenance SB15m Exploded view In order to operate, follow the order outlined here. LF LOUDSPEAKER KR HPBC152 GRILL Kiva owner's manual (EN) version 1.0... - Page 42 Corrective maintenance D/R - Grill Tools • torque screwdriver • 5 mm hex bit Consumables • blue threadlocker Exploded view Use blue threadlocker on the captive screw. 3 N.m 5 mm Kiva owner's manual (EN) version 1.0...
- Page 43 Corrective maintenance D/R - LF loudspeaker Tools • torque screwdriver • 5 mm hex bit Repair kit KR HPBC152* Kit HP BC152 Speaker 15" ×1 ×8 ×1 FT789 S100054 15" LF/MF speaker - 8 ohms M6×30 hex speaker gasket kit * The screws and fasteners are also provided in the .
-
Page 44: Sb18
Corrective maintenance SB18 Exploded view In order to operate, follow the order outlined here. LF LOUDSPEAKER KR HPBC182 GRILL RIGGING PINS KR PIN601 PROTECTIVE COVER Kiva owner's manual (EN) version 1.0... - Page 45 Corrective maintenance D/R - GRILL Tools • torque screwdriver • T30 Torx bit Replair kit KR HPBC182 Kit HP BC182 Speaker 18" - 8 ohms ×4 S247 M6×35 Torx Exploded view For safety reasons, always use the new screws and spare parts provided in the KR. If no new screws are available, use blue threadlocker.
- Page 46 Corrective maintenance D/R - LF loudspeaker Tools • torque screwdriver • T30 Torx bit • 5 mm hex bit • blue threadlocker Repair kit KR HPBC182 Kit HP BC182 Speaker 18" - 8 ohms ×1 ×8 ×14 ×2 S100054 S221 18"...
- Page 47 Corrective maintenance 2. Remove the screws securing the loudspeaker. 5 mm 3. Remove the loudspeaker from the enclosure and disconnect the loudspeaker cables. Kiva owner's manual (EN) version 1.0...
- Page 48 Corrective maintenance Reassembly About this task For safety reasons, always use the new screws and spare parts provided in the KR. Procedure 1. Stick the gasket on the cabinet. 2. Connect the loudspeaker cables and position the loudspeaker in the enclosure. 3.
- Page 49 Corrective maintenance 4. Secure the plate. Gradually tighten the screws following a star pattern. Kiva owner's manual (EN) version 1.0...
- Page 50 Corrective maintenance D/R - Pins Tools • torque screwdriver • T30 Torx bit • blue threadlocker Repair kit For safety reasons, always use the new screws and spare parts provided in the KR. If no new screws are available, use blue threadlocker. KR PIN601 Kit 10 pins long T-shaped head screws &...
- Page 51 Corrective maintenance Disassembly Procedure 1. Remove the ve screws securing the protective cover to the cabinet. 2. Remove the screw securing the steel tab. Kiva owner's manual (EN) version 1.0...
- Page 52 Corrective maintenance Reassembly Procedure 1. Insert the pin in the storage hole. 2. Position the steel tab on the screw. Position the at side of the steel tab toward the cabinet. Kiva owner's manual (EN) version 1.0...
- Page 53 Corrective maintenance 3. Secure the steel tab to the cabinet. 5 N.m 4. Secure the protective cover with the ve screws. 7 N.m 3 N.m Kiva owner's manual (EN) version 1.0...
-
Page 54: Sb18M
Corrective maintenance SB18m Exploded view In order to operate, follow the order outlined here. LF LOUDSPEAKER KR HPBC183 GRILL Kiva owner's manual (EN) version 1.0... - Page 55 Corrective maintenance D/R - GRILL Tools • torque screwdriver • T30 Torx bit Repair kit KR HPBC183 Kit HP BC183 speaker 18'' - 8 ohms ×14 S221 M6×35 Torx Exploded view For safety reasons, always use the new screws and spare parts provided in the KR. If no new screws are available, use blue threadlocker.
- Page 56 Corrective maintenance D/R - LF LOUDSPEAKER Tools • torque screwdriver • T30 Torx bit • 5 mm hex bit Repair kit KR HPBC183 Kit HP BC183 speaker 18'' - 8 ohms ×1 ×4 ×8 ×14 1073 1276 S100054 S221 18" subwoofer speaker - 8 ohms 18"...
- Page 57 Corrective maintenance 2. Remove the loudspeaker screws. 5 mm 3. Remove the loudspeaker from the enclosure and disconnect the loudspeaker cables. Kiva owner's manual (EN) version 1.0...
- Page 58 Corrective maintenance Reassembly About this task For safety reasons, always use the new screws and spare parts provided in the KR. Procedure 1. Stick the gasket on the cabinet. 2. Connect the loudspeaker cables and position the loudspeaker in the enclosure. 3.
- Page 59 Corrective maintenance 4. Secure the plate. Kiva owner's manual (EN) version 1.0...
-
Page 60: Sb18I
Corrective maintenance SB18i Exploded view In order to operate, follow the order outlined here. LF LOUDSPEAKER KR HPBC182 GRILL Kiva owner's manual (EN) version 1.0... - Page 61 Corrective maintenance D/R - GRILL Tools • torque screwdriver • T30 Torx bit Replair kit KR HPBC182 Kit HP BC182 Speaker 18" - 8 ohms ×14 S221 M6×35 Torx Exploded view For safety reasons, always use the new screws and spare parts provided in the KR. If no new screws are available, use blue threadlocker.
- Page 62 Corrective maintenance D/R - LF LOUDSPEAKER Tools • torque screwdriver • T30 Torx bit • 5 mm hex bit • blue threadlocker Repair kit KR HPBC182 Kit HP BC182 Speaker 18" - 8 ohms ×1 ×8 ×14 ×2 S100054 S221 18"...
- Page 63 Corrective maintenance 2. Remove the screws securing the loudspeaker. 5 mm 3. Remove the loudspeaker from the enclosure and disconnect the loudspeaker cables. Kiva owner's manual (EN) version 1.0...
- Page 64 Corrective maintenance Reassembly About this task For safety reasons, always use the new screws and spare parts provided in the KR. Procedure 1. Stick the gasket on the cabinet. 2. Connect the loudspeaker cables and position the loudspeaker in the enclosure. 3.
- Page 65 Corrective maintenance 4. Secure the plate. Gradually tighten the screws following a star pattern. Kiva owner's manual (EN) version 1.0...
-
Page 66: Kibu-Sb
Corrective maintenance KIBU-SB Exploded view In order to operate, follow the order outlined here. Each assembly refers to the corresponding D/R procedure and the necessary repair kit(s). KR CAMAN12 LASERMOUNT KR MBUMPLAS(W) KR PIN670 RUNNERS KR SB18IPAT LOCKING TABS KR WIFOVER(W) Kiva owner's manual (EN) version 1.0... - Page 67 Corrective maintenance D/R - Lasermount Tools • torque screwdriver • T20 Torx bit • 5 mm hex bit • 7 mm hex socket • 10 mm hex socket Repair kits KR MBUMPLAS Kit laser mount for MBUMP ×1 ×4 ×4 ×2 S210 S121...
- Page 68 Corrective maintenance D/R - Runners Tools • torque screwdriver • T30 Torx bit Consumables • blue threadlocker Repair kits KR SB18IPAT Kit SB18i 4 pads ×4 ×4 ×4 S221 S268 runner Ø25 mm M6×35 Torx Exploded view For safety reasons, always use the new screws and spare parts provided in the KR. If no new screws are available, use blue threadlocker.
- Page 69 Corrective maintenance D/R - Locking tabs Tools • riveting pliers Repair kits KR WIFOVER Kit 2 locking tabs with slings ×2 ×2 S142 G1734 M4×10 rivet locking tab (with lanyard) Prerequisite Coupling bar removed. Exploded view For safety reasons, always use the new screws and spare parts provided in the KR. If no new screws are available, use blue threadlocker.
- Page 70 Corrective maintenance D/R - Pin Tools • riveting pliers Repair kits KR PIN670 KR ball-locking pin KIBU/KIBU II ×1 ×1 S142 M4×10 rivet ball-locking pin (with lanyard) Exploded view For safety reasons, always use the new screws and spare parts provided in the KR. If no new screws are available, use blue threadlocker.
- Page 71 Specications Specications Kiva specications Description ® 2-way passive ultra compact WST enclosure, amplied by LA4X / LA8 / LA12X Usable bandwidth (-10 dB) 80 Hz - 20 kHz ([KIVA]) Maximum SPL 132 dB ([KIVA]) Nominal directivity vertical: depending on the number of elements and array curvature horizontal: 100°...
- Page 72 Specications Kiva dimensions 358 mm / 14.1 in 175 mm / 6.9 in 520 mm / 20.5 in Kiva owner's manual (EN) version 1.0...
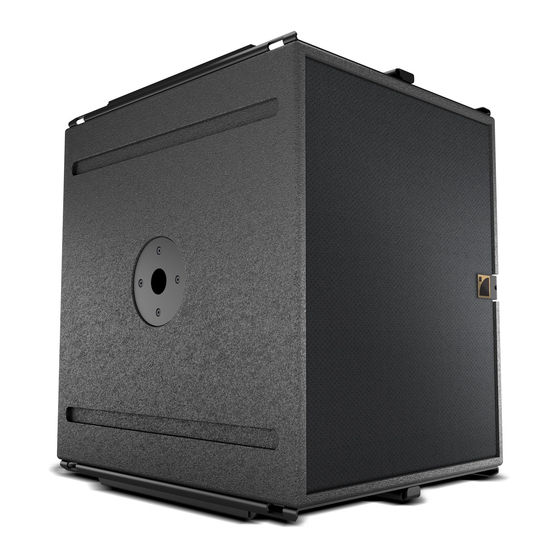
- Page 73 Specications SB15m Description High power compact subwoofer : 1 x 15'' , amplied by LA4X / LA8 / LA12X Low frequency limit 40 Hz ([SB15_100]) Maximum SPL 137 dB ([SB15_100]) Directivity standard or cardioid Transducers 1 x 15" Acoustical load bass-reex enclosure, L-Vents Nominal impedance 8 Ω...
- Page 74 Specications SB15m dimensions 520 mm / 20.5 in 580 mm / 22.8 in Kiva owner's manual (EN) version 1.0...
- Page 75 Specications SB18 specications Description High power compact subwoofer: 1 x 18'' , amplied by LA4X / LA8 / LA12X Low frequency limit (-10 dB) 32 Hz ([SB18_100]) Maximum SPL 138 dB ([SB18_100]) Nominal directivity standard or cardioid Transducers 1 × 18" Acoustical load dual bass-reex, L-Vents Nominal impedance...
- Page 76 Specications SB18 dimensions 707 mm / 27.8 in 750 mm / 29.5 in Kiva owner's manual (EN) version 1.0...
- Page 77 Specications SB18i Description High power compact subwoofer: 1 x 18'' installation version, amplied by LA4X / LA8 / LA12X Low frequency limit 32 Hz ([SB18_100]) Maximum SPL 138 dB ([SB18_100]) Directivity standard or cardioid Transducers 1 × 18" cone driver Acoustical load dual bass-reex, L-Vents Nominal impedance...
- Page 78 Specications SB18i dimensions 700 mm / 27.6 in 713 mm / 28.1 in Kiva owner's manual (EN) version 1.0...
- Page 79 Specications SB18m specications Description High power compact subwoofer: 1 x 18'' , amplied by LA4X / LA8 / LA12X Low frequency limit 32 Hz ([SB18_100]) Maximum SPL 138 dB ([SB18_100]) Directivity standard or cardioid Transducers 1 × 18" cone driver Acoustical load L-Vents, dual bass-reex Nominal impedance...
- Page 80 Specications SB18m dimensions 717 mm / 28.2 in 759 mm / 29.9 in Kiva owner's manual (EN) version 1.0...
- Page 81 Specications KIBU-SB specications Description Rigging frame for ying or stacking KIVA II/KIVA and SB15m 2 × Ø12 mm shackles WLL 1 t Weight (net) 10.7 kg / 23.6 lb Material high grade steel with anti-corrosion coating KIBU-SB dimensions 72.4 mm / 78.8 mm / 3.1 in 105 mm / 4.1 in 2.9 in...
- Page 82 Specications KIBU specications Description Rigging & stacking element for KIVA 2 × Ø12 mm shackles WLL 1 t Weight (net) 4 kg / 8.8 lb Material high grade steel with anti-corrosion coating KIBU dimensions 482 mm / 19 in 91 mm / 3.6 in 522 mm / 20.6 in KIET specications Description...
- Page 83 Specications KIET dimensions 353 mm / 13.9 in 514 mm / 20.2 in Kiva owner's manual (EN) version 1.0...
- Page 84 Installing an inclinometer on KIBU-SB Installing an inclinometer on KIBU-SB Tools • torque screwdriver • T20 Torx bit • 7 mm wrench About this task ® KIBU-SB is equipped with a support plate for installing an optional inclinometer. Three models are compatible: TEQSAS LAP-TEQ PLUS (provided in the TECH TOOLCASE), TEQSAS ®...
- Page 85 4 Ω load 2.7 Ω load For your installation projects, you can use the more detailed L-ACOUSTICS calculation tool to evaluate cable length and gauge based on the type and number of enclosures connected. The calculation tool is available on our website: http://www.l-acoustics.com/installation-outils-de-calcul-137.html...
- Page 86 L-Acoustics, an L-Group Company 13 rue Levacher Cintrat - 91460 Marcoussis - France +33 1 69 63 69 63 - info@l-acoustics.com www.l-acoustics.com L-Acoustics GmbH L-Acoustics Ltd. L-Acoustics Inc. Steiermärker Str. 3-5 PO. Box Adler Shine - Aston House 2645 Townsgate Road, Suite 600...
Need help?
Do you have a question about the KIVA SB15m and is the answer not in the manual?
Questions and answers