Table of Contents
Advertisement
Advertisement
Table of Contents

Related Manuals for L-Acoustics X15 HiQ


Summary of Contents for L-Acoustics X15 HiQ
- Page 1 X15 HiQ owner's manual (EN)
- Page 2 Document reference: X15 HiQ owner's manual (EN) version 1.0 Distribution date: March 15, 2021 © 2021 L-Acoustics. All rights reserved. No part of this publication may be reproduced or transmitted in any form or by any means without the express written consent of the publisher.
-
Page 3: Table Of Contents
EMBi............................21 Subwoofers...........................22 Mechanical safety.............................23 Loudspeaker congurations..........................25 X15 HiQ point source........................... 25 X15 HiQ point source with LF........................26 X15 HiQ stage monitor........................... 29 Low-latency preset......................... 29 X15 HiQ stage monitor with LF........................30 Inspection and preventive maintenance....................... 32 How to do preventive maintenance......................32 Rigging part inspection........................... - Page 4 Acoustical check............................. 40 Rigging procedures............................44 Mounting on a U-bracket.........................44 Using a U-bracket with X-UTILT......................... 48 Flying with a U-bracket........................... 54 Flying with X-BAR............................59 Pole-mounting with a U-bracket........................ 65 Connection to LA amplied controllers........................ 69 Corrective maintenance............................. 70 Forbidden congurations........................... 80 Specications..............................
-
Page 5: Safety
Respect the Working Load Limit (WLL) of third party equipment. L-Acoustics is not responsible for any rigging equipment and accessories provided by third party manufacturers. Verify that the Working Load Limit (WLL) of the suspension points, chain hoists and all additional hardware rigging accessories is respected. - Page 6 This system is intended for use by trained personnel for professional applications. As part of a continuous evolution of techniques and standards, L-Acoustics reserves the right to change the specications of its products and the content of its documents without prior notice.
-
Page 7: Introduction
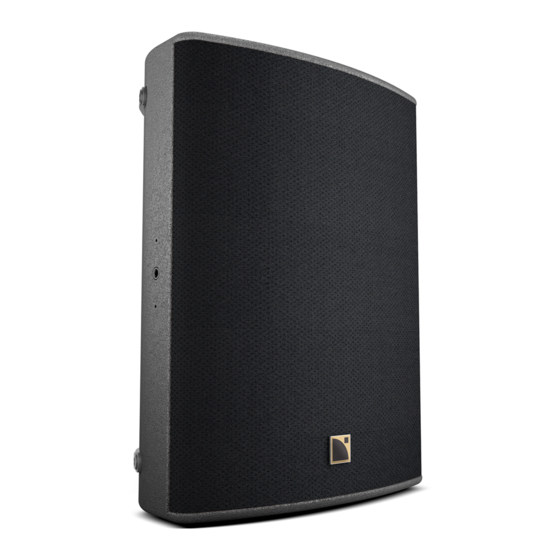
X15 HiQ reference stage monitor The X15 HiQ is an active coaxial system designed as a reference stage monitor. The enclosure features a 3" diaphragm compression driver coaxially-loaded by a 15" low frequency transducer in a bass-reex cabinet. The L-Vents laminar vented ports reduce turbulence and port noise at high levels to increase LF efciency. -
Page 8: System Components
U-bracket wallmount for X series with tilt adjustment X-BAR Rigging bar for 1 enclosure X-UL15 Long U-bracket for X15 HiQ X-US1215 Short U-bracket for X12 and X15 HiQ CLAMP250 Clamp certied for 250 kg X15 HiQ owner's manual (EN) version 1.0... -
Page 9: System Component Illustrations
0.7 m / 5 m / 10 m / 25 m SP.7 / SP.5 / SP10 / SP25 DO.7 / DO10 / DO25 3.5 m 3.5 m 2WAY 2W CH(A) SUB1 2W CH(B) SUB2 DOFILL-LA8 DO3WFILL Rigging accessories EMBi X-UTILT X-BAR X-UL15 X15 HiQ owner's manual (EN) version 1.0... - Page 10 System components X-US1215 CLAMP250 X15 HiQ owner's manual (EN) version 1.0...
-
Page 11: Electro-Acoustical Description
−80 −100 −120 −140 −160 −180 1 000 10 000 Frequency (Hz) Dispersion angle diagram of a single X15 HiQ using lines of equal sound pressure at -3 dB, -6 dB, -12 dB. X15 HiQ owner's manual (EN) version 1.0... -
Page 12: Monitor Angles
Electro-acoustical description Monitor angles X15 HiQ features risers that allow to change the monitor angle from 35° to 55°. 55° 35° Preset description [X15] [X15_MO] loudspeaker elements outputs channels routing gain delay polarity mute OUT 1 IN A 0 dB... -
Page 13: Connectors
SpeakON connectors can be used interchangeably as IN or LINK connector. LINK X15 HiQ 2 × 4-point speakON Internal pinout for L-Acoustics 2-way active enclosures speakON points Transducer connectors LF + LF - HF + HF - X15 HiQ owner's manual (EN) version 1.0... -
Page 14: Rigging System Description
Rigging system description X15 HiQ X15 HiQ features a M8 DIN580 threaded insert designed to implement a secondary safety. The logo on the enclosure front can be rotated to adapt to every conguration. X15 HiQ features ergonomic handles on both sides for easy transportation. - Page 15 Rigging system description X15 HiQ features four runners on the bottom to protect the enclosure. X15 HiQ features risers that allow to change the monitor angle from 35° to 55° relative to the vertical. CLICK! X15 HiQ owner's manual (EN) version 1.0...
-
Page 16: Elements For Ying And Wall-Mounting
X-US1215 and X-UL15 X15 HiQ can be tted with a short U-bracket, X-US1215, or a long U-bracket, X-UL15. The brackets are secured in the enclosure inserts with two threaded knobs. A spring-lock safety mechanism secures the knobs in the U-brackets. - Page 17 Rigging system description X-US1215 and X-UL15 can be used for wall-mounting, ceiling-mounting or ying X15 HiQ. Short U-bracket in horizontal position In this position, the enclosure applies a diagonal force of 419 daN on the anchoring points. Fasteners for wall-mounting or ceiling-mounting Secure the bracket with three M10 screws.
- Page 18 When using the additional holes, consider the maximum site angle available. Maximum angles (p.57). X-US1215 features additional holes on the sides to closely t the enclosure and to optimize visual impact. The knobs shall be stored in the U-brackets. X15 HiQ owner's manual (EN) version 1.0...
-
Page 19: X-Utilt
Secure the X-UTILT with two M10 screws. Select screw length and anchors applicable to the wall properties. X-BAR X-BAR is a rigging bar for ying . The rigging system consists of a threaded axis with a cam lever. X15 HiQ owner's manual (EN) version 1.0... - Page 20 X-BAR is secured to the dedicated inserts on the enclosure, in front or rear extension position. Five angulation holes are available. X-BAR is compatible with a Ø12 mm shackle WLL 1 t (provided) and with CLAMP250. X15 HiQ owner's manual (EN) version 1.0...
-
Page 21: Elements For Pole-Mounting
Rigging system description Elements for pole-mounting Pole sockets X15 HiQ features two 35 mm pole sockets integrated in the handles. EMBi EMBi is a pole-mount adapter for X-US1215 (35 mm pole). The site angle can be adjusted with the U-bracket. -
Page 22: Subwoofers
Use a 35 mm diameter pole The pole can be non-threaded or with M20 thread. Use an adapter for poles with other dimensions, for example the 21329 adapter by K&M, available on www.k ‑ m.de/en. X15 HiQ owner's manual (EN) version 1.0... -
Page 23: Mechanical Safety
Mechanical safety Flown congurations The X15 HiQ rigging system complies with 2006/42/EC: Machinery Directive. It has been designed following the guidelines of BGV-C1. 2006/42/EC: Machinery Directive species a safety factor of 4 against the rupture. The own deployments described in this manual achieve a safety factor of 5 or more. - Page 24 Soundvision calculations are based on usual environmental conditions. A higher safety factor is recommended with factors such as extreme high or low temperatures, strong wind, prolonged exposition to salt water, etc. Always consult a rigging specialist to adopt safety practices adapted to such a situation. X15 HiQ owner's manual (EN) version 1.0...
-
Page 25: Loudspeaker ConGurations
Loudspeaker congurations Loudspeaker congurations X15 HiQ point source Deployed as a standalone point source, a X15 HiQ system operates over the nominal bandwidth of the X15 HiQ enclosure. The [X15] preset allows for a reference frequency response in short throw applications. -
Page 26: X15 Hiq Point Source With Lf
The X15 HiQ, SB18, and KS21 enclosures are driven by the LA4X / LA8 / LA12X amplied controllers. X15 HiQ with SB18 With SB18, the X15 HiQ system contour is reinforced by 4 dB at 60 Hz and 5 dB at 100 Hz, and the system bandwidth is extended down to 32 Hz. - Page 27 Loudspeaker congurations Pre-alignment delays presets pre-alignment delay values and polarity settings [X15] + [SB18_100] X15 HiQ = 4 ms SB18 = 0 ms X15 HiQ owner's manual (EN) version 1.0...
- Page 28 Loudspeaker congurations X15 HiQ with KS21 With KS21, the X15 HiQ system contour is reinforced by 6 dB at 60 Hz and 2 dB at 100 Hz, and the system bandwidth is extended down to 31 Hz. Enclosure X15 HiQ...
-
Page 29: X15 Hiq Stage Monitor
Loudspeaker congurations X15 HiQ stage monitor Deployed as a stage monitor, an X15 HiQ system operates over the nominal bandwidth of the X15 HiQ enclosure. The [X15_MO] preset allows for a reference frequency response in stage monitoring applications. The X15 HiQ enclosure is driven by LA4X / LA8 / LA12X. -
Page 30: X15 Hiq Stage Monitor With Lf
The X15 HiQ and SB18 enclosures are driven by the LA4X / LA8 / LA12X amplied controllers. X15 HiQ with SB18 With SB18, the X15 HiQ system contour is reinforced by 5 dB at 100 Hz, and the system bandwidth is extended down to 32 Hz. - Page 31 Loudspeaker congurations X15 HiQ with KS21 With KS21, the X15 HiQ system contour is reinforced by 6 dB at 60 Hz and 2 dB at 100 Hz, and the system bandwidth is extended down to 31 Hz. 55° 35° Enclosure X15 HiQ...
-
Page 32: Inspection And Preventive Maintenance
Mechanical system overview (p.33) to identify critical parts of the system and apply the specic checks described in the Inspection references (p.38). If any parts are damaged, contact your L-Acoustics representative for further instructions. Acoustics Perform the Enclosure check (p.40). -
Page 33: Rigging Part Inspection
5. Check the moving parts. Make sure that the mechanism engages correctly. What to do next If a problem is detected, perform the authorized maintenance operations or contact your L-Acoustics representative. Mechanical system overview Critical parts of the lifting chains are highlighted. - Page 34 Threaded knobs (p.38) the inserts are not damaged X15 HiQ with X-US1215 and X-UTILT the supporting screws are tightened the inserts are not damaged Threaded knobs (p.38) the axes are tightened and not bent X15 HiQ owner's manual (EN) version 1.0...
- Page 35 X15 HiQ pole-mounted the pole-socket is not damaged X15 HiQ owner's manual (EN) version 1.0...
- Page 36 Inspection and preventive maintenance X15 HiQ pole-mounted with X-US1215 and EMBi on SB18 the inserts are not damaged Threaded knobs (p.38) the screws are tightened the wing knob is tightened Pole-mount socket (p.39) X15 HiQ owner's manual (EN) version 1.0...
- Page 37 Inspection and preventive maintenance X15 HiQ on the ground Runners and risers (p.38) Runners and risers (p.38) X15 HiQ owner's manual (EN) version 1.0...
-
Page 38: Inspection References
• Runners are not worn out. • Risers are not damaged and move correctly. • Screws are tightened. Reference pictures Contact your L-Acoustics representative for repair instructions. Related tasks Rigging part inspection (p.33) X15 HiQ owner's manual (EN) version 1.0... - Page 39 Pole-mount socket • Pole-mount socket is not damaged or bent. • Screws are tightened. • Socket plug is present. Reference pictures Contact your L-Acoustics representative for repair instructions. Related tasks Rigging part inspection (p.33) X15 HiQ owner's manual (EN) version 1.0...
-
Page 40: Acoustical Check
6. Press the OK key or the encoder wheel to launch the ENCLOSURE CHECK. The amplied controller generates short sinusoidal signals simultaneously for each connected output. The amplied controller displays the results for each output. X15 HiQ owner's manual (EN) version 1.0... - Page 41 • a percentage of variation from the expected range (found in NOK and UNDEF results) • the number of operational transducers out of the total Low variations from the expected range are acceptable: displayed percentage can be different from 0 and all transducers considered operational. X15 HiQ owner's manual (EN) version 1.0...
- Page 42 4. Carefully clean the speaker with a dry cloth. 5. Perform the reassembly procedure. Replace the speaker gasket and the screws. Apply the recommended torque. 6. Repeat the listening test. If the problem persists, replace the speaker. X15 HiQ owner's manual (EN) version 1.0...
- Page 43 Apply the recommended torque. 5. Repeat the listening test. If a buzzing sound is still audible, it might be necessary to add an extra shim on the air gap. If the problem persists, replace the driver. X15 HiQ owner's manual (EN) version 1.0...
-
Page 44: Rigging Procedures
The same procedure applies for X-UL15 in vertical position or in ceiling-mounting conguration and X-US1215 in horizontal or vertical position or in ceiling-mounting conguration. Assembly Procedure 1. Drive the knobs in the inserts on the enclosure. Stop when the threading is halfway in. X15 HiQ owner's manual (EN) version 1.0... - Page 45 3. Lift the enclosure by the knobs and place it inside the U-bracket. Adjust the knobs on both sides so that the safety washer is between the hook and the enclosure. 4. Push until the knobs are locked inside the spring-lock safety mechanism. SHLAK! X15 HiQ owner's manual (EN) version 1.0...
- Page 46 Rigging procedures 5. Set the site angle. Use the screw as a reference point to read the label. 6. Tighten the knobs. Make sure the enclosure is steady. X15 HiQ owner's manual (EN) version 1.0...
- Page 47 Do not unscrew the knobs all the way. 2. On both sides, pull on the safety mechanism while lifting the enclosure by the knobs to release it. 3. Remove the U-bracket from the wall. X15 HiQ owner's manual (EN) version 1.0...
-
Page 48: Using A U-Bracket With X-Utilt
X-UTILT shall only be used vertically. Fasteners for wall-mounting Secure the X-UTILT with two M10 screws. Select screw length and anchors applicable to the wall properties. 1. Secure X-UTILT to the wall using M10 screws. X15 HiQ owner's manual (EN) version 1.0... - Page 49 Rigging procedures 2. Secure the U-bracket to X-UTILT. 3. Secure the rigging arm to the U-bracket. Make sure the rigging arm is in the correct position. Always use the central insert. X15 HiQ owner's manual (EN) version 1.0...
- Page 50 Stop when the threading is halfway in. 6. Lift the enclosure by the knobs and place it inside the U-bracket. Adjust the knobs on both sides so that the safety washer is between the hook and the enclosure. X15 HiQ owner's manual (EN) version 1.0...
- Page 51 Rigging procedures 7. Push until the knobs are locked inside the spring-lock safety mechanism. SHLAK! 8. Set the azimuth angle. Use the screw as a reference point to read the label. X15 HiQ owner's manual (EN) version 1.0...
- Page 52 Rigging procedures 9. Tighten the knobs. Make sure the enclosure is steady. X15 HiQ owner's manual (EN) version 1.0...
- Page 53 Do not unscrew the knobs all the way. 2. On both sides, pull on the safety mechanism while sliding the enclosure out of the U-bracket. 3. Remove the U-bracket and X-UTILT from the wall. X15 HiQ owner's manual (EN) version 1.0...
-
Page 54: Flying With A U-Bracket
1. Drive the knobs in the inserts on the enclosure. Stop when the threading is halfway in. 2. Place the U-bracket around the assembly. Adjust the knobs on both sides so that the safety washer is between the hook and the enclosure. X15 HiQ owner's manual (EN) version 1.0... - Page 55 3. Push down until the knobs are locked inside the spring-lock mechanism. SHLAK! Alternatively, use the additional holes on the U-bracket. The hooks on the bracket must be oriented towards the front of the enclosure. X15 HiQ owner's manual (EN) version 1.0...
- Page 56 Make sure the safety washer goes through the hole on the bracket. 4. Tighten the knobs and y the enclosure with a clamp. 5. Loosen the knobs to set the site angle. Use the screw as a reference point to read the label. X15 HiQ owner's manual (EN) version 1.0...
- Page 57 Rigging procedures 6. Tighten the knobs. Make sure the enclosure is steady. Maximum angles When using the additional holes on the U-bracket, consider the maximum negative site angle available. -30° -15° X15 HiQ owner's manual (EN) version 1.0...
- Page 58 Rigging procedures Disassembly Procedure 1. Place the enclosure on a at surface. 2. Loosen the knobs. 3. Pull on the safety mechanism and remove the U-bracket from the enclosure. X15 HiQ owner's manual (EN) version 1.0...
-
Page 59: Flying With X-Bar
When ying an enclosure or an array, use the M8 DIN580 threaded insert to implement a secondary safety. Assembly Procedure 1. Lay the enclosure on a at surface. 2. Drive the X-BAR in the insert. X15 HiQ owner's manual (EN) version 1.0... - Page 60 3. Rotate the X-BAR until perpendicular to the front grill. Use the screws as reference points. 4. Tighten the X-BAR. a) Lift the lever and rotate it counter-clockwise, release the lever and rotate it clockwise. Repeat until the X-BAR is tightly secured. X15 HiQ owner's manual (EN) version 1.0...
- Page 61 Rigging procedures b) Finally, store the lever on the right. X15 HiQ owner's manual (EN) version 1.0...
- Page 62 • Front extension on horizontal enclosure +14° +22° +4.5° +30° +38° • Rear extension on vertical enclosure -1.5° -8.5° +5.5° -15° -22° • Front extension on vertical enclosure +4.5° -2° -9° +11.5° +18.5° X15 HiQ owner's manual (EN) version 1.0...
- Page 63 Rigging procedures 6. Lift the assembly. X15 HiQ owner's manual (EN) version 1.0...
- Page 64 Rigging procedures Disassembly Procedure 1. Take down the assembly. 2. Lift the lever and rotate it clockwise. 3. Release the lever and rotate it counter-clockwise. 4. Repeat until the X-BAR can be removed. X15 HiQ owner's manual (EN) version 1.0...
-
Page 65: Pole-Mounting With A U-Bracket
1. Secure EMBi to the U-bracket with the provided bolts and nuts. 2. Secure the U-bracket to the enclosure using the additional holes. The hooks on the bracket must be oriented towards the front of the enclosure. X15 HiQ owner's manual (EN) version 1.0... - Page 66 3. Tighten the knobs, reverse the assembly and mount it on a pole. 4. Tighten EMBi. 5. Loosen the knobs to set the site angle. Consider the maximum positive site angle available. Maximum angles X15 HiQ owner's manual (EN) version 1.0...
- Page 67 Rigging procedures +30° +15° 6. Tighten the knobs. Make sure the enclosure is steady. The assembly can be mounted on a tripod or on a subwoofer. X15 HiQ owner's manual (EN) version 1.0...
- Page 68 About this task Remove the assembly from the pole before disassembling the enclosure and the bracket. Procedure 1. Loosen EMBi to remove the assembly from the pole. 2. Remove the bracket from the enclosure. X15 HiQ owner's manual (EN) version 1.0...
-
Page 69: Connection To La AmpliEd Controllers
2W CH(B) For passive loudspeakers, the value corresponds to the number of enclosures in parallel on the output. For active loudspeakers, the value corresponds to the number of sections in parallel on the output. X15 HiQ owner's manual (EN) version 1.0... -
Page 70: Corrective Maintenance
® ® tools. The Maintenance Toolcase includes tools manufactured by FACOM , Fluke , Tohnichi, ABUS and Würth. All third-party trademarks, registered trademarks, or product names are the property of their respective owners. X15 HiQ owner's manual (EN) version 1.0... - Page 71 Disassembly and Reassembly procedures In order to operate, follow the order outlined here. Each assembly refers to the corresponding D/R procedure and the necessary repair kit. GRILL WAVEGUIDE DIAPHRAGM G03176 COAXIAL SPEAKER G03210 X15 HiQ owner's manual (EN) version 1.0...
- Page 72 Corrective maintenance D/R - Grill Tools • torque screwdriver • T25 Torx bit Repair kit G03210 - KR coaxial speaker X15 HiQ or G03176 - KR diaphragm X15 HiQ ×6 S100033 M5×25 Torx Exploded view For safety reasons, always use the new screws and spare parts provided in the KR.
- Page 73 Tools • torque screwdriver • 4 mm hex bit • 5 mm hex bit Consumables • cyanoacrylate glue Repair kit G03210 - KR coaxial speaker X15 HiQ or G03176 - KR diaphragm X15 HiQ ×4 ×2 ×1 ×2 100546 100547...
- Page 74 Corrective maintenance 3. Remove the four remaining screws. 5 mm 4. Carefully remove the waveguide. 5. Remove the waveguide gasket. X15 HiQ owner's manual (EN) version 1.0...
- Page 75 For safety reasons, always use the new screws and spare parts provided in the KR. Procedure 1. Place the gasket inside the throat of the speaker. 2. Position the waveguide. The center holes are aligned with the connectors. X15 HiQ owner's manual (EN) version 1.0...
- Page 76 3. Secure the waveguide to the cabinet with the provided 100546 screws. 5 N.m 5 mm 4. Secure the waveguide to the speaker with the provided 100547 screws. 5 N.m 4 mm 5. Stick the Lexan screw covers with the cyanoacrylate glue. X15 HiQ owner's manual (EN) version 1.0...
- Page 77 For safety reasons, always use the new screws and spare parts provided in the KR. Gradually tighten the screws following a star pattern. If the speaker gasket is damaged, remove and replace it. 5 N.m 5 mm What to do next Perform the Acoustical check (p.40) procedures. X15 HiQ owner's manual (EN) version 1.0...
- Page 78 Use the 3 mm hex bit. 2. Remove the cover. 3. Carefully remove the diaphragm. 4. If there are shims on the dome, carefully remove them. Take note of how many and what kind of shims are present. X15 HiQ owner's manual (EN) version 1.0...
- Page 79 Tighten the screws in the same order with the electric screwdriver. Use the 3 mm hex bit. Set the torque to 3.5 Nm. What to do next Perform the Acoustical check (p.40) procedures. X15 HiQ owner's manual (EN) version 1.0...
-
Page 80: Forbidden ConGurations
Forbidden congurations Forbidden congurations Forbidden Authorized X15 HiQ owner's manual (EN) version 1.0... - Page 81 Forbidden congurations Forbidden Authorized X15 HiQ owner's manual (EN) version 1.0...
-
Page 82: SpeciCations
Pantone 426 C custom RAL code on special order IP43 Peak level measured at 1 m under free eld conditions using pink noise with crest factor 4 (preset specied in brackets). X15 HiQ owner's manual (EN) version 1.0... - Page 83 Specications X15 HiQ dimensions 430 mm / 16.9 in 375 mm / 14.8 in 471 mm / 18.5 in 500 mm / 19.7 in X15 HiQ owner's manual (EN) version 1.0...
- Page 84 Rigging components steel with anti-corrosion coating Finish dark grey brown Pantone 426 C IP55 Peak level at 1 m under half space conditions using pink noise with crest factor 4 (preset specied in brackets). X15 HiQ owner's manual (EN) version 1.0...
- Page 85 Specications SB18 dimensions 707 mm / 27.8 in 750 mm / 29.5 in X15 HiQ owner's manual (EN) version 1.0...
- Page 86 Pantone 426 C pure white RAL 9010 custom RAL code on special order IP55 Peak level at 1 m under half space conditions using pink noise with crest factor 4 (preset specied in brackets). X15 HiQ owner's manual (EN) version 1.0...
- Page 87 Specications SB18 IIi dimensions 701 mm / 27.6 in 701 mm / 27.6 in X15 HiQ owner's manual (EN) version 1.0...
- Page 88 Finish dark grey brown Pantone 426 C IP55 Peak level at 1 m under half space conditions using pink noise with crest factor 4 (preset specied in brackets). X15 HiQ owner's manual (EN) version 1.0...
- Page 89 Specications KS21 dimensions 764 mm / 30 in 602 mm / 23.7 in 752 mm / 29.6 in X15 HiQ owner's manual (EN) version 1.0...
- Page 90 Pantone 426 C pure white RAL 9010 custom RAL code on special order IP55 Peak level at 1 m under half space conditions using pink noise with crest factor 4 (preset specied in brackets). X15 HiQ owner's manual (EN) version 1.0...
- Page 91 Specications KS21i dimensions 752 mm / 29.6 in 602 mm / 23.7 in X15 HiQ owner's manual (EN) version 1.0...
- Page 92 X-UL15 dimensions 685 mm / 27 in 200 mm / 7.9 in Ø M10 643 mm / 25.3 in 53 mm / 2.1 in 96 mm / 3.8 in X15 HiQ owner's manual (EN) version 1.0...
- Page 93 Specications X-US1215 specications Description Short U-bracket for X12 and X15 HiQ Weight (net) 3 kg / 6.6 lb Material high grade steel with anti-corrosion coating X-US1215 dimensions 535 mm / 21.1 in 200 mm / 7.9 in Ø M10 493 mm / 19.4 in 53 mm / 2.1 in...
- Page 94 1.5 kg / 3.3 lb Material high grade steel with anti-corrosion coating X-UTILT dimensions 300 mm / 11.8 in 88 mm / 3.5 in 65 mm / 2.6 in 200 mm / 7.9 in Ø M10 X15 HiQ owner's manual (EN) version 1.0...
- Page 95 1 × Ø12 mm shackle WLL 1 t Weight (net) 1.1 kg / 2.4 lb Material high grade steel with anti-corrosion coating X-BAR dimensions 83 mm / 3.3 in Ø 13 mm / 0.5 in 185 mm / 7.3 in X15 HiQ owner's manual (EN) version 1.0...
- Page 96 Pole mount socket: 8XTi/12XTi and X series Weight (net) 0.5 kg / 1 lb Material high grade steel with anti-corrosion coating EMBi dimensions 35 mm / 1.4 in 46 mm / 1.8 in 115.5 mm / 4.5 in X15 HiQ owner's manual (EN) version 1.0...
-
Page 97: Appendix: Recommendation For Speaker Cables
8 Ω load 4 Ω load 2.7 Ω load Use the more detailed L-Acoustics calculation tool to evaluate cable length and gauge based on the type and number of enclosures connected. The calculation tool is available on our website: https://www.l-acoustics.com/en/installation/tools/... - Page 98 L-Acoustics 13 rue Levacher Cintrat - 91460 Marcoussis - France +33 1 69 63 69 63 - info@l-acoustics.com www.l-acoustics.com...
Need help?
Do you have a question about the X15 HiQ and is the answer not in the manual?
Questions and answers