Advertisement
Quick Links
Advertisement

Related Manuals for ELEKTRA Crema Caffe


Summary of Contents for ELEKTRA Crema Caffe
- Page 1 PROFESSIONAL ESPRESSO COFFEE MACHINES INSTRUCTION MANUAL...
- Page 3 PROFESSIONAL ESPRESSO COFFEE MACHINES INSTRUCTION MANUAL...
- Page 4 CONTENTS GENERAL INSTRUCTIONS A INTRODUCTION B GENERAL RECOMMENDATIONS AND SAFETY REGULATIONS C DESCRIPTION OF THE APPLIANCE DISPLAY OF FUNDAMENTAL PARAMETERS (S-C-B) DISPLAY OF FUNDAMENTAL PARAMETERS (A-K) COFFEE DISPENSING (A-S-K-C-B) DISPENSING OF HOT WATER AND STEAM (A-S-K-C-B) PREPARING THE MILK (A-K with MFS) ELIMINATION OF CALCIUM AND MAGNESIUM SALTS FROM THE WATER (A-S-K-C-B)
- Page 5 OPERATION INSTRUCTIONS A USE SWITCHING ON (A-S-K-C-B) USE OF THE WORKING AREAS USE OF THE WORKING AREAS (S-C) USE OF THE WORKING AREAS (A-K) COFFEE DISPENSING WITH MANUAL DOSING (A-S-K-C-B) COFFEE DISPENSING WITH AUTOMATIC DOSING (A-S-K-C-B) COFFEE DISPENSING WITH AUTOMATIC DOSING BUT WITH POSSIBILITY OF STOPPING IT MANUALLY (A-S-K-C-B) WARMING THE CUPS...
- Page 6 THE GAUGE SHOWS A BOILER PRESSURE NOT BETWEEN 0.6 AND 1.6 BAR (S-C-B) THE GAUGE SHOWS A BREWING PRESSURE NOT BETWEEN 8 AND 9 BAR (S-C-B) WARNING: MILK FROTHER FAULT (A-K with MFS) THE MILK FROTHER DOES NOT FROTH THE MILK (A-K with MFS) CHANGING THE ACTIVATED CARBON CARTRIDGE (A-K with WTS)
- Page 7 ADJUSTMENTS BASIC PROGRAMMING BY THE MAINTENANCE TECHNICIAN (S-C-B) TIME SETTING (S-C-B) NIGHT CYCLE PROGRAMMING (S-C-B) BREWING TEMPERATURE SETTING (S-C-B) HEATING ELEMENT SAFETY DEVICE RESET (S-C-B) BASIC PROGRAMMING BY THE MAINTENANCE TECHNICIAN (A-K) LANGUAGE SELECTION (A-K) TIME AND DATE SETTING (A-K) NIGHT CYCLE PROGRAMMING (A-K) MEASURED WATER HARDNESS STORING...
- Page 8 GENERAL INSTRUCTIONS THESE INSTRUCTIONS ARE INTENDED FOR BARMAN / ESPRESSO COFFEE MACHINE OPERATOR INSTALLATION / MAINTENANCE TECHNICIAN...
- Page 9 INTRODUCTION This manual applies to the entire range of professional coffee machines manufactured by ELEKTRA. Each topic has been specifically treated in a separate paragraph for each model belonging to the range, indicating the title of the paragraph itself and the models to which it refers,...
- Page 10 Incorrect installation could cause injury to persons or animals and damage to property, for which the manufacturer cannot be held liable. The company Elektra declines any and all responsibility for tampering or interventions carried out by non authorized persons. Such intervention automatically renders the...
- Page 11 This appliance is only electrically safe when it has been connected to an efficient grounding system in compliance with current safety regulations Make sure that this fundamental safety requirement has been observed and if in doubt request a thorough check of the system by a qualified electrician.
- Page 12 The use of the appliance entails compliance with the following fundamental rules: - the appliance should be used in environments where the temperature does not fall below 5 °C or rise above 40 °C; - do not obstruct the intake and outlet grilles. In particular do not cover the upper cup tray with a cloth or such like.
- Page 13 Disconnect the appliance from the mains electricity supply before carrying out any maintenance, by switching off at the mains switch or disconnecting the plug from the socket. Every time maintenance jobs are carried out on joints for connection to the water supply, you must strictly use new joints and the old joints must never be reused.
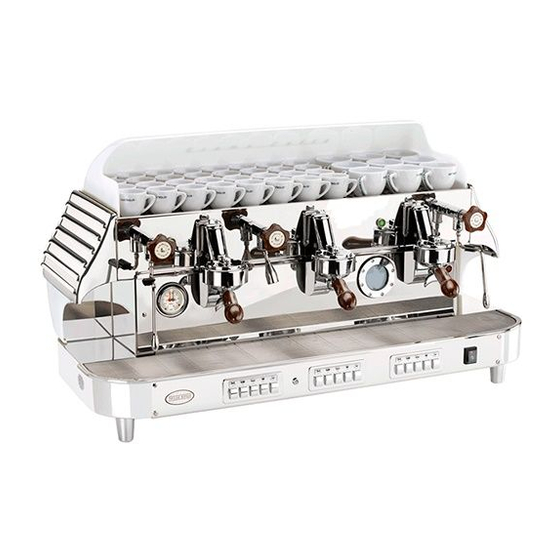
- Page 14 DESCRIPTION OF THE APPLIANCE The main functions of the machine, and its relative parts, are described below, with a view to ensuring its maximum performance. DISPLAY OF FUNDAMENTAL PARAMETERS (S-C-B) The following operating parameters can be read on the dual pressure gauge: - Boiler pressure.
- Page 15 ELIMINATION OF CALCIUM AND MAGNESIUM SALTS FROM THE WATER (A-S-K-C-B) This enables the elimination of scale deposits in the machine thanks to a water softener that softens the water, eliminating the calcium and magnesium salts contained in it. The water softener is not incorporated in the machine and has an independent manual or automatic function.
- Page 16 CONTROL OF WATER TEMPERATURE IN THE BOILER (A-S-K-C-B) Water temperature in the boiler is controlled by a sensor that switches the heating elements on and off. Consequently, it also controls the pressure in the boiler. STABILIZING THE BREWING TEMPERATURE (A-S-K-C-B) Each dispensing group has a heating circuit for brewing water that functions with a heat exchanger.
- Page 17 PROTECTION FROM OVERHEATING (A-S-K-C-B) In each of following cases: - Excessive duration of heating. - Exceeding of maximum allowable temperature value, the heating elements are disabled and a major fault is reported. UPPER CUP TRAY (S-C-B) These models are equipped with cup heater trays with the capacity to contain a large number of cups on various levels and to keep them warm in order to guarantee an excellent cup of coffee.
- Page 18 USER ALERTS (S-C-B) The machine can give the user a series of alerts through different LED light on/off combinations for each coffee dispensing button, on each of the two or three groups on the machine. In model Deliziosa the leds of the second pushbutton are located directly on the electronic unit and can be seen when the upper grille and cup heater is removed.
- Page 19 MILK FROTHER ALERTS TO THE USER (A-K with MFS) The MFS milk frother provides the user with a series of alerts via different led lighting combinations on the two pushbuttons for hot milk , and frothy milk Some of these alerts are combined with corresponding messages on the display as shown in paragraph 26.
- Page 20 GENERAL ADJUSTMENTS COFFEE BREWING DOSES PROGRAMMING (S-C-B) In order to program the coffee brewing doses switch the machine on by pressing the button marked with the symbol keeping contemporaneusly pressed both the “double long coffee” button and the “manual coffee” button of group 1. All the buttons are programmed making one or two sample coffees with the desired dose, as per following procedure: 1 - The group 1 selection is displayed as shown below:...
-
Page 21: Group 1 Doses Copying On Group 2 And Group
9 - Press the “ENTER” key to display the group 1 double short coffee samples request as shown below (pressing on the contrary the “+” key you select group 1 double long coffees - see step 11): 10 - Make two sample coffees by pressing the group 1 double short coffees button. Press the button again when the desired dose has been reached: the pushbutton led goes off, the dose is stored and you pass automatically to the group 1 double long coffees selection menu. - Page 22 COFFEE DELIVERY STOP MANAGEMENT (S-C-B) To activate or deactivate the option of manually stopping the dispensing of coffee selected by automatic doses, please switch on the machine pressing the button holding at the same time the “single long coffee“ and “manual coffee“ buttons from the group 1. GENERAL BASIC PROGRAMMING (A-K) It allows to Adjustment and Maintain as explained below.
- Page 23 COFFEE BREWING DOSES PROGRAMMING (A-K) Through the guided making of single and double sample coffees, the desired doses on each of the four automatic keys for each group may be stored. GROUP 1 DOSES COPYING ON GROUP 2 AND GROUP 3 (A-K) It allows to copy the coffee doses of group 1 on group 2 and 3 in order to make the programming of coffee doses of the whole machine faster.
- Page 24 Community. To be entitled to apply the CE mark, the manufacturer must draw up a technical file which ELEKTRA will place at the disposal of its clientele for all the various kinds of technical controls. The products are in compliance with the following Directives:...
- Page 26 OPERATION INSTRUCTIONS THESE INSTRUCTIONS ARE INTENDED FOR BARMAN / ESPRESSO COFFEE MACHINE OPERATOR...
- Page 27 ATTENTION: USA - CANADA REQUIREMENTS The unit must be flushed after 12 hours of inactivity. With reference to the hydraulic scheme enclosed on chapter “B - INSTALLATION”, once the suitable boiler pressure for correct use of the appliance has been reached and before putting it into service, the machine must be flushed through as follows: 1) Let hot water flow from valve N°14 into a suitable container for 10 sec;...
- Page 28 USE OF THE WORKING AREAS (A-K) The machine is divided into a coffee dispensing area on the right and a steam and hot water dispensing area on the left. It is thus possible to work with containers of up to 2.76 inches in height or up to 5.71 inches in height, depending on the heights of the work counters used (dispensing groups) and with containers of up to 5.91 inches in height (water and steam wands).
- Page 29 WARMING THE CUPS (A-K with CHS) Press the button marked with the symbol located to the side of the main switch. The heating goes off, also automatically, when the temperature of the cup heating tray exceeds the maximum value set. It comes back on automatically when the temperature drops below the minimum value set.
- Page 30 PREPARING HOT MILK WITH AUTOMATIC MILK FROTHER (A-K with MFS) Use a high and narrow stainless steel pitcher filled with the required amount of milk and proceed as follows: 1) Take the wand of the MFS milk frother forward, up to outer edge of the drip tray grille. 2) Place the wand into the pitcher filled with milk, let it return to its original operating position (it has elastic return) and leave the pitcher on the drip tray grille.
- Page 33 MAINTENANCE AND CLEANING DAILY CLEANING OF DISPENSING GROUPS AND FILTERHOLDERS (A-S-K-C-B) Each evening or at least once a day, clean the group shower and the filterholder gaskets with a cloth or a sponge. Rinse the filters and filterholders in boiling water in order to remove the fatty deposits of the coffee.
- Page 34 1) Replace standard filters in the filter holder of all groups by the blind filters (not drilled provided). 2) Insert an ELEKTRA clearing tablet in each blind filter and hook the filter holder on all groups. 3) Switch off the machine by the button.
- Page 35 WEEKLY CLEANING OF THE FILTERS AND FILTERHOLDERS (A-S-K-C-B) 1) Place three teaspoons of detergent for coffee machines and approx. one litre of boiling water in a heat-resistant container. 2) Immerse the filters and filterholders in the solution prepared and allow them to soak for about 20/30 minutes (do not fully immerse filterholders with briarwood handles: the water and detergent solution would damage the handles).
- Page 36 If the problems persist, contact Technical Assistance. Do not carry out repairs directly on the appliance The company Elektra declines any and all responsibility for tampering or interventions carried out by non authorized persons. Such intervention automatically renders the guaran- tee null and void.
- Page 37 WARNING: WATER LEVEL CONTROL SYSTEM FAULT (A-S-K-C-B) If the following alert appears (A-K): “WATER LEVEL CONTROL SYSTEM FAULT - MACHINE OFF - REPAIR” or the following (S-C-B): the fault could be due to: Water supply stoppage (except for A-K models with WTS): restore it. Fault in the boiler water inlet solenoid valve or obstruction to the passing of water through some parts of the machine.
- Page 38 WARNING OF NOT SATISFACTORY BREWING AND FLASHING OF THE DISPENSING PUSHBUTTON LED (A-K) If, after dispensing selected with an automatic button, e.g. group 1 single short coffee, both the following alerts are displayed: “BREWING NOT SATISFACTORY - CHECK COFFEE TAMPING OR DOSING OR GRINDING” the coffee may not have been made according to Italian espresso standards, and therefore adjustments in tamping, dosing or grinding of the coffee powder are required.
- Page 39 WARNING: NO WATER IN THE BOILER (A-S-C-B) If the following alert appears (A): “NO WATER IN THE BOILER - MACHINE OFF - REPAIR FAULT AND RESET HEATING ELEMENT SAFETY DEVICE WITH PROGRAMMING KEY” or the following (S-C-B): Due to the (even temporary) lack of water in the boiler the heating element safety device may have been disactivated.
- Page 40 THE GAUGE SHOWS A BREWING PRESSURE NOT BETWEEN 8 AND 9 BAR (S-C-B) Unless this value exceeds 1.2 MPa (12 Bar), in which case switch off the machine and contact Technical Assistance, this is a fault that does not negatively affect the use of the machine.
- Page 41 CHANGING THE ACTIVATED CARBON CARTRIDGE (A-K with WTS) When the following alert appears on the display: “EXHAUSTED ACTIVE CARBON CARTRIDGE - MACHINE ON - REPLACE IMMEDIATELY AND THEN RESET THIS ALERT USING THE PROGRAMMING KEY” contact Technical Assistance WARNING: WATER TREATMENT SYSTEM FAULT (A-K with WTS) If the following alert appears on the display: “WATER TREATMENT SYSTEM FAULT - MACHINE ON - REPAIR”, this is a fault that does not negatively affect the use of the machine.
- Page 42 19 NO SALT LOADING (A-K with WTS) If “ENTER” is erroneously pressed before the salt is loaded in the water softener, do not try to open the water softener. Proceed as follows: 1) Wait, while continuing to operate the machine: after approx. one hour, the following alert will be displayed: “WATER TREATMENT SYSTEM FAULT - MACHINE ON - REPAIR”, as the machine expects it to be utilized correctly and when it detects the absence of salt...
- Page 43 20 THE WATER SOFTENER AND ACTIVATED CARBON CARTRIDGE CAPS DO NOT OPEN (A-K with WTS) This problem may arise both during installation and during use when the machine requests salt loading or the changing of the activated carbon cartridge. It can be due to a water treatment circuit malfunction. Proceed as follows: 1) Switch the machine off and then on again.
- Page 45 DISPOSAL OF THE APPLIANCE The European Directive 2002/96/EC (WEEE) covering the disposal of electric and electronic equipment dictates that such equipment must not be disposed of through normal solid urban waste channels. When such equipment has reached the end of its useful life, the user is bound take to deliver it to authorized segregated waste collection centres or return it to the dealer on purchasing a new equivalent type of appliance, on a one-to-one ratio For further information on segregated waste collection centres, contact a dealer...
- Page 46 TECNICHAL INSTRUCTIONS THESE INSTRUCTIONS ARE INTENDED FOR ESPRESSO COFFEE MACHINE INSTALLATION / MAINTENANCE TECHNICIAN...
- Page 47 UNPACKING Packaging is carried out with the aim of protecting the machine from damage during transportation. The packaging materials used are recyclable. They are, therefore, chosen according to environmental protection criteria and ease of disposal, the latter process being geared at further integration in productive cycle materials.
- Page 48 INSTALLATION ATTENTION: USA - CANADA REQUIREMENTS The equipment is to be installed with adequate backflow protection to comply with applicable federal, state and local codes. Water and waste piping and connections shall comply with the International Plumbing Code 2003, International Code Council (ICC) or to the Uniform Plumbing Code 2003, International Association of Plumbing and Mechanical Officials (IAPMO).
- Page 49 WATER SOFTENER CONNECTION (A-S-K-C-B, no A-K with WTS) If the standard water softener with completely manual valves is to be used, follow the instructions below. If semiautomatic or automatic water softeners are to be used, follow the specific instructions provided in the handbooks accompanying the water softeners themselves. The water softener has a flexible steel-braided connecting pipe with 3/8 female connections, approx.
- Page 50 WATER SOFTENER CONNECTION (A-K with WTS) The machine must only be used with the three types of special water softener supplied by ELEKTRA, i.e.: 8-litre ELEKTRA water softener 12-litre ELEKTRA water softener 16-litre ELEKTRA water softener No other type or brand of water softener may be used with this model 1) Connect the flexible pipe connected to coupling “1”...
- Page 51 DRAIN CONNECTION (B) The machine has a rubber connecting pipe of 20 mm in external diameter approx. 1.5 metres in length. This flexible pipe must be made to flow into a fixed drain manifold with a minimum internal diameter of 35 mm located underneath the machine work counter. The space created by difference in diameter of the two pipes inserted one into the other must be left free for the venting of air during the discharging of the water.
- Page 52 FILLING THE HYDRAULIC CIRCUITS (A-K-S-C-B, no A-K with WTS) 1) Ensure that the water supply is turned on. 2) Switch on the machine. FILLING THE HYDRAULIC CIRCUITS (A-K with WTS) Before switching on the machine, fill the water treatment hydraulic circuit. Proceed as follows: 1) Open the water softener cap.
- Page 53 HYDRAULIC SCHEME WATER SUPPLY 13 STEAM VALVE WATER SOFTENER 14 HOT WATER VALVE ENTRY WATER CONNECTION 15 EXPANSION VALVE MOTOR / PUMP 16 GAUGE ONE WAY VALVE 17 GROUP SOLENOID VALVE INLET SOL. VALVE 18 COFFEE DELIVERY GROUP BOILER 19 FILTER HEAT EXCHANGER 20 WATER FLOW METER SAFETY VALVE...
- Page 54 ADJUSTMENTS BASIC PROGRAMMING BY THE MAINTENANCE TECHNICIAN (S-C-B) This enables the implementation of some of the Adjustment and Maintenance functions listed below. It also facilitates the providing of telephonic assistance. Basic Programming is the exclusive responsibility of the installer/service technician It is carried out with the key provided, which enables you to use the following menu of led codes: Time setting:...
- Page 55 TIME SETTING (S-C-B) This function lets you set the current time, which is needed to manage the night cycle correctly. Insert and turn the key to access the following time setting menu: Press the “ENTER” key to display the current time as shown below (pressing on the contrary the “+”...
- Page 56 NIGHT CYCLE PROGRAMMING (S-C-B) Through the setting of a time of day, the machine enters into a state of partial operation during which the temperature in the boiler is kept at a very low temperature (preheating temperature) and buttons with automatic dosing are not enabled. Only the manual dosing buttons can be operated.
- Page 57 Select the required night cycle start time using the buttons “+” or “-” and then press the button “ENTER” to confirm. This confirmation puts you automatically in the night cycle end time, displayed as follows: Select the required night cycle end time using the buttons “+” or “-” and then press the button “ENTER”...
- Page 58 1.3 BREWING TEMPERATURE SETTING (S-C-B) This allows the brewing temperature to be varied according user requirements, the blend being used or environmental conditions, with a view to obtaining the best “quality in the cup”. This is done by setting the required increase (or decrease) of the temperature in relation to the standard brewing temperature, measured in centigrade degrees (°C).
- Page 59 1.4 HEATING ELEMENT SAFETY DEVICE RESET (S-C-B) This function lets you reset the heating element safety device that may have been disactivated due to the (even temporary) lack of water in the boiler. Reset the safety device after the reason for the lack of water in the boiler has been eliminated or repaired.
- Page 60 2 BASIC PROGRAMMING BY THE MAINTENANCE TECHNICIAN (A-K) This enables the implementation of the Adjustment, Maintenance and Data Management functions listed below. It also facilitates the providing of telephonic assistance. Basic Programming is the exclusive responsibility of the installer/service technician or of the owner of the business It is carried out with the key provided, which enables you to use a display menu that includes such functions per general issues, as follows:...
- Page 61 Measure the hardness of the water supply using the ELEKTRA kit provided, expressed in French degrees (°F), and store it.
- Page 62 BREWING TEMPERATURE SETTING (A-K) This allows the brewing temperature to be varied according user requirements, the blend being used or environmental conditions, with a view to obtaining the best “quality in the cup”. This is done by setting the required increase (or decrease) of the temperature in relation to the standard brewing temperature, measured in centigrade degrees (°C).
- Page 63 2.10 WATER TREATMENT CIRCUIT RINSE (A-K with WTS) This allows rinsing of the water softener circuit and the activated carbon cartridge to be carried out after repairs or salt loading errors, by automatically excluding it from the machine water supply, enabling the machine to continue operating. 2.11 HEATING ELEMENT SAFETY DEVICE RESET (A) This function lets you reset the heating element safety device that may have been...
- Page 64 Customer requirements Special Programming is the exclusive responsibility of the dealer’s specialized technician who will have been specifically trained by ELEKTRA to do so. Special Programming should be carried out on the dealer’s premises prior to installation.
- Page 66 MAINTAINANCE OF WATER SOFTENER CLEANING THE WATER SOFTENER (A-K-S-C-B, no A-K with WTS) 1) Periodically clean the gigleur fitted on the lower water softener valve by unscrewing it and ensuring that the water hole is not clogged. 2) Refit it on the valve and tighten it. REGENERATION OF THE WATER SOFTENER RESINS (A-K-S-C-B, no A-K with WTS) After the water softener resins have removed a given quantity of calcium and magnesium...
- Page 67 7) Close the softener cap after ensuring that it is full to the brim with water and that no salt residue has been left on the edges of the cap seal. 8) Turn the upper valve lever totally counter-clockwise. 9) Unroll the semitransparent pipe of the lower valve and allow its contents to flow into a general drain or a bucket.
- Page 68 ELEKTRA SRL VIA A. VOLTA,18 - 31030 DOSSON DI CASIER (TREVISO) ITALY TEL. (+39) 0422 490405 R.A. - FAX (+39) 0422 490620 E-mail: info@elektrasrl.com - Website: www.elektrasrl.com...
Need help?
Do you have a question about the Crema Caffe and is the answer not in the manual?
Questions and answers