
Subscribe to Our Youtube Channel
Related Manuals for Spirax Sarco SX100


Summary of Contents for Spirax Sarco SX100
- Page 1 2230053/2 IM-S27-06 CH Issue 2 SX100 Controller Quick Set-up Manual 1. Introduction 2. Controller Printed in the UK © Copyright 2003 IM-S27-06 CH Issue 2...
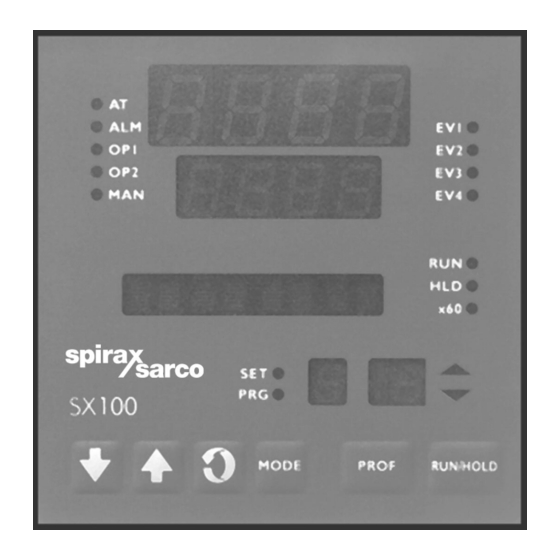
- Page 2 1. Introduction The purpose of this manual is to allow quick set-up of the SX100 controller, providing information on the most commonly used functions when used for control of the EasiHeat unit. See the SX100 Operator's Manual and Site Manual.
-
Page 3: Selecting And Running A Program
Press SCROLL key to return to BASE MODE. 2.2 Selecting and running a program (Refer to SX100 Operator's Manual) Note: if a program is already running, (i.e the 'RUN' indicator is lit), first press the RUN /HOLD key for more than 5 seconds to return unit to BASE MODE. -
Page 4: Adjusting The Setpoint
2.3 Adjusting the setpoint (Refer to SX100 Operator's Manual) Note: This setting is normally set to 0°C . It does not represent the running setpoint temperature. Setting the temperature at this level will prevent the steam valve opening with no circulating pump running. - Page 5 Table 1 Parameters common to all programs ('P No.' = A) (PROGRAM DEFINE MODE) To enter from BASE MODE: Press UP and SCROLL buttons together. Press UP button to select unlock code. Press SCROLL button. Press PROF button repeatedly until 'A' is visible in the 'P No.' display. This permits the user to view / modify parameters common to all programs.
- Page 6 Table 2 Parameters which apply to a specific program No. ('P No.' = 1 - 8) (PROGRAM DEFINE MODE) To enter from BASE MODE: Press UP and SCROLL buttons together. Press UP button to select unlock code. Press SCROLL button. Press PROF button repeatedly until required program no.
-
Page 7: Parameters In Any / Each Segment In A Specific Program
Table 3 Parameters which apply to segments in a specific program ('P No.' = 1 - 8, SEG No. = 1 - 5) (PROGRAM DEFINE MODE) To enter from BASE MODE: Start from Table 2, with SEG window blank, then to move on to the Segment No. parameters, press the RUN / HOLD button (Segment No. - Page 8 2.5 Example of how to set a program: In this example we wish to create a program which will turn on domestic hot water heating in a building. (This example is the same program as is factory set in Program No. 1). The required settings are that: Start time = 0800 hrs Days hot water is required = Monday to Friday...
- Page 9 Segment 1 Press the RUN / HOLD button so that '1' appears in the SEG window (This means we are programming the settings for Segment No. 1). Use UP and DOWN buttons to set the required 'Final SP', i.e. 65. This is the desired temperature for the end of the segment.
-
Page 10: Controller Parameters
Table 4 CONTROLLER DEFINE MODE To enter from BASE MODE: - Press UP and SCROLL buttons together. - Press UP button to select unlock code. - Press SCROLL button. - Press MODE button. Controller parameters These are independent of Program or Segment Nos. ('P No.' 1 - 8), SET led on, SEG display blank. - Page 11 Table 4 (Cont'd) CONTROLLER DEFINE MODE Message Factory Parameter Function display setting Process high HiAlarm1 Alarm level alarm 1 value Process low LoAlarm1 Alarm level alarm 1 value Band alarm 1 value BaAlarm1 Band alarm Deviation alarm DeAlarm1 Deviation alarm Alarm 1 hysteresis value All Hyst Hysteresis band...
-
Page 12: Entry Into Configuration Mode
2.6 Example of how to set the PID settings (Refer to Table 4, pages 10 and 11) It is a good idea to set the PID values to their optimum values, using for example, the Ziegler-Nicholls frequency response method (see DB-S27-08). In order to adjust the settings, from BASE MODE, or RUN MODE: Press UP and SCROLL buttons together. - Page 13 Table 5 Configuration mode parameters Message Factory Parameter Function display setting Primary input Code displayed defines Input 7220 range input type / range Control action Control Specifies control action of output 1 Stdr Alarm 1 type Alarm 1 Specifies alarm 1 operation P_hi Alarm 2 type Alarm 2...
-
Page 14: Manual Control
2.8 Hardware definition parameters (Refer to SX100 Site Manual) This is a special facility which specifies the hardware fitted (input type, output types etc.); this must be compatible with the hardware actually fitted. It can be accessed, in CONFIGURATION MODE by pressing the DOWN and SCROLL keys together. - Page 15 IM-S27-06 CH Issue 2...
- Page 16 IM-S27-06 CH Issue 2...
Need help?
Do you have a question about the SX100 and is the answer not in the manual?
Questions and answers