Advertisement
3231450/3
Printed in the UK
IM-P323-25 CH Issue 3
SX25 Series Process Controller
Installation and Maintenance Instructions
1. Safety Information
2. Installation
3. Electrical connections
4. Configuration
5. Operations
6. Commissioning examples
7. Automatic tuning
8. Technical specifications
IM-P323-25
CH Issue 3
© Copyright 2003
1
Advertisement
Table of Contents

Subscribe to Our Youtube Channel
Related Manuals for Spirax Sarco SX25 Series


Summary of Contents for Spirax Sarco SX25 Series
- Page 1 3231450/3 IM-P323-25 CH Issue 3 SX25 Series Process Controller Installation and Maintenance Instructions 1. Safety Information 2. Installation 3. Electrical connections 4. Configuration 5. Operations 6. Commissioning examples 7. Automatic tuning 8. Technical specifications © Copyright 2003 Printed in the UK...
- Page 2 IM-P323-25 CH Issue 3...
- Page 3 General Index Configuration Safety Information Configuration coding General Wiring Notes Operations Safety requirements and electromagnetic compatibility Keys and display overview Display Installation Parameter setting General description Parameter menu Dimensional details Parameter description Panel cut-out Configuration menu Environmental ratings Panel mounting Commissioning examples Example of pressure control for SX25-mA Electrical connections...
-
Page 4: Wiring Notes
1. Safety Information 1.1 General Please carefully read through the following before proceeding with the installation of the controller. Your attention is drawn to Safety Information leaflet IM-GCM-10. If the controller is handled improperly or not used as specified, the resultant may: •... - Page 5 viii) A disconnecting device (switch or circuit breaker) must be included in the building installation. This must be in close proximity to the equipment and within easy reach of the operator. • There must be a 3 mm contact separation in all poles. •...
-
Page 6: General Description
2. Installation 2.1 General description Installation must only be carried out by qualified personnel. Before proceeding with the installation of this controller, follow the instructions illustrated in this manual and, particularly the installation precautions marked with the symbol, related to the European Community directive on electrical safety and electromagnetic compatibility. - Page 7 2.2 Dimensional details 2.3 Panel cut-out IM-P323-25 CH Issue 3...
-
Page 8: Environmental Ratings
2.4 Environmental ratings Operating conditions Altitude up to 2 000 m (6 561 ft) Temperature 0...50°C (32...122°F) Relative humidity 5...95% non-condensing Special conditions Suggestions Temperature >50°C Use forced air ventilation Humidity > 95% Warm up Conducting atmosphere Use filter Forbidden conditions Corrosive atmosphere Explosive atmosphere IM-P323-25 CH Issue 3... -
Page 9: Panel Mounting
2.5 Panel mounting 2.5.1 Insert the instrument 2.5.2 Installation securing 2.5.3 Clamps removing 1 Prepare panel cut-out 1 Fit the mounting clamps 1 Insert the screwdriver in the clips of the clamps 2 Check front panel gasket position 2 Push the mounting clamps towards the panel surface to secure the 2 Rotate the screwdriver 3 Insert the instrument through... -
Page 10: Termination Unit
3. Electrical connections 3.1 Termination Unit SX25-VMD Pt 100 Output onOP1: OP3: SX25-mA Output on OP4: mA Terminals 18 screw terminals Pin connector Option terminals q 1.4 mm 0.055 in max Holding screw 0.5 N m Fork-shape Positive screw AMP 165004 driver PH1 UL note: Ø... - Page 11 3.2 Precautions and advised conductor course Despite the fact that the instrument has been designed to work in an harsh and noisy environmental (level IV of the industrial standard IEC 60801-4), it is recommended to use the following suggestions. All the wiring must comply with the local regulations.
-
Page 12: Wiring Details
3.3 Wiring details 3.3.1 Power supply 3.3.2 PV control unit A For L-J-K-S-T thermocouple type Please read the safety information • Connect the wires with the polarity as and the wiring notes before shown proceeding with the installation of • Always use compensation cable of the the controller. - Page 13 3.3.2 PV control unit D1 With 2 wire transducer D2 With 3 wire transducer D For mA, mV (SX25 mA only) (SX25 mA only) Rj >10MW Note: [1] Auxiliary power supply for external The auxiliary power supply is not transmitter 18 V ±20%/ 30 mA max. available on the VMD controller.
- Page 14 3.3.5 Output configuration OP2 output can be Relay or logic. The 'jumper' on the auxiliary The functionality associated to each of the outputs is defined during the board selects the output type: configuration of the instrument, index L (see section 4.1). The suggested combinations are: Link Pins 1-2 for OP2-Relay (Factory set)
- Page 15 SX25 mA Output combination 3.3.5 – A, B OP4 Analogue mA control output 3.3.5 – C Double action analogue mA / relay control output • Galvanic isolation 500V~/1 min • 0/4...20mA, (750W or 15V– max) load coil 3.3.5 – D Double action analogue mA / relay control output Relay output load •...
- Page 16 SX25 VMD Output combination 3.3.5 – G Valve Motor Drive 3.3.5 – H Single Action Relay 3.3.5 – I Single Action Logic Relay / Relay Control Output Control Output Control Output Coil of the heat load contactor 3.3.5 – J Double Action Relay / Relay Control Output Valve drive PID without potentiometer (open,close,stop).
- Page 17 3.3.5 – L Double Action Logic / Relay Control Output 3.3.6 Alarms outputs The outputs OP1, OP2 and OP3, can be used as alarm outputs only if they are not configured as control outputs. Relay Logic Load alarm Fuse Coil of the load alarm contactor Coil of the cool load contactor...
-
Page 18: Wiring Examples
3.4 Wiring examples 3.5 Auxiliary Relays for Valve Motor Drive actuators Example 1. SX25-mA for Pressure control: Using a 4-20mA pressure transmitter and a control valve with 4-20mA Electric or Electro-pneumatic positioner. SX25mA When using SX25 controller’s to directly drive VMD electric actuator’s, damage to the controller’s internal S X 2 5 m A relays might occur due to switching the relatively... -
Page 19: Configuration Coding
4. Configuration 4.1 Configuration coding Input type and range RTD Pt100 IEC 60751 -99.9...300.0 °C -99.9...572.0 °F RTD Pt100 IEC 60751 -200...600 °C -328...1112 °F The configuration code consists of TC L Fe-Const DIN43710 0...600 °C -328...1112 °F 4 digits that identify the operating characteristic of the controller, as TC J Fe-Cu45% Ni IEC 60584 0...600 °C... - Page 20 Alarm 2 type and function Not active Sensor break alarm/ Loop Break Alarm When the controller is powered up for the first time, the display shows active high Process the following message. active low active high Deviation active low active out Band active in CON2...
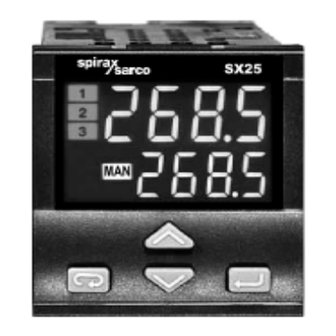
- Page 21 5. Operations 5.1 Keys and display overview 5.1.1 Key functions and display in operator mode 5.1.2 Key functions and display in programming mode IM-P323-25 CH Issue 3...
- Page 22 5.2 Display 5.2.1 Process variables 5.2.2 Configuration codes During the operation, the parameters values cannot be Operator mode Operator modified by the user mode Engineering Engineering units [1] units [1] Hardware Local model output Setpoint (auto) [2] (Manual) Configuration code (see page 19) Note [1] See table page 38...
-
Page 23: Parameter Setting
Operator 5.3 Parameter setting mode 5.3.1 Numeric entry working Setpoint (i.e. the modification of the displayed Setpoint value from 275.0 to 240.0 ) Press momentarily to Local change the value of 1 unit every push. Setpoint display Continued pressing of changes the value, at a rate that Lower doubles every second. - Page 24 5.3.2 Mnemonic codes setting Degree Engineering (e.g. configuration see page 36) Fahrenheit Units Degree Press the to display the Centigrade next or previous mnemonic for the selected parameter. no units Degree defined Continued pressing of Fahrenheit will display further mnemonics at a rate of one mnemonic every 0.5 sec.
- Page 25 5.3.3 Keypad lock 5.3.4 Outputs lock 5.3.5 Auto / Man To lock / unlock the keypad press The outputs are switched to the Operator OFF status by pressing the keys the keys mode together. simultaneously for 2 seconds. To confirm the keypad lock / unlock When the outputs are locked, the the display flashes once.
-
Page 26: Parameter Menu
27. 4 . 8 5.4 Parameter menu Auto/Man selection Operator 275. 0 Note: (see page 25) mode [1] This will not be displayed if the controller has been configured with alarm 2 not active or if sensor break type selected. Digit N / M of the configuration code is assigned to 0 or 1. - Page 27 P p Ass A25. p 1st GROUP Password entry AL2 alarm threshold only if Code value ³ 5000 (see page 30) (see page 38) 5000 Code entry from 5000 to 9999 Must be equal to the value of the parameter Code 1.
- Page 28 tun8 2nd GROUP Tuning run / stop (PID algorithm only) Adpt Continuous Tuning start / stop (adaptive tuning) (PID algorithm only) OF F f f p. 6 . a Calculated Proportional sl. u Setpoint ramp up band [2] (display only) /0.1...999.9 digit/min (available when adaptive tuning is selected)
- Page 29 pass Password entry only if Code value <5000 (see page 38). Direct access to the configuration (pages 36 – 38) none OF f f A2l. b AL2 latching and Input shift In. 5 h blocking functions / -60...60 digit non£ / Ltch bloc / Lt.
-
Page 30: Parameter Description
5.5 Parameter description Integral t.¡. First Group time The controller parameters have been The integral time value specifies the organised in groups, according to their time required by the integral term to functionality. generate an output equivalent to A2S.P AL2 alarm the proportional term. - Page 31 O.C. Control output Overshoot control A2hy hysteresis alarm hysteresis (Automatically disabled when the Cool output hy. C A3hy adaptive tuning is running). hysteresis alarm hysteresis This parameter specifies the span of action of the overshoot control. Hysteresis of the threshold of both The lower the O.C.
- Page 32 Second group Ltch Latch Alarm Alarms with LBA (Loop Break Alarm) and Sensor Break Operation The Loop Break Alarm will detect faults in the input and output circuit of the Using the latch function, the alarm controller. will remain energised after the alarm condition is no longer Select the code 1 on N or O configuration indexes (see page 20) to present.
- Page 33 Second group Input filter Soft-start control The Soft-start function is a warm up t. f ¡l St.op output value time constant phase after the controller is first powered up. Set the value of the control ouput This input filter provides a time The Soft-start will set the control during the Soft-start activation time constant (in seconds) to the PV input.
- Page 34 Heat cool control A Heat /Cool actions separated C Cool action adjusting Using one PID control algorithm, the d. b nd Example with different relative cool gains. Insert positive value controller can handle two different outputs, one of these performs the 10%) Heat action, the other one the Cool action.
- Page 35 Analogue control output OP4 r£tr Analogue control output range 0-20 / 4-20 rt.H Control output selection non£ Not used N.U. Heat (single action) N.U. C. Cool With SX25 mA Cycle Time tc or Cool Cycle Time tc are not present. IM-P323-25 CH Issue 3...
-
Page 36: Configuration Menu
5.6 Configuration menu Operator The configuration of the controller is Press to display mode Auto / Man specified through a 4 digit code that the next parameter or the next selection (see page 25) defines the type of input, of control code and change its value. - Page 37 2nd GROUP 1st GROUP Password entry only if Cod£ value ³ 5000 (see page 38). Direct access to the configuration ³ if code 5000 Code entry from 5000 to 9999 Must be equal to the value of the parameter Code. Entry of digits I-L-M-N of the configuration code Engineering units...
- Page 38 Table 1 - Supported Engineering Units. Password entry only if Cod£ value °C Centigrade degrees* <5000 °F Fahrenheight degrees* non£ no units Code entry from 0 to 4999 (33 default Volt from factory) The entered password must correspond to the one store Ampere in the Cod£...
- Page 39 6. Commissioning Examples 6.1 Example of pressure control When the controller is first powered To change the configuration code it up the display will show: is necessary to access the for SX25-mA configuration menu. Section 5.6 The SX25-mA controller is shows how to access this menu.
- Page 40 Configuration code This selects engineering units for the input signal. Using the table below enter the following values into these parameters. Using the keys, enter Parameter Description Default Value New Value the first part of the configuration code 'ILMN', conf. Unit Input Eng.
- Page 41 First group parameters Parameter Description Default Customer set Value Values Press the scroll key A2S.P Alarm 2 set point Stop Stop The display will show A3S.P Alarm 3 set point Stop Stop Avto P.b. Proportional band A. N ¢n t.i. Integral time which provides the option of t.d.
- Page 42 Second group parameters Parameter Description Default Customer Stop The display will show Value set Values tvn£ tune Tuning PID Stop Stop AdPt Adaptive tuning PID Stop Stop This is used to start the automatic tuning. Using this table enter the SL.
- Page 43 Configuration code 6.2 Example of temperature Using the keys, enter the first part of the configuration code control for SX25-VMD 'ILMN'. The SX25-VMD controller is then press the enter key monitoring system temperature with a RTD Pt100, and provides a then press the enter key Enter the last digit for code 'O' Valve Motor Drive control signal to...
- Page 44 First group parameters Parameter Description Default Customer set From the normal operating mode Value Values press the scroll key . The A2S.P Alarm 2 set point 35.0 display will show Avto A3S.P Alarm 3 set point 10.0 A. N ¢n P.b.
- Page 45 Second group parameters The display will show Stop Parameter Description Default Value Values tvn£ tune Tuning PID Stop Stop This is used to start the automatic AdPt Adaptive tuning PID Stop Stop tuning. Using the table opposite, enter the following values into these SL.
- Page 46 7. Automatic tuning Two tuning methods are provided: This method provides a more Operator • accurate PID calculation but will Initial one shot Fuzzy-tuning mode • Continuous, self learning take more time to complete. Adaptive Tuning If the natural frequency tune is press until taking too long to complete, try Fuzzy-Tuning allows the calculation of...
- Page 47 The self-learning Adaptive Tuning is On the basis of this data and their Operator non-intrusive. It doesn’t affect the statistical values, stored in the mode process during the calculation of instrument, it automatically the optimal PID values. modifies the PID values. press until The new calculated PID values are stored in the controller’s menu,...
- Page 48 8. Technical specifications Features Description (at 25°C environmental temp.) From the keypad the user can select: Total configurability - type of input - associated functions and the corresponding outputs (see section 4.1 page 19 - type of control algorithm - type of output and the safe conditions section 5.6 page 36) - type and functionality of the alarms - values of all the control parameters.
- Page 49 Features Description (at 25°C environmental temp.) Control output AL2 alarm AL3 alarm Single 1 double action OP1-Relay /Triac OP2-Relay or logic OP3-Relay/Triac Operating modes action PID and outputs OP2 -Logic OP1-Relay /Triac OP3-Relay/Triac loop or On/Off OP2-Relay or logic OP1-Relay /Triac OP3-Relay /Triac Double action with 1 or 2...
- Page 50 Features Description (at 25°C environmental temp.) SPST Relay N.O., 2A/250V~ for resistive load OP1 output Triac, 1A/250V~ for resistive load Protection by Jumper selectable varistor Logic not isolated: 5V–, ± 10%, 30mA max OP2 output (page 13) for 220V ~ SPST Relay N.O., 2A/250V~ for resistive load and capacitor SPST Relay N.O., 2A/250V~ for resistive load...
- Page 51 Features Description (at 25°C environmental temp.) Detection of out of range, short circuit or sensor break with automatic activation Measure input of the safety strategies and alerts on display Control output Safety value: -100%…100% Operational safety Parameter and configuration data are stored in a non volatile memory for an Parameters unlimited time Password to access the configuration and parameters data,...
Need help?
Do you have a question about the SX25 Series and is the answer not in the manual?
Questions and answers