Rockwell Automation Allen-Bradley PowerFlex 6000 Commissioning Manual
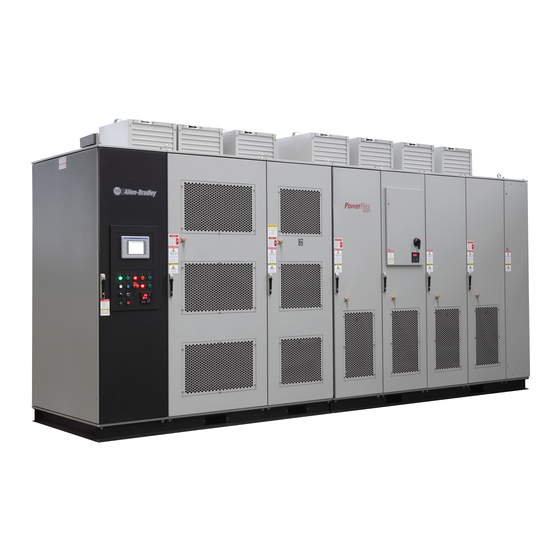
Medium voltage variable frequency drive
Hide thumbs
Also See for Allen-Bradley PowerFlex 6000:
- User manual (154 pages) ,
- Instructions manual (88 pages)

Subscribe to Our Youtube Channel
Related Manuals for Rockwell Automation Allen-Bradley PowerFlex 6000


Summary of Contents for Rockwell Automation Allen-Bradley PowerFlex 6000
- Page 1 Commissioning Manual PowerFlex 6000 Medium Voltage Variable Frequency Drive Commissioning Manual Publication 6000-IN007B-EN-P...
- Page 2 If this equipment is used in a manner not specified by the manufacturer, the protection provided by the equipment may be impaired. In no event will Rockwell Automation, Inc. be responsible or liable for indirect or consequential damages resulting from the use or application of this equipment.
-
Page 3: Table Of Contents
Documentation and Application Review ......12 Review all Rockwell Automation Supplied Documentation ..12 Pre-commissioning Customer Meeting . - Page 4 Torque Requirements ......... . . 109 Rockwell Automation Publication 6000-IN007B-EN-P - March 2016...
- Page 5 Restart the Drive ..........124 Index Rockwell Automation Publication 6000-IN007B-EN-P - March 2016...
- Page 6 Table of Contents Notes: Rockwell Automation Publication 6000-IN007B-EN-P - March 2016...
-
Page 7: Preface
PowerFlex® 6000 medium voltage drives with version 4.001 firmware. Who Should Use This Manual This manual is intended for Rockwell Automation Field Service Engineers with Medium Voltage Drive factory training and field experience commissioning medium voltage solid-state variable speed drive equipment. -
Page 8: Shipping, Handling, And Installation Manual
The customer/contractor has the option to perform the electrical interconnection work between cabinet shipping splits, as shown in this manual, or contract Rockwell Automation to perform this work. This will be reflected in the Services Purchase Order and the pre-commissioning checklist. Verify that the documentation matches the actual scope of work done by the customer/ contractor. -
Page 9: General Precautions
Resource Description Industrial Automation Wiring and Grounding Guidelines, Provides general guidelines for installing a Rockwell publication 1770-4.1 Automation industrial system. Product Certifications website, http://www.ab.com Provides declarations of conformity, certificates, and other certification details. Rockwell Automation Publication 6000-IN007B-EN-P - March 2016... - Page 10 Preface Notes: Rockwell Automation Publication 6000-IN007B-EN-P - March 2016...
-
Page 11: Introduction
Rockwell Automation to perform the power cable and control wiring interconnection work immediately prior to the commissioning process. -
Page 12: Documentation And Application Review
• PowerFlex 6000 Medium Voltage Variable Frequency Drive Commissioning Manual (6000-IN007_-EN-P): required procedures and checklists for Rockwell Automation Field Service Engineers. • PowerFlex 6000 Medium Voltage Variable Frequency Drive User Manual (6000-UM002_-EN-P): instructions for daily recurring drive usage, HMI... -
Page 13: Pre-Commissioning Customer Meeting
Retain a copy of the one-line diagram for commissioning the drive. If applicable, send a copy of the one-line diagram to the Start-up Project Manager to be archived and used for future customer assistance. Rockwell Automation Publication 6000-IN007B-EN-P - March 2016... - Page 14 Automation Electrical Drawings. All customer power and control wiring required for the drive line-up installation has been identified on the Rockwell Automation Electrical Drawings by a dashed line. Installation of all external power cabling and control wiring interfacing with the drive is completed by the customer or their electrical contractor.
-
Page 15: Preparation And Inspection (For Iec)
Electrical Safety requirements for Employee Work places must be followed. Before attempting any work, verify the system has been locked out and tested to have no potential. Rockwell Automation Publication 6000-IN007B-EN-P - March 2016... -
Page 16: Inspect Drive Components
Perform the shipping damage inspection for all components mounted in the drive cabinets and specific bypass unit cabinet (if supplied). Rockwell Automation Publication 6000-IN007B-EN-P - March 2016... -
Page 17: Functional Assessment
The Functional Assessment procedure can be combined with the “Inspect Drive Components” checklist on page Descriptions of the Power Cable Connections to be inspected and torqued to specifications are in the Interconnection Review and Installation Review sections. Rockwell Automation Publication 6000-IN007B-EN-P - March 2016... - Page 18 Chapter 2 Preparation and Inspection (For IEC) Rockwell Automation Publication 6000-IN007B-EN-P - March 2016...
- Page 19 Preparation and Inspection (For IEC) Chapter 2 Rockwell Automation Publication 6000-IN007B-EN-P - March 2016...
-
Page 20: Interconnection Review
Rear Inspection Verify all isolation transformer secondary windings from Power Module Cabinet are properly connected (3 sets) Verify all power supply cables for main cooling fans for Isolation Transformer Cabinet are properly connected(3 sets) Rockwell Automation Publication 6000-IN007B-EN-P - March 2016... -
Page 21: Installation Review
Verify there are no scratches or damage to the cabinet body Verify the top cover of the isolation transformer cabinet is securely 6000-IN006_-EN-P mounted Refer to project-specific EDs to review all electrical connections to external input and output devices. Rockwell Automation Publication 6000-IN007B-EN-P - March 2016... -
Page 22: Electrical Installation Inspection
• Motor Cable Connection to Power Module Bus Grey L13 (C Phase) Line Cable Terminal W Phase: • Power Module Bus • VSB Input Cable • Motor Cable Termination • Motor Cable Connection to Power Module Bus Rockwell Automation Publication 6000-IN007B-EN-P - March 2016... -
Page 23: Control Wiring
Verify with a potential indicator that power sources have been disconnected, and that the control power in the drive is de-energized. Rockwell Automation Publication 6000-IN007B-EN-P - March 2016... - Page 24 100 mm away from the connection point on the Monitor. Figure 3 - Isolation Transformer Temperature Monitor (IEC) Keep the plug at least 100 mm away from Temperature Monitor plug Rockwell Automation Publication 6000-IN007B-EN-P - March 2016...
- Page 25 7. Remove two star connection cables (the cabling that goes through the HECS) and connect them to the output connections of any two power modules within a phase. Figure 6 - Star Connection Cable Rockwell Automation Publication 6000-IN007B-EN-P - March 2016...
- Page 26 (located at the top of the power unit cabinet) Control Cable 9. Disconnect the HMI and Control Board power cables. Figure 8 - Back of HMI Control Board Power Cables HMI Power Cable Rockwell Automation Publication 6000-IN007B-EN-P - March 2016...
-
Page 27: Connect The Insulation Meter
ATTENTION: Discharge the Megger prior to disconnecting it from the equipment. Rockwell Automation Publication 6000-IN007B-EN-P - March 2016... - Page 28 Ground Bus Bar Table 7 - Insulation Test Voltage Values Drive Rated Voltage U1 Insulation Resistance Test Direct Voltage (V) 1000<U1≤5000 2500 5000<U1 5000 Typical of Drive Minimum Megger Value Entire Drive 1 kM Ohm Rockwell Automation Publication 6000-IN007B-EN-P - March 2016...
-
Page 29: Final Steps Before Equipment Is Ready For Energization
Figure 11 - Silicone Locations on Fixed-mounted Power Module Configuration Apply silicone as shown by bold lines Figure 12 - Silicone Locations on Drawout Power Module Configuration Apply silicone as shown by bold lines Rockwell Automation Publication 6000-IN007B-EN-P - March 2016... - Page 30 Chapter 2 Preparation and Inspection (For IEC) Notes: Rockwell Automation Publication 6000-IN007B-EN-P - March 2016...
-
Page 31: Preparation And Inspection (For Ul)
Electrical Safety requirements for Employee Work places must be followed. Before attempting any work, verify the system has been locked out and tested to have no potential. Rockwell Automation Publication 6000-IN007B-EN-P - March 2016... -
Page 32: Inspect Drive Components
Perform the shipping damage inspection for all components mounted in the drive cabinets and specific bypass unit cabinet (if supplied). Rockwell Automation Publication 6000-IN007B-EN-P - March 2016... -
Page 33: Functional Assessment
The Functional Assessment procedure can be combined with the “Inspect Drive Components” checklist on page Descriptions of the Power Cable Connections to be inspected and torqued to specifications are in the Interconnection Review and Installation Review sections. Rockwell Automation Publication 6000-IN007B-EN-P - March 2016... - Page 34 Chapter 3 Preparation and Inspection (For UL) Rockwell Automation Publication 6000-IN007B-EN-P - March 2016...
- Page 35 Preparation and Inspection (For UL) Chapter 3 Rockwell Automation Publication 6000-IN007B-EN-P - March 2016...
-
Page 36: Interconnection Review
Module Cabinet are properly installed – Cables are run in LV cable Verify that the two plugs sections along front and back of cabinet from the LV Control Cabinet and Isolation Transformer Cabinet are properly installed Rockwell Automation Publication 6000-IN007B-EN-P - March 2016... -
Page 37: Installation Review
Verify there are no scratches or damage to the cabinet body Verify the top cover of the isolation transformer cabinet is securely 6000-IN006_-EN-P mounted Refer to project-specific EDs to review all electrical connections to external input and output devices. Rockwell Automation Publication 6000-IN007B-EN-P - March 2016... -
Page 38: Electrical Installation Inspection
• Motor Cable Connection to Power Module Bus Blue L3 (C Phase) Line Cable Terminal W Phase: • Power Module Bus • VSB Input Cable • Motor Cable Termination • Motor Cable Connection to Power Module Bus Rockwell Automation Publication 6000-IN007B-EN-P - March 2016... -
Page 39: Control Wiring
Verify with a potential indicator that power sources have been disconnected, and that the control power in the drive is de-energized. Rockwell Automation Publication 6000-IN007B-EN-P - March 2016... - Page 40 VSB Board Cable connected to Transformer Cabinet 4. Disconnect the Isolation Transformer Temperature Monitor. Keep the plug at least 100 mm away from the connection point on the Monitor. Figure 15 - Isolation Transformer Temperature Monitor (UL) Rockwell Automation Publication 6000-IN007B-EN-P - March 2016...
- Page 41 6. Switch the miniature circuit breakers in the Isolation Transformer Cabinet LV Control panel off. Switch the Top Main Cooling Fan circuit breakers off. Figure 17 - Control Switches (UL) Top Main Cooling Fan Circuit Breakers Miniature Circuit Breakers Rockwell Automation Publication 6000-IN007B-EN-P - March 2016...
- Page 42 Figure 18 - Star Connection Cable (UL) 8. Disconnect the control cable of HECS. Figure 19 - Hall Effect Current Sensor (UL) Control Cable HECS (located on the right side of the power unit cabinet Rockwell Automation Publication 6000-IN007B-EN-P - March 2016...
- Page 43 10. Remove the Analog Interface board and disconnect all of the terminals from the Control Unit. Figure 21 - Back of Control Unit Analog Interface Board location on Control Unit Control Unit terminals Rockwell Automation Publication 6000-IN007B-EN-P - March 2016...
-
Page 44: Connect The Insulation Meter
ATTENTION: Discharge the Megger prior to disconnecting it from the equipment. Rockwell Automation Publication 6000-IN007B-EN-P - March 2016... - Page 45 Ground Bus Bar Table 12 - Insulation Test Voltage Values Drive Rated Voltage U1 Insulation Resistance Test Direct Voltage (V) 1000<U1≤5000 2500 5000<U1 5000 Typical of Drive Minimum Megger Value Entire Drive 1 kM Ohm Rockwell Automation Publication 6000-IN007B-EN-P - March 2016...
-
Page 46: Final Steps Before Equipment Is Ready For Energization
(Fixed-mounted or Drawout Power Module). IMPORTANT Use the approved silicone that is shipped with the drive. Figure 23 - Silicone Locations on Fixed-mounted Power Module Configuration Apply silicone as shown by bold lines Rockwell Automation Publication 6000-IN007B-EN-P - March 2016... -
Page 47: Commissioning
Verify Operation of Input/Output and Bypass Isolation Switches (Manual Bypass) Verify Operation of Input/Output and Bypass Contactors (Automatic Bypass) Verify Operation of DCS Input and Output Signals Restore P Parameter Settings (1) Only required if a bypass configuration is supplied. Rockwell Automation Publication 6000-IN007B-EN-P - March 2016... -
Page 48: Control System Check Setup
Circuit breaker device designation labels (Q1 (CB1), Q2 (CB2), etc.) are affixed to the device mounting surfaces. Figure 24 - UPS and CPT Mounting Plate (Top View) REAR Control Power Transformer FRONT Rockwell Automation Publication 6000-IN007B-EN-P - March 2016... - Page 49 Commissioning Chapter 4 Figure 25 - LV Control Cabinet (CB1) (CB2) (CB3) (CB5) (CB6) Figure 26 - LV Panel in the Isolation Transformer Cabinet For IEC For UL Rockwell Automation Publication 6000-IN007B-EN-P - March 2016...
- Page 50 AC220V (L-N). Refer to Figure 27. Verify that the power supplies (G1, G2, and G3), PLC, HMI, and Verify output is not shorted (2 and 4). PLC, HMI, and Control Unit power up. Control Unit Rockwell Automation Publication 6000-IN007B-EN-P - March 2016...
- Page 51 ATTENTION: The following should be opened successively when the control power is switched off: CB5, CB3, CB2 and UPS; opening CB1 is not necessary when the control power is not disconnected. Figure 27 - AC/DC Power Supplies Rockwell Automation Publication 6000-IN007B-EN-P - March 2016...
-
Page 52: Control System Check
2. In the Languages dialog box, select the language you want and press 3. Press to accept and proceed to the Main Interface Screen. Detailed information about the HMI screens is included in publication 6000-UM002_-EN-P, PowerFlex 6000 Medium Voltage Variable Frequency Drive User Manual. Rockwell Automation Publication 6000-IN007B-EN-P - March 2016... - Page 53 Commissioning Chapter 4 4. Press and confirm the Bypass Configuration matches one of the five Input Supply graphics. No Bypass Cabinet Manual Bypass Cabinet Rockwell Automation Publication 6000-IN007B-EN-P - March 2016...
- Page 54 Operation selection appears when Automatic Bypass is selected Manual Bypass Two Cabinets Automatic Bypass Two Cabinets Note the Contactor Operation selection appears when Automatic Bypass is selected 5. Under Control Owner Selection, press Rockwell Automation Publication 6000-IN007B-EN-P - March 2016...
-
Page 55: Set P Parameters To Enable Testing
This section is password protected and the setup login process must be completed before making any changes. Access Setup Settings 1. Press from the Main Interface Screen. 2. Press under Parameter Access Level. Rockwell Automation Publication 6000-IN007B-EN-P - March 2016... - Page 56 If the login information was incorrect, you will be prompted to login again. Set P Parameters Once the appropriate access has been granted, you can now select and change parameters. For the simulation tests, you only need to change two parameters: P007 and P224. Rockwell Automation Publication 6000-IN007B-EN-P - March 2016...
- Page 57 WARNING: Do NOT press . This will reset all factory-set parameters. When the “P” Parameter number is pressed (e.g. P007), the description appears in the information box at the bottom of the screen. Rockwell Automation Publication 6000-IN007B-EN-P - March 2016...
-
Page 58: Verify Settings For Low-Voltage Testing
Before performing high-voltage testing, the “Power Loss” setting must be IMPORTANT restored to the unshielded state. 1. Press from the Main Interface Screen. 2. Press under Parameter Access Level. The R&D Login dialog box appears. Press Rockwell Automation Publication 6000-IN007B-EN-P - March 2016... - Page 59 If the login information was incorrect, you will be prompted to login again. Set P Parameters Once the appropriate access has been granted, you can now select and change parameters. 1. Press under P Parameter Settings. Rockwell Automation Publication 6000-IN007B-EN-P - March 2016...
- Page 60 2. Press “499” on the keypad dialog and press will now show a value of “499”. 3. Press and enter “1”. Press when finished. 4. Press . The should display “1.00”. 5. Press to view the Fault Masks screen. Rockwell Automation Publication 6000-IN007B-EN-P - March 2016...
- Page 61 For IEC Standard 6. Press . The buttons should change respectively. WARNING: Before performing the high-voltage test, press to change back to and keep current blocked because there is no hardware detection in IEC) Rockwell Automation Publication 6000-IN007B-EN-P - March 2016...
- Page 62 After the end of the simulation tests, the “Power Loss” setting must be restored IMPORTANT to the unshielded state. 9. Press to exit P Parameter Settings, and . Press to confirm Setup has logged out. 10. Press to return to the Main Interface Screen. Rockwell Automation Publication 6000-IN007B-EN-P - March 2016...
-
Page 63: Verify Operation Of Frequency Steps
2. In the Set Freq: dialog box, enter a value of “10” and press Press to confirm. The Set Frequency and Actual Frequency occasionally will not show the exact integral value selected, due to internal data conversion in the HMI program. Rockwell Automation Publication 6000-IN007B-EN-P - March 2016... - Page 64 Accel Speed by Step? dialog box. T Parameter T09 determines the value of the frequency step change. The default is 1. Refer to Access T Parameters on page The Set Frequency and Actual Frequency are now 11 Hz. Rockwell Automation Publication 6000-IN007B-EN-P - March 2016...
-
Page 65: Verify Operation To Set Frequency
Decel Speed by Step? dialog box. The actual frequency will decrease by 1 Hz. Verify Operation to Set Frequency 1. Press the Set Frequency: input field and enter “50” in the Set Freq: dialog box and press Rockwell Automation Publication 6000-IN007B-EN-P - March 2016... - Page 66 Actual Frequency: will show the frequency increasing to 50 Hz. 3. Once the actual frequency has reached the set frequency, press and press in the Stop Drive? dialog to confirm action. The actual frequency will decrease to 0 Hz. Rockwell Automation Publication 6000-IN007B-EN-P - March 2016...
-
Page 67: Simulate Warnings And Faults
Simulate the Transformer Overtemperature Warning 1. Start the drive, then open the door of the Control cabinet. 2. In the control cabinet, remove the wire from terminal block 419. This triggers the transformer overtemperature warning alarm. Rockwell Automation Publication 6000-IN007B-EN-P - March 2016... - Page 68 3. Press to view the alarm record. 4. Replace the wire for terminal block 418 and tighten properly to remove the trip message. 5. Press to return to the Main Interface Screen. Rockwell Automation Publication 6000-IN007B-EN-P - March 2016...
- Page 69 The circuit breakers for the main cooling fans for the entire drive are located here. 3. Turn the first motor control circuit breaker (Q10 for IEC and CB10 for UL), controlling the Isolation Transformer Cabinet Main Cooling Fans (one per fan), to the OFF position. Rockwell Automation Publication 6000-IN007B-EN-P - March 2016...
- Page 70 3. Turn the applicable motor control circuit breaker (Q13 for IEC and CB13 for UL), controlling the Power Module Main Cooling Fans (one per fan), to the OFF position. Rockwell Automation Publication 6000-IN007B-EN-P - March 2016...
- Page 71 The drive will shut off. 3. Close the left Isolation Transformer Cabinet to remove the warning. 4. Repeat this procedure using the: • Right Isolation Transformer Cabinet door • Left Power Module/LV Cabinet door Rockwell Automation Publication 6000-IN007B-EN-P - March 2016...
-
Page 72: Verify E-Stop Functionality
2. Push the E-stop button on the front of the LV Control cabinet. 3. Press and confirm the E-stop Trip fault. 4. Twist to pull out the E-stop button on the front of the LV Control cabinet. Rockwell Automation Publication 6000-IN007B-EN-P - March 2016... -
Page 73: Verify Switching From Local Control To Remote Control
Control Owner Selection. 3. Press in the Select Remote Control? dialog. 4. Press to return to the Main Interface Screen and confirm Remote status indicator light is on. 5. Press from the Main Interface Screen. Rockwell Automation Publication 6000-IN007B-EN-P - March 2016... -
Page 74: Verify Operation Of Input/Output And Bypass Isolation Switches
Main Interface Screen and confirm the Local status indicator is on. Verify Operation of Input/Output and Bypass Isolation Switches (Manual Bypass) Input/Output Isolation Switches 1. Press from the Main Interface screen. Rockwell Automation Publication 6000-IN007B-EN-P - March 2016... - Page 75 Verify the Input and Output contactors are closed on the HMI. 3. Close the customer-supplied input circuit breaker by installing a temporary jumper wire (X-117, X-119). Verify the input circuit breaker is closed. Rockwell Automation Publication 6000-IN007B-EN-P - March 2016...
- Page 76 Chapter 4 Commissioning Bypass Isolation Switches 1. Press from the Main Interface screen. 2. Open the Bypass cabinet door, and close QS1. Verify the bypass isolation switch is closed on the HMI. Rockwell Automation Publication 6000-IN007B-EN-P - March 2016...
-
Page 77: Verify Operation Of Input/Output And Bypass Contactors
Verify Operation of Input/Output and Bypass Contactors (Automatic Bypass) Input/Output Drive Contactors Turn the 3-position on the selector switch on the front of the LV Cabinet to the IMPORTANT Drive position. 1. Press from the Main Interface screen. Rockwell Automation Publication 6000-IN007B-EN-P - March 2016... - Page 78 Chapter 4 Commissioning 2. Close the customer-supplied input circuit breaker by installing a temporary jumper wire (X-117, X-119). Verify the input circuit breaker is closed. 3. Press under Contactor Operation, and press confirm. Rockwell Automation Publication 6000-IN007B-EN-P - March 2016...
- Page 79 Commissioning Chapter 4 Verify the input and output drive contactors are closed. 4. Press under Contactor Operation, and press confirm. Rockwell Automation Publication 6000-IN007B-EN-P - March 2016...
- Page 80 5. Verify the input and output drive contactors are open. Bypass Contactors Turn the 3-position on the selector switch on the front of the LV Cabinet to the IMPORTANT Bypass position. 1. Press from the Main Interface screen. Rockwell Automation Publication 6000-IN007B-EN-P - March 2016...
- Page 81 Commissioning Chapter 4 2. Press under Contactor Operation, and press confirm. Verify the bypass contactor is closed. Rockwell Automation Publication 6000-IN007B-EN-P - March 2016...
- Page 82 Chapter 4 Commissioning 3. Press under Contactor Operation, and press confirm. Verify the bypass contactor is open. Rockwell Automation Publication 6000-IN007B-EN-P - March 2016...
-
Page 83: Verify Operation Of Dcs Input And Output Signals
911-912 Running/Connect Grey READY 913-914 Ready Grey DCS control 915-916 Remote Grey Local Grey Table 16 - 4-20 mA Output Current 925-926 Motor Current 0-Rated Current Output Frequency 927-928 Actual Frequency 0-Rated Frequency Rockwell Automation Publication 6000-IN007B-EN-P - March 2016... -
Page 84: Restore P Parameter Settings
Parameter Access Level. The Setup Login dialog box appears. Press 2. Enter the User and Password details. Press to enter user details. Press when finished. Press to enter password details. Press when finished. Rockwell Automation Publication 6000-IN007B-EN-P - March 2016... - Page 85 Setup has logged out, and to return to the Main Interface Screen. WARNING: Remove the temporary jumper (X1-117, X1-119) in the LV Control Cabinet, which was installed to enable the Control System Test. Rockwell Automation Publication 6000-IN007B-EN-P - March 2016...
-
Page 86: Set Date And Time Zone
5. Once logged in, press 6. Press in the Setup Parameter Type. 7. Press the T10 parameter input field. Enter “555” and press 8. Press to confirm. It will take 3...5 minutes to shutdown. Rockwell Automation Publication 6000-IN007B-EN-P - March 2016... -
Page 87: Change Time/Date/Regional Settings
9. Select language and bypass mode in the System Parameters Settings interface. 10. Press to accept and proceed to the Main Interface Screen. Verify the date and time is updated under Version Info. Rockwell Automation Publication 6000-IN007B-EN-P - March 2016... - Page 88 Chapter 4 Commissioning Notes: Rockwell Automation Publication 6000-IN007B-EN-P - March 2016...
-
Page 89: No-Load Test
ATTENTION: Isolation switches in bypass cabinets can only be opened or closed when the Input Circuit Breaker is in the open position. Isolation Switches must not be operated when the Input Circuit Breaker is closed. Rockwell Automation Publication 6000-IN007B-EN-P - March 2016... -
Page 90: Energize Drive Control Circuit
1 = Forward P009 Motor Rotation Direction Command Selection: 0 = Local Control 1 = DCS P010 Power Cell Fault Mask 32767 32767 P017 Number Of Motor Pole Pairs P019 Encoder Resolution 4096 1024 Rockwell Automation Publication 6000-IN007B-EN-P - March 2016... - Page 91 0 = Disable 1 = Enable P090 Skip Frequency 1 Lower Limit P091 Skip Frequency 1 Upper Limit P092 Skip Frequency 2 Lower Limit P093 Skip Frequency 2 Upper Limit P113 Flying Start-Initial Output Voltage Rockwell Automation Publication 6000-IN007B-EN-P - March 2016...
- Page 92 Ground Fault Warning Threshold 0.00 199.99 20.00 P230 Ground Fault Trip Threshold 0.00 199.99 60.00 P231 Filter Time For Overspeed Fault (Upper Limit) 32767 P232 Filter Time For Overspeed Fault (Lower Limit) 32767 Rockwell Automation Publication 6000-IN007B-EN-P - March 2016...
- Page 93 Flux Control Regulation Control Enable 0 = Disable 1 = Enable P275 Flux Control Regulation Acceleration Threshold 100.00 199.99 100.00 P276 Derating Control No-Load Modulation Index P277 Derating Control Full-Load Modulation Index 50.00 199.99 81.99 Rockwell Automation Publication 6000-IN007B-EN-P - March 2016...
- Page 94 Digital Output #0 Delay 32767 P304 Digital Output #1 Memory Address P305 Digital Output #1 Logic 0 = Non-Inverting 1 = Inverting P306 Digital Output #1 Bit Selection P307 Digital Output #1 Delay 32767 Rockwell Automation Publication 6000-IN007B-EN-P - March 2016...
- Page 95 Analog Output #1 Offset -100 P335 Analog Output #1 Scaling Factor 0.00 199.99 100.00 P336 Analog Output #2 Memory Address P337 Analog Output #2 Filter Time 32767 1000 P338 Analog Output #2 Offset -100 Rockwell Automation Publication 6000-IN007B-EN-P - March 2016...
- Page 96 P383 Frequency At Fifth Point for 5 Point VF P384 Amplitude At Fifth Point for 5 Point VF P385 Deceleration Process Enable 0 = Disable 1 = Enable P386 Deceleration Time 1 3276 Rockwell Automation Publication 6000-IN007B-EN-P - March 2016...
- Page 97 4 = 5 Point VF P454 Flux Time (s) 10.0 P455 Modulation Index 0.00 110.00 87.99 P456 Motor Voltage Upper Limit 0.00 110.00 87.99 P457 Flying Start Voltage Recovery Time (Low Speed Region) 0.00 163.84 5.00 Rockwell Automation Publication 6000-IN007B-EN-P - March 2016...
- Page 98 0 = Digital 1 = Analog Remote Frequency Command Selection 16-bit Unsigned Integer 1 = Analog 2 = 4-Step Speed 4 = Communication Port Frequency Step For Accel or Decel 16-bit Unsigned Integer Rockwell Automation Publication 6000-IN007B-EN-P - March 2016...
- Page 99 4 = Keep T13, Speed 3 5 = Keep T13, Speed 4 ATTENTION: If you enter a value that is greater than the allowed range for the parameter, the input field will turn red. Rockwell Automation Publication 6000-IN007B-EN-P - March 2016...
-
Page 100: Change Parameters T11
• position switch must be set to Drive • bypass contactor must be ON • drive must not be running. 4. If you select , the: • drive must be set to Local Control Rockwell Automation Publication 6000-IN007B-EN-P - March 2016... - Page 101 Parameter T12 is a reserved parameter for R&D and hand-off operation. Parameter T13 To change Parameter T13: 1. Press the T13 Parameter input field. 2. Enter desired speed values in the Enter Four Steps dialog box. Rockwell Automation Publication 6000-IN007B-EN-P - March 2016...
-
Page 102: Close Isolation Switches In Bypass Cabinet
Open QS1 (direct line operation) isolation switch b. Close QS2 and QS3 (drive operation) isolation switches 2. Automatic Bypass (with isolating switches) (see Figure a. Close QS1 and QS2 (drive operation) isolation switches Rockwell Automation Publication 6000-IN007B-EN-P - March 2016... -
Page 103: Close Input Circuit Breaker
5. Turn the circuit breaker back on, and repeat for the remaining Main Cooling Fan circuit breakers. 6. Verify that there are no faults or warnings on the HMI screen. IMPORTANT All fans must turn in the same direction. Rockwell Automation Publication 6000-IN007B-EN-P - March 2016... -
Page 104: Operate Motor By Hmi
The Set Frequency and Actual Frequency occasionally will not show the exact integral value selected, due to internal data conversion in the HMI program. 3. Press , and press in the Start Drive? dialog box to confirm operation. Rockwell Automation Publication 6000-IN007B-EN-P - March 2016... - Page 105 Swap any two cables in the motor’s cable connection box. f. Repeat Close Input Circuit Breaker on page 103. If the motor rotating direction is correct, continue to step 5. 5. From the Main Interface Screen, press the Set Frequency: input field. Rockwell Automation Publication 6000-IN007B-EN-P - March 2016...
- Page 106 3.3 kV 1500 2320 3300 4.16 kV 1060 1900 2930 4160 6 kV 1540 2740 4220 6000 6.6 kV 1690 3010 4650 6600 10 kV (Not applicable for UL) 1040 2560 4560 7040 10,000 Rockwell Automation Publication 6000-IN007B-EN-P - March 2016...
-
Page 107: Load Test Of Drive System
The Input Circuit Breaker should be off and locked out and tagged out to prevent any possibility of energization of the motor circuit while the application is reconfigured to apply load. Repeat steps 1, 4, and 6 listed in the Table on page Rockwell Automation Publication 6000-IN007B-EN-P - March 2016... -
Page 108: Rockwell Automation Publication 6000-In007B-En-P - March
Chapter 5 No-load Test Notes: Rockwell Automation Publication 6000-IN007B-EN-P - March 2016... - Page 109 Appendix Torque Requirements Torque Requirements Proper tightening torque must be used for installation and wiring. Table 20 - Torque Requirements Torque Thread Size N•m lb•ft 16.2 28.8 45.7 70.1 135.7 Rockwell Automation Publication 6000-IN007B-EN-P - March 2016...
- Page 110 Appendix A Torque Requirements Notes: Rockwell Automation Publication 6000-IN007B-EN-P - March 2016...
- Page 111 Appendix Single Line Diagrams Figure 29 - PowerFlex 6000 without Bypass Input Circuit Breaker (by Customer) PowerFlex 6000 Circuit Breaker Rockwell Automation Publication 6000-IN007B-EN-P - March 2016...
- Page 112 Appendix B Single Line Diagrams Figure 30 - 6012M Automatic Bypass Version 1 (without Isolation Switches) Input Circuit Breaker (by Customer) PowerFlex 6000 Circuit Vacuum Breaker Contactor Rockwell Automation Publication 6000-IN007B-EN-P - March 2016...
- Page 113 Single Line Diagrams Appendix B Figure 31 - 6012M Automatic Bypass Version 2 (with Isolation Switches) Input Circuit Breaker (by Customer) Bypass Unit PowerFlex 6000 Circuit Vacuum Isolation Breaker Contactor Switch Rockwell Automation Publication 6000-IN007B-EN-P - March 2016...
- Page 114 Appendix B Single Line Diagrams Figure 32 - 6012M Manual Bypass Input Circuit Breaker (by Customer) Bypass Unit PowerFlex 6000 Circuit Vacuum Isolation Breaker Contactor Switch Rockwell Automation Publication 6000-IN007B-EN-P - March 2016...
- Page 115 Single Line Diagrams Appendix B Figure 33 - PowerFlex 6000 Manual Bypass for Two Cabinets Figure 34 - PowerFlex 6000 Automatic Bypass for Two Cabinets (with Isolation Switches) Rockwell Automation Publication 6000-IN007B-EN-P - March 2016...
- Page 116 Appendix B Single Line Diagrams Notes: Rockwell Automation Publication 6000-IN007B-EN-P - March 2016...
-
Page 117: Overview
P007. If P007=0, this is ignored and the user can run the drive using low voltage. Use this parameter to check low voltage components and the control box. Set P Parameters on page Rockwell Automation Publication 6000-IN007B-EN-P - March 2016... -
Page 118: Switch Control Sources
Instruction: P199 is motor rated current, which is used to determine faults. P017 sets the number of motor pole pairs. Hall Effect Current Sensor Setting Relevant parameter: P198 Instruction: Set the HECS rated current (A) used for the drive current sampling. Rockwell Automation Publication 6000-IN007B-EN-P - March 2016... -
Page 119: Analog Output Display Parameter Setting
P401, P416, P417, P438, P441, P442, P451, P452, P453, P455, P456, P457, P459, P460, P463, P466, P467 User (P005 = 40) P004, P198, P199, P262, P352, P355, P358, P361, P399, P401 R&D (P005 = 50) All P parameters Rockwell Automation Publication 6000-IN007B-EN-P - March 2016... -
Page 120: Speed Command Functions
This parameter avoids the drive’s output fluctuation when the frequency is around 0 Hz. Instruction: if the original set frequency is lower than P414, the set frequency will be changed to P414. Rockwell Automation Publication 6000-IN007B-EN-P - March 2016... -
Page 121: Frequency Amplitude Limit
(Figure 35). The recommended width of these intervals is 1 Hz. Figure 35 - Principle diagram of Frequency Skip Function P090 P091 P092 P093 User Set Frequency Rockwell Automation Publication 6000-IN007B-EN-P - March 2016... -
Page 122: Speed Reference Functions
Description: this function is designed to build a steady rotating magnetic field before the rotor operates. Instruction: P454 is the time to build the rotating magnetic field. This value will not generally be changed. Rockwell Automation Publication 6000-IN007B-EN-P - March 2016... -
Page 123: Analog Input
• search the frequency from set frequency • search the frequency from the last stop frequency added 5 Hz • search from the maximum frequency. Instruction: the flying start feature identifies the motor speed based on the output current. Rockwell Automation Publication 6000-IN007B-EN-P - March 2016... -
Page 124: Restart The Drive
If there is something wrong with a Power Module, it will wait for P465 before restarting. If a fault happens twice during the Fault Reset Timeout (P462), the drive will trip. If restart feature was enabled, the second mode of flying start feature must be IMPORTANT enabled. Rockwell Automation Publication 6000-IN007B-EN-P - March 2016... - Page 125 Drive Megger Check 23 Review 13 Electrical Equipment 15 Drive Components Final Steps 29 Inspection 16 Functional Assessment 17 Checklist 18 Checklist 19 Drive Megger Check 23 Installation Review 21 Electrical Inspection 22 Rockwell Automation Publication 6000-IN007B-EN-P - March 2016...
- Page 126 Number of Power Modules Per Phase Rated/Maximum Output Frequency 118 Restore Factory Setting 119 Switch Control Sources 118 Speed Command Functions 120 Speed Reference Functions 122 Stop Mode 123 Tagout 15 Torque Requirements 109 Rockwell Automation Publication 6000-IN007B-EN-P - March 2016...
- Page 128 New Product Satisfaction Return Rockwell Automation tests all of its products to help ensure that they are fully operational when shipped from the manufacturing facility. However, if your product is not functioning and needs to be returned, follow these procedures.
Need help?
Do you have a question about the Allen-Bradley PowerFlex 6000 and is the answer not in the manual?
Questions and answers