Table of Contents
Advertisement
Quick Links
Advertisement
Table of Contents

Related Manuals for Russell Hobbs RHSBM40


Summary of Contents for Russell Hobbs RHSBM40
- Page 1 INSTRUCTIONS AND WARRANTY MODEL NO. RHSBM40 300W DELUXE PRO STAND BOWL MIXER...
- Page 2 Congratulations on purchasing our Russell Hobbs 300W Deluxe Pro Stand Bowl Mixer. Each unit is manufactured to ensure safety and reliability. Before using this appliance for the first time, please read the instruction manual carefully and keep it for future reference.
-
Page 3: Important Safeguards
IMPORTANT SAFEGUARDS When using any electrical appliance, basic safety precautions should always be followed including the following: CAUTION: When using the stand bowl mixer, the unit must not be used for longer than 5 minute cycles, as this puts pressure on the motor which could lead to overheating and product malfunction. - Page 4 9. Check the power cord and plug regularly for any damage. If the cord or the plug is damaged, the manufacturer or a qualified person must replace it in order to avoid an electrical hazard. 10. Do not use the appliance if it has been dropped or damaged in any way. In case of damage, take the unit in for examination and/or repair by an authorised service agent 11.
- Page 5 cord, the appliance or plug point. Do not place the extension cord in a position where it can be pulled on by children or animals or tripped over. 22. This appliance is not suitable for outdoor use. Do not use this appliance for anything other than its intended use.
- Page 6 39. Ensure that the switch is in the “0” / “Off” position after each use. 40. To avoid the danger of fire and/or explosion, do not use this appliance to stir paints or solvents. 41. The manufacturer does not accept responsibility for any damage or injury caused by improper or incorrect use, or for repairs carried out by unauthorised personnel.
-
Page 7: Parts Description
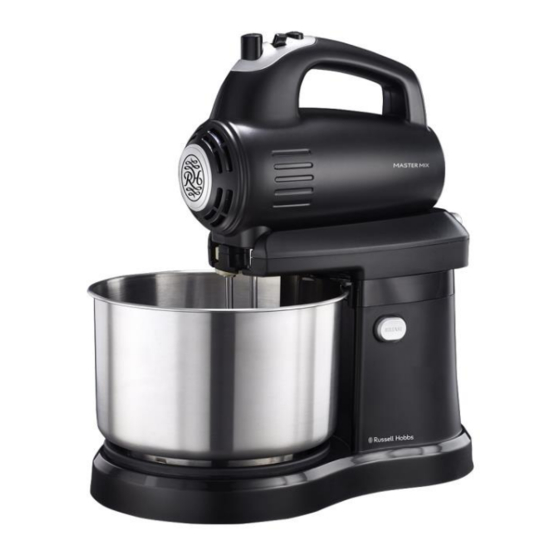
PARTS DESCRIPTION 1. Mixer head 2. Turbo button 3. Speed switch 4. Eject button 5. Dough hooks 6. Beaters 7. Spatula 8. Mixing bowl 9. Mixing plate 10. Cradle release button 11. Cradle 12. Mixer release button 13. Mixer stand... -
Page 8: Preparing For First Use
PREPARING FOR FIRST USE Preparing your hand mixer 1. Insert the dough-hooks/beaters into the mixer head. (Fig.1) 2. Make sure the dough-hooks/beaters are locked at the right place. (Fig.2) If using the mixer with stand, insert the dough-hook/beater with the plastic gear ensuring it aligns with the drive gear on the cradle. - Page 9 OPERATING INSTRUCTIONS To use your stand mixer Press the cradle release button, raise the cradle. Place the ingredients into the mixing bowl and then place the bowl onto the mixer stand. Press the cradle release button with one hand and then push down the cradle/mixer-head with the other. Plug in.
- Page 10 longer mixing time. If you wish to mix larger quantities or heavier mixes, remove the mixer head from the stand and use a bowl of an appropriate size. To re-knead bread doughs remove the mixer from the stand and use hand held.
- Page 11 Recommended speeds for beaters and dough hooks Please note that these are recommendations for using the stand and supplied mixing bowl. If using the mixer by hand, the speed you select may depend upon the bowl size (if not using the bowl supplied), quantities, the ingredients you are mixing and personal preference.
- Page 12 • • 2 tsp vanilla extract 2 tsp corn flour 1. Preheat the oven to 150˚C. 2. Place the egg whites into the mixing bowl and whisk on speed 5, gradually adding the sugar until the mixture thickens (about 3 minutes). 3.
- Page 13 • ¼ tsp ground nutmeg 1. Preheat the oven to 160˚C. 2. Cut the banana up into small pieces and place in the mixing bowl. Add the remaining ingredients and then mix on speed 1. As the mixture starts to come together increase the speed.
- Page 14 on maximum speed for 30 - 45 seconds, keeping the dough hooks in the mix. 4. Shape the dough into a loaf, or rolls, and place on greased baking trays. Cover with oiled cling film and leave somewhere warm until it has doubled in size. 5.
-
Page 15: Storing The Appliance
Stand Wipe with a damp cloth, then dry. Never immerse in water or use abrasives. All other parts Wash by hand, then dry. Alternatively they are dishwasher safe and can be washed on the top rack of your dishwasher. Avoid placing items on the bottom rack directly over the heating element. A low temperature (Maximum 50˚C) is recommended. -
Page 16: Servicing The Appliance
speed function. The mixer should then resume operation straight away. Specifications: Voltage: AC 220 V - 240 V~ Frequency: 50Hz Power: 300W Kb: 15 min SERVICING THE APPLIANCE There are no user serviceable parts in this appliance. If the unit is not operating correctly, please check the following: •... - Page 17 Green/Yellow = Earth Blue = Neutral Brown = Live If the mains cord does not have a green and yellow wire then do not connect anything to the Earth pin.
- Page 18 PLEASE AFFIX YOUR PROOF OF PURCHASE/RECEIPT HERE IN THE EVENT OF A CLAIM UNDER WARRANTY THIS RECEIPT MUST BE PRODUCED. 2 YEAR WARRANTY 1 year retail ⵏ 1 year extended warranty upon registration* visit www.russellhobbs.co.za W A R R A N T Y AND EXTENDED WARRANTY 1.
Need help?
Do you have a question about the RHSBM40 and is the answer not in the manual?
Questions and answers