
Related Manuals for Winmate R12ID8M-RTM7GP


Summary of Contents for Winmate R12ID8M-RTM7GP
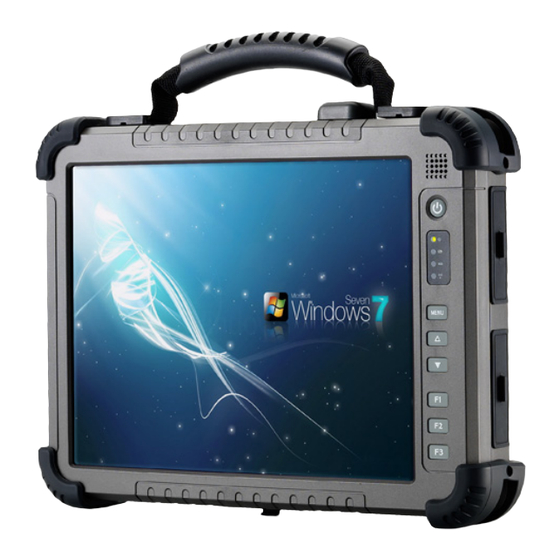
- Page 1 SERVICE MANUAL Part No 98T012A0002G Revision 100 Product Name 12.1” Ultra Rugged Tablet PC Model Name R12ID8M‐RTM7GP Product Name:12.1” Tablet PC Model Name: New Panel (本文件不得擅自塗改或影印) FMRD33B...
- Page 2 SERVICE MANUAL Document History Item Date Revision Page Description 2014.12.2 N/A New Document Released Approved by Reviewed By Made By Brian John (本文件不得擅自塗改或影印) FMRD33B...
-
Page 3: Table Of Contents
SERVICE MANUAL Table of Contents Section 1: Spare Parts List for Service ......................3 Section 2: Exploded-view Drawing ....................... 5 Section 3: Trouble Shooting FAQ ........................6 Replace Front Cover (I) ........................11 Replace Middle Plate Kit (I) ........................ 17 Replace M/B Kit (I) ..........................23 Replace OSD Kit (I) .......................... - Page 4 SERVICE MANUAL Item Part Number Spare Part Note Front Cover Middle Plate 90MBID832005 M/B Kit 76E032300507 SSD 32GB 72MB2GA0050L RAM 2GB 9B0000000298 WiFi+BT Card 90BBSD030000 90BBCK101000 Dock Brd 90BBDB04T002 DB04 Brd 90BBRTIO1000 I/O Brd 90BBTPBAT000 Battery Brd 320412004002 Battery (5200mAh) Note: For the detail spare parts information, please refer to “98T012A0002G_Spare_Parts__V100_EN.xlsx”...
-
Page 5: Section 2: Exploded-View Drawing
SERVICE MANUAL Section 2: Exploded-view Drawing (本文件不得擅自塗改或影印) FMRD33B... -
Page 6: Section 3: Trouble Shooting Faq
SERVICE MANUAL Section 3: Trouble Shooting FAQ Power light is not lit Power light and HDD Replace Front Cover (refer to P.11) light are lit Unable to Power light is lit but power on HDD light is not lit Replace SSD (refer to P.55) Screen is lit as normal, Bios Update (refer to P.) unable to enter OS. - Page 7 SERVICE MANUAL Make sure WIFI&BT WIFI&BT Setup (refer to P.) setting is correct Device Manager WIFI/BT unable to display Replace WiFi & BT Module (refer to abnormal WIFI&BT module Device Manager able Replace Rear Cover Kit (refer to P.) to display WIFI&BT module Make sure WWAN WWAN Setup (refer to P.)
- Page 8 SERVICE MANUAL Make sure GPS setting GPS Setup (refer to P.) is correct abnormal Setting is correct but Replace Rear Cover Kit (refer to P.) GPS still abnormal USB keyboard & Replace Rear Cover Kit (refer to P.) mouse unable to use abnormal Test with headphone Audio...
- Page 9 SERVICE MANUAL Item Trouble Check Point Action Description Power LED is not lit up Plug in the AC adapter. Pressing the Reset key, if you still cannot solve, replace the battery, if you still cannot solve, replace the MB If its normal power LED is lit up,HDD Replace the Front Cover, if this does LED is normal lit up not solve, replace the MB...
- Page 10 SERVICE MANUAL Item Trouble Check Point Action Description Check if the setting for WIFI&BT is Please refer to WIFI&BT set up correct. WIFI/BT Device manager cannot show WIFI&BT Replace WiFi&BT Module aberrant module normally. Device manager can show WIFI&BT Replace MB module normally. Check if the setting for WWAN is correct. Please refer to WWAN set up Device manager could not show WWAN ...
-
Page 11: Replace Front Cover (I)
SERVICE MANUAL Section 4: Replacement Procedure Replace Front Cover (I) Items Material: STEP1 Steps Assembly operation description: Turn back the unit as shown in the Figure. Remove the battery Sequence Notes: STEP2 (本文件不得擅自塗改或影印) FMRD33B... - Page 12 SERVICE MANUAL Replace Front Cover (II) Items Material: STEP1 Steps Assembly operations Description: Remove the Tablet protection Rubber (marked in red circle) Remove the screw (marked red circle.) Sequence note: STEP2 (本文件不得擅自塗改或影印) FMRD33B...
- Page 13 SERVICE MANUAL Replace Front Cover (III) Items Materials: STEP1 Steps Assembly operations Description: Remove antenna cable (marked in red circle, after removing cables, remove the thermal pad from the Heat sink ( marked in red box) Then remove the thermal pad at the copper column (pointed in red arrow) 將紅圈處各天線線材卸下...
- Page 14 SERVICE MANUAL Replace Front Cover (IV) Items Material: STEP1 Steps Assembly operations Description:: Unplug each cables connected from the main board: SPK Cable(A)、Touch Cable(B)、Dimming Board Cable(C) Remove each screws from the main board (marked in red circle) Sequence Note: STEP2 (本文件不得擅自塗改或影印) FMRD33B...
- Page 15 SERVICE MANUAL Replace Front Cover (V) Items Material: STEP1 Steps Assembly operations Description:: Release screws (marked in red circle) then remove the Dock Board. Release screws (marked in red circle) then remove the Battery Board Release each screws (marked in red circles)remove the hexagonal copper column pointed in red arrow, panel cable (pointed in black arrow) then finally...
- Page 16 SERVICE MANUAL Replace Front Cover (VI) Items Materials: STEP1 Steps Assembly operations Description: Release screws (marked in red circle) then remove the middle plate.鬆開紅圈處各螺 絲,將中隔板組件移除 Release screws (marked in red circle) then remove OSD Board and Speaker (marked in red arrows)... 鬆開紅圈處各螺絲,將 OSD Board 與 SPK(紅箭頭處)移除 STEP2 Front cover removal is done.完成前框拆...
-
Page 17: Replace Middle Plate Kit (I)
SERVICE MANUAL Replace Middle Plate Kit (I) Items Materials: STEP1 Steps Assembly operations Description: Turn back the unit as shown in the Figure Remove the battery Sequence Notes: STEP2 (本文件不得擅自塗改或影印) FMRD33B... - Page 18 SERVICE MANUAL Replace Middle Plate Kit (II) Items Material: STEP1 Steps Assembly operations Description: Remove the Tablet protection Rubber (marked in red circle)將 Tablet 手把帶與 各紅圈處之四角防撞 Rubber 卸下 Remove screws (marked red circle.)將各 紅圈處內之螺絲卸下 Sequence Note: STEP2 (本文件不得擅自塗改或影印) FMRD33B...
- Page 19 SERVICE MANUAL Replace Middle Plate Kit (III) Items Materials: STEP1 Steps Assembly operations Description: Remove antenna cable (marked in red circle, after removing cables, remove the thermal pad on the Heat sink ( marked in red box) Then remove the thermal pad at the copper column (pointed in red arrow)將...
- Page 20 SERVICE MANUAL Replace Middle Plate Kit (IV) Items Material: STEP1 Steps Assembly operations Description: Unplug each cables connected from the main board: SPK Cable(A)、Touch Cable(B)、DB04 Cable(C)將 M/B 上各箭 頭所指處之線材: SPK Cable(A)、Touch Cable(B)、DB04 Cable(C)卸下 Remove the screw from the main board (marked in red circle)卸下各紅圈處之螺...
- Page 21 SERVICE MANUAL Replace Middle Plate Kit (V) Items Material: STEP1 Steps Assembly operations Description: Release the screws (marked in red circle) then remove the Dock Board.鬆開紅圈處 各螺絲,將 Dock Board 移除 Release the screws (marked in red circle) then remove the Battery Board 將紅圈處...
- Page 22 SERVICE MANUAL Replace Middle Plate Kit (VI) Items Materials: STEP1 Steps Assembly operations Description: First remove each screws (marked in red circle) then unplug touch controller cable (pointed in red arrow)將紅圈處各螺絲卸 下,以拆下中隔板組件,並拔除箭頭處 Touch 轉接線 Remove all screws (marked in red circle) then take out panel from middle plate.
-
Page 23: Replace M/B Kit (I)
SERVICE MANUAL Replace M/B Kit (I) Items Materials:: STEP1 Steps Assembly operations Description:: Turn back the unit as shown in the Figure Remove the battery Sequence Notes: STEP2 (本文件不得擅自塗改或影印) FMRD33B... - Page 24 SERVICE MANUAL Replace M/B Kit (II) Items Material: STEP1 Steps Assembly operations Description Remove the Tablet protection Rubber (marked in red circle)將 Tablet 手把帶與 各紅圈處之四角防撞 Rubber 卸下 Remove screws (marked red circle.)將各 紅圈處內之螺絲卸下 Sequence Note: STEP2 (本文件不得擅自塗改或影印) FMRD33B...
- Page 25 SERVICE MANUAL Replace M/B Kit (III) Items Materials: STEP1 Steps Assembly operations Description: Remove antenna cable (marked in red circle, after removing cables, remove the thermal pad at the Heat sink ( marked in red box) Then remove the thermal pad at the copper column (pointed in red arrow)將...
- Page 26 SERVICE MANUAL Replace M/B Kit (IV) Items Material: STEP1 Steps Assembly operations Description: Unplug each cables connected from the main board: SPK Cable(A)、Touch Cable(B)、DB04 Cable(C)將 M/B 上各箭 頭所指處之線材: SPK Cable(A)、Touch Cable(B)、DB04 Cable(C)卸下 Remove screws from the main board (marked in red circle)卸下各紅圈處之螺...
- Page 27 SERVICE MANUAL Replace M/B Kit (V) Items Material: STEP1 Steps Assembly operations Description: Remove all screws (marked in red circle), then remove SSD(A)、RAM(B)、Wifi+BT Card(C) M/B disassemble is done. Please follow SOP to re- assemble unit accordingly 如要還原,請依照 SOP 執 行 STEP2 Sequence Notes:...
-
Page 28: Replace Osd Kit (I)
SERVICE MANUAL Replace OSD Kit (I) Items Materials: STEP1 Steps Assembly operations Description: Turn back the unit as shown in the Figure Remove the battery Sequence Notes: STEP2 (本文件不得擅自塗改或影印) FMRD33B... - Page 29 SERVICE MANUAL Replace OSD Kit (II) Items Material: STEP1 Steps Assembly operations Description: Remove the Tablet protection Rubber (marked in red circle)將 Tablet 手把帶與 各紅圈處之四角防撞 Rubber 卸下 Remove the screw (marked red circle.)將 各紅圈處內之螺絲卸下 Sequence Note: STEP2 (本文件不得擅自塗改或影印) FMRD33B...
- Page 30 SERVICE MANUAL Replace OSD Kit (III) Items Materials: STEP1 Steps Assembly operations Description: Remove antenna cable (marked in red circle, after removing cables, remove the thermal pad on the Heat sink ( marked in red box) Then remove the thermal pad at copper column (pointed in red arrow)將...
- Page 31 SERVICE MANUAL Replace OSD Kit (IV) Items Material: STEP1 Steps Assembly operations Description: Unplug each cables connected from the main board: SPK Cable(A)、Touch Cable(B)、DB04 Cable(C)將 M/B 上各箭 頭所指處之線材: SPK Cable(A)、Touch Cable(B)、DB04 Cable(C)卸下 Remove screws from the main board (marked in red circle)卸下各紅圈處之螺...
- Page 32 SERVICE MANUAL Replace OSD Kit (V) Item Material: STEP1 Steps Assembly operations Description: Release screws (marked in red circle) then remove the Dock Board.鬆開紅圈處各螺 絲,將 Dock Board 移除 Release the screws (marked in red circle) then remove the Battery Board 將紅圈處 各螺絲卸下,以先行拆下...
- Page 33 SERVICE MANUAL Replace OSD Kit (VI) Items Material: STEP1 Steps Assembly operations Description: First remove all screw (marked in red circles) then remove the shielding plate.將 紅圈處各螺絲卸下, 以拆下中隔板組件 Remove all screw (marked in red circle) then remove the OSD board. After removal replace with new OSD board.
-
Page 34: Replace Dock Board Kit (I)
SERVICE MANUAL Replace Dock Board Kit (I) Items Materials: STEP1 Steps Assembly operations Description: Turn back the unit as shown in the Figure Remove the battery Sequence Notes: STEP2 (本文件不得擅自塗改或影印) FMRD33B... - Page 35 SERVICE MANUAL Replace Dock Board Kit (II) Items Material: STEP1 Steps Assembly operations Description: Remove the Tablet protection Rubber (marked in red circle)將 Tablet 手把帶與 各紅圈處之四角防撞 Rubber 卸下 Remove the screw (marked red circle.)將 各紅圈處內之螺絲卸下 Sequence Note: STEP2 (本文件不得擅自塗改或影印) FMRD33B...
- Page 36 SERVICE MANUAL Replace Dock Board Kit (III) Items Materials: STEP1 Steps Assembly operations Description: Remove antenna cable (marked in red circle, after removing cables, remove the thermal pad on the Heat sink ( marked in red box) Then remove the thermal pad at copper column (pointed in red arrow)將...
- Page 37 SERVICE MANUAL Replace Dock Board Kit (IV) Items Material: STEP1 Steps Assembly operations Description: Unplug each cables connected on the main board: SPK Cable(A)、Touch Cable(B)、 DB04 Cable(C)將 M/B 上各箭頭所指處 之線材: SPK Cable(A)、Touch Cable(B)、DB04 Cable(C)卸下 Remove the screw from the main board (marked in red circle)卸下各紅圈處之螺...
- Page 38 SERVICE MANUAL Replace Dock Brd Kit (V) Items Material: STEP1 Steps Assembly operations Description: Remove all screw (marked in red circle) then remove Dock Board, after removal replace with new Dock board. 將紅圈處 各螺絲卸下 , 以拆下 Dock Brd , Dock Brd 拆卸完成...
-
Page 39: Replace Dim Brd Kit (I)
SERVICE MANUAL Replace Dim Board Kit (I) Items Materials: STEP1 Steps Assembly operations Description: Turn back the unit as shown in the Figure Remove the battery Sequence Notes: STEP2 (本文件不得擅自塗改或影印) FMRD33B... - Page 40 SERVICE MANUAL Replace Dim Board Kit (II) Items Material: STEP1 Steps Assembly operations Description: Remove the Tablet protection Rubber (marked in red circle)將 Tablet 手把帶與 各紅圈處之四角防撞 Rubber 卸下 Remove the screw (marked red circle.)將 各紅圈處內之螺絲卸下 Sequence Note: STEP2 (本文件不得擅自塗改或影印) FMRD33B...
- Page 41 SERVICE MANUAL Replace Dim Board Kit (III) Items Materials: STEP1 Steps Assembly operations Description: Remove antenna cable (marked in red circle, after removing cables, remove the thermal pad on the Heat sink ( marked in red box) Then remove the thermal pad at the copper column (pointed in red arrow)將...
- Page 42 SERVICE MANUAL Replace Dim Board Kit (IV) Items Material: STEP1 Steps Assembly operations Description: Unplug each cables connected on the main board: SPK Cable(A)、Touch Cable(B)、 DB04 Cable(C)將 M/B 上各箭頭所指處 之線材: SPK Cable(A)、Touch Cable(B)、DB04 Cable(C)卸下 Remove the screw from the main board (marked in red circle)卸下各紅圈處之螺...
- Page 43 SERVICE MANUAL Replace Dim Board Kit (V) Items Material: STEP1 Steps Assembly operations Description: Remove screws (marked in red circle) and also remove the hexagonal copper column (pointed in red arrow), unplug panel cable (pointed in black arrow) then finally remove DB04 Board and I/O board. (Check out indicated in yellow arrow) after removal replace with new Dim Board kit.
-
Page 44: Replace I/O Brd Kit (I)
SERVICE MANUAL Replace I/O Board Kit (I) Items Material: STEP1 Steps Assembly operation description: Turn back the unit as shown in the Figure. Remove the battery Sequence Notes: STEP2 (本文件不得擅自塗改或影印) FMRD33B... - Page 45 SERVICE MANUAL Replace I/O Board Kit (II) Items Material: STEP1 Steps Assembly operations Description: Remove the Tablet protection Rubber (marked in red circle) Remove the screw (marked red circle.) Sequence note: STEP2 (本文件不得擅自塗改或影印) FMRD33B...
- Page 46 SERVICE MANUAL Replace I/O Board Kit (III) Items Materials: STEP1 Steps Assembly operations Description: Remove antenna cable (marked in red circle, after removing cables, remove the thermal pad on the Heat sink ( marked in red box) Then remove the thermal pad at the copper column (pointed in red arrow) 將紅圈處各天線線材卸下...
- Page 47 SERVICE MANUAL Replace I/O Board Kit (IV) Items Material: STEP1 Steps Assembly operations Description: Unplug each cables connected from the main board: SPK Cable(A)、Touch Cable(B)、DB04 Cable(C)將 M/B 上各箭 頭所指處之線材: SPK Cable(A)、Touch Cable(B)、DB04 Cable(C)卸下 Remove the screw from the main board (marked in red circle)卸下各紅圈處之螺...
- Page 48 SERVICE MANUAL Replace I/O Board Kit (V) Items Material: STEP1 Steps Assembly operations Description: Remove each screw (marked in red circle), then remove hexagonal copper column pointed in red arrow, unplug panel cable (pointed in black arrow) then finally remove the I/O board. (check out indicated in yellow arrow )After removal replace with new I/O board.將紅圈處各螺絲卸...
-
Page 49: Replace Battery Brd Kit (I)
SERVICE MANUAL Replace Battery Board Kit (I) Items Materials: STEP1 Steps Assembly operations Description: Turn back the unit as shown in the Figure Remove the battery Sequence Notes: STEP2 (本文件不得擅自塗改或影印) FMRD33B... - Page 50 SERVICE MANUAL Replace Battery Board Kit (II) Items Material: STEP1 Steps Assembly operations Description: Remove the Tablet protection Rubber (marked in red circle)將 Tablet 手把帶與 各紅圈處之四角防撞 Rubber 卸下 Remove the screw (marked red circle.)將 各紅圈處內之螺絲卸下 Sequence Note: STEP2 (本文件不得擅自塗改或影印) FMRD33B...
- Page 51 SERVICE MANUAL Replace Battery Board Kit (III) Items Materials: STEP1 Steps Assembly operations Description: Remove antenna cable (marked in red circle, after removing cables, remove the thermal pad on the Heat sink ( marked in red box) Then remove the thermal pad at the copper column (pointed in red arrow)將...
- Page 52 SERVICE MANUAL Replace Battery Board Kit (IV) Items Material: STEP1 Steps Assembly operations Description: Unplug each cables connected from the main board: SPK Cable(A)、Touch Cable(B)、DB04 Cable(C)將 M/B 上各箭 頭所指處之線材: SPK Cable(A)、Touch Cable(B)、DB04 Cable(C)卸下 Remove the screw from the main board (marked in red circle)卸下各紅圈處之螺...
- Page 53 SERVICE MANUAL Replace Battery Board Kit (V) Items Materials: STEP1 Steps Assembly operations Description: Remove the screw (marked in red circle) then finally remove the Battery board, after removal replace with new battery board.將 紅圈處各螺絲卸下,以拆下 Battery Brd,Battery Brd 拆卸完成 Please follow SOP to re- assemble unit accordingly.
-
Page 54: Replace Ssd Kit (I)
SERVICE MANUAL Replace SSD Kit (I) Items Materials: STEP1 Steps Assembly operations Description: Turn back the unit as shown in the Figure Remove the battery Sequence Notes: STEP2 (本文件不得擅自塗改或影印) FMRD33B... - Page 55 SERVICE MANUAL Replace SSD (II) Items Material: STEP1 Steps Assembly operations Description: Remove the Tablet protection Rubber (marked in red circle)將 Tablet 手把帶與 各紅圈處之四角防撞 Rubber 卸下 Remove the screw (marked red circle.)將 各紅圈處內之螺絲卸下 Sequence Note: STEP2 (本文件不得擅自塗改或影印) FMRD33B...
- Page 56 SERVICE MANUAL Replace SSD (III) Items Materials: STEP1 Steps Assembly operations Description: Remove antenna cable (marked in red circle, after removing cables, remove the thermal pad on the Heat sink ( marked in red box) Then remove the thermal pad at copper column (pointed in red arrow)將...
- Page 57 SERVICE MANUAL Replace SSD (IV) Items Material: STEP1 Steps Assembly operations Description: Unplug each cables connected on the main board: SPK Cable(A)、Touch Cable(B)、 DB04 Cable(C)將 M/B 上各箭頭所指處 之線材: SPK Cable(A)、Touch Cable(B)、DB04 Cable(C)卸下 Remove the screw from the main board (marked in red circle)卸下各紅圈處之螺...
- Page 58 SERVICE MANUAL Replace SSD (V) Items Materials: STEP1 Steps Assembly operations Description: After removing the screw (marked in red circle) remove SSD (A). then replace new SSD.將紅圈處螺絲卸下後,拆下箭頭處 之 SSD(A),SSD 拆卸完成 Please follow SOP to re- assemble unit accordingly. 如要還原,請依照 SOP 執 行...
-
Page 59: Replace Ram (I)
SERVICE MANUAL Replace RAM (I) Items Materials: STEP1 Steps Assembly operations Description: Turn back the unit as shown in the Figure Remove the battery Sequence Notes: STEP2 (本文件不得擅自塗改或影印) FMRD33B... - Page 60 SERVICE MANUAL Replace RAM (II) Items Material: STEP1 Steps Assembly operations Description: Remove the Tablet protection Rubber (marked in red circle)將 Tablet 手把帶與 各紅圈處之四角防撞 Rubber 卸下 Remove the screw (marked red circle.)將 各紅圈處內之螺絲卸下 Sequence Note: STEP2 (本文件不得擅自塗改或影印) FMRD33B...
- Page 61 SERVICE MANUAL Replace RAM (III) Items Materials: STEP1 Steps Assembly operations Description: Remove antenna cable (marked in red circle, after removing cables, remove the thermal pad on the Heat sink ( marked in red box) Then remove the thermal pad at copper column (pointed in red arrow)將...
- Page 62 SERVICE MANUAL Replace RAM (IV) Items Material: STEP1 Steps Assembly operations Description: Unplug each cables connected from the main board: SPK Cable(A)、Touch Cable(B)、DB04 Cable(C)將 M/B 上各箭 頭所指處之線材: SPK Cable(A)、Touch Cable(B)、DB04 Cable(C)卸下 Remove the screw from the main board (marked in red circle)卸下各紅圈處之螺...
- Page 63 SERVICE MANUAL Replace RAM (V) Items Material: STEP1 Steps Assembly operations Description: Remove the RAM (A) from the main board,After RAM removal is done. Replace new RAM, Please follow SOP to re- assemble unit accordingly. 如要還 原,請依照 SOP 執行 Sequence Note: (本文件不得擅自塗改或影印) FMRD33B...
-
Page 64: Replace Wifi+Bt Card(I)
SERVICE MANUAL Replace Wifi+BT Card(I) Items Materials: STEP1 Steps Assembly operations Description: Turn back the unit as shown in the Figure Remove the battery Sequence Notes: STEP2 (本文件不得擅自塗改或影印) FMRD33B... - Page 65 SERVICE MANUAL Replace Wifi+BT Card(II) Items Material: STEP1 Steps Assembly operations Description: Remove the Tablet protection Rubber (marked in red circle)將 Tablet 手把帶與 各紅圈處之四角防撞 Rubber 卸下 Remove the screw (marked red circle.)將 各紅圈處內之螺絲卸下 Sequence Note: STEP2 (本文件不得擅自塗改或影印) FMRD33B...
- Page 66 SERVICE MANUAL Replace Wifi+BT Card(III) Items Materials: STEP1 Steps Assembly operations Description: Remove antenna cable (marked in red circle, after removing cables, remove the thermal pad on the Heat sink ( marked in red box) Then remove the thermal pad at copper column (pointed in red arrow)將...
- Page 67 SERVICE MANUAL Replace Wifi+BT Card(IV) Items Material: STEP1 Steps Assembly operations Description: Unplug each cables connected from the main board: SPK Cable(A)、Touch Cable(B)、DB04 Cable(C)將 M/B 上各箭 頭所指處之線材: SPK Cable(A)、Touch Cable(B)、DB04 Cable(C)卸下 Remove the screw from the main board (marked in red circle)卸下各紅圈處之螺...
- Page 68 SERVICE MANUAL Replace Wifi+BT Card(V) Items Material: STEP1 Steps Assembly operations Description: After removing screw(marked in red circle) remove Wifi+BT card (A),Wifi +BT card removal is done.將紅圈處螺絲卸下後, 拆下箭頭處之 Wifi+BT Card(A), Wifi+BT Card 拆卸完成 Replace new WIFI+BT card, Please follow SOP to re- assemble unit step by step.
-
Page 69: Replace Battery (I)
SERVICE MANUAL Replace Battery (I) Items Materials: STEP1 Steps Assembly operations Description: Turn back the unit as shown in the Figure Remove the battery Take new battery and replace (refer to SOP battery assembly) Sequence Notes: STEP2 (本文件不得擅自塗改或影印) FMRD33B... - Page 70 SERVICE MANUAL Part No 98T012A0002G Revision Station 圖示 Operation Name Test Flow Chart Remark 12.1” ID83 TPC Testing Process LED Indicator Audio Card Reader Test 1 Button Key RS232 Speaker Touch Wi-Fi Test 2 Bluetooth Burn Packaging (本文件不得擅自塗改或影印) FMRD33B...
- Page 71 SERVICE MANUAL Part No 98T012A0002G Revision Station 圖示 測試站 1 Operation Name LED Indicator Remark 步驟 測試作業說明: 1 LED for Power LED 上一 LED 為 Power 2 LED for Battery LED 上二 LED 為 Batte 3 LED under a HDD LED 下三...
- Page 72 SERVICE MANUAL Part No 98T012A0002G Revision Station 圖示 測試站 1 Operation Name Remark Steps Testing Description: Use USB Keyboard to update DOS BIOS 利用 USB 鍵盤隨身碟 DOS 更新 BIOS Or in Windows connect USB device to test 或於 Windows 接上 USB 裝置 Items Testing Description:...
- Page 73 SERVICE MANUAL Part No 98T012A0002G Revision Station 圖示 測試站 1 Operation Name Audio Remark Steps Testing Description: Connect headphone to test 接上耳機 Connect Microphone to test 接上麥克風 Using microphone headset listen to the Sound. 透過耳機聆聽麥克風端收錄之聲音 Items Judgment standard: Headset with microphone can be used Without failure.耳機與麥克風可使用無異...
- Page 74 SERVICE MANUAL Part No 98T012A0002G Revision Station 圖示 測試站 1 Operation Name Remark Steps Testing Description: Connect the network cable (one end connected to the Hub) 接上網路線(另一端已接上 Hub) Check the RJ45 Link LED & Active LED 檢查 RJ45 Link LED & Active LED Items Judgment standard:...
- Page 75 SERVICE MANUAL Part No 98T012A0002G Revision Station 圖示 測試站 1 Operation Name Card Reader Remark Steps Testing description: Insert SD or MMC Card to test. 插入 SD or MMC Card Items Judgment standard: System should be Secured Digital storage Device 系統出現 Secure Digital storage device SD or MMC Card can be added or deleted files .SD or MMC Card 可增刪檔案...
- Page 76 SERVICE MANUAL Part No 98T012A0002G Revision Station 圖示 測試站 1 Operation Name Button Key Remark Steps Testing Description: Sequentially press Menu, arrow keys, F1, F2, F3 to test.依序按 Menu,上下鍵, F1, F2, F3 Categorize Hot Tab Hotkey Function to test 搭配 HotTab Hotkey Function Items Judgment standard:...
- Page 77 SERVICE MANUAL Part No 98T012A0002G Revision Station 圖示 測試站 1 Operation Name RS232 Remark Steps Testing Description: Connect the RS232 testing tools 接上 RS232 測試治具 Items Judgment standard: There should be no error occur 無錯誤發生 Items Testing Tools: RS232 Test Items Notes: (本文件不得擅自塗改或影印) FMRD33B...
- Page 78 SERVICE MANUAL Part No 98T012A0002G Revision Station 圖示 測試站 1 Operation Name Speaker Remark Steps Testing description: Play music without headset to test speaker 不接耳機時播放音樂 items Judgment standard: Speaker should be normal used without any breaking sound. Speaker 可正常使用無破音 Items Testing Tools: Items Notes:...
- Page 79 SERVICE MANUAL Part No 98T012A0002G Revision Station 圖示 測試站 1 Operation Name Touch Remark Steps Testing description: Double click on the eGalax Touch icon 雙擊桌 面 eGalaxTouch Select Tool -> 4 Points Calibration 點選 Tool -> 4 Points Calibration Perform consecutive 4 points correction 依序...
- Page 80 SERVICE MANUAL Part No 98T012A0002G Revision Station 圖示 測試站 2 Operation Name Wi-Fi Remark Steps Testing Description: Select connection Wi-Fi AP to test.連接 Wi- 項目 判定標準: Ping 100 second test packet, lost rate of Less than 5% Ping 100 次測試封包 lost rat 低於...
- Page 81 SERVICE MANUAL Part No 98T012A0002G Revision Station 圖示 測試站 2 Operation Name Bluetooth Remark steps Testing Description: Use Bluetooth headset to test.使用藍芽耳機 測試 Play music file then test 10meters away.於 10 公尺遠處播放音樂檔案 Items Judgment standard : While playing music, should be normal and No sound interruption 播放之音樂需正常且...
- Page 82 SERVICE MANUAL Part No 98T012A0002G Revision Station 圖示 測試站 2 Operation Name Remark Steps Testing Description: Perform GPS Cold-Start test. Items Judgment Standard: Cold-Start time is 60 second or less. Must received 6 or more satellite signal Signal strength have3 SNR of 38 percent. Items Testing tools:...
Need help?
Do you have a question about the R12ID8M-RTM7GP and is the answer not in the manual?
Questions and answers