
Subscribe to Our Youtube Channel
Related Manuals for Metal Defender MD-6


Summary of Contents for Metal Defender MD-6
- Page 1 MD-6 User Manual Contact 772 Twin Rail Drive Minooka, IL 60447 Phone: (815) 467-6464 Email: support@metaldefender.com Website: www.metaldefender.com...
-
Page 2: Medical Safety
MEDICAL SAFETY Metal Defender makes every effort to ensure its products are safe for use. Extensive research by Metal Defender has produced no information which would indicate that its products have any adverse effects on medical implants, pregnancy, recording media or magnetic strips. -
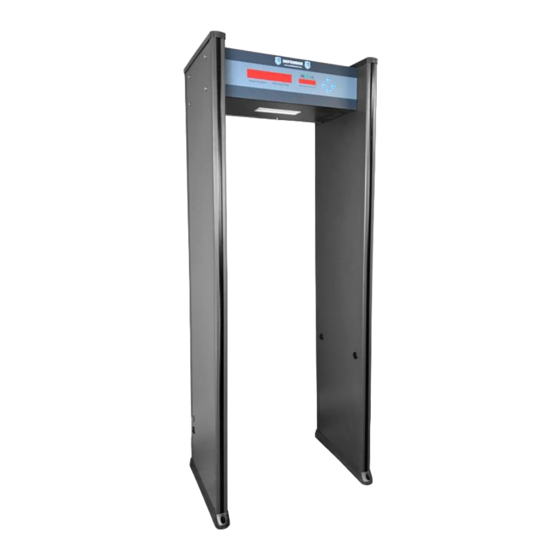
Page 3: Parts Of The Detector
Index Medical Safety – pg.2 Parts of the Detector – pg.3 Technical Specifications – pg.5 Product Features – pg.6 General Information – pg.6-7 Install Instructions – pg.8-9 Understanding the Zones – pg.9-10 Adjusting Sensitivity/Debugging – pg.11-13 How to Change Password – pg.14 FAQ –... - Page 4 Make sure the legs are aligned and so the Power Socket is positioned on the Front Right hand side when facing the Front. Type: 6 Zone Stand up metal detector Application: For use in commercial or industrial use. It detects both ferromagnetic and nonferromagnetic items.
-
Page 5: Technical Specifications
Technical Specifications Metal Defender’s MD-6 Walk-through Metal Detector provides pinpoint accuracy and discrimination features. This detector is effective in all environments including but not limited to airports, government buildings, correctional facilities, and sports venues. While being cost effective it also provides the same security that professionals worldwide receive from other brands. -
Page 6: Product Features
Product Features • Alarm Display, LED lights determine metal objects on both sides • Built in power supply • Waterproof for mild outdoor usage • Computer networking and ability to adjust security settings General Information Regional Sensitivity: The maximum sensitivity can detect metal content as small as a paper clip, in self-regulation between 0-99 sensitivity detection requirements may need to be adjusted. - Page 7 Safety Protection: Double password protected, allowing only authorized personnel operation and access. Multiple passwords allow for better security parameters. Parameter settings are automatically stored without interrupting power supply protection, both safe and convenient. Electromagnetic Radiation: EMC electromagnetic radiation standards; use of weak magnetic field technology, safe for pregnant women, cell phones, film, video tapes and other sound equipment.
-
Page 8: Installation Instructions
Installation Instructions Please read through the following instructions to properly install, program, and adjust the sensitivity of the Metal Defender walk-through metal detector. 1. Open the boxes and take out the 3 main pieces – Left probe, Right probe, and main board. - Page 9 4. Once you have the 8 bolts securely in place with the probes and main board, take the 8 nuts and tighten securely with the included Allan Wrench (you may need a wrench to hold nut in place when tightening). 5.
-
Page 10: Understanding The Zones
Understanding the Zones A: Alarm Zone Locations – There are 6 unique and precise zones that will monitor and attempt to detect for metal each time somebody walks through. Each zone can be individually programmed for a specific sensitivity. Each individual zone will light up when metal is detected and a beep will sound to alert security as to where the metal is located. - Page 11 Signal Strong or Weak Indicator: The signal strength of the board. (For best results, have the unit in a location where the signal strength is at zero dots or 1). Many times, the board will detect surrounding metal (door frames, HVAC vents, banisters or metal doors). Please keep the unit about 3 feet away from these types of items, or until the signal indicator is empty or at 1 dot.
- Page 12 If the password is correct, push the ENTER button to get to the next step If password is incorrect, please enter the 8888 password to bypass and change 4. This is the alarm time length adjustment. You will see the following: The warning time should read: D00X (the X will have a number 0-3) - The number represents the time in seconds the alarm will sound.
- Page 13 A Visual Flowchart to Help Guide with Instructions on Previous Page The best way to determine what sensitivity setting would work best for you, is to start on the lowest sensitivity setting – 01 and find an article of metal that you wish to pick up. Walk through with the object and increase sensitivity gradually until the detector picks up the metal.
- Page 14 How to Change Your Password You may want to change your password from the standard 1234 or may find yourself with an error code of E000 when debugging. No worries, the instructions below will show you how to change the password. Changing without E000 code The unit comes with the standard 1234 as a password.
- Page 15 What does the signal strength indicator mean? This is how the unit detects metal. This indicates the density and presence of metal. Sometimes if there are any overhead pipes, hvac vents, metal doors, metal cabinets or florescent light fixtures this may trigger this indicator to light up. Ideally you would want to keep 2-3 feet from these items and find a location where this indicator won’t light up continuously.
- Page 16 I set up my unit, but it will not sound when I walk through with metal? Always remember that the control panel with the buttons and LED should always be facing away from the people walking through. Continue with the flowchart and make sure that your alarm time length is not set at y-00.
- Page 17 SUGGESTED SINGLE LANE CONFIGURATION...
- Page 18 SUGGESTED MULTI-LANE CONFIGURAT...
- Page 19 2 YEAR WARRANTY INFORMATION Metal Defender warrants that each piece of security equipment manufactured by Metal Defender is protected by the following limited parts and labor warranty for a period of 24 (twenty-four) months (the “Warranty”). During this 24-month period Metal Defender will inspect and evaluate all equipment returned to its authorized repair station or factory to determine if the equipment meets Metal Defender’s performance specifications.
-
Page 20: Power Supply
Replacement Parts Please Call Us Directly For Price: Replacement Legs (815-290-5354) (815-467-6464) Please Call Us Directly For Price: Replacement Head Unit (815-290-5354) (815-467-6464) Speaker $19.99 Zone Card $22.99 Fuse $15.99 Power Supply $34.99 Motherboard $79.99 Power Cords $21.99 Set of Nuts + Bolts $14.99 Battery Back Up $165.00...
Need help?
Do you have a question about the MD-6 and is the answer not in the manual?
Questions and answers
We have Defender MD-6 and it is plugged in and power button lights up but there is no power to the unit head, need help on trouble shotting this issue.