
Related Manuals for NED CLISBee-S


Summary of Contents for NED CLISBee-S
- Page 1 User’s Manual Line Scan Camera Type: XCM4085TLCT6 NIPPON ELECTRO-SENSORY DEVICES CORPORATION...
- Page 2 Directive on Waste Electrical and Electronic Equipment (WEEE) Please return all End of Life NED products to the distributor from whom the product was purchased for adequate recycling and / or disposal. All costs of returning the Product to NED are borne by the shipper.
- Page 3 Introduction Thank you for purchasing NED’s Line Scan Camera. We look forward to your continued custom in the future. For safety use For your protection, please read these safety instructions completely before operating the product and keep this manual for future reference.
- Page 4 Design the system configuration so that a loop will not be formed by the ground potential differential. Do not disconnect the camera while rewriting an embedded memory. When you change exposure mode that is set at NED factory, input control signal (CC1) from the capture board. XCM4085TLCT6...
- Page 5 Product Warranty Warranty Period The product warranty period, as a general rule, is two years from purchase; however for detailed conditions please contact the sales representative for your region/country. However, in some cases due to the usage environment, usage conditions and/or frequency of use, this warranty period may not be applicable.
- Page 6 Note about Product Usage This product has been designed and manufactured as a general-purpose product for general industry. In applications expected to be life-critical or safety-critical, the installer or user is requested to install double or triple failsafe systems. Repair Service Outline ...
-
Page 7: Table Of Contents
Table of Contents 1. Product Outline ..............10 1.1 Features(XCM4085TLCT6) ....................10 1.2 Application ..........................10 1.3 Image Sensor ..........................11 1.4 Performance Specifications ....................11 2. Camera Setting and Optical Interface ....... 13 2.1 Setting the Camera ........................13 2.2 Fixing the Camera........................ - Page 8 4.2.13 Setting Scanning Direction .....................31 4.2.14 Saving Pixel Correction Data ..................32 4.2.15 Setting Pixel Correction (1) .....................32 4.2.16 Setting Pixel Correction (2) .....................32 4.2.17 Generating Test Pattern ....................32 4.2.18 Setting Gamma correction ....................33 4.2.19 Memory Initializing (Initializing Camera Settings) ............33 4.2.20 Memory Load ........................33 4.2.21 Memory Save ........................34 4.2.22 Returning the Camera Settings to its original status...........34...
- Page 9 6 Sensor Handling Instructions ..........55 6.1 Electrostatic Discharge and the Sensor ................55 6.2 Protecting Against Dust, Oil and Scratches ................55 6.3 Cleaning the Sensor Window ....................55 7 Troubleshooting ..............56 7.1 When there is no Image ......................56 7.2 When Noise is present in the Image ..................
-
Page 10: Product Outline
1. Product Outline 1.1 Features(XCM4085TLCT6) High speed readout 85MHz(6 taps for R,G,B x 2 of odd/even) Easy control of gain / offset / video output with external software. Easy connection with a variety of frame grabber boards via Camera Link interface ... -
Page 11: Image Sensor
1.3 Image Sensor The camera uses a CMOS sensor to acquire high quality images with high sensitivity. The pixel size is 10μm x 10μm. The camera uses RGB with 4096 pixels each. 1.4 Performance Specifications The Performance Specifications are shown in Table 1-4-1. It shows the data when the camera is operating at maximum scan rate, unless otherwise specified. - Page 12 Consumption Current (mA) (typically) Size W x H x D (mm) 62x100x72(F Mount) 400(F Mount) Mass (g) (Camera only) 1 Shading Correction 2 Gain/Offset/Video Output Adjustable Additional Functions 3 Programmable Exposure Control 4 Scan Direction Switching 5 Line delay function Note : *1) DN : Digital Number (8bit : 0-255 / 10bit : 0-1023) *2) Measurements were made at room temperature, daylight fluorescent light.
-
Page 13: Camera Setting And Optical Interface
2. Camera Setting and Optical Interface 2.1 Setting the Camera Use the M4 screw holes or the tripod screw hole to set the camera. 2.2 Fixing the Camera Use the M4 screw holes (4 at the front) to set the camera. The screw length for fixing the camera should be less than 6mm. -
Page 14: Optical Interface
2.3 Optical Interface Nikon F mount is provided as standard. Notes: 1) The amount and wavelengths of light required to capture useful images depend on the intended use. Factors include the physical properties, speed, the object’s spectral characteristics, exposure time, the light source characteristics, the specifications of the acquisition system and so on. -
Page 15: Hardware
3. Hardware 3.1 Camera Connection Use the camera in the following way: ① Camera Link cables must be used to connect the camera unit with the frame grabber board. Notes: When using 2 taps at each colour or 10-bit, two Camera Link cables are required. - Page 16 <Note: Choosing the appropriate Camera Link cable length > According to the Camera Link Specification, the maximum cable length is 10m. But the maximum cable length to be able to transfer data depends on the type of cable performance and clock speed. The actual maximum transmission distance becomes less than 10m at faster clock speeds, though the transmission distance of 10m is feasible at slower clock speeds.
-
Page 17: Input / Output Connectors And Indicator
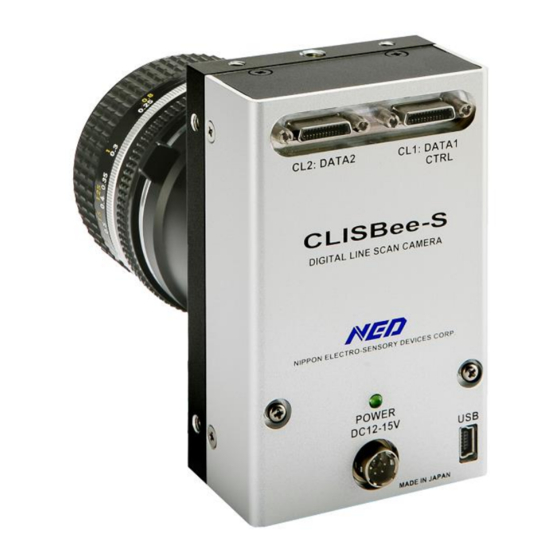
3.2 Input / Output Connectors and Indicator The layout of input /output connectors and the LED indicator are as follows. Mini Camera Link Connector(SDR26) Indicator(Green) Power Connector(HIROSE HR10A 6P) Mini-USB Connector ※Used for maintenance. Figure 3-2-1 Input / Output connectors and Power connector XCM4085TLCT6 UME-0062-01... -
Page 18: Connectors・Pin Assignments・Cables
3.3 Connectors・Pin Assignments・Cables This camera adopts Configurations of Camera Link interface standards. -Base Configuration for output of 1 tap at each colour with 8 bits, -Medium Configuration for output of 2 taps at each colour with 8 bits, output of 2 taps at each colour or output 1 tap at each colour with 10 bits -Full Configuration for output of 2 taps at each colour with 10bits Figure 3-3-1 shows the interface for the camera and a typical implementation for... - Page 19 The camera link port assignment is shown in the table below in case of output of 2 taps at each colour with 8 bits and output of 2 taps at each colour with 10 bits. Table 3-3-1 Port Assignment of Output 8bit RGB o/e 10bit RGB o/e 8bit RGB o/e...
- Page 20 Notes: In 24-bit colour, Base Configuration is used, so it is not necessary to connect a cable to CL2. Do not make the driver side of LVDS open but set the logic to H or L, even if not used. Set the LVDS, Channel Link receiver side to 100-ohm termination.
- Page 21 Table 3-3-1 Camera Link Connector (26-pin SDR Connector) pin assignments CL1(Base/Medium Configuration) CL2(Medium/Full Configuration) No NAME No NAME No NAME No NAME Inner Shield Inner Shield Inner Shield Inner Shield X0 - X0 + Y0 - Y0 + X1 - X1 + Y1 - Y1 +...
-
Page 22: Power Supply
This camera uses 6-pin round shape push-pull lock type connector for the Power Supply Figure 3-3-4 Power Supply Connector (HIROSE: HR10G-7R-6PB) Table 3-3-2 Pin Assignment of Power Supply Connector NAME Colour of Cable DC12 –15V White DC12 –15V DC12 –15V Green Black Note: The cable colour in the table describes the compatible cable DGPSH-10. -
Page 23: Camera Control
4 Camera Control The camera can be controlled through the serial communication. Two methods can be used to change the camera’s parameters. The first approach is to change parameters using CLISBeeCtrl (Camera control software). (See “8 CLISBeeCtrl”.) Or you can also change the parameters directly from your application by using serial communication commands to set values in the camera register. -
Page 24: Camera Sending Message (Pc Receiving Message)
4.1.3 Camera Sending Message (PC Receiving Message) Format R 1 >R CR >[SB] CR EOT Format R 2 >R CR >[MEM] CR >[SB] CR EOT > : Results start text (0 x 3E) Camera receive command analyzed results (See table 4-1-3-1) [SB] : Camera receive command send back [MEM] :... -
Page 25: Camera Control Commands
4.1.4 Camera Control Commands Table shows the 4-1-4-1 list of Camera Control Commands Table 4-1-4-1 Lists of Camera Control Commands Control Item VAL1 VAL2 Control Description Analog Gain x1,x1.5,x2,x3,x4,x5.5 0 to 5 (RGB Shared) (x1-x3 recommended) Digital Gain (RGB x1… x2 (1+VAL1/511) 0 to 511 Shared) Digital Gain R... - Page 26 Scanning Direction 0 /1 0: Forward / 1: Reverse Memory Initializing Reset to factory settings Memory Load Readout setup data in memory Memory Save Store present setup data in memory Arbitrary user’s correction data is Pixel Correction Data Save [gray] acquired and stored in the memory.
-
Page 27: Memory Setup Values (Factory Settings)
4.1.5 Memory Setup Values (Factory Settings) The memory setup values (factory settings) are shown in Table 4-1-5-1. Table 4-1-5-1 Memory Setup Values (Factory Settings) Control Item Control Description VAL1 VAL2 Analog Gain x1 ( 0 dB ) Digital Gain (RGB Shared) x1 ( 0 dB ) Digital Gain R gdxr... -
Page 28: Details On Commands
Pixel Correction target value User arbitrary correction data 1 (user settings 1) B target value(768 DN) Pixel Correction target value User arbitrary correction data 2 (user settings 2) R target value(768 DN) Pixel Correction target value User arbitrary correction data 2 (user settings 2) G target value(768 DN)... -
Page 29: Setting Digital Gain (2)
4.2.3 Setting Digital Gain (2) Set individual R, G, B gain (gdxr, gdxg, gdxb), “automatically”. Format S1 CMD CR Format R2 >R CR >[MEM] CR >[SB] CR EOT <Example> Send:awb CR Receive::>OK CR > awb CR EOT 4.2.4 Setting Digital Gain (3) Set R,G,B individual digital gain settings (gdxr, gdxg, gdxb) to initial value of “0”... -
Page 30: Setting Exposure Time
4.2.7 Setting Exposure Time Sets the exposure time. Only operates at Free Run/Ext Edge. Format S3 CMD □ VAL1 □ VAL2 CR, Format R1 >R CR >[SB] CR EOT VAL1 64 (Fixed Dividing setting) VAL2 *31~32767 (Setting Counter value) ... -
Page 31: Setting Data Output Bit Number
4.2.10 Setting Data Output Bit Number Sets the bit numbers of the data output. Format S3 CMD □ VAL1 CR , Format R1 >R CR >[SB] CR EOT VAL1 8,10(8: 8bits output at each RGB, 10: 10bits output at each RGB) ... -
Page 32: Saving Pixel Correction Data
4.2.14 Saving Pixel Correction Data Acquires the current pixel correction data (gray) and saves it in the flash memory. One set of correction data can be saved for each step of analog gain. Format S1 CMD CR, Format R1 >R CR >[SB] CR EOT ... -
Page 33: Setting Gamma Correction
4.2.18 Setting Gamma correction Switches Gamma correction value. S2 CMD □ VAL1 CR,Format R1 >R CR >[SB] CR EOT ● Format ● CMD gamma ● VAL 0,1,2,3(0:Off(1.0),1:0.45, 2:0.56 3: Reverse Negative-Positive) <Example> Set the gamma adjustment to 0.45 Send:gamma □ 1 CR Receive:>OK CR >... -
Page 34: Memory Save
>MFr 768 CR >MFg 768 CR >MFb 768 CR >MUr 768 CR >MUg 768 CR >MUb 768 CR >MVr 768 CR >MVg 768 CR >MVb 768 CR >rev 0 CR >clkcl 85 CR >gamma 0 CR >rfd 4 CR EOT 4.2.21 Memory Save Stores the current camera settings in the flash memory. -
Page 35: Digital Processing Flow In Fpga
4.3 Digital Processing flow in FPGA The digital processing flow in FPGA is shown below. Digital Gain & Offset Flat Field Correction Video Data From Sensor Dark image reference Bright image reference Digital Gain Digital Offset subtract multiplication Value Set Value Set Line Delay Output Format... -
Page 36: Serial Communication Settings
Notes: 1) The number of times the flash memory can be rewritten will vary depending on actual operational conditions. 2) After turning on the power supply, the camera always checks the memory status. If the data is not within the designated range due to a malfunction or other type of trouble, the memory will be automatically reset to the factory settings. -
Page 37: Video Output Format
4.7 Video Output Format The camera outputs 8-bit or 10-bit digital data. The A/D converter of the camera has a 10-bit resolution. For 8-bit output, the upper 8-bits of the signal can be output as video data. 8-bit(Default) 10-bit bit9 bit9... -
Page 38: Exposure Mode And Timing Chart
4093 4094 4095 4096 4190 XCLK DVAL LVAL 無効 無効 無効 無効 4093 4094 4095 4096 無効 無効 無効 無効 無効 無効 Invalid Invalid Invalid Invalid Invalid Invalid Invalid Invalid Invalid Invalid Invalid Invalid Invalid Invalid 無効 無効 無効 無効 4093 4094 4095... - Page 39 Data output at each colour at 85MHz 2taps:24.10 Readout time at 85MHz 1tap:48.19 at 40MHz 2taps:50.73 at 40MHz 1tap:101.45 Data output at each colour at 85MHz 2taps:24.97~23376.02 Scan Rate at 85MHz 1tap:49.22~23376.02 at 40MHz 2taps:52.79~23376.02 at 40MHz 1tap:103.44~23376.02 (unit:μs) 露光 Exposure 読み出し...
-
Page 40: External Trigger Exposure Mode (External Trigger Edge)
4.8.2 Exposure Mode ( External Trigger External trigger edge In external trigger exposure mode (Trigger Edge), the exposure time is determined by the setting through the serial communication, each exposure starts with the rising edge and the line period is determined by the time from rising edge to rising edge of the trigger pulse. -
Page 41: External Trigger Exposure Mode (Trigger Level)
4.8.3 External Trigger Exposure Mode (Trigger Level) In external trigger exposure mode (Trigger Level), the exposure time is determined by the high trigger pulse time, each exposure starts with the rising edge and the line period is determined by the time rising edge to rising edge of trigger pulse. -
Page 42: Digital Gain / Offset Settings
4.9 Digital Gain / Offset Settings 4.9.1 Setting Digital Gain (1) Digital gain is set with the following commands: Digital Gain (Common) “gdx”; digital gain (R) “gdxr”; digital gain (G) “gdxg”; digital gain (B) “gdxb”. RGB (Common) digital gain setting should be used when making small adjustments to multiple cameras. -
Page 43: Setting Analog Gain
Note : Adjust amount of offset in accordance with the requirements of your camera system. The gradients of lines do not change. 4.10 Setting Analog Gain Gain can be adjusted by setting analog gain (6 steps, x1~x5.5) or digital gain (512 steps, x1~x2). -
Page 44: Pixel Correction
4.11 Pixel Correction Generally speaking, image sensors (CCD, CMOS and so on) have fixed pattern noise and photo response non-uniformity. When you use a lens, lens shadings and light sources also can cause non-uniformity. The camera is factory set to the optimal correction before shipping in order to provide images of high grade. -
Page 45: Operating Procedure
4.11.1 Operating Procedure Pixel Correction settings are done for either User Arbitrary Correction Data 1 or 2. Send the command “shc2 CR” or “shc3 CR” via the COM port; User Arbitrary Correction Data will be made active. Place a uniformly white object fully in the camera view. Now we can acquire User Arbitrary Correction Data (gray). -
Page 46: Test Pattern
4.13 Test Pattern The test pattern can be used to check whether your system is correctly receiving the camera data. The gray test patterns for 24 and 30-bit colour are shown below. Figure 4-13-1 24-bit Colour Gray Test Pattern Figure 4-13-2 24-bit Colour Gray Test Image Where pixel 0 has the value 0DN, the value increases by 1DN each pixel, up to 255DN, then the pattern repeats. - Page 47 The gray XY test pattern for 24 and 30-bit colour are shown below. Figure 4-13-5 24-bit Colour Gray XY Test Pattern Figure 4-13-6 24-bit Colour Gray XY Test Image The value increases by 1DN each pixel, up to 255DN in both X-direction and Y-direction(downward), then the pattern repeats.
- Page 48 The Colour 24-/30-bit colour bar test pattern is shown below. Figure 4-13-9 24-bit Colour Bar Test Pattern Figure 4-13-10 24-bit Colour Bar Test Image From the first pixel, the image is a sequence of blocks of 512 pixels: Black (R:0 G:0 B:0), White (R;255, G:255, B:255), Yellow (R:255 G:255 B:0), Aqua (R:0 G:255 B:255), Green (R:0 G:255 B:0) Pink: (R:255 G:0 B: 255), Red (R:255 G:0 B:0), Blue (R:0 G: 0 B:255)
-
Page 49: Line Delay Correction Setting
From the first pixel, the image is a sequence of blocks of 512 pixels: Black (R:0 G:0 B:0), White (R;1023, G:1023, B:1023), Yellow (R:1023 G:1023 B:0), Aqua (R:0 G:1023 B:1023), Green (R:0 G:1023 B:0) Pink: (R:1023 G:0 B: 1023), Red (R:1023 G:0 B:0), Blue (R:0 G: 0 B:1023) 4.14 Line Delay Correction Setting Three (3) line sensors of this camera are located laterally at one line interval. -
Page 50: Line Fine Adjusting Correction Setting
4.15 Line Fine Adjusting Correction Setting The Line delay correction setting on 4.14 can be used for correcting the deviation of delay between output datas of each colour at the unit of one line. This line fine adjusting correction can be used at the unit of a half of line by the corrective calculation. -
Page 51: Camera Scan Readout Direction Setting
4.17 Camera Scan Readout Direction Setting The camera scan readout direction can be changed from forward to reverse, or vice versa.The correlation between the camera scan readout direction and web (object movement) direction is shown below. 4096 4096 Forward Reverse Web Direction Movement Direction... -
Page 52: Confirming Camera Settings
5 Confirming Camera Settings 5.1 Before Power-on Please check the exterior for any damages that may have been caused during transportation or handling etc. ① Confirm the pin assignment of the power cable. (See table 3-3-2 and Figure 3-3-4) ② Confirm the direction and the channel of the cables. Some Camera Link cables are directional. -
Page 53: After Power-On
5.2 After Power-on (1) Confirm sent and received commands using the camera control utility. Launch CLISBeeCtrl, set COM port and connect. Click “Memory Dump” and wait for the response. Figure 5-2-1 Confirmation of Connection (2) Set a trigger mode and a video output mode with the camera control utility. Figure 5-2-2 Setting of Exposure Mode and Video Output Mode XCM4085TLCT6 UME-0062-01... -
Page 54: In Operation
(3) Capture images using a camera interface board utility. In case of Matrox’s Solios, it is convenient to use Intellicam. Figure 5-2-3 Solios Intellicam dcf Window 5.3 In Operation (1) Does acquisition time out error occur? <Cause> ①Captured images are too heavy. Note: If there are many filtering processes, the assignments to the driver may be insufficient. -
Page 55: Sensor Handling Instructions
6 Sensor Handling Instructions 6.1 Electrostatic Discharge and the Sensor CMOS sensors are susceptible to damage from electrostatic discharge and can become defective. 6.2 Protecting Against Dust, Oil and Scratches The CMOS sensor window is part of the optical path and should be handled like other optical components with care. -
Page 56: Troubleshooting
7 Troubleshooting The following pages contain several troubleshooting charts that can help you find the cause of problems users sometimes encounter. Are the correct connectors being used 7.1 When there is no Image between the camera and the power supply, they properly The indicator is glowing. - Page 57 The communication port is set correctly. Set the communication port correctly. The camera could be faulty. Please contact us for assistance. カメラの修理をご依頼ください。 capturing software program The capturing software program is provided with the board as a sample custom made. program. No image is captured with the Check the compatibility between the sample software program provided.
-
Page 58: When Noise Is Present In The Image
7.2 When Noise is present in the Image The camera has been used for 3 or Noise is present at the more years, ambient point of first use. temperature is higher than room temperature. servomotor magnetic valve is placed There are some degradable parts near the camera. - Page 59 Cables are asymmetric such as thin cables. One of the connectors of an asymmetric camera cable is to be connected with a camera. (Labeled as “Camera side”) The camera cables are too long. Use camera cables in accordance with the transmission rate.
-
Page 60: When The Camera Becomes Hot
7.3 When the Camera becomes hot The consumption current of the power supply is larger than the rating. The camera is too hot to touch. The camera will become hotter than the ambient temperature while in operation because of self-heating. Allow sufficient air circulation around the camera to give it the longer life. -
Page 61: Clisbeectrl
8 CLISBeeCtrl 8.1 Overview The CLISBeeCtrl is the remote control software for “CLISBee*” camera using “NED Camera Control Protocol” (NCCP) from a PC. Connectable interfaces are following. 1)Camera Link API 2)Communication Port (Including a virtual COM port provided by the Frame grabber) 8.2 System Requirements... -
Page 62: Operation
8.5 Operation 8.5.1 Start Program Open Windows Explorer and Double-click the “CLISBeeCtrl.exe”. It is possible to switch the page by clicking each tab under the window. A B C D Buttons in the tool-bar have the following functions. A: Exporting parameters in the text file format. B: Load the parameters from a text file (*.txt file) C: Connection with the camera. -
Page 63: Selecting Interface And Timeout Setting
8.5.2 Selecting interface and Timeout setting 8.5.2.1 Selecting interface 1) Click button E. 2) Select the interface in Drop-down-list-box. 3) Click “Setting” button to set the interface. (See 8.5.2.2. and 8.5.2.3.) 4) Click “OK” button. Click “Cancel” button when stopping setup. Note: The camera can be used without this operation after it has been set up correctly. - Page 64 8.5.2.2 Setting Communication port 1) Set up each item as follows. (NED standard) However, when the setup which differs to the camera to connect is shown, follow there. (1) Port: Select connecting port. (2) Bits per Second: 115200 (3) Data bits: 8...
- Page 65 8.5.2.3 Setting Camera Link API Input the DLL file name for Camera Link API by edit-box, Or click “Browse” button and select this file. Input value corresponding to the position of Camera Link cable to connect, into “Serial Index” column. Click “OK”...
-
Page 66: Connect
8.5.2.4 Setting Timeout Input each timeout value in the edit-box.(unit :ms) When you will click on the “Default” button, the value will be reset to the cameras default values. The meanings of each timeout are as follows. First Receive: The maximum time from sending a command to receiving the first data. -
Page 67: Disconnect And End Program
8.5.4. Disconnect and end program Click button D. Then click “X” button in the upper right of the window. 8.5.5. Check of the contents of communication Click “Console” tag near the bottom window. XCM4085TLCT6 UME-0062-01... -
Page 68: Control
8.6 Control 8.6.1 Gains and Offsets Operating it in『Gains & Offsets』tab. < Gain > Analog 1 : The signal will be sent to the camera every time you make a selection from the menu in the drop-down-list-box. Note: This camera does not use ‘Analog 2’ Digital : Set a value with the slider, the edit-box or the spin-button. -
Page 69: Clock & Integration
8.6.2 Clock & Integration Operating it in『Clock & Integration』tab. Clock : Shows the camera internal clock frequency. Note: Read Only Integration Time : Setting integration time. (Unit: μs) When the trigger mode is Free Run, and Ext Edge Dividing / Counter : First, choose a dividing clock from the drop-down-list-box. -
Page 70: Exposure Mode (Trigger Mode) & Video Output Mode
8.6.3 Exposure mode (Trigger Mode) & Video output mode Operating it in the『Trigger & Video』tab. (Trigger Mode) : Exposure mode Select Free Run Exposure mode, External Trigger Exposure mode and External Trigger level. The signal will be sent to the camera every time you make a selection from the menu in the drop-down-list-box. -
Page 71: Intelligence
8.6.4 Intelligence Operating it in the『Intelligence』tab. < Calibration > Calib White: Acquisition of white data and saving the calibration data to camera’s flash memory. Mode / Level: First, choose the mode from the drop-down-list-box. Next, set a value with the slider, the edit-box or the spin-button. Then, click “Send”... -
Page 72: Upgrade
8.7 Upgrade When installing a newer / updated software version from our company, Please perform in the following procedure. Check the CLISBeeCtrl has not started. Uninstall the old version software. (See “8.4.Uninstall”) Install new version software. (See “8.3.Install”) 8.8 How to Program Please refer sample programs in CLISBeeCtrl¥SampleProgram folder. -
Page 73: Others
Contents of this document are subject to change without prior notice. Every care has been taken in the preparation of this User’s Manual. If you should discover any errors or omissions, please notify your nearest NED representative. 9.2 Contact for support... -
Page 74: Product Support
If there is still a problem with your camera after checking it in accordance with the troubleshooting guide, turn off the power and call your NED representative. In such case, please inform us of the status of the camera. You can get the status on console by (1) executing the “sta”... - Page 75 Revision Date Changes Number 22 October 2015 Initial release XCM4085TLCT6 UME-0062-01...
Need help?
Do you have a question about the CLISBee-S and is the answer not in the manual?
Questions and answers