
Related Manuals for NED XCM8085DLMT8


Summary of Contents for NED XCM8085DLMT8
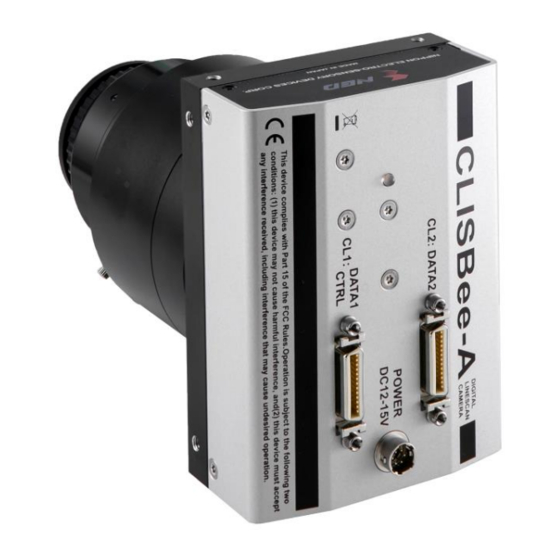
- Page 1 User’s Manual Line Scan Camera Type: XCM8085DLMT8 NIPPON ELECTRO-SENSORY DEVICES CORPORATION...
- Page 2 Directive on Waste Electrical and Electronic Equipment (WEEE) Please return all End of Life NED products to the distributor from whom the product was purchased for adequate recycling and / or disposal. All costs of returning the Product to NED are borne by the shipper.
- Page 3 Introduction Thank you for purchasing NED’s Line Scan Camera. We look forward to your continued custom in the future. For safety use For your protection, please read these safety instructions completely before operating the product and keep this manual for future reference.
- Page 4 For stabilized image capturing, turn on the power supply and execute aging for ten to twenty minutes before actually using the camera unit. Do not share the power supply with motor units or other devices that generate noise interference. Do not disconnect the camera while rewriting an embedded memory. XCM8085DLMT8 UME-0060-04...
- Page 5 As a general rule, in the first instance fault diagnosis should take the form of a telephone call or an email to enable us to assess the circumstances of the malfunction. However, depending on the customer’s requests, we, or our agent, may require an additional fee for this service. XCM8085DLMT8 UME-0060-04...
- Page 6 On request, arrangements can be made separately. Scope of Repair Service The above assumes business dealings and usage to take place in the customer’s region / country. In cases of business dealings and/or usage outside the customer’s region/country, separate consultation is required. XCM8085DLMT8 UME-0060-04...
-
Page 7: Table Of Contents
4.2.11 White Pixel Correction Data Save ................34 4.2.12 Setting Pixel Correction ....................35 4.2.13 Setting Exposure Time - Readout Time ............... 35 4.2.14 Returning the Camera Settings status ................ 36 4.2.15 Setting Pixel Readout Direction ................... 36 XCM8085DLMT8 UME-0060-04... - Page 8 7.1 When there is no Image ......................68 7.2 When Noise is present in the Image ..................70 7.3 When the Camera becomes hot ....................72 8 CLISBeeCtrl ......................73 8.1 Overview ............................ 73 8.2 System Requirements ......................73 XCM8085DLMT8 UME-0060-04...
- Page 9 8.7 Upgrade ............................. 85 8.8 How to Program ........................85 8.9 Attention on use........................85 9 Others ........................86 9.1 Notice ............................86 9.2 Contact for support ........................86 9.3 Product Support ........................87 Revision History ....................... 88 XCM8085DLMT8 UME-0060-04...
-
Page 10: Product Outline
1.2 Application Inspection of transparent panels and PCBs Flat panel display inspection Inspection of glass and sheet-like objects Inspection of high speed moving objects This camera utilizes an Intelligent Transportation System Outdoor surveillance XCM8085DLMT8 UME-0060-04... - Page 11 LED incident lighting Figure 1-2-1 Visual Inspection of PCBs Applicable Work COB, BGA and MCM printed circuit boards Unit Configuration 1. Camera: Line scan camera 2. Controller: Dedicated software for PC system Applicable Fields Inspection of patterns on film PCBs XCM8085DLMT8 UME-0060-04...
-
Page 12: Image Sensor
In addition, the output data rate can be selected at 40MHz by setting the camera link clock. 8192Pixels line A line B (View from camera mount side when the camera screw hole for a tripod is at the bottom) 4096 pixels with 14μm-square pixel equivalent by 2x2 pixels binning 4096Pixels 14um 14um XCM8085DLMT8 UME-0060-04... -
Page 13: Performance Specifications
(Photo Response Non Uniformity) with correction, at minimum gain Typically 10DN Random Noise (peak value at minimum gain) Camera Link(full/medium/base) ①8,10bit/8192pixels 8,4,2tap Camera Link (full/medium) Video output ②8,10bit/8192pixels x 2(all pixel readout)/8,4tap Camera Link (medium/base) ③8,10bit/4096pixels 4,2tap(2x2pixels binning) XCM8085DLMT8 UME-0060-04... - Page 14 4. Test Pattern Output On / Off 5. Scan Direction Switching 6. Display of internal camera temperature Note: *1) DN : Digital Number (8bit : 0-255) *2) Measurements were made at room temperature. The spectral responsivity is shown below. Figure 1-4-1 Spectral Responsivity XCM8085DLMT8 UME-0060-04...
-
Page 15: Camera Setting And Optical Interface
MADE IN JAPAN (66.7) (61.2) Indicator 4-M4 DEEP8 (Front) Mount M72×0.75 DEEP10 1st.pixel 4-M4 DEEP6 Cameralink Connector M72 Mount (Side) (11.75) (FB=31.8) Power Connector 2-M4 DEEP6 USB Connector (Bottom) 1/4"-20UNC DEEP6 (Bottom) Figure 2-2-1 Dimensions of the Camera XCM8085DLMT8 UME-0060-04... -
Page 16: Optical Interface
2.3 Optical Interface The XCM8085DLMT8 comes with M72-Mount as standard. 1) Quantities of light and the wavelength etc. of a source of light necessary to take the image for which the customer hopes are different according to the usage. The factor to... -
Page 17: Hardware
Figure 3-1-1 Connections between Camera and Frame Grabber Board and Power Supply Camera Link cable manufacturers may have two types of cable for the Camera Link Full Configuration board. See the specification and choose the appropriate cable. XCM8085DLMT8 UME-0060-04... -
Page 18: Input / Output Connectors And Indicator
SOL 6M CL E* (20~66MHz) SOL 6M FC E* (20~85MHz) 3.2 Input / Output Connectors and Indicator The layout of input /output connecters and the LED indicator are as follows. 【side panel】 Mini-USB *For maintenance Figure 3-2-1 Input/Output Connectors and Indicator XCM8085DLMT8 UME-0060-04... -
Page 19: Connectors・Pin Assignments・Cables
This camera adopts Full/Medium/Base Configuration of Camera Link interface standards. Figure 3-3-1 shows the interface for the camera and a typical implementation for the frame grabber interface. CC1(Control input) Figure 3-3-1 Camera / Frame Grabber Interface (Full Configuration) XCM8085DLMT8 UME-0060-04... - Page 20 Figure 3-3-2 Circuit of LVDS The camera has 26-pin MDR connectors for control signals of Camera Link, data signals and serial communications. #4-40 Figure 3-3-3 Camera Link Connector Half pitch (miniature half ribbon) shape Locking screw (UNC #4-40) type XCM8085DLMT8 UME-0060-04...
- Page 21 3M: 14B26 –SZLB – xxx – 0LC by or equivalent Notes: 1) To avoid uncoupling of the cable connectors during power on, make sure to clamp them with the locking screws. 2) Do not unplug the cables while power is being supplied to the camera. XCM8085DLMT8 UME-0060-04...
-
Page 22: Power Supply
Power supply voltage: DC+12 –15V (+/-5%) Consumption Current (rated): DC+12V: 700mA If the lamp fails to illuminate even after power is supplied, turn off power immediately. Inspect wiring. Check the voltage and capacity of the supplied power source. XCM8085DLMT8 UME-0060-04... -
Page 23: Camera Control
CMD□VAL 1□VAL2□VAL3 CR CMD: Control text (3 Bytes) Use 3 lowercase letters only. No numerals allowed. Carriage Return (0x0D) □: Space (0x20) or Comma (0x2C) VAL : Setting value (decimal, 1 Byte x maximum 5 digits <Example> gax□0 CR XCM8085DLMT8 UME-0060-04... -
Page 24: Camera Sending Message (Pc Receiving Message)
Table 4-1-3-1 Error Messages Camera Response Meaning Camera executed command CMD ERR! Command is not valid CMD OVR ERR! Command text line is too long VAL ERR! Parameter accepted was outside of specified MEM ERR! Camera memory error XCM8085DLMT8 UME-0060-04... -
Page 25: Camera Control Commands
Data Save memory. White Pixel User arbitrary white pixel correction Correction data is acquired and stores it in the Data Save memory. Pixel Correction 0/1/2 0: Correction Off 0 to 255 Setting /3/4/5 1: Factory black correction + factory XCM8085DLMT8 UME-0060-04... - Page 26 When you use 2 displays (disp=1), the value of output tap is equal to half of the number of Camera Link taps. When you use 1 display (disp=0), the value of output tap is equal to the number of Camera Link taps. (*2) Programmable Exposure Time=VAL2÷85 Exposure-Readout Time=2.141+(VAL1÷85) XCM8085DLMT8 UME-0060-04...
-
Page 27: Memory Setup Values (Factory Settings)
Pixel Correction Setting white correction Exposure-Readout Time 2.141μs Scanning Direction Forward Line Delay 0(Line Delay setting is Line Delay not used) Output Data Rate Setting clkcl 85MHz Output Signal Setting 1 8bit Output Signal Setting 2 Dual Lines Mode (Average) XCM8085DLMT8 UME-0060-04... -
Page 28: Details On Commands
CR (Setting digital gain 255(1023/(1023-255)=x1.33)) >OK >gdx 255 4.2.3 Setting Digital Offset Sets digital offset -127 to 127(0.5DN/step at 8bit) Format 2 CMD□VAL1 CR CMD VAL1 -127 to 127 <Example> odx□10 CR (Setting digital offset 8/10bit) >OK >odx 10 XCM8085DLMT8 UME-0060-04... -
Page 29: Setting Exposure Mode
(85MHz at the output data rate setting) [8192pixels_8tap] [4096pixels_4tap] 914~1048575 [8192pixels_4tap] [4096pixels_2tap] 1874~1048575 [8192pixels_2tap] 3922~1048575 (40MHz at the output data rate setting) [8192pixels_8tap] [4096pixels_4tap] 2010~1048575 [8192pixels_4tap] [4096pixels_2tap] 4187~1048575 [8192pixels_2tap] 8538~1048575 <Example> int□1□8500 <CR> (Setting exposure time 100μs) >OK >int 1,8500 XCM8085DLMT8 UME-0060-04... - Page 30 Exposure time1(inta) ≧ Exposure time2(intb). (85MHz at the output data rate setting) [8192pixels_8tap] 914~1048575 [8192pixels_4tap] 1874~1048575 [8192pixels_2tap] 3922~1048575 (40MHz at the output data rate setting) [8192pixels_8tap] 2010~1048575 [8192pixels_4tap] 4187~1048575 [8192pixels_2tap] 8538~1048575 <Example> Inta□8500 <CR> (Setting exposure time 100μs) >OK >inta 8500 XCM8085DLMT8 UME-0060-04...
- Page 31 Exposure time1(inta) ≧ Exposure time2(intb). (85MHz at the output data rate setting) [8192pixels_8tap] 914~1048575 [8192pixels_4tap] 1874~1048575 [8192pixels_2tap] 3922~1048575 (40MHz at the output data rate setting) [8192pixels_8tap] 2010~1048575 [8192pixels_4tap] 4187~1048575 [8192pixels_2tap] 8538~1048575 <Example> intb□8500 <CR> (Setting exposure time 100μs) >OK >intb 8500 XCM8085DLMT8 UME-0060-04...
-
Page 32: Memory Initializing (Initializing Camera Settings)
4.2.6 Memory Initializing (Initializing Camera Settings) Resets the flash memory to the factory default. Format 1 CMD CR CMD <Example> rst CR >OK >Type=XCM8085DLMT8 >Ver.=1.09_0x0143 >Serial=0 >gax 0 >gdx 0 >odx 0 >inm 0 >int 1,10000 >pad 0 >shc 1,200... -
Page 33: Memory Load
4.2.7 Memory Load Reads out the camera settings from the flash memory. Format 1 CMD CR CMD <Example> rfd CR >OK >Type=XCM8085DLMT8 >Ver.=1.09_0x0143 >Serial=0 >gax 0 >gdx 0 >odx 0 >inm 0 >int 1,10000 >pad 0 >shc 1,200 >tpn 0... -
Page 34: Memory Save
4.2.11 White Pixel Correction Data Save Saves the user arbitrary white pixel correction data in the flash memory. The data at each step of the analog gain can be saved. Format 1 CMD CR <Example> wht CR >OK >wht XCM8085DLMT8 UME-0060-04... -
Page 35: Setting Pixel Correction
4.2.13 Setting Exposure Time - Readout Time Prolongs the line period without changing the exposure time. Format 2 CMD□VAL1 CR CMD VAL 0 to 1048575 (XCM8085DLMT8 : 0 to 12336.176μs) <Example> pad□10 CR >OK >pad 10 XCM8085DLMT8... -
Page 36: Returning The Camera Settings Status
4.2.14 Returning the Camera Settings status Returns the current camera settings. Format 1 CMD CR CMD <Example> sta CR >OK >Type=XCM8085DLMT8 >Ver.=1.04_0x0138 >Serial=0 >gax 0 >gdx 0 >odx 0 >inm 0 >int 1,10000 >pad 0 >shc 1,200 >tpn 0 >rev 0... -
Page 37: Setting Outputsignal 1
Make sure that the “disp” command is set at 0 for one display. If the “disp” command is set at 1, the setting of the “vod” command is ignored on this outputsignal2 setting. <Example> vod□1 CR (Dual Line Mode (average)) >OK >vod 1 XCM8085DLMT8 UME-0060-04... -
Page 38: Setting Line Delay
4.2.20 Setting Output TAP Number Selects output format to 8tap / 4tap / 2tap. Format 2 CMD□VAL1 CR CMD VAL 8 : 8tap output 4 : 4tap output 2 : 2tap output <Example> tap□8 <CR> (8tap output) >OK XCM8085DLMT8 UME-0060-04... -
Page 39: Temperature Display
85MHz before the camera link clock changes >clkcl 40 from 85 to 40. That value was not within a setable range at the output data rate 40MHz. but the value changes automattically. Make sure that the desired value is set. (sta) XCM8085DLMT8 UME-0060-04... -
Page 40: Summary Of Settings Of Four Modes
(line B) 2x2binning (Average) 2x2binning 2x2 binning (Additional) 2x2binning (Additional ÷2) 2 Displays When you use 2 displays (disp=1), (2disp the value of output tap is equal to -1/0/1 mode half of the number of Camera Link (2line)) taps. XCM8085DLMT8 UME-0060-04... -
Page 41: Digital Processing Flow In Fpga
(2) Reads out the latest camera settings from the flash memory. (User settings if any or factory default settings) (3) Set up the camera with the setting value from the flash memory. After this sequence, the camera is ready to get images and output data. XCM8085DLMT8 UME-0060-04... -
Page 42: Saving And Loading Camera Settings
(From frame grabber board) Free Run(Programmable time setting) Not in use (Factory Setting) Ext Edge (External trigger edge + External trigger (CC1) is required Programmable time setting) Ext Level (External trigger level time External trigger (CC1) is required setting) XCM8085DLMT8 UME-0060-04... -
Page 43: Serial Communication Settings
The camera outputs 8bit or 10bit digital data through 8tap, 4tap or 2tap. 8-bit(Default) 10-bit bit9 bit9 bit8 bit8 bit7 bit7 bit6 bit6 bit5 bit5 8bit 10bit bit4 bit4 bit3 bit3 bit2 bit2 bit1 bit1 bit0 bit0 Figure 4-7-1 Pin Assignments of Digital Data XCM8085DLMT8 UME-0060-04... - Page 44 One display or two displays can be set with the “disp” command. 【One display】disp=0 ① This camera outputs 8/10 bit digital data through 8192pixels_8tap formats. ◆ FVAL = 0 (low level) fixed Figure 4-7-2 Video Output Phase of the Camera at XCM8085DLMT8(8192pixels_8tap) XCM8085DLMT8 UME-0060-04...
- Page 45 ② This camera outputs 8/10 bit digital data through 8192pixels_4tap formats. ◆ FVAL = 0 (low level) fixed Figure 4-7-3 Video Output Phase of the Camera at XCM8085DLMT8(8192pixels_4tap) ③ This camera outputs 8/10 bit digital data through 8192pixels_2tap formats. ◆ FVAL = 0 (low level) fixed...
- Page 46 ④ This camera outputs 8/10 bit digital data through 4096pixels_4tap formats [2x2mode(tap=4 / vod=4 or vod=5)] ◆ FVAL = 0 (low level) fixed Figure 4-7-5 Video Output Phase of the Camera at XCM8085DLMT8(4096pixels_4tap) ⑤ This camera outputs 8/10 bit digital data through 4096pixels_2tap formats [2x2mode(tap=2 / vod=4 or vod=5)]...
- Page 47 4 when the number of Camera Link taps is 8. vod 2 (For reference: If one display (disp=0)is set, the value of output tap is equal to the number of Camera tap.) Line A Line B Figure 4-7-7 Video Output Phase of the Camera at XCM8085DLMT8(16384pixels_8tap) XCM8085DLMT8 UME-0060-04...
- Page 48 The value of output is 2 when the number of Camera Link taps is vod 2 4. (For reference: If one display (disp=0) is set, the value of output tap is equal to the number of Camera tap.) Line_A Line B Figure 4-7-8 Video Output Phase of the Camera at XCM8085DLMT8(16384pixels_4tap) XCM8085DLMT8 UME-0060-04...
- Page 49 ■Sample for 2 Displays■ The sample of 2 displays (line A and line B) is shown below. Note: The exposure time values must be set as follows. Exposure time1(inta) ≧ Exposure time2(intb)”. intb 5000 inta 15000 Figure 4-7-9 sample at XCM8085DLMT8(16384pixels_8tap) XCM8085DLMT8 UME-0060-04...
-
Page 50: Exposure Mode And Timing Chart
51.19 8192pixels_2tap 48.19 102.40 4096pixels_4tap 12.05 25.60 4096pixels_2tap 24.09 51.19 (unit:μs) scan Exposure ① ② ③ ④ ⑤ ① ② ③ ④ Readout Figure 4-8-1-1 Free Run Exposure Mode Note: The readout is delayed one scan from exposure. XCM8085DLMT8 UME-0060-04... -
Page 51: External Trigger Exposure Mode (External Trigger Edge)
8192pixels_2tap 48.19 102.40 4096pixels_4tap 12.05 25.60 4096pixels_2tap 24.09 51.19 ≧0.026 Trigger pulse H time ≧0.026 Trigger pulse L time ≧12.906 ≧25.800 Trigger pulse cycle 8192pixels_8tap ≧24.200 ≧51.412 8192pixels_4tap ≧48.295 ≧102.600 8192pixels_2tap ≧12.906 ≧25.800 4096pixels_4tap ≧24.200 ≧51.412 4096pixels_2tap (unit:μs) XCM8085DLMT8 UME-0060-04... - Page 52 ① ② ③ Trigger (CC1) ① ② ③ Exposure ① ② Exposure Figure 4-8-2-1 External Trigger (Trigger Edge) Exposure Mode Note: The readout is delayed one scan from exposure. XCM8085DLMT8 UME-0060-04...
-
Page 53: External Trigger Exposure Mode (Trigger Level)
8192pixels_8tap ≧22.000 ≧49.212 time 8192pixels_4tap ≧46.095 ≧100.400 8192pixels_2tap ≧10.706 ≧23.600 4096pixels_4tap ≧22.000 ≧49.212 4096pixels_2tap Trigger pulse Low ≧2.200 time ≧12.906 ≧25.800 Trigger pulse cycle 8192pixels_8tap ≧24.200 ≧51.412 8192pixels_4tap ≧48.295 ≧102.600 8192pixels_2tap ≧12.906 ≧25.800 4096pixels_4tap ≧24.200 ≧51.412 4096pixels_2tap (unit:μs) XCM8085DLMT8 UME-0060-04... - Page 54 ① ③ ② Trigger (CC1) ① ② ③ Exposure ① ② Readout Figure 4-8-3-1 External Trigger (Trigger Level) Exposure Mode Note: The readout is delayed one scan from exposure. XCM8085DLMT8 UME-0060-04...
-
Page 55: Setting Offset
The gradient of the line does not change. DF : Offset Value Output Amount of Incident Light (lx・s) Figure 4-9-2 Offset Adjustment Adjust amount of offset in accordance with the requirements of your camera system. XCM8085DLMT8 UME-0060-04... -
Page 56: Setting Gain
Sensitivity (V/lx・s) x1.0 0.0dB x1.8 5.0dB x3.4 10.7dB x5.2 14.3dB x6.4 16.1dB x7.8 17.9dB x9.7 19.7dB 1213 x17.8 25.0dB 2225 Note: Digital gain x1, Pixel correction default (Factory white correction data, Correction level 200 DN / 8 bit) XCM8085DLMT8 UME-0060-04... - Page 57 (except 0), or high scan rate. In addition, gain setting x1.0 is recommended for reducing noise as noise is lower when gain is low. Keep in mind that illumination with higher brightness may be required as sensitivity becomes low. XCM8085DLMT8 UME-0060-04...
-
Page 58: Pixel Correction
Vin :Input data (digital) Vout :Output data (digital) The corrected data is expressed in the following equation. Vout= (Vin-Cal_bl) x Target_val / (Cal_wh-Cal_bl) Waveform before bit correction Output Pixel Number Waveform after bit correction Output Pixel Number Figure 4-11-1 Waveform before and after bit correction XCM8085DLMT8 UME-0060-04... -
Page 59: Command Settings
(3) Confirm that the camera returns “>OK” and “>wht”. Thus user white correction data is saved and loaded to the camera. (4) Send the “shc 2 VAL CR” command through serial communication. Then the user white correction will be on and set the correction level as “VAL”. XCM8085DLMT8 UME-0060-04... -
Page 60: Test Pattern
This camera can generate a test pattern. Use the test pattern to verify the proper timing and connections between the camera and the frame grabber board. The test pattern of XCM8085DLMT8, (10 bit 8192 Pixels) is as follows. Figure 4-12-1 Test Pattern of XCM8085DLMT8(10bit) In 10-bit mode, from pixel 0, 10 bit data is output in order (0,1,2,3... -
Page 61: Line Delay Setting
Line A Line B Figure 4-13-1 Line Delay Correction (Upper) abcde fghijk lmnop qrstuv The moving direction of the wxyz imaging object. 123456 (Form the bottom to the upper 7891011 imaging) (Bottom) Figure 4-13-2 Camera Setting and Line Delay(d□1) XCM8085DLMT8 UME-0060-04... -
Page 62: Confirming Camera Settings
(2) Confirm the direction and the channel of the cables. Some Camera Link cables are directional. If one of the connectors says “Camera side”, connect this to the camera. Camera Frame grabber side side Figure 5-1-2 Connection Direction of Camera Cable XCM8085DLMT8 UME-0060-04... - Page 63 The connection channel in case of “Solios”, Camera side connector CL1 and frame grabber side connector CHANNEL#0 Camera side connector CL2 and frame grabber side connector CHANNEL#1 CHANNEL #0 CHANNEL #1 Connector Figure 5-1-3 Channels of Camera Link Cables XCM8085DLMT8 UME-0060-04...
-
Page 64: After Power-On
Figure 5-2-1 Confirmation of Connection (2) Set a trigger mode and a video output mode with the camera control utility Trigger mode: Free run Video output: 10bit, 8192pixels_8tap Figure 5-2-2 Setting of Exposure Mode and Video Output Mode XCM8085DLMT8 UME-0060-04... - Page 65 (3) Capture images using a camera interface board utility. In case of Matrox’s Solios, it is convenient to use Intellicam. Figure 5-2-3 Solios Intellicam dcf Window XCM8085DLMT8 UME-0060-04...
-
Page 66: In Operation
(2) Are there dark lines in the direction of vertical scanning on the image? <Cause> <1>Dust on the sensor window. Dust may get onto the sensor window from the inside or the outside of the camera. Remove the dust with air or a lens cleaner. XCM8085DLMT8 UME-0060-04... -
Page 67: Sensor Handling Instructions
Dust can obscure pixels, producing dark lines on the image. 6.3 Cleaning the Sensor Window Dust: Can usually be removed by blowing the window surface using a compressed air blower. Oil: Wipe the window with a lint-free cloth wiper moistened with ethyl alcohol carefully and slowly. XCM8085DLMT8 UME-0060-04... -
Page 68: Troubleshooting
The sample software program is used to with the camera control the camera and is communicating successfully. To next page with the camera successfully. To next page To next page Confirm the communication software, the control protocol for the camera and commands. XCM8085DLMT8 UME-0060-04... - Page 69 The optical axes of the camera and Check the light source. If the images are the image sensor are aligned. too dark, try to increase the light intensity, and vice versa. The camera could be faulty. Please contact us for assistance. カメラの修理をご依頼ください。 XCM8085DLMT8 UME-0060-04...
-
Page 70: When Noise Is Present In The Image
(attached to a machine which applies stress to the cables). Check the condition of the camera cables and the power supply cable. The camera could be faulty. Please To next page contact us for assistance. XCM8085DLMT8 UME-0060-04... - Page 71 When the camera gain is on a high level, bright spots occur without incident light. The camera could be faulty. Please Secondary radiation (rays) contact us for assistance. could cause bright spots, but カメラの修理をご依頼ください。 this is not malfunction. XCM8085DLMT8 UME-0060-04...
-
Page 72: When The Camera Becomes Hot
Allow sufficient air circulation around the camera to give it the longer life. Keep the ambient temperature within the range of the specifications. The camera could be faulty. Please contact us for assistance. カメラの修理をご依頼ください。 XCM8085DLMT8 UME-0060-04... -
Page 73: Clisbeectrl
8 CLISBeeCtrl 8.1 Overview The CLISBeeCtrl is the remote control software for “CLISBee*” camera using “NED Camera Control Protocol” (NCCP) from a PC. Connectable interfaces are following. 1)Camera Link API 2)Communication Port (COM port, RS232C) *CLISBee is the nickname for XCM series camera. -
Page 74: Operation
It is possible to switch the page by clicking each tab under the window. A B C D E Buttons in the tool-bar have the following functions. A: Exporting parameters in the text file format. B: Connection with the camera. C: Disconnection. D: Setting Communication. E: Version Information. XCM8085DLMT8 UME-0060-04... -
Page 75: Selecting Interface And Timeout Setting
2) Select the interface in Drop-down-list-box. 3) Click “Setting” button to set the interface. (See 8.5.2.2. and 8.5.2.3.) Click “OK” button. Click “Cancel” button when stopping setup. Note: The camera can be used without this operation after it has been set up correctly. XCM8085DLMT8 UME-0060-04... - Page 76 8.5.2.2 Setting Communication port 1) Set up each item as follows. (NED standard) However, when the setup which differs to the camera to connect is shown, follow there. (1)Port: Select connecting port. (2) Bits per Second: 9600 (3) Data bits: 8...
- Page 77 Note: The camera can be used without this operation after it has been set up correctly. Note: DLL for Camera Link API is provided by the manufacturer of the grabber board. Please contact the manufacturer of the grabber board for detail. XCM8085DLMT8 UME-0060-04...
-
Page 78: Connect
Note: The camera can be used without this operation after it has been set up correctly. 8.5.3 Connect Click button B. Then you can control the camera. (See “8.6.Control”) Click the “Memory Dump” button to acquire the current data of the camera. XCM8085DLMT8 UME-0060-04... -
Page 79: Disconnect And End Program
8.5.4 Disconnect and end program Click button C. Then click “X” button in the upper right of the window. 8.5.5 Check of the contents of communication Click “Console” tag near the bottom window. XCM8085DLMT8 UME-0060-04... -
Page 80: Export Parameters To Text File
Input file name and click “Save” button. Present setting value of each control is saved by text format. 8.5.7 Import Parameters from text file Select menu “File” – “Text Load” Input file name and click “Open” button. Each command preserved in the text file is issued one by one. XCM8085DLMT8 UME-0060-04... -
Page 81: Control
This camera does not use ‘Analog 2’ Digital : Sets a value with the slider, the edit-box or the spin-button. Then, click “Send” button. < Offset > Digital : Sets a value with the slider, the edit-box or the spin-button. Then, click “Send” button. XCM8085DLMT8 UME-0060-04... -
Page 82: Clock & Integration
Shows the calculated value of the scan rate. (unit: μs ) Scanrate Scanrate -> Counter automatic setting: The Counter value of Clock, Diving, and Padding is calculated and set from the present value when the scanning cycle is set and then clicking on the “Scanrate->Counter Calculating” button. XCM8085DLMT8 UME-0060-04... -
Page 83: Exposure Mode (Trigger Mode) & Video Output Mode
ADC Characteristic Read Only Direction of scanning: The order of outputting data from the camera is switched in positive direction (forward) or opposite direction (reverse). XCM8085DLMT8 UME-0060-04... -
Page 84: Intelligence
Loading the data from the camera’s flash memory. Flash Save: Saving the data in the camera’s flash memory. Flash Initialize: Initializing the camera’s flash memory with the factory standard data. Note: It takes a while to save and initialize. XCM8085DLMT8 UME-0060-04... -
Page 85: Upgrade
Reproducing and distributing without notice the part or all of this software and this document is prohibited. Reverse engineering, decompiling, disassembling and modifying parts or all of this software without notice is prohibited. The specification of this software and the contents of this document may be changed without announcement . XCM8085DLMT8 UME-0060-04... -
Page 86: Others
Contents of this document are subject to change without prior notice. Every care has been taken in the preparation of this User’s Manual. If you should discover any errors or omissions, please notify your nearest NED representative. 9.2 Contact for support... -
Page 87: Product Support
If there is still a problem with your camera after checking it in accordance with the troubleshooting guide, turn off the power and call your NED representative. In such case, please inform us of the status of the camera. You can get the status by (1) executing the “sta”... -
Page 88: Revision History
Date Changes Number Initial release. 24 December 2015 Added the function to switch the data rate. 13 April 2016 Digital offset (0.5DN/step) 8 June 2016 P1 Photograph change 1 November 2016 P61 An uppre bottom reverses a photograph. XCM8085DLMT8 UME-0060-04...
Need help?
Do you have a question about the XCM8085DLMT8 and is the answer not in the manual?
Questions and answers