Advertisement
Quick Links
Advertisement

Related Manuals for Malloca K-3410DR


Summary of Contents for Malloca K-3410DR
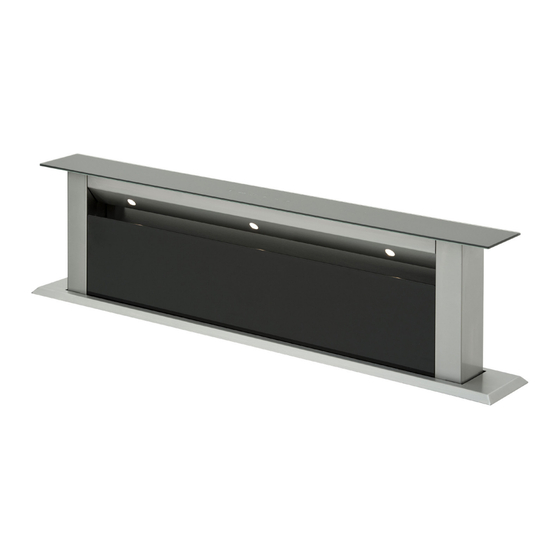
- Page 1 COOKER HOOD INSTRUCTIONS MANUAL K-3410DR...
- Page 2 E-mail: info@malloca.com Customer Care: Hotline: 1800 12 12 E-mail: chamsockh@malloca.com CÔNG TY TNHH MALLOCA VIỆT NAM Showroom: 279 Đường Nguyễn Văn Trỗi, Phường 10, Quận Phú Nhuận, TP.HCM Điện Thoại: (84) 28 39975 893 / 94 Fax: (84) 28 38447 102 - (84) 28 38633 882 Email: info@malloca.com...
-
Page 3: Safety Notes
1 Safety notes 1.1 User’s manual Read this user’s manual completely before you work with the hood. Keep this manual in a safe place. When passing on the appliance to third parties, please also include the user’s manual. Strictly observe the precautions in order to avoid injury to persons and damage to the appliance. - Page 4 1 Safety notes 1.3 Children, special people Persons (including children) because of mental, physical or motor skills not able to use the appliance safely (special people), may not use the appliance without supervision or may use it only according under directives of a responsible person. Do not leave the appliance unattended.
-
Page 5: Unpacking And Installation
2 Unpacking and Installation -Open flame can lead to inflammation in the hood. -Cleaning the hood with agents or devices which are not specifically approved for this purpose, e.g. with a steam cleaner Maintenance). - Repair work carried out by unauthorized personnel ( Customer Service). - Page 6 2 Unpacking and Installation 1.7 Defective equipment ATTENTION! Do not install or operate a defective hood. Repair work must be performed by qualified personnel authorized by the manufacture Customer Service). Any intervention by unauthorized personnel terminates the guarantee and warranty claims Warranty).
- Page 7 2 Unpacking and Installation 2.1 Unpacking The packaging materials are recyclable. Save resources reduce waste generation. Feed the packaging items to the material recycling process again. Your dealer will take the packaging back 2.2 Installation and electrical Observe the safety notes during installation connection and electrical connection ( Safety notes)
- Page 8 2 Unpacking and Installation 2.3.2 General information on The hood is seated in the countertop (worktop) installation behind the hotplate. WARNING! Danger to life in case of damage to power lines. When drilling, supply lines (electricity, gas and/or water pipes) can be damaged. Before drilling get informed about courses of the supply lines (e.g.
- Page 9 2 Unpacking and Installation 2.3.3 Installation drawings Fig. M1 Fig. M2a Fig. M2b Fig. M3...
- Page 10 2 Unpacking and Installation 2.3.4 Dimensions of the appliance...
- Page 11 1. Cutout in the countertop The cutout dimensions are: K-3410DR : 800 x103 mm - You can connect the exhaust air from all 2. Motor module port direction for directions to the hood (Fig. M3). For such...
- Page 12 2 Unpacking and Installation 2.3.6 Installation of the hood 1. Position the cutout to the countertop. The distance between the hob’s edge and the hood’s edge shall be max. 20 mm (see Figure M1). 2. Installing the hood housing ATTENTION! Insert the hood housing into the cutout until you can carefully place the mounting sleeve Do not install or operate a defective...
- Page 13 2 Unpacking and Installation To use this range hood in recirculation mode, 2.3.7 Hood for recirculation mode install the recirculation module so that the aspirated blown through recirculation module back to the kitchen area, e.g., through to the skirting board of the kitchen furniture, or the like.
-
Page 14: Operation
3 Operation Fig. 4: Touch control operation panel The hood is in STANDBY mode when it is powered. In this state, the display shows 3.1. Lift operation nothing. Moving the lift out By touching the or button, the lift moves Info: As long as the lift is extended by less than 20 cm, the display will show a “0”... - Page 15 3 Operation Safety function when clo- In the event that any obstacle exists on the sing the lift: way of the lift when closing, e.g. a pot, dishes, hands, etc., the movement is stopped when the cover plate hits the obstacle and the lift then goes up again.
- Page 16 3 Operation 3.4. Light on and off The light goes on when the lift is extended By touching the button you can turn the backlight on or off. Info: The lift must be extended to a height of 20 cm at the least. The light goes off when the lift is fully down-By touching the button the lift moves...
-
Page 17: Maintenance
4 Maintenance 4.1 General maintenance notes ATTENTION! The hood housing gets damaged if cleaned incorrectly. Discoloration may occur on the surfaces. Do not use any steam cleaner to clean hood housing. Aggressive cleaning agents such as vinegar-based cleaners, abrasive cleansers, abrasive granules or pointed items must not be used. - Page 18 4 Maintenance - Immediately absorb and wipe dry fresh drops or spots (e.g. acidic liquids such as fruit juices) with a cloth. - Do not pull or hit hot, heavy and sharp objects on top the painted surfaces. Maintenance of stainless steel Special stainless steel cleaning agents are surfaces suitable for the maintenance of stainless steel...
- Page 19 4 Maintenance - Pull the top edge suction plate forward and 4.4 Metallic grease filter removal, disengage from the locking latch. Thus, the installation and cleaning hood gets immediately de-energized Fig. 6a). Take out the edge suction plate upwards. To remove the grease filter ( Fig.
- Page 20 4 Maintenance ATTENTION! Too frequent cleaning or the use of aggressive cleaning agents may cause damage to the mesh fabric of the metallic grease filters. For cleaning, only use a detergent suitable for this purpose (e.g. dishwashing detergent). CAUTION! Performance is affected in case of undue maintenance intervals.
- Page 21 4 Maintenance 4.5.1 Removal and installation Remove the stainless steel front panel from of the carbon filter pad from and the magnets towards the front. Pull out into the recirculation module upwards the carbon filter pad which is now visible from the top. Reinsert the pad after washing or install a new one behind the stainless steel front panel, and push in the drawer contacting the magnets.
- Page 22 4 Maintenance 4.7 Lamp replacement WARNING! Risk of short circuit when replacing the lamp. The hood is electrically operated. Interrupt the power supply before changing the lamp. Replacement of the defective Power-LED To do this: The built-in power LED are very reliable and durable lamps.
- Page 23 4 Maintenance Cooker-hood does not work Illumination Lamp does not work Cooker-hoods air suction is weak Cooker-hood does not direct air out (at places without chimney)
- Page 24 4 Maintenance 4.8 If the product does not work: Make sure that the product is plugged in and the electric fuse of the electric wiring is Before you contact the technical running. Do not take any action that will service: damage the product.
Need help?
Do you have a question about the K-3410DR and is the answer not in the manual?
Questions and answers