Lincat Silverlink 600 User, Installation And Servicing Instructions
Gas chargrills
Hide thumbs
Also See for Silverlink 600:

Related Manuals for Lincat Silverlink 600


Summary of Contents for Lincat Silverlink 600
- Page 1 User, Installation and Servicing Instructions Silverlink 600 Gas Chargrills CG4 and CG6 IS205 ECN4245...
-
Page 2: Customer Information
Details are available from your local distributor or direct from us. Used for the purposes for which it is intended, and with careful maintenance as outlined in this User Guide, your Lincat product will give you years of trouble free service. IMPORTANT INFORMATION Please read all of the safety and operating instructions carefully before using this product. -
Page 3: Table Of Contents
CONTENTS Contents Page Customer Information………………………………………………………. 2 Warnings and Precautions………………………………………………… 3 Technical Data……………………………………………………………….. 4 Commissioning………………………………………………………………. 5 Check List of Enclosures………………………………………………….. 5 Serial Number…………………………………………………….………….. 5 Installation…………………………………………………….……………… 6 User…………………………………………………………………………….. 7-8 Servicing ……………………………………………………………………… 9 Component Replacement ………………………………………….……… 10-11 Spare Parts List……………………………………………………………… 11 Fault Finding…………………………………………………………………. 11 Service information………………………………………………………….. -
Page 4: Technical Data
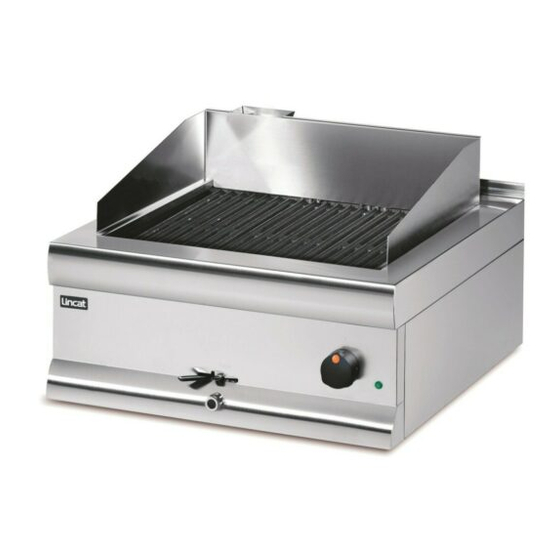
TECHNICAL DATA Model Dimensions Overall height (mm) Width (mm) Depth (mm) Weight (kg) 27kg (Nett) 35kg (Nett) Hob cooking surface w x d (mm) 325 x 440 475 x 440 Heat Input Total heat input Natural(Gross) 16.4 kW 16.4 kW Total heat input Propane(Gross) 17.6 kW 17.6 kW... -
Page 5: Commissioning
Coooking Grid Instruction Manual SERIAL NUMBER Each appliance manufactured at Lincat has a unique identifying number found in the NOTE top right hand corner of the data plate attached at the rear of the appliance. Please record that number in the space provided should it be required for future reference. -
Page 6: Installation
INSTALLATION SITING The installer must ensure that all regulations are met and that there is an unobstructed minimum distance of 1000mm from the top of the flue to the ceiling, which must be of non- combustible material. The appliance should be installed on a level surface ensuring the unit is stable and firmly located. -
Page 7: User
USER INSTRUCTION APPLIANCE USE This appliance is only for professional use and should only be used by qualified personnel. Ensure that the person responsible understands how to light, safely operate, clean and shutdown the appliance and is made aware of the position and operation of the gas isolating cock in the event of an emergency. - Page 8 Any accumulated fats or grease on internal parts and collecting pans from previous cooking should be routinely cleaned prior to use to prevent the risk of fire. The cooking grid may be cleaned using a wire brush to remove carbon deposits. It is recommended that suitable eye and hand protection be worn.
-
Page 9: Servicing
SERVICING SERVICE ACCESS To access and service the gas control valves Remove the control knobs and fascia panel to gain access to the valves. Remove cooking grid, heat transfer profiles and supports, splash back to gain clear access to burners and thermocouples. ... -
Page 10: Component Replacement
COMPONENT REPLACEMENT Thermocouple Remove the control knobs and fascia panel. Loosen the the thermocouple nut (HH) at the rear of the valve (FF) Remove the lock nut (EE) at the bracket (NN). Remove the thermocouple. Fit the new thermocouple and re-assemble in the reverse order. ... -
Page 11: Spare Parts List
Injector Remove the control knobs and fascia panel. Loosen the burner pipe nut (JJ) at the valve (FF) and at the elbow (LL). Remove the screws at the elbow retaining bracket (KK). Remove the injector (MM) with the copper and fibre washers. ... -
Page 12: Service Information
Gas Appliance Regulations 2016/426. GUARANTEE This unit carries a comprehensive UK mainland warranty. The guarantee is in addition to, and does not diminish your statutory or legal rights. Contact Lincat for terms and conditions The guarantee does not cover: Accidental damage, misuse or use not in accordance with the manufacturer’s instructions ...
Need help?
Do you have a question about the Silverlink 600 and is the answer not in the manual?
Questions and answers