
Related Manuals for ChamSys QuickQ Series


Summary of Contents for ChamSys QuickQ Series
- Page 1 ChamSys QuickQ 10, QuickQ 20 and QuickQ 30 Console Installation, Software manual and Warranty Certificate...
- Page 2 ChamSys reserves the right to revise the content of this document without any obligation to notify any person or company of such revision, however, ChamSys has no obligation to make, and does not commit to make, any such revisions. Download the latest version from www.chamsys.co.uk...
-
Page 3: Table Of Contents
QuickQ User Manual Table of Contents Care of Your Console ..............................4 Safety Notes .................................. 4 Glossary ..................................5 QuickQ Software User Manual ............................. 7 1. Introduction ................................7 2. New Shows and Patching ............................14 3.0 Home Screen and Controlling Fixtures ........................ 18 3.2 Controlling Fixtures with QuickQ ........................ -
Page 4: Care Of Your Console
Safety Notes Do not open the console unless you are a skilled person authorised and trained by ChamSys in console maintenance and repair. The console contains components with voltages that may shock. -
Page 5: Glossary
QuickQ User Manual Glossary Below are a few commonly used terms to help with getting started with QuickQ programing. DMX or DMX512: an acronym for Digital Multiplex and is a standard for digital communication networks that are commonly used to control stage lighting and effects. Today, we can transmit DMX data over both direct DMX cables and via Network. - Page 6 QuickQ User Manual Cue Stack: One or more cues, either taken one after the other by pressing the go button or taken automatically one after the other in a Chase. Theatre Style Cue Stack: a numbered sequence of cues in a cue stack, typically run one after the other in the same order and fader in and out with a Fade Time.
-
Page 7: Quickq Software User Manual
QuickQ User Manual QuickQ Software User Manual 1. Introduction This document is intended to enable you to get up and running with QuickQ consoles. It is designed to introduce the layout of the console along with programming instructions and the key functions. - Page 8 QuickQ User Manual Powering Up To power up the console, simply plug in the supplied 12v DC power supply. If the console has been shut down via the software, press the power switch on the back panel. After a few seconds the screen will come to life, you will see the operating system loading.
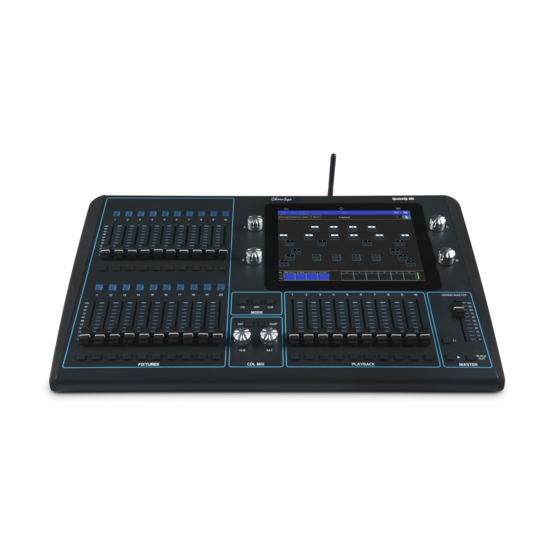
- Page 9 QuickQ User Manual Console Layout All QuickQ consoles layout are very similar - the programming interface is consistent across the entire range of consoles. One of the main areas of QuickQ consoles is the large 9.7” multi-touch display. QuickQ consoles feature an intuitive smart phone based, app-based user interface making them extremely user friends.
- Page 10 QuickQ User Manual User Interface layout The QuickQ user interface is based around a smart phone style interface, with familiar buttons similar to those used on phones/tablets such as the home and menu keys. The top menu bar of the interface remains consistent with its buttons in all windows on the console.
- Page 11 QuickQ User Manual Settings Menu To access the QuickQ settings menu, click the main menu button on the top right of the display and press the “Settings” option. Within the Settings window, you are able to adjust network, DMX and user interface options.
- Page 12 QuickQ User Manual DMX Settings The DMX Settings window can be used to define the way the console outputs DMX. QuickQ automatically assigns each console universe to a corresponding DMX port located on the rear of the console. If you wish to output via the console’s network port, the output protocol and universe can be defined within this window.
- Page 13 QuickQ User Manual User Interface Options The User Interface options window enables users to change the console language. Supporting GB English, US English, Spanish and Dutch, the language can be changed by pressing the language drop down and selecting the appropriate language.
-
Page 14: New Shows And Patching
QuickQ User Manual 2. New Shows and Patching Starting a New Show To start a new show, press the menu button on the top right of the display and select the ‘Files’ menu. In the Files Menu, Press the ‘New Show’ soft button. This clears the current show file from memory – saved shows still remain stored on the console and can be loaded back into memory at any point, by selecting the ‘Load Show’... - Page 15 QuickQ features a comprehensive fixture library of over 25,000 different fixture files; this library is constantly updated by ChamSys. To request a new fixture file contact ChamSys Support (support@chamsys.co.uk) Adding Fixtures To Patch or Add some fixtures, open the patch window from the menu button and select the ‘+’ button on the lower right-hand side of the patch window The Add Fixtures window has two different views ‘Quick’...
- Page 16 QuickQ User Manual Once selected, enter the universe that the fixture(s) will be patched onto. Next enter the DMX start address of the first fixture. Finally enter the Quantity of this type of fixture to be patched and press the ‘Patch’ button on the lower right of the window.
- Page 17 QuickQ User Manual Changing DMX Addresses of patched fixtures To change the DMX address of a single patched fixture press and hold on the DMX Address inside the patch window, then enter the new address on Set DMX Address menu.
-
Page 18: Home Screen And Controlling Fixtures
QuickQ User Manual 3.0 Home Screen and Controlling Fixtures 3.1 Home – Layout Screen Introduction to the Layout Screen On QuickQ consoles, the Layout screen can be accessed by pressing the home button located centrally at the top of the display. Using this screen, fixtures can be arranged as desired and selected. Colours and intensities of these fixtures will also be visually displayed here. -
Page 19: Controlling Fixtures With Quickq
QuickQ User Manual Selecting Fixtures Tap to select fixtures. Once selected, fixture icons highlight green, as pictured above. Selected fixtures can quickly be given 100% or 0% intensity by tapping the corresponding buttons near the top right of the display. Once selected, fixtures can be programmed via the Intensity, Position, Colour and Beam windows (see section 3.2). - Page 20 QuickQ User Manual Controlling Fixtures from Cues Cues contain recorded parameter values. Cues can be played back from the playbacks or from the intensity faders when in cue mode. (Press the [CUE] mode button) or from a combination of both. The fader will control the intensity of the instruments between a zero level and the maximum level that was recorded into the cue.
- Page 21 QuickQ User Manual The larger fader on the left controls all currently selected instruments . You can also modify individual instruments by selecting them in this window. Tip - Renaming your fixtures in patch to their function makes selection easier.
- Page 22 QuickQ User Manual Controlling Colour Colour Mix Encoders - COL MIX Having selected one or more fixtures, it is possible to control colour directly using the COL MIX encoders, Hue and Saturation. If you adjust the saturation encoder first, you can deepen the colour that you then chose with the hue encoder.
- Page 23 QuickQ User Manual Controlling Position This window can be opened by selecting the (POSITION) button from the home screen. First select one or more fixtures then any of the position control options can be used. If you are going to use a position in more than one cue, consider saving it to a palette.
- Page 24 QuickQ User Manual Controlling Beam functions - Gobos, Focus, Zoom and other Beam Options This window can be opened by selecting the (BEAM) button from the home screen. First, select one or more fixtures then any of the beam control options can be used. If you are going to use the same beam attributes in more than one cue, consider saving them to a palette.
- Page 25 QuickQ User Manual Controlling Gobos This window can be opened by selecting the (BEAM) button from the home screen and then selecting either Gobo 1. If the fixture has multiple gobo wheels there is a Gobo 2 page. First, select one or more fixtures then any of the gobo control options can be used. If you are going to use the same gobo attributes in more than one cue, consider saving them to a palette.
-
Page 26: Recording Items With Quickq
QuickQ User Manual 3.3 Recording Items with QuickQ Recording a Group Groups can be selected and controlled from the multifunction faders when they are in Group Mode or from the Home Screen. Recording a New Group: Select some fixtures. - Page 27 QuickQ User Manual Recording a Cue Recording a cue on a Playback Any active or selected levels and attributes including FX, can be recorded to a cue by selecting record. QuickQ will indicate where you can record a cue to with either an onscreen red shading.
- Page 28 QuickQ User Manual Chase Direction Chases direction can be modified from the cue list window using the buttons in the top right of the screen. The options are: Backward Forward Bounce Random Chase Speed - Tap to Time, Speed and Crossfader ...
- Page 29 QuickQ User Manual Recording a Theatre style Cue Stack Theatre Mode When the console is in “Theatre” mode (settings, theatre mode) recording conservative cues to a playback will result in a cue stack of cues with a default fade time of 3 seconds. Additionally: ...
- Page 30 QuickQ User Manual Playing Back a Cue Stack Selecting a playback by holding or double tapping on the cue stack preview above the fader will display the cue list on for that playback. Then. the GO Button on the console can be used to run the cues on the cue stack.
- Page 31 QuickQ User Manual Cue Fade Times To change the fade in or fade out times on a cue in a cue stack, hold the fade time or double tap the fade time of the cue. The intensity fade in times can be edited.
-
Page 32: Editing Cues
QuickQ User Manual Go to a Cue Pull out the arrows on the end of the comments box and select Go to This Cue. 3.4 Editing Cues Moving cues in a cue stack Cues in a cue stack can be reordered and moved by selecting the 6 dots symbol by holding and then dragging the cue to a new location in the list. -
Page 33: Effects
QuickQ User Manual 3.5 Effects Introduction to Effects on QuickQ QuickQ contains user selectable effects for each attribute set that can be found under the effects header on the top right of each attribute page. An effect applies a “shape” to a given attribute; this shape can be controlled in size and speed. - Page 34 QuickQ User Manual Quick Q will display all the applicable effects for that attribute type; each attribute type will have its own unique effects. Once on the effects tab of, the encoders will change to reflect the settings for those effects, you will also see a “Tap Time”...
-
Page 35: Execute Window
QuickQ User Manual FX on dimmer channels Adding effects to dimmer channels is a little different than other attributes, as dimmers are treated as HTP or Highest Takes Precedence channels. This means that the highest value will always be what shows on stage. This... - Page 36 QuickQ User Manual Using the ‘link’ option will allow for clicking on an execute to release any other executes that are ‘linked’ to it. In order to Link executes, they must be directly next to each other horizontally. Use the Action Menu to link and unlink execute Items.
-
Page 37: Midi Notes And Timecode
QuickQ User Manual 3.7 MIDI Notes and Timecode QuickQ consoles support input via MIDI notes and MIDI timecode, enabling users to control cue stacks remotely. Enabled by default, there’s no setup required on QuickQ for MIDI input, simply insert a 5pin MIDI cable into the MIDI input port located on the rear of the console. -
Page 38: Audio Input
QuickQ User Manual 3.8 Audio Input Audio input can be used on QuickQ consoles for simple sound to light control, setting the BPM of chases in time with music. Audio can be input to the console via the 3.5mm jack socket on the rear labelled “Audio In”. -
Page 39: Upgrading Console Software
QuickQ User Manual 3.9 Upgrading Console Software New versions of QuickQ console software are made available on the downloads page of the ChamSys website – www.chamsys.co.uk in the form of .cdq files. It is always recommended to back up your show file before updating the console, although upgrading should not affect show files and settings on the console. -
Page 40: Fcc Part 15 Notice
Connect the equipment into an outlet on a circuit different from that to which the receiver is connected. You may also consult your local ChamSys Ltd dealer or an experienced radio/TV technician for assistance. NOTICE: The FCC regulations provide that any changes or modifications not expressly approved by ChamSys Ltd could void the user’s authority to operate the equipment. -
Page 41: Technical Specifications
QuickQ User Manual 4.0 Technical Specifications QuickQ 10 QuickQ 20 QuickQ 30 Touch Screen 9.7" 9.7" 9.7" Universes Supported DMX Outputs 5-Pin XLR Fixtures Supported 1024 2048 Fixture Faders Bump Buttons Dedicated Hue/Saturation Encoders Attribute Encoders 10 Multiple Function... - Page 42 QuickQ User Manual Disposal and Recycling of unwanted consoles Please be aware that ChamSys products must be disposed of in accordance with the WEEE disposal and recycling regulations (http://ec.europa.eu/environment/waste/weee/index_en.htm). ChamSys products must not be disposed of through normal household waste.
-
Page 43: Quickq Console Warranty Certificate
For Warranty claims please contact the dealer you purchased the console from. If you are based outside of the UK please contact your local dealer. Your local dealer can be located here: www.chamsys.co.uk/contact This QuickQ console was manufactured on: ……………………...
Need help?
Do you have a question about the QuickQ Series and is the answer not in the manual?
Questions and answers