Table of Contents
Advertisement
Quick Links
MagicQ Training Course
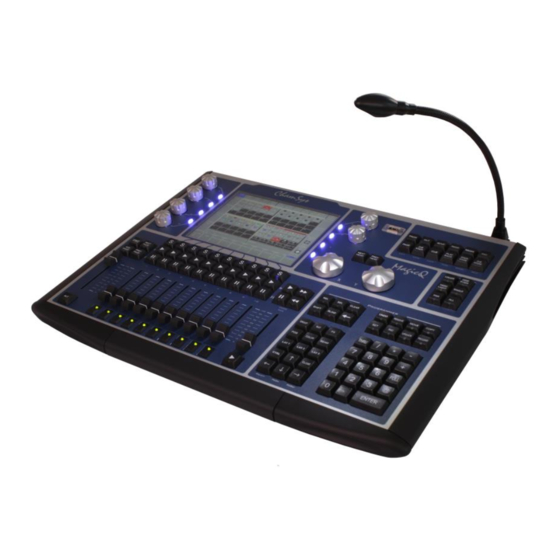
1. MagicQ Compact Series Consoles
This manual covers the MQ40/40N/60/70 Compact Consoles
! MAINTENANCE SHOULD BE CARRIED OUT BY
EXPERIENCED AND QUALIFIED PERSONNEL !
! WARNING – LIVE 240V AC. DISCONNECT MAINS BEFORE
PERFORMING ANY MAINTENANCE !
1 of 21 – Part Three: Maintenance
www.chamsys.co.uk
Advertisement
Table of Contents

Related Manuals for ChamSys MagicQ Compact Series


Summary of Contents for ChamSys MagicQ Compact Series
- Page 1 MagicQ Training Course 1. MagicQ Compact Series Consoles This manual covers the MQ40/40N/60/70 Compact Consoles ! MAINTENANCE SHOULD BE CARRIED OUT BY EXPERIENCED AND QUALIFIED PERSONNEL ! ! WARNING – LIVE 240V AC. DISCONNECT MAINS BEFORE PERFORMING ANY MAINTENANCE ! 1 of 21 –...
-
Page 2: Tools Required
MagicQ Training Course Tools Required There are several tools required for maintaining MagicQ Compact series consoles. 5.5mm Nut driver for PCB spacers 2mm tip pozidrive Screwdriver 1mm tip pozidrive Screwdriver Small Flatheaded screwdriver for removing the large encoder knobs 2 of 21 –... - Page 3 The Faders knobs will gently pull off, with the Encoders requiring a small flat head screw driver to remove them. Note the screws only need loosening off, rather than fully removing to lift off the encoders. 3 of 21 – Part Three: Maintenance www.chamsys.co.uk...
-
Page 4: Opening The Console
The console is opened by removing the 6 of M4 x 6mm Pozi head screws located under the console. Turn the console upside down onto a soft surface such as bubble wrap and remove the 6 screws as shown: 4 of 21 – Part Three: Maintenance www.chamsys.co.uk... - Page 5 Gently open the console as shown. Note DO NOT open more than 45 degree’s from the base as damage can be caused to the battery connector. 5 of 21 – Part Three: Maintenance www.chamsys.co.uk...
- Page 6 Disconnect this as below. At this stage many minor repairs such as replacing the hard drive, power supply and UPS battery can be carried out, without the need to strip the console down any further. 6 of 21 – Part Three: Maintenance www.chamsys.co.uk...
- Page 7 The side and front extrusions are removed to gain access to the front of the main PCB. Remove the 10 of M3 x 5mm counter sunk screws on the metal extrusions. 7 of 21 – Part Three: Maintenance www.chamsys.co.uk...
- Page 8 The side extrusions are be removed by pulling the lower part away from the console and gently then pulling down to remove as shown below. Repeat for both side extrusions on the console. 8 of 21 – Part Three: Maintenance www.chamsys.co.uk...
- Page 9 Now remove the 11 of M3 Pozi head screws on the back of the PCB. Note that the 4 x screws around the LCD screen should not be removed. Once these screws have been removed, lower the front panel back down onto the base. 9 of 21 – Part Three: Maintenance www.chamsys.co.uk...
- Page 10 Once removed the front panel is lifted away from the main PCB. With the console at this stage, maintenance such as replacement of screen replacement, keys, encoders and faders can be carried out. 10 of 21 – Part Three: Maintenance www.chamsys.co.uk...
-
Page 11: Replacing Components
Removing the Screen/Screen replacement. The MQ40/40N/60/70 consoles use the same display assembly, which is available as a complete display/touch combined assembly directly from ChamSys. ChamSys part no for this is: 410-102 Disconnect the touch screen connector located on the underside of the PCB. This is a push fit connector. - Page 12 Once the 4 screws have been removed, carefully lift the lower edge taking care of the ribbon connector on the underside of the screen. Use an object to support the screen, while removing the ribbon connector. 12 of 21 – Part Three: Maintenance www.chamsys.co.uk...
- Page 13 The brown locking band of the connector can be gently be released by sliding away from the connector at both edges. Take care to keep this locking band flat. Once the locking band has been released as above the screen ribbon cable can then be removed. 13 of 21 – Part Three: Maintenance www.chamsys.co.uk...
- Page 14 In order to replace a component in MagicQ products, you will need the tools for that product and a good quality soldering iron. Component replacements can be obtained from ChamSys or your local distributor. ! MAINTENANCE SHOULD BE CARRIED OUT BY...
- Page 15 Replace the LED in the same orientation it was removed, and resolder the LED. ChamSys Part no for replacement flash switches for the MQ40/40N/60/70 is: 307-003 15 of 21 – Part Three: Maintenance...
- Page 16 Pressing CTRL 9 on the external keyboard – this resets the front panel. Pressing CTRL 0 on the external keyboard – this resets the MagicQ application. Pressing CTRL BREAK on the external keyboard – this shuts down the console. 16 of 21 – Part Three: Maintenance www.chamsys.co.uk...
-
Page 17: Strange Key Presses, Unexpected Window Changes
Re-assemble the screen and screw back into place. Re-boot the console with the Hard drive attached and check to see if the screen still has the intermittent fault. If the fault continues, contact ChamSys UK for repair/service advice. 17 of 21 – Part Three: Maintenance... -
Page 18: Resetting The Console
To force the console to power off completely, disconnect the mains power to the console and hold the reset button on the back panel until it powers off (approximately 15 seconds.) 18 of 21 – Part Three: Maintenance www.chamsys.co.uk... -
Page 19: Backup Archives
5.30am. Daily files are also stored – “backupfri.sbk” indicates the show file that was recorded at the start of Friday. Archive files are overwritten every 24 hours, except for the daily files, which are overwritten every 7 days. 19 of 21 – Part Three: Maintenance www.chamsys.co.uk... -
Page 20: Reporting Problems
– a new log file is started each time the console re-starts. The time and date of the file is the time that the session ended. Please email the log files and show files to support@chamsys.co.uk 20 of 21 – Part Three: Maintenance... -
Page 21: Upgrading Console Software
ChamSys website – www.chamsys.co.uk The MagicQ Compact series uses our Stadium/Compact/Pro software installer from the website which ends ends with the extension .cdc Note if downloading on Mac based systems check OSX has not added ._ before the file name.
Need help?
Do you have a question about the MagicQ Compact Series and is the answer not in the manual?
Questions and answers