Advertisement
Advertisement
Table of Contents

Subscribe to Our Youtube Channel
Related Manuals for XIEGU G1M


Summary of Contents for XIEGU G1M
- Page 1 XIEGU G-CORE Operation Manual HF Four Band Portable SDR Transceiver V3 Manual...
- Page 2 Connector Pin-Outs External Power Connection Menu & Features 9-10 LCD Display Connection to PC Band Voltage Data Specifications Packing List In order to better experience the Rig, please read this manual carefully before use to fully understand the operation of G1M.
- Page 3 The new G1M is a 5W portable QRP transceiver using SDR technology. Its A to D chip is a 16bit and provides excellent performance. The newly added AM broadcast reception capability allows you to listen to news broadcasts from around the world. The new 800Hz narrowband CW digital filter makes CW reception a real pleasure.
- Page 4 Power switch / volume Hold press the button for 2s to lock the button ○ Rotate the switch to turn the device on or off; operation. ○ 5 Display screen Rotate the knob to increase or decrease the ○ Display screen volume of the radio.
- Page 5 7 Antenna interface 10 KEY interface BNC Connector. Impedance 50Ω. This interface is a 3.5mm stereo jack (3-pin) for 8 ACC interface connecting manual or automatic telegraph keys. 11 SPK External speaker interface Output band voltage signal and PTT signal. See below.
- Page 6 1、 MIC 4、ACC Note: The MIC pin has a bias voltage and cannot be shorted. 5、CW key lead connection method: 2、 COMM 3、 SPK...
- Page 7 The G1M can use a 13.8V external DC power supply. The DC power supply requires a current load capacity of at least 3A. The supplied power cord can be used to connect radio and DC power. When connecting the DC power supply, please carefully connect according to the following figure to avoid the polarity of the power supply being reversed.
- Page 8 When the G1M uses an external power supply, in order to prevent external interference from entering the radio through the power line, please place a snap-on ferrite choke close to the DC plug. Loop the DC cord through the choke a few times.
- Page 9 The G1M uses the multi-function menu for various functions. All functions are distributed in different menu pages, and each menu has 5 function options. The operation is as follows: Light press IN the main tuning knob to switch to the four page menu.
- Page 10 Momentarily press the "lock" button to switch the menu page. Hold press the "lock" button to lock the button operation. Menu Features Button mode page Light press Mode switching Band decrement Band increment Step selection VFO switching Pre-amplifier Step back 1 Frequency/channel Hold press Channel storage...
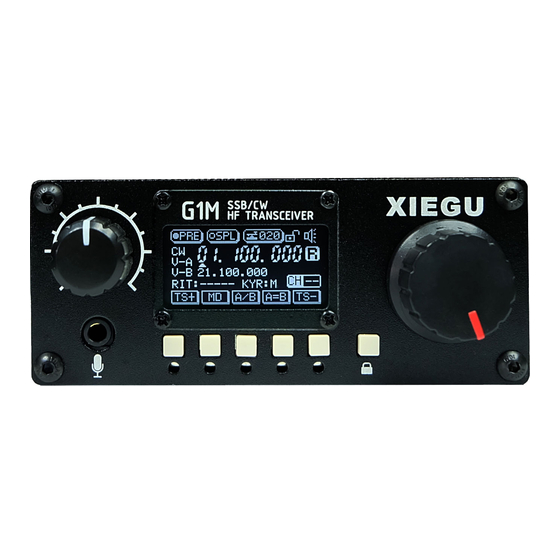
- Page 11 The G1M uses an OLED display screen that displays all status information for the user. It has excellent visibility in outdoor sunlight.
- Page 12 Connection cable method: 1. Install the driver for the data cable on the PC side. 2. Plug the data cable into the COMM port and connect the G1M to the computer. 3. Run the corresponding computer software. When using software such as HRD, G1M must be in VFO mode it cannot be in channel mode, ,...
- Page 13 You can also configure the control instructions of other software to control the G1M. Band Voltage Data G1M's ACC port provides band data voltage for the four TX bands. The band data can control a peripheral device to automatically switch the band of the G1M.. (such as the XPA-125B)
-
Page 14: Specifications
Specifications: Receiving frequency:0.5~30MHz(Continuous) Transmitting frequency: 3.5~4.0MHz 7.0~7.3MHz 14.0~14.35MHz 21.0~21.45MHz Operating mode: SSB/CW/AM (AM Used only to receive broadcasts) Receiving sensitivity: 0.45uV @12dB SINAD Transmit power: 5W @13.8V DC Spurious suppression: ≥45dB Frequency stability: ±1.5ppm (30 minutes after turning on the power) Audio output power:... - Page 15 Packing List Box Packing List: G1M:1 PCS Mic:1 pcs POWER CABLE: 1pcs User manual: 1pcs Certificate: 1pcs Warranty Card: 1pcs ...
- Page 16 Copyright 2018 Chongqing Xiegu Technology Co., Ltd. reserves all rights to this manual, and reproduction of any part of this manual is prohibited without permission. ------------------------------------------------------------------------------------------------ V3.0 1010160206-C...
Need help?
Do you have a question about the G1M and is the answer not in the manual?
Questions and answers