Table of Contents
Advertisement
Available languages
Available languages
Quick Links
Advertisement
Chapters
Table of Contents

Related Manuals for RTW TM3-Primus


Summary of Contents for RTW TM3-Primus
- Page 1 TM3-Primus Manual...
- Page 2 Manual TM3-Primus Software Version 1.00 | 11.2014 © 2014 | RTW GmbH & Co.KG Am Wassermann 25 | 50829 Köln | Germany Fon +49 221. 70 913-0 | Fax +49 221. 70 913-32 www.rtw.com | rtw@rtw.com Manual | TM3-Primus...
- Page 3 TM3-Primus Bedienungsanleitung...
- Page 4 Software-Version: 1.00 und höher | 11.2014 © 2014 | Technische Änderungen vorbehalten! RTW GmbH & Co.KG | Am Wassermann 25 | 50829 Köln | Germany Fon +49 221. 70 913-0 | Fax +49 221. 70 913-32 www.rtw.com | rtw@rtw.com WEEE-Reg.-Nr.: DE 90666819 RoHS-Konformität: Diese Geräte erfüllen als Überwachungs- und Kon-...
-
Page 5: Sicherheitshinweise
Wenn Sie dieses Zeichen auf einem Gerät fi nden, beachten Sie die Hinweise in der Bedienungsanleitung zu entsprechenden Vorsichts- maßnahmen. HINWEIS Dieses Symbol weist Sie auf Besonderheiten hin, bei denen es sich nicht um Fehlfunktionen handelt. Manual | TM3-Primus Sicherheitshinweise DE-3... -
Page 6: Allgemeine Sicherheitsanweisungen
Personal durchgeführt werden. • Entfernen Sie keine Teile aus dem Gerät und führen Sie keine Modifi - kation am Gerät aus ohne die schriftliche Freigabe durch RTW. Verän- derungen am Gerät können sowohl Sicherheitsrisiken verursachen als auch die Konformitäten und Zertifi... - Page 7 • Betreiben Sie das Gerät nicht in der Nähe von Wasser. • Betreiben Sie das Gerät nicht in nassen bzw. feuchten Umgebungen. • Betreiben Sie das Gerät nicht in explosionsgefährdeten Umgebungen. • Betreiben Sie das Gerät nicht in staubigen Umgebungen. Manual | TM3-Primus Sicherheitshinweise DE-5...
-
Page 8: Achtung
Reparaturen sind erforderlich bei jeglicher Art von Beschädigung insbesondere bei beschädigtem Netzkabel oder Netzstecker, Beschä- digung durch übergelaufene Flüssigkeiten, beim Eindringen von Ge- genständen, wenn das Gerät Regen oder Feuchtigkeit ausgesetzt war, wenn es nicht ordnungsgemäß arbeitet oder wenn es gefallen ist. Manual | TM3-Primus DE-6 Sicherheitshinweise... -
Page 9: Umweltschutz
Verwendung bestimmter gefährlicher Stoffe in Elektro- und Elektronikgeräten . Das Gerät kann in geringen Mengen Blei, Cadmium und/oder Quecksilber enthalten. Bitte verwerten oder entsorgen Sie die elektronischen Teile und Baugruppen entsprechend den gesetzlichen Bestimmungen in Ihrem Land. Manual | TM3-Primus Sicherheitshinweise DE-7... -
Page 10: Table Of Contents
3 | Bedienung 7 | Kalibrierung 3.1 | Inbetriebnahme 3.2 | Signalquellen und Synchronisa- 8 | Update tion 3.3 | DAW und TM3-Primus 9 | Technische Daten 3.4 | Horizontale und vertikale Aus- richtung 10 | CE-Konformität 3.5 | Instrumente wählen 11 | RoHS-Konformität... -
Page 11: Bevor Sie Beginnen
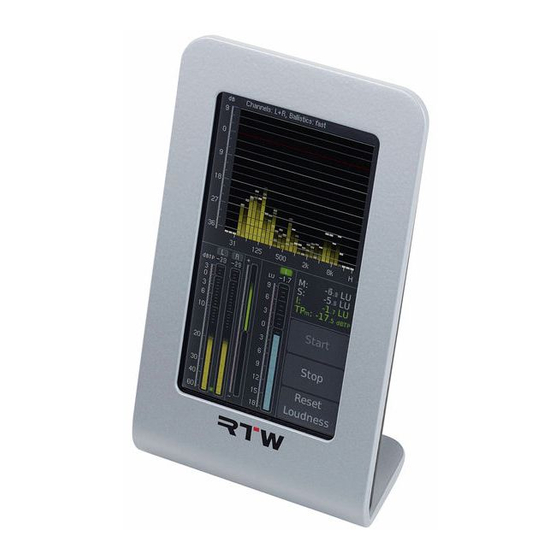
1 | Bevor Sie beginnen 1.1 | Das Konzept Vielen Dank für den Erwerb des TM3-Primus von RTW. Sie haben sich für eine leistungsfähige Metering-Lösung auf der Basis moderner Hardware und aktuellster Technologie entschieden, die eine sehr intuitive, voraus- setzungsfreie Handhabung und Bedienung ermöglicht, dabei dennoch hohe Flexibilität und umfangreiche Konfi... - Page 12 4,3“-Bildschirm unterstützt Sie dabei jederzeit mit einer schlüssigen visu- ellen Aufbereitung der technischen Parameter. Neben der Verarbeitung der über die RCA-Buchsen eingehenden analogen oder digitalen Signale ist TM3-Primus darüber hinaus in der Lage, USB-Audio-Signale mit bis zu 6-Kanälen direkt aus einem Computer zu verarbeiten. Manual | TM3-Primus DE-10 1 | Bevor Sie beginnen | 1.1 | Das Konzept...
- Page 13 Die Auswahl der angezeigten Instrumente und die Anpassung grundle- gender Parameter erfolgt über den berührungsempfi ndlichen Bildschirm. Neben PPM- und True Peak-Instrumenten bietet der TM3-Primus umfas- sende Loudness-Messfunktionen nach allen weltweit relevanten Stan- dards ( EBU R128, ITU BS.1770-3/1771-1, ARIB, ATSC A/85, OP-59, AGCOM, CALM Act ), darunter summierende Bargraphen, Loudness Ran- ge (LRA) sowie numerische Anzeigen.
-
Page 14: Lieferumfang
Packen Sie das Gerät aus und prüfen Sie, ob Sie alle entsprechenden Komponenten erhalten haben. Falls Teile fehlen, wenden Sie sich bitte an Ihren Händler. Eine ausführliche Bedienungsanleitung können Sie unter „Audio-Moni- tore/TM3-Primus“ im Mitgliederbereich unserer Webseite herunterladen: https://www.rtw.com/de/service/manuals-software.html TM3-Primus TM3-Primus... -
Page 15: Installation
2 | Installation Der TouchMonitor TM3-Primus wurde für die freie Platzierung auf Tischen, Pulten, u. a. entwickelt, besteht aus einer Einheit mit 4,3-Zoll Touch Screen und verfügt über vielfältige Anschlussmöglichkeiten. Die Stromversorgung des TM3-Primus erfolgt über den USB 2.0 Micro-B-Anschluss mittels des mitgelieferten USB-Kabel, das entweder an das mitgelieferte externe USB- Netzteil oder direkt an einen Computer angeschlossen wird. -
Page 16: Anschlüsse
Netzteil) nur dann, wenn es absolut not- wendig sein sollte. Das Gerät wur- Verwenden Sie zum Anschluss de von RTW kalibriert, es bietet in der Software die Möglichkeit immer das im Lieferumfang ent- haltene USB-Verbindungskabel der analogen 0-dB-Anpassung. -
Page 17: Signale Anlegen
1. Stecken Sie den Micro-B-Stecker des mitgelieferten USB-Kabels in die mit USB gekennzeichnete USB Micro-B-Buchse des Gerätes. 2. Stecken Sie anschließend den USB-A-Stecker des USB-Kabels in die entsprechende Buchse des USB-Netzteils oder eines PCs. Manual | TM3-Primus 2 | Installation | 2.2 | Signale anlegen DE-15... - Page 18 2. Stecken Sie den Micro-B-Stecker des mitgelieferten USB-Kabels in die USB Micro-B-Buchse des Gerätes. 3. Stecken Sie anschließend den USB-A-Stecker des USB-Kabels in die entsprechende Buchse des externen USB-Netzteils oder eines PCs. TM3-Primus startet. Manual | TM3-Primus DE-16 2 | Installation | 2.2 | Signale anlegen...
- Page 19 (Voreinstellung entspre- chender Standards) betriebsbereit 4. Wählen Sie Ihre Region. TM3-Primus übernimmt die in der Region gül- tigen Voreinstellungen (Sprache, Loudness-Standard, Referenzen). 5. Wählen Sie als Domäne Analog RCA. TM3-Primus zeigt den Info-Bild- schirm zur Bedienung und ist nach ca. 3 s betriebsbereit.
- Page 20 2. Stecken Sie den Micro-B-Stecker des mitgelieferten USB-Kabels in die USB Micro-B-Buchse des Gerätes. 3. Stecken Sie anschließend den USB-A-Stecker des USB-Kabels in die entsprechende Buchse des externen USB-Netzteils oder eines PCs. TM3-Primus startet. Manual | TM3-Primus DE-18 2 | Installation | 2.2 | Signale anlegen...
- Page 21 (Voreinstellung entspre- chender Standards) betriebsbereit 4. Wählen Sie Ihre Region. TM3-Primus übernimmt die in der Region gül- tigen Voreinstellungen (Sprache, Loudness-Standard, Referenzen). 5. Wählen Sie als Domäne Digital SPDIF. TM3-Primus zeigt den Info- Bildschirm zur Bedienung und ist nach ca. 3 s betriebsbereit.
- Page 22 1. Stecken Sie den Micro-B-Stecker des mitgelieferten USB-Kabels in die USB Micro-B-Buchse des Gerätes. 2. Stecken Sie anschließend den USB-A-Stecker des USB-Kabels in die entsprechende Buchse eines PCs. TM3-Primus startet. Manual | TM3-Primus DE-20 2 | Installation | 2.2 | Signale anlegen...
- Page 23 USB - Surround chender Standards) wählen 3. Wählen Sie Ihre Region. TM3-Primus übernimmt die in der Region gül- tigen Voreinstellungen (Sprache, Loudness-Standard, Referenzen). 4. Wählen Sie als Domäne USB – Stereo oder USB – Surround. TM3- Primus zeigt für ein paar Sekunden den Info-Bildschirm zur Bedienung.
- Page 24 Mac OS X®-Systeme RTW TM3-Primus als Audiogerät defi nieren Samplerate (Format) prüfen und ggfs. anpassen betriebsbereit Manual | TM3-Primus DE-22 2 | Installation | 2.2 | Signale anlegen...
- Page 25 Sie Sound. 7. Wählen Sie Output und dort TM3-Primus Output Typ USB. 8. Öffnen Sie das Audio Midi Setup und klicken Sie auf TM3-Primus Output zur Anzeige der Details. 9. Stellen Sie als Format die von Ihnen verwendete Samplerate ein (max.
- Page 26 Audio-Treiber, den Sie unter „Audio-Monitore/TM3-Primus“ im Mit- gliederbereich unserer Webseite herunterladen können: https://www.rtw.com/de/service/manuals-software.html Mit dem Treiber wird gleichzeitig das RTW TM3 Primus Control Panel zur Anpassung der Treiber-Einstellungen installiert und bereitgestellt. 7. Rufen Sie die Windows®-Systemsteuerung auf und wählen Sie Sound.
- Page 27 RTW TM3-Primus Control Panel aufrufen Aktuelle Samplerate überprüfen Format einstellen Buffereinstellungen vornehmen Ausgangslautstärke anpassen betriebsbereit Manual | TM3-Primus 2 | Installation | 2.2 | Signale anlegen DE-25...
- Page 28 10. Passen Sie über das RTW TM3 Primus Control Panel das Latenz- verhalten an. Das Control Panel rufen Sie über das RTW-Icon im Info- bereich der Windows-Taskleiste auf. 11. Überprüfen Sie, ob die im Karteireiter Status angezeigte Aktuelle Abtastrate mit den Einstellungen in Ihrer DAW übereinstimmen.
-
Page 29: Bedienung
5. Nach Abfrage des Gebietes und der vorgesehenen Eingangs-Domäne (analog, digital, USB) ist das Gerät betriebsbereit. 6. Falls die Signalquelle aus einem USB-Audio-Datenstrom kommt, bin- den Sie den TM3-Primus als Audiogerät in Ihr Computer-System ein. Manual | TM3-Primus 3 | Bedienung | 3.1 | Inbetriebnahme... -
Page 30: Signalquellen Und Synchronisation
Änderung der Eingangsdomäne elegant zwischen gleich- zeitig angeschlossenen externen analogen und digitalen Signalquellen umzuschalten. HINWEIS - Da der TM3-Primus bei der Nutzung von USB-Audio- Signalen als Standard-Audiogerät ins Computer-System eingebunden ist und DAWs darauf synchronisieren, ist das Umschalten auf externe analoge oder digitale Signale nicht sinnvoll. - Page 31 Midi Setup und auf Windows®-Systemen im RTW Primus Control Panel angezeigt. HINWEIS - Stellen Sie bei der Verwendung einer DAW sicher, dass die eingestellte Abtastrate der DAW mit der vom TM3-Primus ange- zeigten Abtastrate identisch ist. Manual | TM3-Primus 3 | Bedienung | 3.2 | Signalquellen und Synchronisation...
-
Page 32: Daw Und Tm3-Primus
TM3-Primus. Ausgangsrouting Da DAWs jeweils nur ein Input-/Output-Interface unterstützen, wird beim Betrieb des TM3-Primus im USB-Modus kein Audio über das bisher ge- nutzte Ausgangs-Interface ausgegeben. Möchten Sie dennoch Signale während des USB-Betriebs abhören, ins- tanzieren und aktivieren Sie das Monitoring-Instrument im TM3-Primus (siehe Abschnitt 3.5 | Instrumente wählen und 4.10 | Monitoring). -
Page 33: Horizontale Und Vertikale Ausrichtung
3.4 | Horizontale und vertikale Ausrichtung Der TM3-Primus kann sowohl vertikal als auch horizontal aufgestellt wer- den. Für beide Ausrichtungen sind im Gerät passende Anordnungen der zur Verfügung stehenden Instrumente sowie der Menüseiten gespeichert. Umschalten auf horizontale Ausrichtung 1. Wischen Sie im Normalbetrieb mit einem Finger vertikal über den Bildschirm des aufrecht stehenden Gerätes. - Page 34 2. Stellen Sie das Gerät wieder aufrecht auf seinen Fuß. HINWEIS - Bitte beachten Sie, dass die Umschaltung zwischen Vertikal- und Horizontalbetrieb nur durch Erkennung der Wischrichtung (längs oder quer) erfolgt. TM3-Primus verwendet dazu keinen Bewe- gungssensor. Manual | TM3-Primus DE-32 3 | Bedienung | 3.4 | Horizontale und vertikale Ausrichtung...
-
Page 35: Instrumente Wählen
Nicht gewünschte Instrumente lassen sich ausblen- den, andere dafür einblenden. 1. Halten Sie den Bildschirm für mehr als 2 Sekunden gedrückt. Das Hauptmenü erscheint. 2. Berühren Sie die Taste der Option Aktive Instrumente. Manual | TM3-Primus 3 | Bedienung | 3.5 | Instrumente wählen DE-33... - Page 36 3. Sie werden nun schrittweise durch die bis zu fünf Auswahlseiten ge- führt. Manual | TM3-Primus DE-34 3 | Bedienung | 3.5 | Instrumente wählen...
- Page 37 Alle vorgenommenen Änderungen gehen dabei verloren. Das Gerät benutzt weiterhin die vorherigen Einstellungen. 7. Gehen Sie in gleicher Weise vor, wenn Sie Loudness-Standard, Skalen und weitere Parameter anpassen möchten. Manual | TM3-Primus 3 | Bedienung | 3.5 | Instrumente wählen DE-35...
-
Page 38: Instrumente
4 | Instrumente Im TouchMonitor TM3-Primus stehen die nachfolgend beschriebenen Instrumente zur Verfügung, die jeweils unterschiedliche Parameter der gemessenen Audiosignale visualisieren. Die Instrumente wurden auf verschiedene Weise und in verschiedener Größe miteinander kombiniert, um je nach getroffener Auswahl möglichst optimal die zur Verfügung stehende Bildschirmfl äche zu nutzen. - Page 39 • Numeric (wählbare Werte) • Tastenfeld (wählbare Tasten aus verschiedenen Instrumenten) -> wahlweise: • TP/PPM • MC -> dazu: • Correlator Je nach Platzbedarf stehen einzelne Instrumente nur für bestimmte Kombinationen zur Verfügung. Manual | TM3-Primus 4 | Instrumente DE-37...
-
Page 40: Vsc - Vectorscope
Das Instrument wird nach Auswahl in der oberen Hälfte der Bildschirmfl ä- che angezeigt. Parameter Für das Audio-Vektorskop stehen keine veränderbaren Parameter zur Verfügung. Die werkseitig gesetzten Parameter entnehmen Sie bitte dem Kapitel 9 | Technische Daten. Manual | TM3-Primus DE-38 4 | Instrumente | 4.1 | VSC – Vectorscope... -
Page 41: Chart
Linie). Das abgebildete Programm müsste insgesamt abgesenkt werden, um den I-Wert in den grünen Bereich zu bekommen. Das Instrument wird nach Auswahl in der oberen Hälfte der Bildschirmfl ä- che angezeigt. Manual | TM3-Primus 4 | Instrumente | 4.2 | Chart DE-39... - Page 42 Parameter ändern Für das Chart-Instrument stehen veränderbare Parameter im Setup-Menü zur Verfügung, alle anderen fi nden Sie im Kapitel 9 | Technische Daten. Manual | TM3-Primus DE-40 4 | Instrumente | 4.2 | Chart...
- Page 43 6. Berühren Sie auf der Menü-Seite Monitoring wieder Übernehmen. Sie gelangen zurück ins Hauptmenü. 7. Berühren Sie Speichern, um Ihre Einstellungen zu übernehmen und zu laden. TM3-Primus wechselt zurück in den Normalbetrieb. Manual | TM3-Primus 4 | Instrumente | 4.2 | Chart...
-
Page 44: Rta
Verteilungskurve lässt sich ablesen, ob es sich z. B. um basslastiges oder höhenlastiges Tonmaterial handelt oder ob Fre- quenzanteile fehlen. Das Instrument wird nach Auswahl in der oberen Hälfte der Bildschirmfl ä- che angezeigt. Manual | TM3-Primus DE-42 4 | Instrumente | 4.3 | RTA... - Page 45 Parameter ändern Für das RTA-Instrument stehen veränderbare Parameter im Setup-Menü zur Verfügung, alle anderen fi nden Sie im Kapitel 9 | Technische Daten. Manual | TM3-Primus 4 | Instrumente | 4.3 | RTA DE-43...
- Page 46 6. Berühren Sie auf der Menü-Seite Monitoring wieder Übernehmen. Sie gelangen zurück ins Hauptmenü. 7. Berühren Sie Speichern, um Ihre Einstellungen zu übernehmen und zu laden. TM3-Primus wechselt zurück in den Normalbetrieb. Manual | TM3-Primus DE-44 4 | Instrumente | 4.3 | RTA...
-
Page 47: Tp/Ppm Bargraph
Codecs, in Abtastratenwandlern (SRC) oder bei der D/A-Wandlung keine störenden Artefakte bilden kann. Beim Einsatz von Codecs gibt der EBU-Standard R128 einen Maximalpegel von –3 dBTP vor, ansonsten –1 dBTP. Manual | TM3-Primus 4 | Instrumente | 4.4 | TP/PPM Bargraph DE-45... - Page 48 Skalen ändern Für das PPM-Instrument stehen auswählbare Skalen im Setup-Menü zur Verfügung. Weitere Daten fi nden Sie im Kapitel 9 | Technische Daten. Manual | TM3-Primus DE-46 4 | Instrumente | 4.4 | TP/PPM Bargraph...
- Page 49 Skalen zur Verfügung. Berühren Sie Übernehmen. 5. Berühren Sie Speichern, um Ihre Einstellungen zu übernehmen und zu laden. TM3-Primus wechselt zurück in den Normalbetrieb. Manual | TM3-Primus 4 | Instrumente | 4.4 | TP/PPM Bargraph...
-
Page 50: Mc - Moving Coil
Abhängig vom gewählten Standard und Modus werden die Kanäle L und R eines Stereo-Signals in zwei separaten Zeigerinstrumenten (PPM, VU) oder in einem einzigen Instrument (PPM + Loudness) dargestellt. Manual | TM3-Primus DE-48 4 | Instrumente | 4.5 | MC – Moving Coil... - Page 51 Skalen und Parameter ändern Für das MC-Instrument stehen auswählbare Skalen und Parameter im Setup-Menü zur Verfügung. Weitere Daten fi nden Sie im Kapitel 9 | Tech- nische Daten. Manual | TM3-Primus 4 | Instrumente | 4.5 | MC – Moving Coil DE-49...
- Page 52 4. Wählen Sie Ihre Skala aus. Für den VU-Modus können Sie zusätzlich einen Vorlauf einstellen. Berühren Sie Übernehmen. 5. Berühren Sie Speichern, um Ihre Einstellungen zu übernehmen und zu laden. TM3-Primus wechselt zurück in den Normalbetrieb. Manual | TM3-Primus DE-50...
-
Page 53: Correlator
Anzeige keine dauerhaft negativen Werte (rot) annimmt. Parameter Für den Correlator stehen keine veränderbaren Parameter zur Verfügung. Die werkseitig gesetzten Parameter entnehmen Sie bitte dem Kapitel 9 | Technische Daten. Manual | TM3-Primus 4 | Instrumente | 4.6 | Correlator DE-51... -
Page 54: Loudness Bar
Messungen mit unterschiedlichen Zeitkonstanten (M, S, I). Bei Stereo-Quellen werden die Kanäle L und R für die Messung summiert, bei 5.1-Quellen die fünf Hauptkanäle (5.0). Manual | TM3-Primus DE-52 4 | Instrumente | 4.7 | Loudness Bar... - Page 55 Programm auf den Zielwert dieses Standards ausgesteu- ert werden, also im Falle von EBU R128 bei Verwendung einer Relativ- Skala auf 0 LU und bei Verwendung einer Absolut-Skala auf –23 LUFS. Manual | TM3-Primus 4 | Instrumente | 4.7 | Loudness Bar DE-53...
- Page 56 Loudness-Standard und Parameter ändern Alle gängigen Loudness-Standards können für das Loudness-Bar- Instrument ausgewählt und einige Parameter im Setup-Menü angepasst werden. Weitere Daten fi nden Sie im Kapitel 9 | Technische Daten. Manual | TM3-Primus DE-54 4 | Instrumente | 4.7 | Loudness Bar...
- Page 57 Tasten die Steuertasten Loudness. Berühren Sie auf dieser und der nächsten Menü-Seite Übernehmen. Sie gelangen zurück ins Haupt- menü. 7. Berühren Sie Speichern, um Ihre Einstellungen zu übernehmen und zu laden. TM3-Primus wechselt zurück in den Normalbetrieb. Manual | TM3-Primus 4 | Instrumente | 4.7 | Loudness Bar DE-55...
-
Page 58: Magic Lra
LRA-Wert, desto geringer ist die Programm-Dynamik. Die Messung gibt also an, ob ein Programm eine durchgängig gleiche Loudness aufweist (kleine LRA-Werte), oder ob große Unterschiede zwischen sehr leisen und sehr lauten Passagen vorkommen (hohe LRA-Werte). Manual | TM3-Primus DE-56 4 | Instrumente | 4.8 | Magic LRA... - Page 59 LRA-Absolutwert korrespondierenden Länge aus. Parameter Für das Magic-LRA-Instrument stehen keine veränderbaren Parameter zur Verfügung. Die werkseitig gesetzten Parameter entnehmen Sie bitte dem Kapitel 9 | Technische Daten. Manual | TM3-Primus 4 | Instrumente | 4.8 | Magic LRA DE-57...
-
Page 60: Numeric Instrument
Messungen individuell aktiviert und deaktiviert werden. Laufende Messungen der I-, LRA- und TPmax-Werte werden grün dargestellt, angehaltene Messungen gelb. Bei Überschreitung der Skalengrenze er- scheinen die Werte in rot. Manual | TM3-Primus DE-58 4 | Instrumente | 4.9 | Numeric Instrument... - Page 61 Anzeige ändern Im Setup-Menü können die verfügbaren Loudness-Werte individuell für das Numeric-Instrument aktiviert werden. Weitere Daten fi nden Sie im Kapitel 9 | Technische Daten. Manual | TM3-Primus 4 | Instrumente | 4.9 | Numeric Instrument DE-59...
- Page 62 Berühren Sie Übernehmen. Sie gelangen zurück ins Hauptmenü. 6. Berühren Sie Speichern, um Ihre Einstellungen zu übernehmen und zu laden. TM3-Primus wechselt zurück in den Normalbetrieb. Manual | TM3-Primus DE-60 4 | Instrumente | 4.9 | Numeric Instrument...
-
Page 63: Monitoring
Dabei können die Tasten jeweils mit Schalt- oder Tastfunktion versehen werden, die die jeweilige Funktion entweder ein- und ausschaltet oder nur für die Dauer des Festhaltens der Taste aktiviert. Manual | TM3-Primus 4 | Instrumente | 4.10 | Monitoring DE-61... - Page 64 Parameter ändern Für das Monitoring-Instrument können im Setup-Menü Tasten und Downmix aktiviert werden. Weitere Daten fi nden Sie im Kapitel 9 | Technische Daten. Manual | TM3-Primus DE-62 4 | Instrumente...
- Page 65 Monitoring Downmix, wenn Sie das Signal als 2-Kanal-Stereo-Down- mix ausgeben möchten. Berühren Sie Übernehmen. Sie gelangen zurück ins Hauptmenü. 6. Berühren Sie Speichern, um Ihre Einstellungen zu übernehmen und zu laden. TM3-Primus wechselt zurück in den Normalbetrieb. Manual | TM3-Primus 4 | Instrumente DE-63...
-
Page 66: Tastenfeld
Instrumenten enthalten, um damit direkt auf dem Bildschirm verschiedene Funktionen der angezeigten Instrumente zu bedienen. So lassen sich Loudness-Messungen, die Zeiteinteilung im Chart, die RTA-Referenz oder die Dim- und Mute-Funktionen des Monitoring-Instrumentes darüber steuern. Manual | TM3-Primus DE-64 4 | Instrumente | 4.11 | Tastenfeld... - Page 67 Tasten aktivieren Die für das Tastenfeld-Instrument verfügbaren Tasten ergeben sich aus der Auswahl der aktiven Instrumente. Weitere Informationen fi nden Sie in den Kapiteln über die jeweiligen Instrumente. Manual | TM3-Primus 4 | Instrumente | 4.11 | Tastenfeld DE-65...
- Page 68 5. Es erscheint die Menü-Seite Monitoring. Berühren Sie Übernehmen. Sie gelangen zurück ins Hauptmenü. 6. Berühren Sie Speichern, um Ihre Einstellungen zu übernehmen und zu laden. TM3-Primus wechselt zurück in den Normalbetrieb. Manual | TM3-Primus DE-66 4 | Instrumente | 4.11 | Tastenfeld...
-
Page 69: Referenzpegel Anpassen
British-Skala 6 bei einem Pegel von +8 dBu oder eine VU-Skala 0 dB bei einem Pegel von +4 dBu an. Die Re- ferenzpegeleinstellung von +6 dBu im TM3-Primus kann in Schritten zu 0,1 dBu angepasst werden. -
Page 70: Dbu/0 Dbfs
0 dBFS-Anzeige bei Verwendung einer digitalen Skala defi niert. Bei einer Referenzpegeleinstellung von 15 dBu/0 dBFS im TM3-Primus zeigt ein Eingangspegel von +6 dBu auf z. B. der TP60- Skala den Wert –9 dBFS an. Dieser Bezug kann in Schritten zu 0,1 dBu angepasst werden. - Page 71 6. Berühren Sie Übernehmen. Sie gelangen zurück ins Hauptmenü. 7. Berühren Sie Speichern, um Ihre Einstellungen zu übernehmen und zu laden. TM3-Primus wechselt zurück in den Normalbetrieb. Manual | TM3-Primus 5 | Referenzpegel anpassen | 5.3 | Einstellungen vornehmen...
-
Page 72: Werkseinstellung
6 | Werkseinstellung Mit dieser Menü-Option kann der TM3-Primus auf seine werkseitigen Grundeinstellungen zurückgesetzt werden. Er startet dann wieder mit den initialen Abfragen zur Region und zur bevorzugten Eingangsquelle. Spra- che, TP- oder PPM-Skala, Loudness-Standard und Referenzpegel bei analoger Quelle werden entsprechend voreingestellt. - Page 73 Manual | TM3-Primus 6 | Werkseinstellung DE-71...
- Page 74 3. Die Menü-Seite für die Werkseinstellung erscheint. Beachten Sie die Hinweise auf der Menü-Seite. Berühren Sie Werkseinstellung. 4. TM3-Primus bootet neu und zeigt die Regionswahl. Wählen Sie Ihre Region. TM3-Primus übernimmt die in der Region gültigen Voreinstel- lungen (Sprache, Loudness-Standard, Referenzen).
-
Page 75: Kalibrierung
7 | Kalibrierung Wichtige Hinweis zur Kalibrierung und analogen Pegelein- stellung beim TM3-Primus Der TM3-Primus ist für den Betrieb an analogen Quellen mit unsymme- trischen RCA-Eingängen ausgerüstet. Im professionellen Studioumfeld gilt für die deutschsprachigen Länder in der Regel der Referenzpegel +6 dBu für die Anzeige 0 dB. - Page 76 2. Die Menü-Seite für die Werkseinstellung erscheint. Beachten Sie die Hinweise auf der Menü-Seite. Berühren Sie Werkseinstellung. 3. TM3-Primus bootet neu und zeigt die Regionswahl. Berühren Sie die Taste für die deutschsprachigen Länder (oberste Taste). 4. Die Menü-Seite Eingangswahl erscheint. Berühren Sie Analog RCA.
-
Page 77: Update
8 | Update Um Ihren TM3-Primus auf dem neuesten Stand zu halten, sollten Sie in regelmäßigen Abständen die System-Software aktualisieren. Es stehen immer nur die Optionen im Gerät zur Verfügung, die zum Zeitpunkt der Veröffentlichung der installierten Software-Version verfügbar waren. - Page 78 USB Micro-B USB-A 1,5 m 1. Schließen Sie den TM3-Primus, sofern nicht bereits geschehen, mit dem mitgelieferten USB-Verbindungskabel an einen Computer mit Internet-Verbindung an. Manual | TM3-Primus DE-76 8 | Update...
- Page 79 2. Halten Sie den Bildschirm für mehr als 2 Sekunden gedrückt, um das Setup-Menü aufzurufen. 3. Berühren Sie Systemeinstellungen. 4. Die Menü-Seite für die Systemeinstellungen erscheint. Berühren Sie System Update. Manual | TM3-Primus 8 | Update DE-77...
- Page 80 5. TM3-Primus wird nun als USB-Laufwerk am Computer-System ange- meldet (TM3-PRIMUS). Sobald dies erfolgt ist, erscheint die Menü- Seite System Update mit Hinweisen zur Vorgehensweise. 6. Loggen Sie sich im Mitglieder-Bereich der RTW-Webseite (https:// www.rtw.com/de/service/manuals-software.html) ein. Falls Sie noch kein Mitglied sind, registrieren Sie sich kostenlos.
- Page 81 7. Klicken Sie auf „Audio-Monitore“ und anschließend auf „TM3-Primus“. 8. Klicken Sie im Abschnitt „Aktuelle Firmware“ auf den Link der Firmwa- re und laden Sie die Datei vom Typ „rtw-tm3-fw-n-nn.bin“ direkt auf das TM3-PRIMUS-USB-Laufwerk. 9. Sobald die Datei vollständig auf dem TM3-PRIMUS-USB-Laufwerk gespeichert ist, berühren Sie Update.
-
Page 82: Technische Daten
Kapazitiver 4,3’’-Touch-Screen (272 x 480 Pixel) Anschlüsse: 1 x USB Micro-B; USB 2.0 Full Speed-Anschluss zum Datenaustausch zwischen Computer und TM3-Primus und zur Stromversorgung über externes Netzteil 2 x RCA-F, Analog In (unsym., einstellbar) 1 x RCA-F, S/PDIF In (unsymmetrisch) - Page 83 Impedanz: > 10 kOhm HINWEIS – Bitte lesen Sie unbedingt das Manual, bevor Sie Änderungen vornehmen. Das Gerät wurde von RTW kalibriert. Alle zuvor genannten Referenzen verändern sich bei Anpassung der Eingangsempfi ndlichkeit. Digitale Ein-/Ausgänge 1 digitaler S/PDIF-Eingang, RCA-F, unsymmetrisch, permanent mit 75 ...
- Page 84 • +6 dB auf Nordic-Skala • “6” auf BR-IIa-Skala • +6 dB auf SMPTE24-Skala • 0 dB auf NHK-Skala Integrationszeit: entsprechend Standard: Sample (TP60), 20 ms (BR IIa), 10 ms (alle anderen) Manual | TM3-Primus DE-82 9 | Technische Daten...
- Page 85 Stereo horizontal, Stereo vertical - Skala analog: VU (–20 bis +3 dB) - Skala digital: VU Digital (–20 bis + 3 dB) - Lead: 0 dB; einstellbar von 0 bis 10 dB in 1-dB-Schritten Manual | TM3-Primus 9 | Technische Daten DE-83...
- Page 86 K fi lter entsprechend ITU BS.1770 Pegelanpassung für die Summierung: • 0,0 dB (L, R, C) • +1,5 dB (LS, RS) • Off (LFE) TruePeak-Over-Schwelle: –1 dBTP; einstellbar von 0 bis –4 dBTP in 1-dBTP-Schritten Manual | TM3-Primus DE-84 9 | Technische Daten...
- Page 87 Skala: ATSC0: 0 .. –60 LKFS M Integrationszeit: 400 ms (SQR) S Integrationszeit: I Silence Gate: –70.0 LKFS I Relative Gate: –10.0 LU I Toleranzbereich: ±2 LU Over-Empfi ndlichkeit: –2 dBFS Over-Haltezeit: Manual | TM3-Primus 9 | Technische Daten DE-85...
- Page 88 Skala: ATSC0: 0 .. –60 LKFS M Integrationszeit: 400 ms (SQR) S Integrationszeit: I Silence Gate: –70.0 LKFS I Relative Gate: –8.0 LU I Toleranzbereich: ±0,5 LU Over-Empfi ndlichkeit: –2 dBFS Over-Haltezeit: Manual | TM3-Primus DE-86 9 | Technische Daten...
- Page 89 Nullpunkt ausbreitend, Farbwechsel bei überschreiten der eingestellten Bereiche Skalenbereich: –10 LU bis +10 LU Minimalbereich: 5 LU Komfortbereich: 10 LU Maximalbereich: außerhalb des Komfortbereichs Farbe: grün, 3 Stufen von dunkel zu hell entsprechend Minimal-, Komfort- und Maximalbereich Manual | TM3-Primus 9 | Technische Daten DE-87...
- Page 90 –0.0 LU; Toleranz unterhalb des Target Level, einstellbar von 0 bis –6 LU in 0,5-LU-Schritten Toleranz oben: 0.0 LU; Toleranz oberhalb des Target Level, einstellbar von 0 bis 6 LU in 0,5-LU-Schritten Manual | TM3-Primus DE-88 9 | Technische Daten...
- Page 91 Bewertungsfi lter: Linear Peakhold-Anzeige: 4 s, 2 s, off Messbereich: max. 45 dB. Skalierung: 3, 6, 9 dB Referenz: 0.0 dB; einstellbar von 0.0 bis 21.0 dB in 1-dB-Schritten Integrationszeit (Ballistik): Fast Manual | TM3-Primus 9 | Technische Daten DE-89...
- Page 92 –1 r bis 0 bis +1 r Standard-Farbeinstellung: rot: –1 r bis –0,1 r weiß: 0 r (–0,1 r to +0,1 r) grün: +0,1 r bis +1 r Ansprech-/Rücklaufzeit: 1,0 s/2,5 s Manual | TM3-Primus DE-90 9 | Technische Daten...
- Page 93 • USB-A auf Micro-USB-BVerbindungskabel, 1,5 m Länge • USB-Netzteil, Manual Bestell-Nr.: TM3-Primus Zubehör USB-Treiber: USB-Treiber-Software zum Betrieb des TM3-Primus im USB-Audio-Eingangs-Modus auch auf Windows®-Syste- men. Installer zum Download verfügbar unter Audio-Moni- tore/TM3-Primus im Mitgliederbereich unserer Webseite: https://www.rtw.com/de/service/manuals-software.html Manual | TM3-Primus...
-
Page 94: Ce-Konformität
10 | CE-Konformität EG-Konformitätserklärung | Richtlinie 2004/108/EG und Richtlinie 2006/95/EG Die RTW GmbH & Co.KG, Am Wassermann 25, 50829 Köln, Deutschland, erklärt in alleiniger Verantwortung, dass die Produkte der RTW TouchMonitor TM3-Primus auf die sich diese Erklärung bezieht, mit den folgenden Normen bzw. normativen Dokumenten übereinstimmt:... -
Page 95: Rohs-Konformität
11 | RoHS-Konformität RoHS-Konformitätserklärung für TM3-Primus | Richtlinie 2011/65/EU Die RTW GmbH & Co.KG, Am Wassermann 25, 50829 Köln, Deutschland, erklärt in alleiniger Verantwortung, dass das Produkt RTW TouchMonitor TM3-Primus bestehend aus den Komponenten: • TM3-Primus Tischgerät mit Display • Verbindungskabel USB-A auf USB-Micro-B, 1,5 m Länge •... -
Page 96: Lizenzen
Das Produkt TouchMonitor TM3-Primus umfasst neben der Hardware ein Softwarepa- ket, das Programme mit unterschiedlichen Lizenzen beinhaltet: A. Software aus der Urheberschaft der RTW GmbH & Co.KG, die nur zum bestim- mungsmäßen Gebrauch des Gerätes verwendet werden darf (Applikation, DSP- Programme, Bootloader). - Page 97 Die Lizenz fi nden Sie unter http://opensource.org/licenses/MIT. An der unter B. aufgeführten Software wurden teilweise Änderungen vorgenom- men. In diesem Fall können Sie die Sourcen der geänderten Software von RTW auf Anfrage innerhalb von drei Jahren nach Erhalt des Gerätes zugesandt bekommen.
-
Page 98: Blockdiagramm
Blockdiagramm © 10/2014 | Technische Änderungen vorbehalten. MANTM3P RTW GmbH & Co. KG Am Wassermann 25 | 50829 Köln | Germany Phone: +49 221. 70 913-0 | Fax: +49 221. 70 913-32 Internet: www.rtw.com | E-Mail: rtw@rtw.com... - Page 99 TM3-Primus Operating Manual...
- Page 100 1.00 and higher | November, 2014 © 2014 | Technical changes without prior notice! RTW GmbH & Co.KG | Am Wassermann 25 | 50829 Köln | Germany Fon +49 221. 70 913-0 | Fax +49 221. 70 913-32 www.rtw.com | rtw@rtw.com WEEE Reg.-no.:...
- Page 101 If you see this marked on equipment, consult the operating manual for precautionary instructions. NOTE This symbol points your attention to specifi c characteristics that are no malfunctions. Manual | TM3-Primus Safety Instructions EN-3...
- Page 102 • Never remove any parts from the unit and do not make any modifi ca- tions to the unit without the express written consent of RTW. Modifi - cations can cause both safety hazards and affect the unit’ s conformity and certifi...
- Page 103 • Do not use this apparatus near water. • Do not operate in wet/damp conditions. • Do not operate in explosive atmosphere. • Do not operate in dusty environments. Manual | TM3-Primus Safety Instructions EN-5...
- Page 104 Manual | TM3-Primus EN-6 Safety Instructions...
- Page 105 European Parliament and Council from June 8th, 2011. This product may contain lead, cadmium and/or mercury in slight quantities. Please dispose of or recycle the electronic parts or devices according to your local government regulations. Manual | TM3-Primus Safety Instructions EN-7...
- Page 106 7 | Calibration 3.1 | System Start-up 3.2 | Signal Sources and Synchroni- 8 | Update zation 3.3 | DAW and TM3-Primus 9 | Specifi cations 3.4 | Loading vertical and horizontal Presets 10 | EC Conformity 3.5 | Select Instruments...
-
Page 107: Before You Begin
1 | Before You Begin 1.1 | Design Concept Thank you for purchasing the TM3-Primus made by RTW. You have settled for a highly effi cient metering solution based on modern hardware and most recent technology providing intuitive and easy operation, howe- ver including a high degree of fl... - Page 108 Being a stand-alone unit using an elegant touchscreen-based control, TM3-Primus will always provide you with the exact audio signal informati- on that you will need for fast and safe interpretation even without having a profound technical background. The high-contrast 4.3“ screen can be used vertically or horizontally alternatively.
- Page 109 The selection of the displayed instruments and the adjustment of essen- tial parameters can be made on the touch-sensitive display. Besides PPM and True Peak instruments, TM3-Primus features comprehensive loud- ness measuring options conforming to all relevant international standards ( EBU R128, ITU BS.1770-3/1771-1, ARIB, ATSC A/85, OP-59, AG- COM, CALM Act ) including single-channel and summing bargraphs, loud- ness range and numerical displays.
-
Page 110: Scope Of Delivery
Unpack the instrument and check, if you received all items listed. If com- ponents are missing, please contact your dealer. A detailed operating manual can be found in “Audio Monitors/TM3- Primus” section at members area on web site: https://www.rtw.com/en/ service/manuals-software.html TM3-Primus... -
Page 111: Installation
• If you want to use the USB connection for audio signals instead of RCA, defi ne TM3-Primus as the standard audio device on your compu- ter (on Windows® systems an audio driver has to be installed). • TM3-Primus will initiate its system startup sequence. After confi rmation of the initial setting requests the unit is ready for use. -
Page 112: Connectors
• Power supply (via computer or external mains adapter) special causes. The unit has been calibrated at RTW, the software Always use the delivered USB integrated reference level setting for the analog input shall be used. -
Page 113: Signal Connection
USB marked USB Micro-B connector of the unit. 2. Then plug the USB-A connector of the USB connecting cable to a cor- responding socket of the USB mains adapter or a computer. Manual | TM3-Primus 2 | Installation | 2.2 | Signal Connection EN-15... - Page 114 USB Micro-B connector of the unit. 3. Then plug the USB-A connector of the USB connecting cable to a corresponding socket of the USB mains adapter or a computer to boot TM3-Primus. Manual | TM3-Primus EN-16 2 | Installation | 2.2 | Connect Signals...
- Page 115 4. Select your area. TM3-Primus overtakes correspondings settings being valid in this area (language, Loudness standard, references). 5. Select Analog RCA as input domain. TM3-Primus displays the info screen about operating and will be ready for operation after a few se- conds.
- Page 116 USB Micro-B connector of the unit. 3. Then plug the USB-A connector of the USB connecting cable to a corresponding socket of the USB mains adapter or a computer to boot TM3-Primus. Manual | TM3-Primus EN-18 2 | Installation | 2.2 | Connect Signals...
- Page 117 4. Select your area. TM3-Primus overtakes correspondings settings being valid in this area (language, Loudness standard, references). 5. Select Digital SPDIF as input domain. TM3-Primus displays the info screen about operating and will be ready for operation after a few se- conds.
- Page 118 1. Plug the Micro-B connector of the delivered USB connecting cable to the USB Micro-B connector of the unit. 2. Then plug the USB-A connector of the USB connecting cable to a cor- responding socket of a computer to boot TM3-Primus. Manual | TM3-Primus EN-20...
- Page 119 USB - Stereo or will be set) USB - Surround 3. Select your area. TM3-Primus overtakes correspondings settings being valid in this area (language, Loudness standard, references). 4. Select USB – Stereo or USB – Surround as input domain. TM3- Primus displays the info screen about operating for a few seconds.
- Page 120 Mac OS X® Systems Defi ne RTW TM3-Primus as audio output device Check sample rate (Format) and adapt, if necessary ready for operation Manual | TM3-Primus EN-22 2 | Installation | 2.2 | Connect Signals...
- Page 121 Sound. 7. Select Output and there TM3-Primus Output Type USB. 8. Open the Audio Midi Setup and click the TM3-Primus Output option to display the details. 9. Adapt the Format option to the sample rate you are using (max. 96 kHz).
- Page 122 Together with the driver the RTW TM3 Primus Control Panel for the adjustment of driver settings will be installed and provided. 7. Open the Windows® system control panel and select Sound.
- Page 123 Open RTW TM3-Primus Control Panel Check current sample rate Select Format Adapt buffer settings Adjust output volume ready for operation Manual | TM3-Primus 2 | Installation | 2.2 | Connect Signals EN-25...
- Page 124 10. Adapt the buffer depth using the RTW TM3 Primus Control Panel. It can be displayed with a click on the RTW icon located at the info section of the Windows task bar. 11. Check that the displayed current sample rate on the Status tab mat- ches to the corresponding settings of your DAW.
-
Page 125: Operation
3 Connect the delivered USB connecting cable to the unit. 4. Connect the USB connecting cable to the computer or to the USB mains adapter and this to mains supply. After a short time TM3-Primus presents the requests for the initial confi guration. -
Page 126: Signal Sources And Synchronization
Input selection option of the setup menu. In this way, swit- ching between several sources connected to the unit is done very easily. NOTE - For using USB audio signals TM3-Primus is defi ned as standard audio output device on the computer system. DAWs may syn- chronize on it. - Page 127 Primus handles digital signal sources with sampling rates up to 96 kHz. Correspondently the selected input will be used for synchronization pur- poses. If using the analog input, TM3-Primus will use its internal clock to be the sync reference. NOTE - Depending on the settings of the operating system of a Mac, it might happen, that TM3-Primus displays no signals on its initial instantiation as USB device.
-
Page 128: Daw And Tm3-Primus
3.3 | DAW and TM3-Primus With the USB audio interface of TM3-Primus, audio data streams can directly be used and displayed from a digital audio workstation (DAW) without conversion. Input Routing Inside a DAW always use channel pair “1 + 2”, if you have selected USB audio 2.0 (Stereo) as input domain. -
Page 129: Loading Vertical And Horizontal Presets
The display changes from vertical to horizontal orientation. 2. Rotate the display unit to the left so that the base is positioned on the right hand side. Manual | TM3-Primus 3 | Operation | 3.4 | Loading vertical and horizontal Presets EN-31... - Page 130 2. Place the display unit in its upright position again. NOTE - Please note that the TM3-Primus recognizes the wipe orientation (lengthwise or crosswise) in order to switch between vertical and horizontal display modes. It doesn‘t use a motion sensor for this.
-
Page 131: Select Instruments
1. Touch and hold the screen for more than 2 seconds. The Main menu appears. 2. Touch the key of the Active instruments option. Manual | TM3-Primus 3 | Operation | 3.5 | Select Instruments EN-33... - Page 132 3. Step by step you will be led through up to fi ve menus. Manual | TM3-Primus EN-34 3 | Operation | 3.5 | Select Instruments...
- Page 133 All currently made settings will be lost. The unit still operates with the previous used settings. 7. Follow all these steps, if you want to adapt loudness standards, scales or additional parameters. Manual | TM3-Primus 3 | Operation | 3.5 | Select Instruments EN-35...
-
Page 134: Instruments
The description follows the order the instruments have in the setup menu. Manual | TM3-Primus EN-36 4 | Instruments... - Page 135 (selectable values) • Keyboard (selected keys of different instru- ments) -> alternatively: • TP/PPM • MC -> in addition: • Correlator For lack of space some instruments are only available in specifi c combinations. Manual | TM3-Primus 4 | Instruments EN-37...
-
Page 136: Vsc - Vectorscope
Parameter There are no adjustable parameters available for the Audio Vectorscope. In chapter 9 | Specifi cations you may fi nd the parameters set by factory. Manual | TM3-Primus EN-38 4 | Instruments | 4.1 | VSC – Vectorscope... -
Page 137: Chart
(parts below doubled line and above graph). The program shown in the example should be reduced to get the I value into the green range. After its selection, the instrument will be displayed in the upper half of the screen. Manual | TM3-Primus 4 | Instruments | 4.2 | Chart EN-39... - Page 138 Adjust Parameters For the Chart instrument adjustable parameters are available in the setup menu. In chapter 9 | Specifi cations you may fi nd all parameters. Manual | TM3-Primus EN-40 4 | Instruments | 4.2 | Chart...
- Page 139 6. On Monitoring menu page, again touch Confi rm. You will get back to the main menu. 7. Touch Store to transfer the changes to the system. The unit gets back to normal operation using the new settings. Manual | TM3-Primus 4 | Instruments | 4.2 | Chart EN-41...
-
Page 140: Rta
After its selection, the instrument will be displayed in the upper half of the screen. Manual | TM3-Primus EN-42 4 | Instruments | 4.3 | RTA... - Page 141 Adjust Parameters For the RTA instrument adjustable parameters are available in the setup menu. In chapter 9 | Specifi cations you may fi nd all parameters. Manual | TM3-Primus 4 | Instruments | 4.3 | RTA EN-43...
- Page 142 6. On Monitoring menu page, again touch Confi rm. You will get back to the main menu. 7. Touch Store to transfer the changes to the system. The unit gets back to normal operation using the new settings. Manual | TM3-Primus EN-44 4 | Instruments | 4.3 | RTA...
-
Page 143: Tp/Ppm Bargraph
D/A converter. For codec processing, the EBU R128 recommends a maximum level of –3 dBTP. For all other applica- tions, it recommends a maximum level of –1 dBTP. Manual | TM3-Primus 4 | Instruments | 4.4 | TP/PPM Bargraph EN-45... - Page 144 Select Scales For the TP/PPM instrument selectable scales are available in the setup menu. In chapter 9 | Specifi cations you may fi nd more information. Manual | TM3-Primus EN-46 4 | Instruments | 4.4 | TP/PPM Bargraph...
- Page 145 Touch Confi rm. You will get back to the main menu. 5. Touch Store to transfer the changes to the system. The unit gets back to normal operation using the new settings. Manual | TM3-Primus 4 | Instruments | 4.4 | TP/PPM Bargraph EN-47...
-
Page 146: Mc - Moving Coil
Depending on selected mode and standard, the L and R channels of a stereo signal can be displayed in two separate moving coil instruments (PPM, VU) or in one single (PPM + Loudness). Manual | TM3-Primus EN-48 4 | Instruments | 4.5 | MC – Moving Coil... - Page 147 For the MC instrument selectable scales and adjustable parameters are available in the setup menu. In chapter 9 | Specifi cations you may fi nd more information. Manual | TM3-Primus 4 | Instruments | 4.5 | MC – Moving Coil EN-49...
- Page 148 Touch Confi rm. You will get back to the main menu. 5. Touch Store to transfer the changes to the system. The unit gets back to normal operation using the new settings. Manual | TM3-Primus EN-50 4 | Instruments | 4.5 | MC – Moving Coil...
-
Page 149: Correlator
(shown in red) across extended periods. Parameters There are no adjustable parameters available for the Correlator. In chapter 9 | Specifi cations you may fi nd the parameters set by factory. Manual | TM3-Primus 4 | Instruments | 4.6 | Correlator EN-51... -
Page 150: Loudness Bar
For stereo sources, the L and R chan- nels are summed. For 5.1 sources, the fi ve main channels (5.0) are used for the measurement. Manual | TM3-Primus EN-52 4 | Instruments | 4.7 | Loudness Bar... - Page 151 „Integrated“ target level of this standard. Using EBU R128, it should read 0 LU on a relative scale or –23 LUFS on an absolute scale. Manual | TM3-Primus 4 | Instruments | 4.7 | Loudness Bar EN-53...
- Page 152 For the Loudness Bar instrument all relevant Loudness standards are selectable and some parameters can be adjusted in the setup menu. In chapter 9 | Specifi cations you may fi nd more information. Manual | TM3-Primus EN-54 4 | Instruments | 4.7 | Loudness Bar...
- Page 153 You will get back to the main menu. 7. Touch Store to transfer the changes to the system. The unit gets back to normal operation using the new settings. Manual | TM3-Primus 4 | Instruments | 4.7 | Loudness Bar EN-55...
-
Page 154: Magic Lra
LRA values represent lower program dynamics. In this way, the LRA measurement can show whether a program has a continuously constant loudness (low LRA values) or a high variation between low and high level components (high LRA values). Manual | TM3-Primus EN-56 4 | Instruments | 4.8 | Magic LRA... - Page 155 LRA value. Parameters There are no adjustable parameters available for the Magic LRA. In chap- ter 9 | Specifi cations you may fi nd the parameters set by factory. Manual | TM3-Primus 4 | Instruments | 4.8 | Magic LRA EN-57...
-
Page 156: Numeric Instrument
I, LRA, and TPmax values will be colored green, those of stopped measurements yellow. If values are exceeding the upper limits, they will be colored red. Manual | TM3-Primus EN-58 4 | Instruments | 4.9 | Numeric Instrument... - Page 157 The numerical Loudness values for the Numeric instrument can be acti- vated in the setup menu. In chapter 9 | Specifi cations you may fi nd more information. Manual | TM3-Primus 4 | Instruments | 4.9 | Numeric Instrument EN-59...
- Page 158 Touch Confi rm. You will get back to the main menu. 6. Touch Store to transfer the changes to the system. The unit gets back to normal operation using the new settings. Manual | TM3-Primus EN-60 4 | Instruments | 4.9 | Numeric Instrument...
-
Page 159: Monitoring
Mute functions keys can be displayed to dim or to mute the volume just by a fi ngertip. These keys may have switching function (on/off) or momentary function for temporary activation by holding the key. Manual | TM3-Primus 4 | Instruments | 4.10 | Monitoring EN-61... - Page 160 Adjust Parameters For the Monitoring instrument keys and downmix can be activated in the setup menu. In chapter 9 | Specifi cations you may fi nd more information. Manual | TM3-Primus EN-62 4 | Instruments...
- Page 161 Touch Confi rm. You will get back to the main menu. 6. Touch Store to transfer the changes to the system. The unit gets back to normal operation using the new settings. Manual | TM3-Primus 4 | Instruments EN-63...
-
Page 162: Keyboard
Loudness measurements, the time range of the Chart, the RTA reference or the Dim and Mute functions of the Monitoring instru- ment can be controlled this way. Manual | TM3-Primus EN-64 4 | Instruments | 4.11 | Keyboard... - Page 163 The number of keys being available for the Keyboard instrument depends on the selection of the active instruments. In the paragraphs about the instruments you may fi nd more information. Manual | TM3-Primus 4 | Instruments | 4.11 | Keyboard EN-65...
- Page 164 5. The Monitoring menu page appears. Touch Confi rm. You will get back to the main menu. 6. Touch Store to transfer the changes to the system. The unit gets back to normal operation using the new settings. Manual | TM3-Primus EN-66 4 | Instruments | 4.11 | Keyboard...
-
Page 165: Reference Level Adjust
(input level, dBu/0 dBFS relation) of TM3-Primus can be ad- apted to local requirements by software. The physical calibration adjusted at RTW (see 7 | Calibration chapter) shall be unchanged not to lose the absolute dBu referencing. 5.1 | Input level... -
Page 166: Dbu/0 Dbfs
0 dBFS display when using a digital scale will be set. Using a reference level setting of 15 dBu/0 dBFS on TM3-Primus means that an input level of +6 dBu reads –9 dBFS on a TP60 scale for example. The relation can be adjusted in steps of 0.1 dBu. - Page 167 6. Touch Confi rm to get back to the main menu. 7. Touch Store to transfer the changes to the system. The unit gets back to normal operation using the new settings. Manual | TM3-Primus 5 | Reference Level Adjust | 5.3 | Change References EN-69...
-
Page 168: Factory Reset
6 | Factory Reset The Factory Reset option is used to reset TM3-Primus to the main set- tings made by factory. The unit starts with the initial requests about area and favoured input domain. Language, TP or PPM scale, loudness stan- dard, and reference level of an analog source will be set. - Page 169 Manual | TM3-Primus 6 | Factory Reset EN-71...
- Page 170 5. The initial Domain selection menu page is displayed. Select your favoured input domain. TM3-Primus overtakes the correspondings set- tings being valid for this domain (scales, references). 6. TM3-Primus displays the info screen about operating and will be ready for operation after a few seconds. Manual | TM3-Primus...
-
Page 171: Calibration
Important note regarding calibration and analog references for TM3-Primus The TM3-Primus features unbalanced RCA input for operation with ana- log signals. In a professional environment there is a clear standard for the analog reference. For most german speaking countries this is +6 dBu for 0 dB display on a PPM DIN5 scale. - Page 172 2. The menu page with information about to proceed the factory reset appears. Touch Factory reset. 3. TM3-Primus reboots and displays the area selection menu. Touch the key for the german language countries (fi rst key). 4. The initial Domain selection menu page appears. Touch Analog RCA.
-
Page 173: Update
8 | Update If you want to keep your TM3-Primus up to date, periodic maintenance of the system software is neccessary, because you only will fi nd options that were already available at the release date of the software version installed on the unit. - Page 174 USB Micro-B USB-A 1.5 m 1. If not proceeded yet, connect TM3-Primus to a computer with internet connection using the delivered USB connecting cable. Manual | TM3-Primus EN-76 8 | Update...
- Page 175 2. Touch and hold the screen for more than 2 seconds. The Main menu appears. 3. Touch the System parameter option. 4. The menu page with the system parameters appears. Touch System update. Manual | TM3-Primus 8 | Update EN-77...
- Page 176 5. TM3-Primus will be recognized by the computer system as a USB drive (TM3-PRIMUS). As soon as the unit has been detected, the System update menu page appears displaying notes about how to proceed. 6. Access members area of the RTW web site (https://www.rtw.com/en/ service/manuals-software.html).
- Page 177 “rtw-tm3-fw-n-nn.bin” fi le type directly to the TM3- PRIMUS USB drive. 9. As soon as the fi le has been completely stored on the TM3-PRIMUS USB drive touch Update. 10. TM3-Primus will be correctly unmounted from the computer system, rebootet, and the update process initialized.
-
Page 178: Specifi Cations
• Loudness Range instrument (Magic LRA) • Moving Coil (BR, VU, BBC mode) • Stereo Correlator • 1/3-octave spectrum analyzer (RTA) • 2-channel Audio Vectorscope • Monitoring (with onscreen level fader) • Numerical displays Manual | TM3-Primus EN-80 9 | Specifi cations... - Page 179 Impedance: > 10 k NOTE – Please read the manual before adjustment changes are performed. The unit has been calibrated at RTW. All above mentioned analog references will change, when modifying the input sensitivity. Digital Inputs/Outputs 1 digital S/PDIF input, RCA-F, unbalanced, permanently terminated with 75 ...
- Page 180 • “6” on BR IIa scale • +6 dB on SMPTE24 scale • 0 dB on NHK scale Integration time: acc. to standard: Sample (TP60), 20 ms (BR IIa), 10 ms (all others) Manual | TM3-Primus EN-82 9 | Specifi cations...
- Page 181 - Scale analog: VU (–20 to +3 dB) - Scale digital: VU Digital (–20 to + 3 dB) - Lead: 0 dB, adjustable from 0 to 10 dB in steps of 1 dB Manual | TM3-Primus 9 | Specifi cations EN-83...
- Page 182 (channel weighting): • 0.0 dB (L, R, C) • +1.5 dB (LS, RS) • Off (LFE) TruePeak Over Threshold: –1 dBTP; adjustable from 0 to –4 dBTP in steps of 1 dBTP Manual | TM3-Primus EN-84 9 | Specifi cations...
- Page 183 ATSC0: 0 .. –60 LKFS M Integration time: 400 ms (SQR) S Integration Time: I Silence Gate: –70.0 LKFS I Relative Gate: –10.0 LU I Tolerance Range: ±2 LU Over Sensitivity –2 dBFS Over hold time: Manual | TM3-Primus 9 | Specifi cations EN-85...
- Page 184 ATSC0: 0 .. –60 LKFS M Integration time: 400 ms (SQR) S Integration Time: I Silence Gate: –70.0 LKFS I Relative Gate: –8.0 LU I Tolerance Range: ±0.5 LU Over Sensitivity –2 dBFS Over hold time: Manual | TM3-Primus EN-86 9 | Specifi cations...
- Page 185 LRA low range: 5 LU Comfort zone: 10 LU LRA high range: outside the comfort zone Color: green, blended in 3 steps from dark to light acc. to low range, comfort zone, high range Manual | TM3-Primus 9 | Specifi cations EN-87...
- Page 186 –0.0 LU; tolerance below the Target Level, adjustable from 0 to –6 LU in steps of 0.5 LU Upper tolerance: 0.0 LU; tolerance above the Target Level, adjustable from 0 to 6 LU in steps of 0.5 LU Manual | TM3-Primus EN-88 9 | Specifi cations...
- Page 187 4 s, 2 s, off Measuring range: 45 dB max. Resolution: 3, 6, 9 dB Reference: 0.0 dB; adjustable from 0.0 to 21.0 dB in steps of 1 dB Integration time (ballistics): Fast Manual | TM3-Primus 9 | Specifi cations EN-89...
- Page 188 –1 r to 0 to +1 r Standard color setting: red: –1 r to –0.1 r white: 0 r (–0.1 r to +0.1 r) green: +0.1 r to +1 r Attack/release time: 1.0 s/2.5 s Manual | TM3-Primus EN-90 9 | Specifi cations...
- Page 189 • USB-A to Micro-USB-B connecting cable, 1.5 m length • USB mains adapter, manual Order no.: TM3-Primus Accessory USB-Driver: USB-Driver-Software to run TM3-Primus in USB audio input mode also on Windows® systems. Installer available for download at Audio Monitors/TM3-Primus section of members area on our website: https://www.rtw.com/en/ service/manuals-software.html Manual | TM3-Primus 9 | Specifi...
-
Page 190: Ec Conformity
10 | EC Conformity EC Declaration of Conformity | Directive 2004/108/EG and 2006/95/EG We, RTW GmbH & Co.KG, Am Wassermann 25, 50829 Köln, Germany, declare under sole responsibility that the products of the RTW TouchMonitor TM3-Primus meet the intend of the Directive 2004/108/EG and Directive 2006/95/EG . -
Page 191: Rohs Conformity
11 | RoHS Conformity RoHS Declaration of Conformity for TM3-Primus | Directive 2011/65/EU We, RTW GmbH & Co.KG, Am Wassermann 25, 50829 Köln, Germany, declare under sole responsibility that the product RTW TouchMonitor TM-Primus consisting of the components: • TM3-Primus table-top unit with display •... -
Page 192: Licenses
In addition to the hardware the RTW TouchMonitor TM3-Primus product includes a software package for which a variety of licenses apply: A. Software produced by RTW GmbH & Co.KG, which may only be used for the pro- per operation of the product as described in the documentation (application, DSP programs, boot loader). - Page 193 • Mac OS X is trademark of Apple Inc., registered in the U. S. and other countries. • Qt® and the Qt logo is a registered trade mark of Digia plc and/or its subsidiaries and is used pursuant to a license from Digia plc and/or its subsidiaries. Manual | TM3-Primus 12 | Licenses EN-95...
-
Page 194: Block Diagram
Block Diagram © 10/2014 | Technical changes without prior notice. MANTM3P RTW GmbH & Co. KG Am Wassermann 25 | 50829 Köln | Germany Phone: +49 221. 70 913-0 | Fax: +49 221. 70 913-32 Internet: www.rtw.com | E-Mail: rtw@rtw.com...
Need help?
Do you have a question about the TM3-Primus and is the answer not in the manual?
Questions and answers