Table of Contents
Advertisement
INSTRUCTIONS
GENERAL RULES
1. Where specified, assemble and disas-
semble the suspension system using the
M
ARZOCCHI
2. On reassembling the suspension system,
always use new seals.
3. Clean all metal parts with a special,
preferably biodegradable, solvent such
as trichloroethane or trichloroethylene.
4. Before reassembling, lubricate all parts
in contact with each other using silicone
fat spray or specific seal oil.
5. Always grease the conic seal rings be-
fore reassembling.
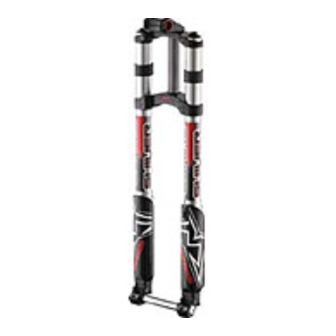
Shiver
6. Use wrenches with metric size only.
Wrenches with inch size might damage
DC
the fastening devices even when their
size is similar to that of the wrenches in
metric size.
7. If two screws are close one to the other,
always tighten using a 1-2-1 sequence.
In short, screw the first screw just up to the
point it is well tightened, then tighten the
second screw and then go back to the
first one and screw it tighter.
special tools only.
Advertisement
Table of Contents

Subscribe to Our Youtube Channel
Related Manuals for Marzocchi Shiver DC


Summary of Contents for Marzocchi Shiver DC
- Page 1 INSTRUCTIONS GENERAL RULES 1. Where specified, assemble and disas- semble the suspension system using the special tools only. ARZOCCHI 2. On reassembling the suspension system, always use new seals. 3. Clean all metal parts with a special, preferably biodegradable, solvent such as trichloroethane or trichloroethylene.
- Page 2 FAILURES, CAUSES AND REMEDIES This paragraph reports some troubles that may occur when using the fork. It also indicates possible causes and suggests a remedy. Always refer to this table before doing any repair work. FAILURES CAUSES REMEDIES Oil leaking through the dust seal. 1.
- Page 3 RECOMMENDATIONS FOR INSTALLATION MAINTENANCE Installing a SHIVER on a bicycle is a very FITTING FORK ONTO THE FRAME delicate operation that should be carried • Check the tightening torque of the retain- forks are based on advanced ARZOCCHI out with extreme care. ing screws (3) before installing the fork technology, supported by year-long experi- •...
- Page 4 • Distance “D” between lower Crown • Assemble the fork to the frame complete • If the lower Crown position with respect and tyre edge (when inflated) should not with headset. to the sliders has been changed for any be lower than 193 mm (total travel + 3 •...
- Page 5 • Now finally tighten the screws (3) on the • Position lower handlebar support (37) DISC BRAKE SYSTEM ASSEMBLY upper crown (36) or (39) to the speci- or (25) onto the upper crown (36) or Assembling the brake caliper onto the wheel fied torque.
- Page 6 FITTING WHEEL • Insert the complete wheel assembly be- • Tighten the wheel shaft screw (21B) • Compress the fork several times so the tween the legs and fit the wheel shaft onto the LH to the specified torque. legs will become properly seated onto (21A) into the wheel shaft pinch bolt wheel shaft.
- Page 7 ADJUSTMENTS SPRING PRELOAD REBOUND Turning the adjuster knob (35) on top of The adjuster screw (C) located on top of the fork legs to adjust preload of spring for leg controls REBOUND damping. When COMPRESSION damping. The fork is set to turning inside the cartridge rod, this ad- the minimum preload at the factory, i.e.
- Page 8 ASSEMBLY INSTRUCTIONS REMOVING UPPER CAP AND FIG. 2 FIG. 3 SPRING Remove the stop ring (34) from the top of Remove the cap (32) with a 28-mm the preload knob support (10) with a small socket wrench. NOTE: leave fork legs secured to the lower screwdriver.
- Page 9 FIG. 4 FIG. 5 REMOVING HYDRAULIC Push down the outer slider onto the stan- Push the stanchion tube into the slider and CARTRIDGE chion tube. remove the upper washer (29), the preload FIG. 6 Lock the check nut (9) and remove the cap sleeve (23) and the spring (24).
- Page 10 FIG. 7 REMOVING GUIDE BUSHING AND FIG. 9 Pull the hydraulic cartridge (12) from stan- SEAL ASSEMBLY Remove the stop ring (15) from the slider chion tube top and make all necessary FIG. 8 by placing the screwdriver bit in one of the changes.
- Page 11 FIG. 10 FIG. 11 FIG. 12 Fit the slider protector (A) onto the slider Remove bush washer (17) from the slider. To remove the guide bushing (19) and the and remove the oil seal (16) with the help spacer (20), beat powerfully the slider of a large slot screwdriver.
- Page 12 ASSEMBLING GUIDE BUSHING FIG. 14 FIG. 15 AND SEAL ASSY Fit the bush washer (17) into the slider so Lubricate the oil seal (16) and place it onto FIG. 13 that it touches the guide bushing. the drift (B) with the hollow side toward the Check that no dirt or debris is between slider.
- Page 13 FIG. 16 FIG. 17 FIG. 18 Insert the stop ring (15) and make sure it is Lubricate the dust seal (14) and insert it into Duly lubricate the stanchion tube and fit it properly seated into place in the slider. the stanchions from the spring end.
- Page 14 RE- ASSEMBLING HYDRAULIC FIG. 20 HOW TO FILL WITH OIL CARTRIDGE Grease the O-ring (2) on the foot nut (1) FIG. 21 FIG. 19 and screw the nut on the hydraulic cartridge Pour the oil little by little when the slider is Insert the hydraulic cartridge (12) com- threaded end.
- Page 15 RE-ASSEMBLING SPRING AND FIG. 23 FIG. 24 UPPER CAP Move the plunger (30, see exploded view), Lubricate the O-ring (31), lift slider (18) FIG. 22 in the cap (32), to the minimum preload and fit the cap (32) by hand. Fit spring (24), preload sleeve (23) and position.
- Page 16 FIG. 25 FIG. 26 Fit the stop ring (34) of the preload knob Fit the preload knob (35) and secure it on support (10) and make sure it is properly the support (10) by tightening the grub seated into place. screw (33) to specified torque.
Need help?
Do you have a question about the Shiver DC and is the answer not in the manual?
Questions and answers