
Related Manuals for Marzocchi Drop-Off SL 2006


Summary of Contents for Marzocchi Drop-Off SL 2006
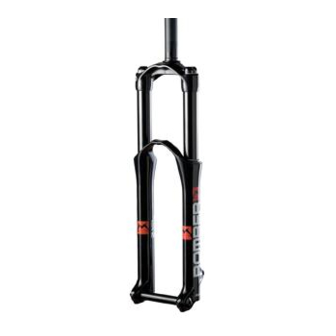
- Page 1 © Marzocchi Suspension 2006 - Drop-Off SL 2006 - Drop-Off SL Technical instructions Technical characteristics: Technical characteristics...
- Page 2 © Marzocchi Suspension 2006 - Drop-Off SL Single-crown fork with ø 32mm legs. Available travels: 130mm, 150 mm. Right fork leg damping element: spring (air pre-load). Left fork leg damping element: air. Right fork leg damping system: VF2 pumping element with internal rebound adjustment.
- Page 3 Always grease the seal lips before reassembling. All of the components of Marzocchi forks require the use of metric tools. Use only metric tools. Imperial (US) tools may have similar sizes, but can damage the bolts, making them impossible to loosen or tighten.
- Page 4 © Marzocchi Suspension 2006 - Drop-Off SL The brake cable must never touch the crown and stanchions. Warnings: Assembling the fender The fender can be supplied with the fork or purchased separately. Fender (1) must be assembled by placing the small support bush (2) between the screw and the fender as shown and by tightening screws (3) with an 8mm fixed spanner to the recommended tightening torque (6 Nm ±1).
- Page 5 © Marzocchi Suspension 2006 - Drop-Off SL Dismantling: Removing the top caps Put the fork in the vice in vertical position, fixing it by the dropouts. Remove the protection cap (1). Using a small pin screwdriver, blow the air off the fork leg, pushing on the air valve.
- Page 6 © Marzocchi Suspension 2006 - Drop-Off SL Use the special spanner to remove the bottom nuts. Do not use other tools. Turn the arch-slider assembly upside down. Using the special 12mm spanner (A), loosen the bottom nuts (1) of both legs.
- Page 7 © Marzocchi Suspension 2006 - Drop-Off SL Remove the bottom pad (1). Pull out the pumping element (3), the rebound spring (7) and the preload tube (9). Dismantling: Removing the seals Prize the dust seal (1) off its seat with a small flat-tip screwdriver.
- Page 8 © Marzocchi Suspension 2006 - Drop-Off SL Remove the spring cup (4). The old sealing rings and dust seals must not be used again. Dismantling: Removing the guide bushes Use the special extractor to remove the guide bushes. Do not use other tools.
- Page 9 © Marzocchi Suspension 2006 - Drop-Off SL...
- Page 10 © Marzocchi Suspension 2006 - Drop-Off SL Assembling: Assembling the guide bushes Insert the guide bushes using the special introducers (short type for the top bush and long type for the bottom bush, both with a white finish). Do not use other tools.
- Page 11 © Marzocchi Suspension 2006 - Drop-Off SL Smear the dust seal and the sealing ring with some grease. Insert the sealing ring (3) in its seat with the special introducer (A). Using a hammer, knock in introducer (A) and drive the sealing ring home into the arch-slider assembly.
- Page 12 © Marzocchi Suspension 2006 - Drop-Off SL Fit the bottom pad (1) to the pumping element rod. Assembling: Assembling the left pumping element Insert the rebound spring (7) and the preload tube (9) ( only for models with 130mm travel ) into the piston rod (3).
- Page 13 © Marzocchi Suspension 2006 - Drop-Off SL Insert the crown-stanchion unit (3) in the arch-slider assembly (4). Using the special 12mm spanner (A), tighten the bottom nuts (1) complete with O-rings (2) of both legs to the recommended tightening torque (10 Nm ± 1).
- Page 14 © Marzocchi Suspension 2006 - Drop-Off SL In a graduated recipient, prepare the quantity of oil to pour into the fork leg (see table). Pour roughly 1/3 of the oil required into each stanchion, then pump the fork a few times to eliminate any traces of air.
- Page 15 © Marzocchi Suspension 2006 - Drop-Off SL Restore the correct air pressure (see settings). Fit the protection cap (1).
- Page 16 During setting don't force the adjusters beyond their limit of travel and don't exceed the max recommended air pressure. To keep the pressure inside the fork’s legs, only use the special MARZOCCHI pump with pressure gauge. The use of any other pump can compromise the inflating operation and cause malfunction or damage to the fork, resulting in an accident, personal injury or death.
- Page 17 The optimal spring preloading is the one that lets you obtain the desired SAG under the biker's weight. Use the MARZOCCHI pump with pressure gauge to inflate the fork legs. Using inadequate tools may lead to a wrong inflation and result in a malfunctioning or damage to the fork.
- Page 18 © Marzocchi Suspension 2006 - Drop-Off SL Do not force the adjuster beyond its limit of travel.
- Page 19 © Marzocchi Suspension 2006 - Drop-Off SL Tightening torques Components Tightening torque (Nm) Fender fixing screws 6±1 Fork leg top caps 10±1 Pumping element/cartridge bottom nuts 10±1 Wheel axle Allen screws 6±1 Wheel axle screws 15±1 Drop-Off SL 130 - Oil levels...
- Page 20 © Marzocchi Suspension 2006 - Drop-Off SL Diagnostics Finding the problem Finding the possible cause Possible solutions proposed Fork doesn't get full travel Oil level too high Check oil levels Fork extends too quickly; harsh top-out after Rebound damping is not enough...
Need help?
Do you have a question about the Drop-Off SL 2006 and is the answer not in the manual?
Questions and answers