Table of Contents
Advertisement
Advertisement
Table of Contents

Related Manuals for Marzocchi 66 SL 150


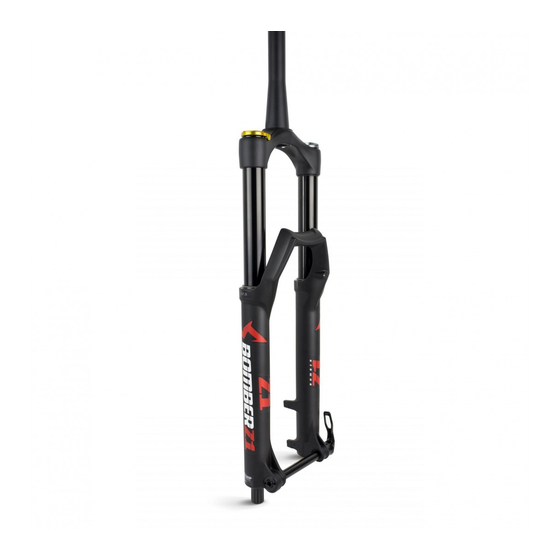
Summary of Contents for Marzocchi 66 SL 150
- Page 1 © Marzocchi Suspension 2006 - 66 SL 2006 - 66 SL Technical instructions...
- Page 2 © Marzocchi Suspension 2006 - 66 SL Exploded view - 66 SL 150 - 170 Rif. Code Quantity 1 818356/E 1 818356/R 2 701290/C 3 528247 4 528188 5 549098LA 6 5081001/C 7 549097AC 8 549094LA 9 523294 10 528265...
- Page 3 © Marzocchi Suspension 2006 - 66 SL Spare part list - 66 SL 150 - 170 Q.ty in the Rif. Code Description model 818356/E CROWN+STANC+ALLOY STEM 66SL'06 818356/R CROWN+STANCHIONS 66SL '06 701290/C AIR PLUG UNIT-66SL'06 528247 O-RING 528188 O-RING 549098LA...
- Page 4 © Marzocchi Suspension 2006 - 66 SL 538128>A LOWER BUSHING DIA.35 H.15 5321369RS/C ECO BLK MONOL.DIA.35-66 FORK 5321369RR/C FLAT BLK MONOL.DIA.35-66 FORK 5321369TK/C PEARL COPPER MONO.D.35-66 FORK 5321369TI/C PURE WHITE MONOL.D.35-66 FORK 5321369TH/C TRAF.GREY MONOL.DIA.35-66 FORK 520341 SCREW 5321153>A CABLE GUIDE 547708 EXTER.COMPRESS.ADJUST.-LABEL...
- Page 5 © Marzocchi Suspension 2006 - 66 SL Technical characteristics: Technical characteristics Single-crown fork with ø35mm legs. Available travels: 150/170 mm (adjustable by changing the negative air pressure). Right fork leg damping element: air. Left fork leg damping element: air. Right fork leg damping system: RC2 cartridge with external adjustment of rebound and compression.
- Page 6 Always grease the seal lips before reassembling. All of the components of Marzocchi forks require the use of metric tools. Use only metric tools. Imperial (US) tools may have similar sizes, but can damage the bolts, making them impossible to loosen or tighten.
- Page 7 © Marzocchi Suspension 2006 - 66 SL The brake cable must never touch the crown and stanchions. Warnings: Assembling the fender The fender can be supplied with the fork or purchased separately. Fender (1) must be assembled by placing the small support bush (2) between the screw and the fender as shown and by tightening screws (3) with an 8mm fixed spanner to the recommended tightening torque (6 Nm ±1).
- Page 8 © Marzocchi Suspension 2006 - 66 SL Put the fork in the vice in vertical position, fixing it by the dropouts. Dismantling: Removing the top right cap Lift the ring (4) of the central cap using a flat screwdriver, if necessary.
- Page 9 © Marzocchi Suspension 2006 - 66 SL Using a small pin screwdriver, blow the air off the fork leg, pushing on the air valves. Fully unscrew lock cap (2) with the Shimano TL-LR10 lockring tool. Now you can remove the cap from the cartridge rod. We recommend doing this operation after having pulled the cartridge off the arch-slider assembly.
- Page 10 © Marzocchi Suspension 2006 - 66 SL Remove screw (5), washer (11) and the adjustment knob (6). Using the special 12mm spanner (A), loosen the right bottom nut (1). Pull out the right bottom nut (1) complete with O-ring (2).
- Page 11 © Marzocchi Suspension 2006 - 66 SL Pull the crown-stanchion unit (3) off the arch-slider assembly (4). Dismantling: Dismantling the RC2 cartridge Loosen and remove nut (1) with a 10mm fixed spanner. The hydraulic cartridge (5) has been sealed through machining and cannot be overhauled. In the case of faults or a malfunctioning, this cartridge must be replaced.
- Page 12 © Marzocchi Suspension 2006 - 66 SL Prize the dust seal (1) off its seat with a small flat-tip screwdriver. Take great care not to damage the internal surfaces of the one-piece assembly while removing the dust seal. Prize the dust seal (1) off its seat with a small flat-tip screwdriver.
- Page 13 © Marzocchi Suspension 2006 - 66 SL Protect the upper part of the slider with the special tool (A). With a screwdriver, prize off the sealing ring (3). Remove the sealing ring (3). Take great care not to damage the internal surfaces of the one-piece assembly while removing the sealing ring.
- Page 14 © Marzocchi Suspension 2006 - 66 SL Fit the extraction washer keeping the blunt side towards the threaded grubscrew (C) fixed crosswise on to the main rod as shown. The slot in the rod lets the extraction washer swing inside the rod itself.
- Page 15 © Marzocchi Suspension 2006 - 66 SL...
- Page 16 © Marzocchi Suspension 2006 - 66 SL Assembling: Assembling the guide bushes Insert the guide bushes using the special introducers (short type for the top bush and long type for the bottom bush, both with a black finish). Do not use other tools.
- Page 17 © Marzocchi Suspension 2006 - 66 SL Using a hammer, knock in introducer (A) and drive the sealing ring home into the arch-slider assembly. Using a small flat-tip screwdriver, fit the stop ring (2) and check that it fits perfectly into its groove.
- Page 18 © Marzocchi Suspension 2006 - 66 SL Insert the crown-stanchion unit (3) in the arch-slider assembly (4). Insert the complete RC2 cartridge (9) in the right leg. With the special 12mm spanner, tighten the right bottom nut (1) complete with O-ring (2) to the recommended tightening torque (10 Nm ±...
- Page 19 © Marzocchi Suspension 2006 - 66 SL With the special 15mm key, tighten the left bottom nut (1) complete with O-ring (2) to the required torque (10 Nm ± 1). Using introducer (A) insert the dust seals (11) in their seats.
- Page 20 © Marzocchi Suspension 2006 - 66 SL A lower or higher volume or a type of oil other than the one recommended can change the behaviour of the fork in every phase. Lift the crown-stanchion unit on the arch-slider assembly.
- Page 21 © Marzocchi Suspension 2006 - 66 SL Assembling: Assembling the top left cap Check that O-ring (3) is not damaged. Using the Shimano TR-RL10 lockring tool, tighten lock cap (2) to the recommended tightening torque (10 Nm ± 1). Restore the correct air pressure (see settings).
- Page 22 During setting don't force the adjusters beyond their limit of travel and don't exceed the max recommended air pressure. To keep the pressure inside the fork’s legs, only use the special MARZOCCHI pump with pressure gauge. The use of any other pump can compromise the inflating operation and cause malfunction or damage to the fork, resulting in an accident, personal injury or death.
- Page 23 Increasing the pressure in the fork leg reduces the travel. Use the MARZOCCHI pump with pressure gauge to inflate the fork legs. Using inadequate tools may lead to a wrong inflation and result in a malfunctioning or damage to the fork.
- Page 24 © Marzocchi Suspension 2006 - 66 SL To increase the pressure in the fork leg: Remove the rubber protection cap. Tighten the threaded pump adapter on the air valve and inflate till reaching the pressure you wish. Refit the rubber protection cap.
- Page 25 95 - 110+ 209 - 242 3,60 - 4,50 5.220,00 - 6.525,00 Progressive air pressure User weight Air pressure 0 - 110+ 0 - 242 0 - 1,00 0,00 - 1.450,00 66 SL 150 - 170 - Oil levels Position Oil type Quantity (cc) Right fork leg SAE 7,5 - 550013...
- Page 26 © Marzocchi Suspension 2006 - 66 SL Diagnostics Finding the problem Finding the possible cause Possible solutions proposed Fork doesn't get full travel Oil level too high Check oil levels Fork doesn't get full travel Spring rate too stiff Change to softer spring rate...
Need help?
Do you have a question about the 66 SL 150 and is the answer not in the manual?
Questions and answers