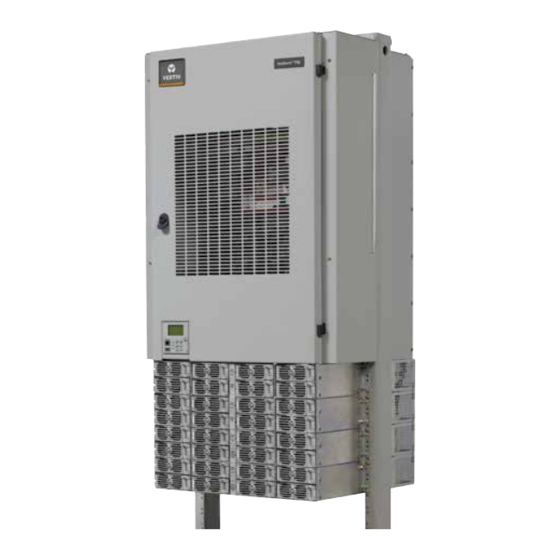
Vertiv NetSure 710 Series User Manual
+24v dc power system
Hide thumbs
Also See for NetSure 710 Series:
- Installation manual (142 pages) ,
- Quick start manual (80 pages)
Table of Contents
Advertisement
Quick Links
Download this manual
See also:
Installation Manual
Advertisement
Table of Contents

Related Manuals for Vertiv NetSure 710 Series


Summary of Contents for Vertiv NetSure 710 Series
- Page 1 NetSure™ 710 SERIES +24V DC Power System User Manual (UM581127000), Revision L Specification Number: 581127000 Model Number: 710 NPBA...
- Page 2 This document may contain confidential and/or proprietary information of Vertiv Group Corporation, and its receipt or possession does not convey any right to reproduce, disclose its contents, or to manufacture or sell anything that it may describe.
-
Page 3: Table Of Contents
Replacing a Distribution Panel (List AA, AB, AC, AD, AE, AF, AG, AH, AJ, AK, DA, DB, DC, DD, BA, BB, BC, BD, BE, BF, BG, BH, AM, and AP)......55 Vertiv | NetSure 710 Series User Manual (UM581127000) | Rev. L... -
Page 4: Vertiv | Netsure 710 Series User Manual (Um581127000) | Rev. L
AK, DA, DB, DC, DD, BA, BB, BC, BD, BE, BF, BG, or BH with a List AL, AN, DE, DF, DG, DH, DJ, or DK ........................61 Circuit Card Replacement Procedures ....................66 Replacing a Battery or Load Disconnect Contactor ..............79 Vertiv | NetSure 710 Series User Manual (UM581127000) | Rev. L... -
Page 5: Admonishments Used In This Document
(ISO) SAFETY! Informs the reader of general safety information, reminders, precautions, or policies not related to a particular source of hazard or to fire safety. (ISO, ANSI, OSHA) Vertiv | NetSure 710 Series User Manual (UM581127000) | Rev. L... -
Page 6: Important Safety Instructions
DANGER! Follow local lockout/tagout procedures to ensure DC branch circuit protection devices remain de-energized during installation at loads, as required. Vertiv | NetSure 710 Series User Manual (UM581127000) | Rev. L... -
Page 7: Battery
Only install in a ventilated environment. • Batteries are an energy source that can produce high amounts of electrical current. Vertiv | NetSure 710 Series User Manual (UM581127000) | Rev. L... -
Page 8: Personal Protective Equipment (Ppe)
NOTE! When performing any step in procedures that requires removal of existing hardware, retain all hardware for use in subsequent steps, unless otherwise directed. Vertiv | NetSure 710 Series User Manual (UM581127000) | Rev. L... -
Page 9: Static Warning
If necessary to repair equipment containing static sensitive components, wear an appropriately grounded wrist strap, work on a conductive surface, use a grounded soldering iron, and use grounded test equipment. Vertiv | NetSure 710 Series User Manual (UM581127000) | Rev. L... - Page 10 This page is intentionally blank. Vertiv | NetSure 710 Series User Manual (UM581127000) | Rev. L...
-
Page 11: Customer Documentation Package
• NCU Controller 2nd Ethernet Port Retrofit Kit Instructions: IM559251 • Engineering Drawings • Also provided on the USB drive is a controller configuration drawing and the controller configuration files loaded into the controller as shipped. Vertiv | NetSure 710 Series User Manual (UM581127000) | Rev. L... -
Page 12: System Description
Ethernet port and comes with comprehensive webpages for remote access. The controller has SNMP capability for remote system management. The controller supports software upgrade via its USB port. Refer to the ACU+ Controller Instructions (UM1M820BNA) for more information. Vertiv | NetSure 710 Series User Manual (UM581127000) | Rev. L... -
Page 13: Operating Procedures
Refer to the ACU+ Instructions (UM1M820BNA) or NCU Instructions (UM1M830BNA) to program this feature. Battery charge current is limited to the value set in the controller, as long as battery voltage is above 23.5V DC. Vertiv | NetSure 710 Series User Manual (UM581127000) | Rev. L... -
Page 14: Local Controls And Indicators
Refer to this section for descriptions of the local controls and indicators located on the circuit cards installed in the distribution cabinet. Circuit Card Locations Refer to Figure 1. Vertiv | NetSure 710 Series User Manual (UM581127000) | Rev. L... - Page 15 Optional LVD Optional LVD Driver Circuit Card Inhibit Switch (factory installed if option specified) Optional Manual Battery Disconnect Circuit Card System Interface Optional LVD Driver Circuit Card Lite Circuit Card Vertiv | NetSure 710 Series User Manual (UM581127000) | Rev. L...
- Page 16 List 24, 4-Row Cabinet 2500A / 25mV 100A per mV TP1 TP2 TP3 TP4 TP1 (+) and TP2 (-) TP3 (+) and TP4 (-) System Voltage System Load Monitoring Shunt Monitoring Vertiv | NetSure 710 Series User Manual (UM581127000) | Rev. L...
- Page 17 Momentary UP Position: Closes all LVD Contactors (inhibit mode). circuit has been disabled Middle Position: OFF (Controller DOES NOT control LVD’s) (inhibit mode). through the use of the DOWN Position: ON (Controller controls LVD’s). LVD Inhibit switch. Vertiv | NetSure 710 Series User Manual (UM581127000) | Rev. L...
- Page 18 Momentary UP Position: Closes all LVD Contactors (inhibit mode). circuit has been disabled Middle Position: OFF (Controller DOES NOT control LVD’s) (inhibit mode). through the use of the DOWN Position: ON (Controller controls LVD’s). LVD Inhibit switch. Vertiv | NetSure 710 Series User Manual (UM581127000) | Rev. L...
- Page 19 Closes (latches in close position) the Battery Disconnect Contactor. Middle Position: Normal Operation. Momentary DOWN Position: Opens (latches in open position) the Battery Disconnect Contactor. Momentarily place switch in the UP position to close the contactor. Vertiv | NetSure 710 Series User Manual (UM581127000) | Rev. L...
-
Page 20: Maintenance
Check the module location diagram on the front of the module mounting assembly to determine which type of module (rectifier or DC-DC converter) can be installed in each mounting position. See Figure 6. Vertiv | NetSure 710 Series User Manual (UM581127000) | Rev. L... - Page 21 ACCEPTS ONLY RECTIFIERS (PCUs) IN ALL 8 SLOTS AND CONVERTERS IN 4 MIDDLE SLOTS This Shelf Accepts This Shelf Accepts Rectifier Modules Only Rectifier Modules and DC-DC Converter Modules Vertiv | NetSure 710 Series User Manual (UM581127000) | Rev. L...
-
Page 22: Installing A Field Expansion Module Mounting Assembly
Refer to the Power System Installation Instructions (IM581127000) and connect AC input power to the expansion shelf. Refer to the rectifier and converter User Instructions and install modules into the expansion shelf as required. Vertiv | NetSure 710 Series User Manual (UM581127000) | Rev. L... - Page 23 6. Reinstall rear covers. Vertiv | NetSure 710 Series User Manual (UM581127000) | Rev. L...
- Page 24 Wires Module Mounting Shelf Existing Communications Cable Connections Distribution Cabinet Slate and Slate/White Wires Brown and Brown/White Wires Module Mounting Shelf Expansion Module Mounting Shelf New Communications Cable Connections Vertiv | NetSure 710 Series User Manual (UM581127000) | Rev. L...
-
Page 25: Reconfiguring A Dual Voltage Distribution Panel
Refer to Figure 9 and remove the hardware securing the distribution panel to the distribution cabinet. Remove the distribution panel from the distribution cabinet. Vertiv | NetSure 710 Series User Manual (UM581127000) | Rev. L... - Page 26 Components removed in illustration for clarity only. 1/4-20 x 5/8 Bolt 1/4” Lock Washer 1/4” Flat Washer -48V Jumpers Torque to 75 in-lbs. List DB Dual Voltage Distribution Panel (List DA, DC, DD similiar) Vertiv | NetSure 710 Series User Manual (UM581127000) | Rev. L...
- Page 27 Lead Busbars Move -48V Input Power Busbar 4-Positions Front Left or Right in Increment of Four Positions Move +24V Move -48V Distribution Device Distribution Device Busbar Left Busbar Right Vertiv | NetSure 710 Series User Manual (UM581127000) | Rev. L...
- Page 28 Distribution Panel (List DA, DC, DD similar) Rear Press in Tabs to Release -48V Input Input Lead Busbars Power Busbar -48V Input Lead Busbars Front -48V Input Power Busbar Vertiv | NetSure 710 Series User Manual (UM581127000) | Rev. L...
- Page 29 Re-install the distribution device lead busbars three (3) positions to the left or to the right of the original positions. Slide a distribution device lead busbar down and into the distribution panel. Repeat for all distribution device lead busbars. Vertiv | NetSure 710 Series User Manual (UM581127000) | Rev. L...
- Page 30 6-32 x 3/4 Screw #6 Lock Washer #6 Flat Washer Torque to 11 in-lbs. Move +24V Distribution Move -48V Distribution Device Busbar(s) Device Busbar(s) 3 Positions Left 3 Positions Right Vertiv | NetSure 710 Series User Manual (UM581127000) | Rev. L...
- Page 31 Place Alarm Spring 6-19 x 1/2 Screw Link on Opposite Side Torque to 9.6 in-lbs. Move Alarm Spring(s) Move Alarm Spring(s) 3 Positions Left 3 Positions Right Typical After View Rear Vertiv | NetSure 710 Series User Manual (UM581127000) | Rev. L...
- Page 32 Torque to 75 in-lbs. -48V Input Lead Busbars Enlarged View -48V Input Front 1/4-20 x 3/4 Bolt Power Busbar 1/4” Lock Washer 1/4” Flat Washer Torque to 75 in-lbs. Vertiv | NetSure 710 Series User Manual (UM581127000) | Rev. L...
- Page 33 Reconnect the load leads to the circuit breaker and/or fuse positions. Replace the circuit breakers and/or fuseholders. Replace the plastic shield covering the circuit breakers and/or fuseholders on the distribution panel. Verify no circuit breaker/fuse alarms are active. Vertiv | NetSure 710 Series User Manual (UM581127000) | Rev. L...
-
Page 34: Reconfiguring A Dual Voltage Distribution Panel
Refer to Figure 16 and remove the hardware securing the distribution panel to the distribution cabinet. Remove the distribution panel from the distribution cabinet. Vertiv | NetSure 710 Series User Manual (UM581127000) | Rev. L... - Page 35 Note that the busbar that is removed should be retained in the event that the panel is re-configured at a later date to revert back to a panel with some subsystem positions. Vertiv | NetSure 710 Series User Manual (UM581127000) | Rev. L...
- Page 36 Connect “-48V” jumpers to an available landing here. (Lists DE, DF, Assembly order is: lug, 1/4" flat washer, DH, DJ, and DK similar.) 1/4" lock washer, 1/4-20 x 3/4” bolt. Torque to 84 in-lbs. Vertiv | NetSure 710 Series User Manual (UM581127000) | Rev. L...
- Page 37 Distribution Panel Extra Shorting Block Stored Here List DJ Dual Voltage Distribution Panel Extra Shorting Block Stored Here List DK Dual Voltage Distribution Panel Reconfigured for all System Positions Vertiv | NetSure 710 Series User Manual (UM581127000) | Rev. L...
- Page 38 Apply a thin coating of electrical anti-oxidizing 1/4-20 x 5/8 Bolt compound to the mating 1/4” Lock Washer Move Shorting surfaces of the busbars. 1/4” Flat Washer Bus Here Torque to 75 in-lbs. Vertiv | NetSure 710 Series User Manual (UM581127000) | Rev. L...
- Page 39 Shown electrical anti-oxidizing compound to the mating 1/4-20 x 5/8 Bolt surfaces of the busbars. 1/4” Lock Washer Move Shorting 1/4” Flat Washer Bus Here Torque to 75 in-lbs. Vertiv | NetSure 710 Series User Manual (UM581127000) | Rev. L...
- Page 40 An Alarm Strap is Stored Here Note that if you reconfigure a distribution panel for all subsystem voltage (List DK), you must disconnect and insulate the system CBA/FA lead attached here. Vertiv | NetSure 710 Series User Manual (UM581127000) | Rev. L...
- Page 41 3. Remove the load lug from the right-most NEW sub-system distribution position. Front 4. Replace the load lug from the right-most NEW sub-system distribution position WITH the voltage barrier shield. Vertiv | NetSure 710 Series User Manual (UM581127000) | Rev. L...
- Page 42 Verify no circuit breaker/fuse alarms are active. Close the distribution cabinet’s front door. Turn the latch clockwise to secure the door. Ensure that there are no local or remote alarms active on the system. Vertiv | NetSure 710 Series User Manual (UM581127000) | Rev. L...
-
Page 43: Changing The Controller's Lvd Control Level For A Contactor
Active Alarm Alarm History The controller’s submenus allow the User to view alarm details. Refer to the ACU+ Instructions (UM1M820BNA) or NCU Instructions (UM1M830BNA) to access these menus. Vertiv | NetSure 710 Series User Manual (UM581127000) | Rev. L... - Page 44 If the controller resets while a converter communications fail alarm is active, the converter communications fail alarm is replaced with a converter lost alarm. Refer to the ACU+ Instructions (UM1M820BNA) or NCU Instructions (UM1M830BNA) for a procedure to clear the alarm. Vertiv | NetSure 710 Series User Manual (UM581127000) | Rev. L...
-
Page 45: Replacement Information
Insure that the safety fuse cover is installed after replacing a fuse. Refer to Figure 18for installation details. Vertiv | NetSure 710 Series User Manual (UM581127000) | Rev. L... - Page 46 Open the distribution cabinet’s front door by turning the latch in the counterclockwise position. Remove the fuse carrier from the mounted fuseholder body by pulling it straight out. Hold the fuseholder body while you pull the fuse carrier from the body. Vertiv | NetSure 710 Series User Manual (UM581127000) | Rev. L...
- Page 47 Fuseholder Assembly (P/N 117201) includes Polarizing Keyway body & carrier, alarm fuse, and alarm fuse safety cover. Matches Key on Bottom of Fuse Carrier GMT-18/100A Alarm Fuse (Replacement P/N 248610301) Vertiv | NetSure 710 Series User Manual (UM581127000) | Rev. L...
- Page 48 Open the distribution cabinet’s front door by turning the latch in the counterclockwise position. Remove the fuse carrier from the mounted fuseholder body by grasping its handle and pulling straight out. Vertiv | NetSure 710 Series User Manual (UM581127000) | Rev. L...
- Page 49 Replace the alarm fuse located in the front of the TPL-B fuse block. Replace only with a fuse of the same type and rating. Ensure that a plastic safety cover is installed on the alarm fuse. Vertiv | NetSure 710 Series User Manual (UM581127000) | Rev. L...
- Page 50 Wiring diagrams are provided in Figure 23. Carefully disconnect the shunt wiring from the back of the circuit breaker, ensuring the exposed end does not contact any energized circuit. Vertiv | NetSure 710 Series User Manual (UM581127000) | Rev. L...
- Page 51 Operate the replacement circuit breaker to the ON position. Verify no Circuit Breaker Alarms are active. Close the distribution cabinet’s front door. Turn the latch clockwise to secure the door. Vertiv | NetSure 710 Series User Manual (UM581127000) | Rev. L...
- Page 52 ALARM WIRING (BREAKERS W/OUT SHUNTS) Alarm Jumper: Brown Shunted Breaker Jumper: Black Standard and Alarm Jumper: Brown Electrical Alarm Jumper: Red Alarm Jumper: Red Trip Breaker Shunted Breaker Jumper: Red Vertiv | NetSure 710 Series User Manual (UM581127000) | Rev. L...
- Page 53 ALARM WIRING (BREAKERS W/OUT SHUNTS) Alarm Jumper: Brown Shunted Breaker Jumper: Black Standard and Alarm Jumper: Brown Electrical Alarm Jumper: Red Alarm Jumper: Red Trip Breaker Shunted Breaker Jumper: Red Vertiv | NetSure 710 Series User Manual (UM581127000) | Rev. L...
- Page 54 ALARM WIRING (BREAKERS WITH SHUNTS) Alarm Jumper: Brown Shunted Breaker Jumper: Black Standard and Alarm Jumper: Brown Electrical Alarm Jumper: Red Alarm Jumper: Red Trip Breaker Shunted Breaker Jumper: Red Vertiv | NetSure 710 Series User Manual (UM581127000) | Rev. L...
-
Page 55: Replacing A Distribution Panel (List Aa, Ab, Ac, Ad, Ae, Af, Ag, Ah, Aj, Ak, Da, Db, Dc, Dd, Ba, Bb, Bc, Bd, Be, Bf, Bg, Bh, Am, And Ap)
Orient the replacement distribution panel into distribution cabinet, checking to ensure no wires are pinched. Replace the hardware securing the distribution panel to the distribution cabinet (10-32 x 5/8” bolt, #10 flat washer, 4-places). Vertiv | NetSure 710 Series User Manual (UM581127000) | Rev. L... - Page 56 Replace the plastic shield covering the circuit breakers or fuseholders on the replacement panel. Verify no Circuit Breaker/Fuse Alarms are active. Close the distribution cabinet’s front door. Turn the latch clockwise to secure the door. Vertiv | NetSure 710 Series User Manual (UM581127000) | Rev. L...
- Page 57 1/4" lock washer, 1/4-20 bolt. 1/4-20 nut. Torque to 84 in-lbs. Note that a shorting block Torque to 84 in-lbs. will be factory installed in this distribution device position. Vertiv | NetSure 710 Series User Manual (UM581127000) | Rev. L...
- Page 58 Torque per Figure 25. Locate the in-line FA/CBA connector located near the back of the panel, and plug it into the mating connector half in the distribution cabinet. Vertiv | NetSure 710 Series User Manual (UM581127000) | Rev. L...
- Page 59 Replace the plastic shield covering the circuit breakers or fuseholders on the replacement panel. Verify no circuit breaker/fuse alarms are active. Close the distribution cabinet’s front door. Turn the latch clockwise to secure the door. Vertiv | NetSure 710 Series User Manual (UM581127000) | Rev. L...
- Page 60 Connect “-48V” jumpers to an available landing here. (Lists DE, DF, Assembly order is: lug, 1/4" flat washer, DH, DJ, and DK similar.) 1/4" lock washer, 1/4-20 x 3/4” bolt. Vertiv | NetSure 710 Series User Manual (UM581127000) | Rev. L...
- Page 61 In the following procedure, before making busbar-to-busbar connections, apply a thin coating of electrical anti-oxidizing compound to the mating surfaces of the busbars. Perform the procedure in Figure 27. Vertiv | NetSure 710 Series User Manual (UM581127000) | Rev. L...
- Page 62 Replace the plastic shield covering the circuit breakers or fuseholders on the replacement panel. Verify no Circuit Breaker/Fuse Alarms are active. Close the distribution cabinet’s front door. Turn the latch clockwise to secure the door. Vertiv | NetSure 710 Series User Manual (UM581127000) | Rev. L...
- Page 63 Connector Front Components removed in illustration for clarity only. Battery Busbar Hardware (Battery Distribution Panel) List DB Dual Voltage Distribution Panel -48V Jumpers (other distribution panels similiar) Front Front Vertiv | NetSure 710 Series User Manual (UM581127000) | Rev. L...
- Page 64 Lock Washers face each other) 3/8" Hardened Flat Washer (2 places) New busbar. Torque to 180 in-lbs. Apply electrical anti-oxidizing compound to busbar mating surfaces. 3. New busbar installed view. Vertiv | NetSure 710 Series User Manual (UM581127000) | Rev. L...
- Page 65 Connect “-48V” jumpers to an available landing here. (Lists DE, DF, Assembly order is: lug, 1/4" flat washer, DH, DJ, and DK similar.) 1/4" lock washer, 1/4-20 x 3/4” bolt. Torque to 84 in-lbs. Vertiv | NetSure 710 Series User Manual (UM581127000) | Rev. L...
-
Page 66: Circuit Card Replacement Procedures
Unplug all connectors plugged into the circuit card. Remove the screws securing the circuit card and remove the circuit card from the distribution cabinet. Vertiv | NetSure 710 Series User Manual (UM581127000) | Rev. L... - Page 67 Close the distribution cabinet’s front door. Turn the latch clockwise to secure the door. Enable the external alarms, or notify appropriate personnel that this procedure is finished. Ensure that there are no local or remote alarms active on the system. Vertiv | NetSure 710 Series User Manual (UM581127000) | Rev. L...
- Page 68 TB1-4: External Battery Monitoring (-) TB1-5: External Battery Monitoring (+) Wire Size Capacity: 22-12 AWG. Recommended Torque: 3.0 in-lbs. FA Signals: Battery applied to the terminal turns in an alarm. Vertiv | NetSure 710 Series User Manual (UM581127000) | Rev. L...
- Page 69 DO NOT allow the bare wire end to contact any grounded or energized object. After securing the wire, gently tug on the Vertiv | NetSure 710 Series User Manual (UM581127000) | Rev. L...
- Page 70 Ensure that there are no local or remote alarms active on the system. Figure 30: IB2 (Controller Interface Board) Connector Locations IB2 Board Assembly J3-J9: Wire Size Capacity: 16-26 AWG. Recommended Torque: 2.2 in-lbs. Vertiv | NetSure 710 Series User Manual (UM581127000) | Rev. L...
- Page 71 Figure 31: EIB (Controller Extended Interface Board) Connector Locations Optional EIB Interface Board Assembly Optional EIB Interface Board (Top View) J5-J9 Wire Size Capacity: 16-26 AWG. Recommended Torque: 2.2 in-lbs. Vertiv | NetSure 710 Series User Manual (UM581127000) | Rev. L...
- Page 72 After securing the wire, gently tug on the wire to ensure that it cannot be pulled out of the terminal block. Repeat for each wire to be reconnected. Vertiv | NetSure 710 Series User Manual (UM581127000) | Rev. L...
- Page 73 Figure 32: SM-DU+ and Shunt Interface Assembly Connector Locations SM-DU+ and Shunt Interface Board TB1 - TB2 Wire Size Capacity: 16-26 AWG. Recommended Torque: 2.2 in-lbs. SM-DU+ Shunt Interface Board Vertiv | NetSure 710 Series User Manual (UM581127000) | Rev. L...
- Page 74 Close the distribution cabinet’s front door. Turn the latch clockwise to secure the door. Enable the external alarms, or notify appropriate personnel that this procedure is finished. Ensure that there are no local or remote alarms active on the system. Vertiv | NetSure 710 Series User Manual (UM581127000) | Rev. L...
- Page 75 Low Voltage Battery Disconnect LVD2 control setting (Level 2). contactor. To LVBD contactor, uses Controller LVD2 control setting (Level 2). Notes: 1. Connects up to (4) LVLD and (1) LVBD contactors. Vertiv | NetSure 710 Series User Manual (UM581127000) | Rev. L...
- Page 76 2. Only one (1) contactor per level can be accommodated. J2 and J3 are on Level 2, only one (1) of these connectors can be used at a time. Vertiv | NetSure 710 Series User Manual (UM581127000) | Rev. L...
- Page 77 Close the distribution cabinet’s front door. Turn the latch clockwise to secure the door. Enable the external alarms, or notify appropriate personnel that this procedure is finished. Ensure that there are no local or remote alarms active on the system. Vertiv | NetSure 710 Series User Manual (UM581127000) | Rev. L...
- Page 78 Figure 35: Optional Manual Battery Disconnect Circuit Card Connector Locations Vertiv | NetSure 710 Series User Manual (UM581127000) | Rev. L...
-
Page 79: Replacing A Battery Or Load Disconnect Contactor
Reconnect the AC and DC power sources to the power system. Start the power system. Refer to the separate Installation Instructions (IM581127000) for a startup procedure. Verify no alarms are active. Vertiv | NetSure 710 Series User Manual (UM581127000) | Rev. L... - Page 80 Components removed in illustration for clarity only. Front Contactor styles vary between manufacturer’s. Brown Wire Brown/White Wire Red/White Wire Brown Wire White/Black Wire White/Black Wire Brown/White Wire Red/White Wire Vertiv | NetSure 710 Series User Manual (UM581127000) | Rev. L...
- Page 81 Removal is from rear. Components removed in illustration for clarity only. Brown/White Wire Brown Wire 2-row Distribution Cabinet shown, 3 or 4-row cabinet similar. Red/White White/Black Wire Wire Vertiv | NetSure 710 Series User Manual (UM581127000) | Rev. L...
- Page 82 Components removed in illustration for clarity only. Front Contactor styles vary between manufacturer’s. Violet/White Wire Violet Wire Red Wire Violet/White Wire Black Wire Violet Wire Black Wire Red Wire Vertiv | NetSure 710 Series User Manual (UM581127000) | Rev. L...
- Page 83 2-row Distribution Cabinet shown, 3 or 4-row cabinet similar. Contactor styles vary between manufacturer’s. Violet/White Wire Violet Wire Red Wire Violet/White Wire Black Wire Violet Wire Black Wire Red Wire Vertiv | NetSure 710 Series User Manual (UM581127000) | Rev. L...
- Page 84 VertivCo.com | Vertiv Headquarters, 1050 Dearborn Drive, Columbus, OH, 43085, USA UM581127000 (RL 06/17)
Need help?
Do you have a question about the NetSure 710 Series and is the answer not in the manual?
Questions and answers