Table of Contents
Advertisement
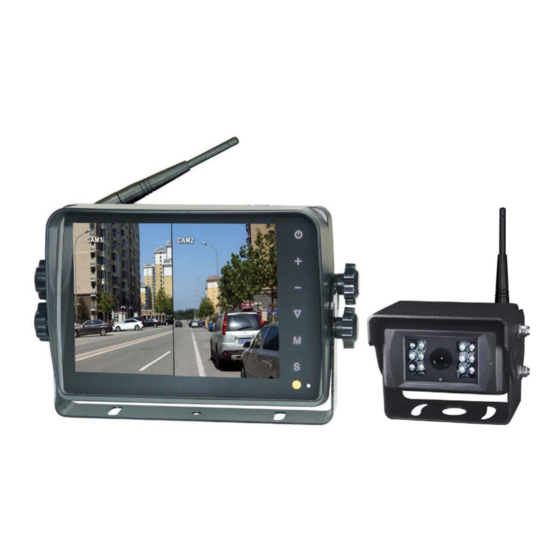
5.6" WIRELESS REVERSING SYSTEM
SPECIFICATIONS
MONITOR
- LCD:
143mm (5.6") Digital Colour
- Resolution:
640 x 480
- Aspect Ratio:
4:3
- Image Orientation:
Normal/Mirror/Flip/Mirror-Flip
- Display:
Split/Single/Auto-Scan
- Inputs:
4 x Wireless
- Operating Freq:
2.4 ~ 2.4835 GHz
- Decomp Format:
MPEG4
- Pairing to Camera/s:
Auto when camera activated
- Time Delay:
120ms
- Transmitting Range:
120 Metres (approx)
- Signal System:
PAL/NTSC Select
- Other:
Touch Buttons/Auto Dim
- Loudspeaker:
1W/8 Ohm
- Operating Temp:
-20~+60°C
- Power Consumption: 5W Max
- Power Supply:
DC 10-32V
2
JS056WK
YEAR
WARRANTY
CAMERA
- Image Device:
- Viewing Angle:
- Signal System:
- Effective Pixels:
- Sensing Area:
- Image Mode:
- Scanning System:
- Sync System:
- Horizontal Sync Frequency:
- Vertical Sync Frequency:
- Video Output:
- S/N Radio:
- White Balance:
- Electronic Shutter:
- Operating Frequency:
- Receiving Sensitivity:
- Line of Sight Range:
- Compression Format:
- Frame Rate:
- Transmit Output Power:
- RF Bit Rate:
- Minimum Illumination:
- Night Vision Distance:
- Audio:
- Ingress Protection:
- Power Supply:
- Optional Extra Camera:
1/3" PC3089 Sensor
120°
PAL
756 x 504
4.80mm x 3.78mm
Mirror/Normal Selectable
2:1 Interlace
Internal
15.625 KHz
50 Hz
1.0Vp-p, 75 Ohm
Better than 46.5dB
Auto
1/50 (PAL) ~1/100,000 sec
2.4 ~ 2.4835 GHz
-89 dBm
120 metres
MPEG4
25f/s
17 dBm
4Mbps
0 Lux (12 IR LEDs)
10m
Yes
IP69K
DC 8-36V
CC007W
Advertisement
Table of Contents

Related Manuals for Axis JS056WK


Summary of Contents for Axis JS056WK
- Page 1 JS056WK 5.6” WIRELESS REVERSING SYSTEM SPECIFICATIONS CAMERA MONITOR - Image Device: 1/3” PC3089 Sensor - LCD: 143mm (5.6”) Digital Colour - Viewing Angle: 120° - Resolution: 640 x 480 - Signal System: - Aspect Ratio: - Effective Pixels: 756 x 504...
-
Page 2: Table Of Contents
Contents 1. Precautions ......................3 2. Features........................5 3. Technical Specifications ..................5 4. Accessories ......................6 5. Parts Identification ....................7 6. Remote Control Operation .................. 8 7. Basic Operation .....................9 8. Menu ........................11 9. Troubleshooting ....................15 07/17... -
Page 3: Precautions
1. Precautions Storage and Keeping 1. Do not expose the monitor to excessive heat or cold. The storage temperature of this device is -30~+80 , and the operating temperature is -20~+70 . The humidity is Rh90%. 2. Never use this device near a bathtub, wash basin, kitchen, damp basement, swimming pool or similar places. - Page 4 Maintenance 1. Remove all cable connections from the monitor before cleaning the device. 2. Use a mild household detergent and clean the unit with a slightly damp, soft cloth. Never use strong solvents such as thinners or benzine. This symbol is intended to alert the user to the presence of uninsulated “dangerous voltage”...
-
Page 5: Features
2. Features 1. TFT LCD monitor with wide angle view and high resolution display. 2. NORMAL, MIRROR, FLIP and MIR-FLIP viewing available. 3. Split mode, auto-scan mode and single-display mode available. 4. Auto pairing: Auto pairing happens when camera is activated. 5. -
Page 6: Accessories
4. Accessories U-Support Bracket Centre Mount Bracket Sun Shield Power cable Angle Adjustment Screws IR Remote control 07/17... -
Page 7: Parts Identification
5. Parts Identification Power switch/Power indicator Volume increase Volume decrease Press bu on to enter menu item or save user se ngs. Menu Select channels Light level senor Digital Color LCD screen Remote control sensor Loudspeaker U-support bracket installa Support a aching piece 7/17... -
Page 8: Remote Control Operation
6. Remote Control Operation Press to turn on/o the Press to select MUTE or monitor enable sound Press OK bu on to enter Press to show menu or exit menu item or save user menu se ngs. Volume increase and menu Volume decrease and selec right... -
Page 9: Basic Operation
7. Basic Operation 7.1 Installation of Centre Mounting Bracket: Adjust monitor level by sliding the support to the desired height. Adjust the angle of the monitor and tighten the knob on the center mounting bracket. Support a aching piece Knob 7.2. - Page 10 07/17...
-
Page 11: Menu
8. Menu Press MENU to display the following options and settings: 1. MODE 2. PICTURE 3. MIR-FLIP 4. AUTOSCAN 5. SYSTEM 6. PAIRING (1) Press - or + to select MODE. Press to enter. Press - or + to select SPLIT . Press MENU return to main menu. - Page 12 (2) Press - or + to select PICTURE. ress to enter Press - or to select BRIGHTNESS / CONTRACT / HUE / VOLUME, ress to enter. Press - or + to adjust . Press to exit. Press MENU return to main menu.
- Page 13 (4) Press - or + to select AUTOSCAN. Press to enter. Press to select CAM1/CAM2/CAM3/CAM4/SCANTIME, press enter. When the icon turns yellow, press to select or adjust . Press to exit. Press MENU to return to main menu. No video will be displayed under AUTOSCAN mode if a channel is turned OFF. SCANTIME frame is between 5 and 45 seconds , with a step time of 5s.
- Page 14 TIME Press - or to select TIME, Press to set. Press - or adjust. Press to continue setting. COLOR-SYS: Press - or + to select COLOR-SYS. Press to enter. Press - or + to select NTSC/PAL. AUTO-DIM: Press to select AUTO-DIM. Press to enter, press - or + to select ON/OFF.
-
Page 15: Troubleshooting
9. Troubleshooting The symptoms described below do not necessarily mean a failure within the display. Please check the following items before you initiate request for repair. Symptoms Possible Causes/Solutions No picture, no Improper connection of power circuit. Use of improper power supply. sound Power switch is set OFF. - Page 16 JS056WK JS007WQK 07/17...
Need help?
Do you have a question about the JS056WK and is the answer not in the manual?
Questions and answers