Table of Contents
Advertisement
Advent XT2
Assisted Living Call Management System
_________________________________________________________________________________________________
Tynetec, a business unit of Legrand Electric Ltd
Cowley Road, Blyth Riverside Business Park, Blyth, Northumberland, NE24 5TF.
T: +44 (0)
1670 352 371 www.tynetec.co.uk
_______________________________________________________________________________________________________________________
Trusted Technology
Caring for People
Operators Manual
Tynetec operates a policy of continual product improvement and
reserves the right to modify the specification of its products.
If any variation to the details in this document are suspected please
contact Tynetec's Technical Support.
Doc No. FM0816 issue 4 Page 1
Advertisement
Table of Contents

Related Manuals for Tynetec Advent XT2


Summary of Contents for Tynetec Advent XT2
- Page 1 Assisted Living Call Management System _________________________________________________________________________________________________ Operators Manual Tynetec operates a policy of continual product improvement and reserves the right to modify the specification of its products. If any variation to the details in this document are suspected please contact Tynetec’s Technical Support.
-
Page 2: Table Of Contents
CONTENTS Section Topic Page Safety Instructions Regulatory Information Maintenance & Care Standard Intercom Unit Door Entry Intercom Unit DECT & Desktop Telephones Manager’s Display Panel Answering a Call Calling a Resident Sequential Daily Calls Call Waiting Using the PA Function Using the Fire Alarm Function Selecting the Operating Mode Parking an Alarm Call... -
Page 3: Safety Instructions
1. SAFETY INSTRUCTIONS Read and understand these instructions before use. Keep these instructions for future reference. To reduce the risk of electric shock, do not disassemble this product. Opening or removing covers may expose you to dangerous voltages or other hazards. No user serviceable parts inside. -
Page 4: Regulatory Information
3. MAINTENANCE & CARE For peace of mind and to ensure your system is maintained to the highest standard Tynetec recommend an annual maintenance contract. This will provide vital assistance in times of need from a nationwide team of trained Service Engineers who specialise in Warden Call systems. -
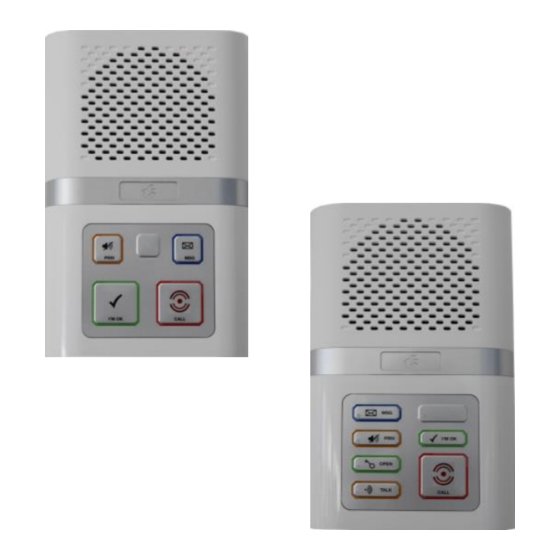
Page 5: Standard Intercom Unit
4. STANDARD INTERCOM UNIT Each room on your scheme will have an Advent XT2 intercom unit, there may also be others in communal areas, corridors and toilets. The intercom unit ORANGE cord or associated ORANGE ceiling pullcords located in bedrooms and bathrooms etc. -
Page 6: Door Entry Intercom Unit
STEADY AMBER = LISTEN MODE A pictorial user guide is also available; request Tynetec Doc No. FM0819 TALK BUTTON When the intercom is called from the door entry system it will sound a telephone ring tone and the TALK LED will be FLASHING AMBER. -
Page 7: Dect & Desktop Telephones
6. DECT CORDLESS & DESKTOP TELEPHONES All DECT cordless handsets and/or desktop telephones will ring when a call exists in onsite mode. To answer a call using a DECT handset press the LINE key, if using a desk telephone simply lift the handset. When answered, a speech message will identify the call type and room number, the residents name can also be displayed if it has been programmed into the telephone name/number memory. -
Page 8: Manager's Display Panel
7. MANAGER’S DISPLAY PANEL There can be up to 32 Manager’s Display Panels installed per scheme. One panel, designated as the Controller, is used to program the system features, change the operating mode and add/remove Telecare devices. Up to 31 Satellite panels will all display the same information as the Controller but have limited functionality. -
Page 9: Answering A Call
AUTOMATIC CALL TYPES An alarm call triggered automatically may be from a smoke detector, a PIR movement detector or another environmental device. The Advent XT2 monitors itself for faults and these are also reported, see examples below; “smoke alarm flat 1”... -
Page 10: Calling A Resident
9. CALLING A RESIDENT You can call a resident any time by dialling their room number on the DECT handset. To call any other intercoms in the common room, corridors, etc. use the same procedure but enter the actual intercom number. 1. -
Page 11: Using The Pa Function
Note; the fire tone is optional and may not be enabled. If you want to use the Advent XT2 system before the fire alarm panel is reset you can stop the fire tone by pressing the LINE key followed by the 5 key on the DECT handset. -
Page 12: Selecting The Operating Mode
14. SELECTING THE OPERATING MODE The Advent XT2 system can report calls in three different ways; 1. ONSITE MODE - to an onsite carer via the DECT handset 2. LOCAL OFFSITE MODE - to a mobile carer via a mobile telephone 3. -
Page 13: Parking An Alarm Call
If you are unable to clear any fault conditions contact your Service Engineer immediately. 16. FAULT MEMORY The Advent XT2 system can store a number of faults in memory and still allow the remainder of the system to operate as normal until the faults are cleared. -
Page 14: Alarm Memory
17. ALARM MEMORY The Advent XT2 system stores the last 8 alarm calls in memory. These can be listed by entering a special code on the telephone handset and listening to the messages in the earpiece. 1. Press the LINE key and enter 8 1 2. -
Page 15: Using The Local Offsite Mode
19. USING THE LOCAL OFFSITE MODE The Advent XT2 system has a local offsite facility to divert calls to a mobile Carer. Answering a call in local offsite mode is identical to onsite mode except site identification is included in the message. -
Page 16: Releasing The Main Entrance Door Lock
21. RELEASING THE KEYSAFE The Advent XT2 system may be fitted with an intercom unit alongside an electric keysafe. If a Carer or the Emergency Service makes a call from the intercom you can answer and speak with them and allow access to the master keys by releasing the electric keysafe. -
Page 17: Using The Extracare Function
23. USING THE EXTRACARE FUNCTION Intercoms can be set to operate in Extracare mode for categories of schemes where alarm calls must be cancelled at source. Both normal and Extracare intercoms can be mixed to maximise operational efficiency whilst ensuring care level compliance. -
Page 18: Using The I'm Ok Function
24. USING THE I’M OK FUNCTION The Advent XT2 system can be set to flash the green light and sound a double-beep every 20 seconds on the resident’s intercom unit during a preset time period each morning ( audible alert can be disabled). -
Page 19: Using The Message Service
27. USING THE MESSAGE SERVICE The Advent XT2 has the facility to leave a recorded message for any resident when they return. A message is recorded by entering a special code on the DECT handset followed by the resident’s room number. -
Page 20: Intercom Unit Test Mode
28. INTERCOM UNIT TEST MODE The intercom unit Test Mode allows all ceiling pullcords, smoke detectors and pendants etc. to be tested without putting a call on the system. Once in Test Mode the intercom will beep as each device is activated, the system will log each test with the room number, device type, time &... -
Page 21: Manager's Panel Home Screen
29. MANAGER’S PANEL HOME SCREEN The Manager’s Panel Home screen displays a dementia clock showing the time and day, and whether its morning, afternoon, evening or night time; There are 3 other tabs along the top of the screen to select System, Event Log and Flat Status. The Log On button on the Home screen allows access to the system setup screen –... -
Page 22: Manager's Panel Event Log Screen
31. MANAGER’S PANEL EVENT LOG SCREEN Touch the Event Log tab to display a list of all events that have occurred on the system over a given date range; Set the From:/To: date range then press the Get Events button. Use the scroll bar to view up/down the list. -
Page 23: Manager's Panel Information Circle
33. MANAGER’S PANEL INFORMATION CIRCLE On the Flat Status Tab touch a flat status indicator to open an information circle; Flat 1 Flat 2 Flat 3 Touch the arrow on the outer circle of the Device Status segment to display; Flat 1 Flat 2 Flat 3... -
Page 24: Manager's Panel System Setup
34. MANAGER’S PANEL SYSTEM SETUP From the Home page touch the Log On button to open the Enter Password box; There are 3 Log on options: User – change system operating mode only Manager – access to all user features Engineer –... -
Page 25: Manager's Panel Notice Board Setup
35. MANAGER’S PANEL NOTICE BOARD SETUP An optional large-screen display can be attached to each Manager’s Panel to act as an electronic Notice Board. The display will be automatically configured with the information entered in this section. Log on using the Manager (or Engineer) password and touch the Notice Board button to view the edit screen like below. -
Page 26: Manager's Panel Date & Time Programming
36. MANAGER’S PANEL DATE & TIME PROGRAMMING Date & Time Programming can only be performed from the Manager’s Panel designated as the Controller. Log on using the Manager (or Engineer) password and touch the Programming button. Programming will always open at the Program Date Time option as shown below. This shows the current Windows date and time on the panel. -
Page 27: Manager's Panel Activity Monitoring Programming
38. MANAGER’S PANEL ACTIVITY MONITORING PROGRAMMING The XT2 system may be fitted with optional PIR movement detectors in each flat to monitor the residents activity. Up to 3 Activity Start/Stop Time periods can be set per flat to operate on a daily basis. The Activity Period is a smaller window of time (1 to 720 mins) which can be set to split each start/stop time into smaller inactivity reporting periods. -
Page 28: Manager's Panel I'm Ok Programming
If the resident is up and about and feeling “OK” they can press the “I’m OK” button on their intercom to stop the alert and clear their flat number from a list in the Advent XT2 memory. The flat numbers of the residents that HAVE NOT responded “I’m OK” can be checked at any time on the Manager’s ... -
Page 29: Manager's Panel Client Wandering Programming
40. MANAGER’S PANEL CLIENT WANDERING PROGRAMMING An optional radio door contact (Tynetec P/No. ZXT830) can be used to monitor if a resident leaves their flat during a preset time period each day. The start and stop times can be set on an individual flat basis. If a resident leaves their flat during the set period, a wandering alarm will be reported. -
Page 30: Manager's Panel Call Routing Programming
41. MANAGER’S PANEL CALL ROUTING PROGRAMMING Call Routing is used to set a direction (onsite/offsite) and the specific DECT extension or offsite telephone number that a call will be routed to on an individual flat basis during a set time period each day. Up to 8 routes can be set per flat. Call Routing Programming can only be performed from the Manager’s Panel designated as the Controller. -
Page 31: Manager's Panel Alarm Call Routing Programming
42. MANAGER’S PANEL ALARM CALL ROUTING PROGRAMMING This is the same as Call Routing but also allows specific alarm types to be routed differently. Note: settings made on the Alarm Type Routing page have priority over the settings on the Call Routing page. Alarm Call Routing Programming can only be performed from the Manager’s Panel designated as the Controller. -
Page 32: Manager's Panel Change Password
43. MANAGER’S PANEL CHANGE PASSWORD Passwords can only be changed from the Manager’s Panel designated as the Controller. Log on using the current Manager (or Engineer) password and touch the Change Password button. An Engineer can change 3 passwords; Engineer, Manager and User. A Manager can change 2 passwords;... -
Page 33: Manager's Panel Configure Flats
44. MANAGER’S PANEL CONFIGURE FLATS Flats can only be configured from the Manager’s Panel designated as the Controller. The flat label that appears on the Status screen can be changed by editing the text in Flat Label box. The order in which the flats appear on the array of LEDs can be changed by editing the New Location box. Log on using the Manager (or Engineer) password and touch the Configure Flats button. -
Page 34: Manager's Panel Database Utility
45. MANAGER’S PANEL DATABASE UTILITY The database utility can be used to export logged data to a CSV file. The data can be selected over a date range and once exported is saved into an Archive directory. During this process there is an option to delete the files from the Manager’s Panel database to reduce its size. -
Page 35: Special Codes Summary
46. SPECIAL CODES SUMMARY Code Function 1000 Select All Call PA Speech Mode 1003 Select Fire Alarm Tone Mode 1004 Operating Mode Enquire 1005 Select Onsite Mode 1006 Select Local Offsite Mode 1007 Select Remote Offsite Mode 1008 Fault Memory Enquire 1009 Alarm Memory Enquire 2000...
Need help?
Do you have a question about the Advent XT2 and is the answer not in the manual?
Questions and answers