Table of Contents
Advertisement
SIMATIC NET PROFIBUS
Optical Link Module
OLM / P11 V4.0
OLM / P12 V4.0
OLM / P11 V4.0
OLM / G12 V4.0
OLM / G12-EEC V4.0
OLM / G11-1300 V4.0
OLM / G12-1300 V4.0
Operating Instructions
07/2008
A2B00065774O, Edition V1.5
Preface
Introduction
Network Topologies
Product Characteristics
Installation and Maintenance
Approvals and Marks
References
Drawings
1
2
3
4
5
6
7
8
Advertisement
Table of Contents
Troubleshooting

Related Manuals for Siemens OLM/P11 V4.0


Summary of Contents for Siemens OLM/P11 V4.0
- Page 1 Preface Introduction Network Topologies Product Characteristics SIMATIC NET PROFIBUS Optical Link Module Installation and Maintenance OLM / P11 V4.0 OLM / P12 V4.0 Approvals and Marks OLM / P11 V4.0 OLM / G12 V4.0 References OLM / G12-EEC V4.0 OLM / G11-1300 V4.0 OLM / G12-1300 V4.0 Drawings Operating Instructions...
- Page 2 Disclaimer Copyright Siemens AG 2008. All rights reserved. The reproduction, transmission or use of this document or its contents is not permitted We have checked the contents of this manual for agreement with the hardware and software described.
- Page 3 Siemens. This product can only function correctly and safely if it is transported, stored, set up, and installed correctly, and operated and maintained as recommended.
-
Page 4: Table Of Contents
Contents Preface ..............................1 Preface............................1 Introduction..............................3 Introduction ............................3 Network Topologies ........................... 7 Linear (bus) Topology ........................8 3.1.1 Linear (bus) topology with fiber-optic link monitoring and segmentation........9 3.1.2 Bus topology without fiber-optic link monitoring................9 Star Topology..........................10 Ring Topology ..........................12 3.3.1 Redundant Optical Ring with two OLMs ..................14 Product Characteristics.......................... - Page 5 Ex approval ..........................47 UL approval (U.S. and Canada)....................47 Shipbuilding approvals.........................48 References .............................. 49 References...........................49 Drawings..............................51 Tables Table 2-1 Number of electrical and optical ports per module, ...............4 Table 4-1 Overview of the product characteristics..................19 Table 4-2 DIL-switches in compatibility mode....................23 Table 5-1 Meaning of the LED displays and indication by the signaling contact .........39 Table 5-2...
- Page 6 Figure 5-13 LED displays on the front panel ....................37 SIMATIC NET PROFIBUS, Optical Link Module Operating Instructions, 07/2008, A2B00065774O, Edition V1.5...
-
Page 7: Preface
These operating instructions support you when commissioning PROFIBUS OLM devices (Optical Link Module) Validity of these operating instructions These operating instructions are valid for the following devices: SIMATIC NET OLM/P11 V4.0 6GK1 503-2CA00 SIMATIC NET OLM/P12 V4.0 6GK1 503-3CA00 SIMATIC NET OLM/G11 V4.0 6GK1 503-2CB00 SIMATIC NET OLM/G12 V4.0... - Page 8 Further documentation You will find more information on other SIMATIC NET products that you can use with the OLM V4.0 devices in the “SIMATIC NET PROFIBUS networks SIEMENS AG” manual. Finding information To help you find the information you require more quickly, the manual includes not only the table of contents but also the following sections in the Appendix: •...
-
Page 9: Introduction
Introduction 2.1 Introduction This section provides you with an overview of the functions of the PROFIBUS OLM4.0 product family. What is possible? PROFIBUS OLMs are designed for use in optical PROFIBUS fieldbus networks. They allow the conversion of electrical PROFIBUS interfaces (RS-485 level) into optical PROFIBUS interfaces and vice versa. -
Page 10: Table 2-1 Number Of Electrical And Optical Ports Per Module
Introduction 2.1 Introduction Every module has two (OLM P11, G11) or three (OLM P12, G12) independent channels (ports) that consist of transmitter and receiver pairs. The power supply voltage for operation is 24 V DC. To increase operational reliability, a redundant power supply is possible. - Page 11 Introduction 2.1 Introduction The PROFIBUS OLMs comply with the standard EN 50170 /2/ and with the technical guideline “Optical transmission technology for PROFIBUS” published by the PROFIBUS User Organization (PNO). OLM/G12 and OLM/G12-EEC have the same functions. They only differ in the specification of the ambient climatic conditions: the OLM/G12 is suitable for use in the standard temperature range from 0 °C to 60 °C, whereas the OLM/G12-EEC (extended environmental conditions) can be used in the extended temperature range of -25 °C to...
-
Page 13: Network Topologies
Network Topologies 2.1 Introduction Network Topologies Which network topologies can be implemented? The following network topologies can be implemented with the PROFIBUS OLM: Point-to-point connection • Bus (linear) topology • Star topology • Redundant optical ring • Combinations of these basic types are also possible. To set up the fiber-optic links of these network topologies, cables with two optical fibers are used. -
Page 14: Linear (Bus) Topology
Network Topologies 3.1 Linear (bus) Topology 3.1 Linear (bus) Topology DTE/ DTE/ DTE/ DTE/ bus segment bus segment bus segment bus segment RS-485 OLM/P11 OLM/P12 OLM/P12 OLM/P11 OLM/G12(-1300) OLM/G12(-1300) OLM/G11(-1300) OLM/G11(-1300) Ch 1 Ch 1 Ch 1 Ch 1 Ch 2 Ch 2 Ch 2 Ch 3... -
Page 15: Linear (Bus) Topology With Fiber-Optic Link Monitoring And Segmentation
Network Topologies 3.1 Linear (bus) Topology 3.1.1 Linear (bus) topology with fiber-optic link monitoring and segmentation Use this mode especially when you want a disrupted fiber-optic cable segment to be separated from the rest of the network (see section 4.2.2.4). Only use this mode, if you only connect PROFIBUS OLM V4.0 or V3/V4.0 with each other. -
Page 16: Star Topology
Network Topologies 3.2 Star Topology 3.2 Star Topology RS-485 Electrical star segment OLM/P11 OLM/G12 OLM/P11 OLM/G11-1300 Ch 1 Ch 1 Ch 1 Ch 1 Ch 2 Ch 2 Ch 2 Ch 2 Ch 3 Ch 2 Ch 2 Ch 1 Ch 1 Ch 2 Ch 2... - Page 17 Network Topologies 3.2 Star Topology When the monitoring on the optical channels is active, the fiber-optic links are monitored by the connected OLMs. Note: Unused optical channels you intend to use later to expand the network cause a broken fiber-optic cable signal if the monitoring is active. You can avoid this error message by setting unused channels to the mode “bus without fiber-optic link monitoring”.
-
Page 18: Ring Topology
Network Topologies 3.3 Ring Topology 3.3 Ring Topology DTE/ DTE/ DTE/ DTE/ bus segment bus segment bus segment bus segment RS-485 OLM/P12 OLM/P12 OLM/P12 OLM/P12 OLM/G12(-1300) OLM/G12(-1300) OLM/G12(-1300) OLM/G12(-1300) Ch 1 Ch 1 Ch 1 Ch 1 Ch 2 Ch 3 Ch 2 Ch 3 Ch 2... -
Page 19: Optical Ring)
Network Topologies 3.3 Ring Topology Please note the following: For correct operation, the following conditions must be met: Only use this mode, if you only connect PROFIBUS OLMs with at least version V3 with each other. Both optical channels must be set to the “redundant optical ring”... -
Page 20: Redundant Optical Ring With Two Olms
Network Topologies 3.3 Ring Topology 3.3.1 Redundant Optical Ring with two OLMs Setting up a redundant optical ring with two PROFIBUS OLMs can be seen as special case of the redundant optical ring and can be implemented with the following two configurations. DTE/ DTE/ DTE/... - Page 21 Network Topologies 3.3 Ring Topology Configuration 1 (see Figure 3-2 Configuration 1, FOC1 < FOC2) , LED display: 1. Situation, no FOC interruption: OLM 1 OLM 2 SystemLED = lit green SystemLED = lit green LED = lit yellow LED = lit yellow LED = lit yellow LED = is not lit LED = is not lit...
- Page 22 Network Topologies 3.3 Ring Topology 3. Fault, FOC2 interrupted: OLM 1 OLM 2 SystemLED = lit green SystemLED = lit green LED = lit yellow LED = lit yellow LED = lit yellow LED = lit yellow LED = lit red LED = lit red 2.
-
Page 23: Product Characteristics
Product Characteristics 4.1 Technical Specifications Product Characteristics 4.1 Technical Specifications Characteristics Device type OLM P11 V4.0 OLM G11 V4.0 OLM G11-1300 V4.0 OLM P12 V4.0 OLM G12 V4.0 OLM G12-1300 V4.0 OLM G12-EEC V4.0 Power supply Operating voltage 24 V DC safety extra low voltage permitted voltage range 18..32 V DC NEC Class 2 Current consumption max. - Page 24 Product Characteristics 4.1 Technical Specifications Characteristics Device type C-Tick approval according to type plate FM approval according to type plate Ex (hazardous area) approval according to type plate Electrical channel Type RS-485 Input voltage stability -7 V..+12 V Optical channels OLM P11 V4.0 OLM G11 V4.0 OLM G11-1300 V4.0...
-
Page 25: Table 4-1 Overview Of The Product Characteristics
Product Characteristics 4.1 Technical Specifications Characteristics Device type Voltage interruption EN61000-4-11, Voltage dips voltage reduction by >95% for 5 s voltage reduction by 30% for 10 ms voltage reduction by 60% for 100 ms and 1000 ms Climatic ambient conditions Ambient temperature during operation -25 °C..+60 °C for OLMG12-EEC 0 °C..+60 °C for all other OLMs... -
Page 26: Installation
Product Characteristics 4.2 Installation 4.2 Installation 4.2.1 Safety related notices Only use the PROFIBUS OLM in the way intended in these operating instructions. In particular, observe all warnings and safety-relevant notices. Run the modules only with a safety extra-low voltage of a maximum of +32 V DC (typically +24 V DC) according to IEC 950 / EN 60 950 / VDE 0805. -
Page 27: General Information On Commissioning
Product Characteristics 4.2 Installation 4.2.2 General information on commissioning Unpack the OLM V4.0 and its accessories and check that the consignment is complete and that there has been no damage during transportation. After unpacking, the device should be acclimatized for some time to avoid condensation after to storage in cold surroundings. -
Page 28: Setting Compatibility, Mode And Transmit Power
Product Characteristics 4.2 Installation 4.2.3 Setting compatibility, mode and transmit power Please note the following: The OLM must be switched off when changing the mode. You can achieve this for example by disconnecting the 5-pin terminal block. 4.2.3.1 Setting the compatibility With DIL switch S7, you can enable or disable functional compatibility with devices of the previous generation SINEC L2FO OLM/P3, -P4, -S3, -S4, S3-1300 and S4- 1300. -
Page 29: Table 4-2 Dil-Switches In Compatibility Mode
Product Characteristics 4.2 Installation The significance of the DIL switches of the OLM when S7=1 for: SINEC L2FO SINEC L2FO OLM/P3 and OLM/P4 OLM/S3 and OLM/S4, OLM/S3-1300 and OLM/S4-1300 Output power CH4 Reserved Standard High Output power CH3 Reserved Standard High Reserved Reserved... - Page 30 Product Characteristics 4.2 Installation Mode “electrical channel without segment monitoring“ CH1 is set to this mode, when S0 is in position 1. Note: This mode should only be set in the star segment of the star topology. 4.2.3.4 Setting the mode of the optical channels (CH2, CH3) The mode can be set separately for each optical channel.
- Page 31 Product Characteristics 4.2 Installation Leave S5 in position 1 (default) if the fiber-optic link on CH2 works correctly in this position. Leave S6 in position 1 (default) if the fiber-optic link on CH3 works correctly in this position. Set S5 to position 0 (reduced) if overdrive of a non-OLM device occurs on CH2 when plastic fiber-optic cables are used.
-
Page 33: Installation And Maintenance
Installation and Maintenance 5.1 Installation Installation and Maintenance 5.1 Installation 5.1.1 Installation instructions Electromagnetic compatibility Electromagnetic compatibility involves all questions regarding electric, magnetic and electromagnetic emission effects. To avoid disturbing influences on electrical installations, these effects must be reduced to a minimum. The construction of device, correct connection of bus lines and the suppression of self inductances are essential limitation measures. -
Page 34: Figure 5-2 Securing Shielded Cables With Cable Clamps And Cable Retainers
Installation and Maintenance 5.1 Installation Please note the following: A minimum distance of 15 cm must be maintained between an OLM and a load switching element (e.g. contactor, relay, temperature control, switch, etc.). This minimum clearance is measured between the outside edges of the components and must be adhered to in all directions around an OLM. - Page 35 Installation and Maintenance 5.1 Installation surfaces are ideal for good contact between grounding elements. With tin- plated surfaces, the necessary contact must be established using screws. Painted or varnished surfaces at the contact points are unsuitable. Shield clamps or contacts must not be used as strain relief.
-
Page 36: Connecting Optical Cables
Installation and Maintenance 5.1 Installation 5.1.2 Connecting optical cables Connect the single modules via a two-core fiber-optic cable with BFOC/2.5 connectors. Make sure – that the end faces of the optical connectors are clean. – that always one optical input : ψ and one optical output : ζ are interconnected (“crossover connection“). -
Page 37: Installation Of The Modules
Installation and Maintenance 5.2 Installation of the Modules 5.2 Installation of the Modules Installation options The OLM modules can either be mounted on a 35 mm rail according to DIN EN 50022 or on a flat surface with the help of a mounting plate. Choose the location so that the climatic and mechanical limit values listed in the technical specifications can be met. -
Page 38: Figure 5-5 Installation Of A Module With A Mounting Plate
Installation and Maintenance 5.2 Installation of the Modules Installation on a mounting plate Unscrew the 3 screws on the right side of the OLM (the side with the type label). Fix with this screws the mounting plate (MLFB: 6GK1503-8AA00). Now fix the OLM at the wall or at a cubicle plate. Make sure there is a reliable and permanent electrical connection between the mounting plate and surface, for example by using toothed washers. -
Page 39: Connection Of The Electrical Rs-485 Bus Cables
Installation and Maintenance 5.3 Connection of the Electrical RS-485 Bus Cables 10,15 37,35 60,15 3x Ø3,5 Figure 5-6 Drilling measures for the mounting plate, all dimensions are millimeter 5.3 Connection of the Electrical RS-485 Bus Cables The modules are equipped with an electrical port with RS-485 level. - Page 40 Installation and Maintenance 5.3 Connection of the Electrical RS-485 Bus Cables Only use shielded twisted pair for the RS-485 bus cables as described in the manual “SIMATIC NET PROFIBUS Networks”. Do not exceed the segment lengths specified there. Connect the RS-485 bus segment via a PROFIBUS connector. If the module is at the beginning or at the end of a bus segment, this connector must have an active bus terminator.
-
Page 41: Connecting Of The Operating Power Supply
Installation and Maintenance 5.4 Connecting of the Operating Power Supply 5.4 Connecting of the Operating Power Supply The terminal block can be removed from the device to allow cables to be connected. Supply the module only with a stabilized safety extra-low voltage of a maximum of +32 V (typically +24V) according to IEC 950 / EN 60 950 / VDE 0805. -
Page 42: Receive Level Of The Optical Channels
Installation and Maintenance 5.6 Receive Level of the Optical Channels 5.6 Receive Level of the Optical Channels The receive level of the two optical channels CH2 und CH3 can be measured using a standard voltmeter via the measurement sockets. The voltmeter can be connected and disconnected while the device is operating. -
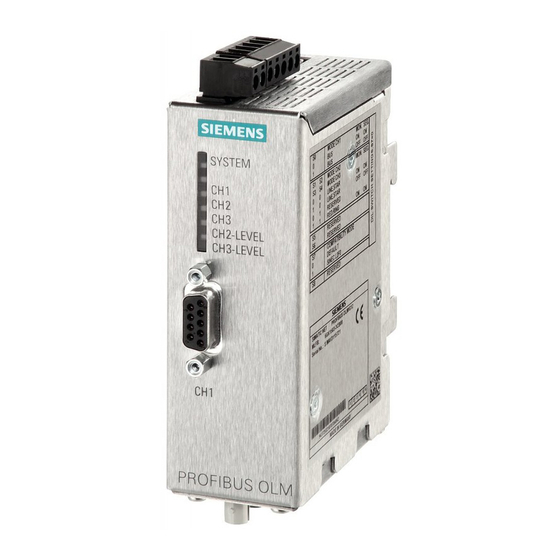
Page 43: Led Displays And Troubleshooting
Installation and Maintenance 5.7 LED Displays and Troubleshooting Notes: For a valid measurement, that the partner OLM at the other end of the fiber-optic cable must send normal PROFIBUS frames. This can be recognized by the LED display of the partner OLM (see section 5.7.1). The output voltages at the measurement sockets are influenced by many factors: strength of the optical transmit power of the partner OLM ambient temperature of the optical transmitter and receiver... - Page 44 Installation and Maintenance 5.7 LED Displays and Troubleshooting LED display Possible causes Signaling contact System lit green - The transmission rate was detected and the voltage supply is ok does not signal not lit - Voltage supply outage (complete outage, with a redundant supply, outage signals down of both supply voltages) - Voltage supply connected wrongly...
-
Page 45: Troubleshooting
Installation and Maintenance 5.7 LED Displays and Troubleshooting LED display Possible causes Signaling contact not lit Transmission rate not detected yet – LED “System“ flashes red does not signal - There is no transmitting bus node - Transmit and receive fiber-optic cables swapped over -No partner module connected or partner module is not turned on - Connected partner module is defective Transmission rate is detected –... - Page 46 Installation and Maintenance 5.7 LED Displays and Troubleshooting 5.7.2.2 Error display on CH1 Check whether the DIL switch S0 is in position 1, when the OLM is in the electrical star segment of a star topology (see section 3.2) the problem remains after removing the RS-485 connector. Still there: Device defective .
-
Page 47: Maintenance
OLM V4.0 (DIL switches). If there are any signs of changes, the OLM V4.0 should be replaced. If any other fault develops, please send the device to your SIEMENS service center for repair. Repairs on-site are not possible. -
Page 48: Configuration
Installation and Maintenance 5.10 Configuration 5.10 Configuration Because of frame delays due to cables, network components and monitoring mechanisms in the network components, the PROFIBUS network parameter "slot time" must be adapted to the network span, the network topology and the data rate when configuring the network. -
Page 49: Table 5-2 Constants For Calculating The Slot Time For Dp-Standard (Redundant Optical Ring)
Installation and Maintenance 5.10 Configuration Data rate 12 Mbps 1651 6 Mbps 3 Mbps 1.5 Mbps 500 Kbps 187.5 Kbps 3.75 93.75 Kbps 1.875 45.45 Kbps 0,909 19.2 Kbps 0,384 9.6 Kbps 0,192 Table 5-2 Constants for calculating the slot time for DP-standard (redundant optical ring) Data rate 12 Mbps... -
Page 51: Approvals And Marks
Approvals and Marks 6.1 CE Mark Product name SIMATIC NET SIMATIC NET OLM/P11 V4.0 6GK1 503-2CA00 SIMATIC NET OLM/P12 V4.0 6GK1 503-3CA00 SIMATIC NET OLM/G11 V4.0 6GK1 503-2CB00 SIMATIC NET OLM/G12 V4.0 6GK1 503-3CB00 SIMATIC NET OLM/G12-EEC V4.0 6GK1 503-3CD00 SIMATIC NET OLM/G11-1300 V4.0... -
Page 52: C-Tick
Networks” /1/ manual when installing and operating the device. Conformity certificates The EC Declaration of Conformity is available for the responsible authorities according to the above-mentioned EC Directive at the following address: Siemens Aktiengesellschaft Bereich Automatisierungs- und Antriebstechnik Industrielle Kommunikation (A&D SC IC) Postfach 4848 D-90327 Nürnberg, Germany... -
Page 53: Fm Approval
Approvals and Marks 6.3 FM approval 6.3 FM approval CL.1, DIV.2, GP. A,B,C,D, T4 CL.1, Zone 2, GP. IIC, T4 Ta: -25°C...+60°C (model OLM/G12 ECC, only) Ta: 0°C...+60°C (all other models) 6.4 Ex approval II 3 G Ex nA II T4 KEMA 08 ATEX 0003 X EN 60079-15:2005 EN 60079-0:2006... -
Page 54: Shipbuilding Approvals
The devices of the OLM V4.0 series also meet several requirements for shipbuilding. For the respectively valid approvals call our hotline +49-18050500222. Furthermore you can gather information at: http://support.automation.siemens.com SIMATIC NET PROFIBUS, Optical Link Module Operating Instructions, 07/2008, A2B00065774O, Edition V1.5... -
Page 55: References
References 7.1 References Sources of information and other documentation 1. SIMATIC NET PROFIBUS networks order numbers: 6GK1970-5CA20-0AA0 German 6GK1970-5CA20-0AA1 English 6GK1970-5CA20-0AA2 French 6GK1970-5CA20-0AA4 Italian 2. EN 50170-1-2 1996: “General Purpose Field Communication System“, Volume 2 “Physical Layer Specification and Service Definition“ 3. -
Page 57: Drawings
Drawings SIMATIC NET PROFIBUS, Optical Link Module Operating Instructions, 07/2008, A2B00065774O, Edition V1.5... - Page 59 Glossary Bayonet Fiber Optic Connector BFOC Deutsche Industrie Norm [German industrial standard] Extended Environmental Conditions Electronic Industries Association European standard Electromagnetic Compatibility Hard Polymer Cladded Silica Fiber HCS™ (registered trademark of Ensign-Bickford) Highest Station Address International Electrotechnical Commission Light Emitting Diode Optical Bus Terminal Optical Link Module Polymer Cladded Fiber...
- Page 61 Index point-to-point-connection, 7 redundant optical ring, 7 ring topology, 12 star topology, 7, 10 ATEX, 47 Optical link power budget, 29 CE mark, 45 Optical star topology, 3 Compatibility, 22 C-tick mark, 46 Redundant ring, 12 DIL switch, 22 Segment monitoring, 23 Shielded cables, 28 Electromagnetic compatibility, 27 SINEC L2FO, 22...
Need help?
Do you have a question about the OLM/P11 V4.0 and is the answer not in the manual?
Questions and answers