
Related Manuals for Emerson Copeland PerformanceAlert


Summary of Contents for Emerson Copeland PerformanceAlert
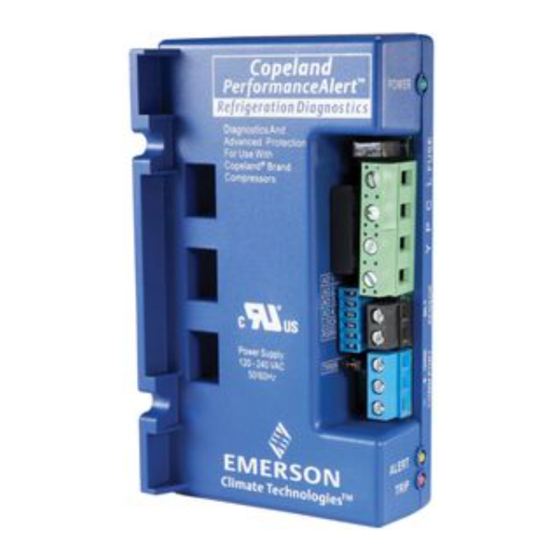
- Page 1 026-1724 Rev 0 12-MAY-2008 Copeland® PerformanceAlert™ Gateway System Installation and Operation Manual...
- Page 3 1640 Airport Road, Suite 104 Kennesaw, GA 30144 Phone: (770) 425-2724 Fax: (770) 425-9319 ALL RIGHTS RESERVED. The information contained in this manual has been carefully checked and is believed to be accurate. However, Com- puter Process Controls, Inc. assumes no responsibility for any inaccuracies that may be contained herein. In no event will Computer Process Controls, Inc.
-
Page 5: Table Of Contents
Table of Contents 1 OVERVIEW ................................... 1 1.1. T ™ G ....................... 1 ERFORMANCE LERT ATEWAY YSTEM 1.2. T ™ G ......................1 ERFORMANCE LERT ATEWAY OARD 1.3. T ™ ERFORMANCE LERT ................................1 IAGNOSTIC ODULE 1.4. H ............................... 2 ERMINAL 2 GATEWAY BOARD MOUNTING .......................... - Page 6 7.2.2.5. Screens 15 through 17............................... 17 7.2.2.6. Screen 18 and 19................................17 7.2.3. Individual Module Configuration........................17 7.2.3.1. Screen 1: Rack # and Install Date ............................. 17 7.2.3.2. Screen 2: Date of Installation............................18 7.2.3.3. Screen 3: Customer Code ..............................18 7.2.3.4.
-
Page 7: Overview
1.2. The PerformanceAlert™ Gateway Board The PerformanceAlert™ Gateway is designed to allow the Emerson Climate Technologies Retails Solutions fam- ily of site controllers (E2, Einstein, and REFLECS) to in- ® terface directly with up to 14 Copeland PerformanceAlert™ Diagnostic Modules. -
Page 8: Hand-Held Terminal
Diagnostic Module is documented and sup- ® ported by Copeland , and is beyond the scope of this document. For more information, visit www.EmersonCli- mate.com or contact Emerson Climate Technologies, Inc. at 1-888-EMR-9950. 1.4. Hand-Held Terminal Figure 1-3 - Hand-Held Terminal (HHT) -
Page 9: Gateway Board Mounting
Gateway Board Mounting The Gateway is typically mounted in the same area as the site controller, near the controller’s 16AI, 8RO, and other RS485 Network peripherals. The Gateway is de- signed to fit into a standard 3" snap track (supplied with the board) or may be mounted in a panel or on stand-offs. -
Page 10: Gateway Power Wiring
Table 3-1 - Gateway Power Requirements The Gateway requires 24VAC power from a Class 2 center-tapped transformer. Emerson Climate Technologies Retail Solutions sup- plies several sizes of center-tapped transformers for power- ing multiple 16AIs, 8ROs, and other RS485 peripheral boards of the E2, Einstein, and REFLECS systems. -
Page 11: Networking
Gateway to the E2 via the RS485 I/O net- work port. Cable Type Emerson Climate Technologies Retail Solutions speci- fies all RS485 I/O and MODBUS wiring used by the E2 must be Belden 8641 (24AWG, 300V, CPC P/N 135- 8641);... -
Page 12: Performancealert™ Module Modbus Addressing
4.1.2. PerformanceAlert™ Module 4.1.4. MODBUS Termination MODBUS Addressing Figure 4-3 - PerformanceAlert™ MODBUS Addressing Jumpers AD1 through AD4 on the PerformanceAlert™ module set the MODBUS device address. Modules should be uniquely numbered in sequence starting with 1 and con- tinuing in numerical order up to 14. Refer to Figure 4-3 for jumper settings for each address number. -
Page 13: Gateway Board Numbering
4.2.1.1. Setting the Gateway Address Switch MODBUS BAUD RATE Figure 4-6 - Connecting the Gateway to the RS485 Network 4.2.1. Gateway Board Numbering The E2, Einstein, or REFLECS controller interprets the PerformanceAlert™ Gateway board as one or more 16AI Analog Input boards. The number of virtual "boards" is de- pendent on two things: the setting of the board’s address DIP switch, and whether the PerformaceAlert Gateway Figure 4-7 - Gateway Dip Switch Numbering... -
Page 14: Gateway Board Rs485 I/O Termination
GATEWAY DIP SWITCH MODBUS I/O NETWORK OR BAUD COM A AND D RATE BAUD RATE I/O NET BAUD RATE SETTINGS 9600 19200 MODBUS BAUD RATE SETTINGS 9600 Figure 4-8 - Dip Switch Setting for Numbering Gateway 4.2.3. Gateway Board RS485 I/O Termi- nation Figure 4-9 - Gateway RS485 I/O Network Termination If the Gateway board will be an end device on the... -
Page 15: Gateway Software Setup
Gateway Software repeat until all are set correctly. PF ALERT-1 : ENB Setup PF ALERT-2 : ENB PF ALERT-3 : ENB PF ALERT-4 : ENB When the Gateway and all PerformanceAlert™ mod- ules are correctly powered up and networked, the Gateway IMPORTANT: Always set unused ad- firmware must be configured with a Hand-Held Terminal dresses to "DIS."... -
Page 16: Performancealert™ I/O Summary
PerformanceAlert™ 6.2. I/O Setup for Condensed I/O Summary Mode During operation, the PerformanceAlert™ Gateway Note: If you will be using the Perfor- serves two main functions: manceAlert™ Gateway in Expanded Mode, skip this section and follow the instructions in • Communicating with, and collecting information Section 6.3., I/O Setup for Expanded Mode. -
Page 17: I/O Setup For Expanded Mode
the Input Status screen. The point will now and functions are fixed and are the same for each module. display a "D" (for digital) in the Type col- Table 6-1 lists the point numbers and their data types and umn, and will also display the current value functions. - Page 18 For every board number used by the Perfor- fields near the bottom of the screen must be manceAlert™ Gateway, there will be sixteen rows in the set to 0 and 655.5 respectively. The Low Eng Input Status table corresponding to "points" 1 through 16 Units by default should read 0 and will not re- on the Gateway.
- Page 19 you may set up logging, alarming, and (if desired) output control. Refer to the E2 User’s Guide (P/N 026-1610) for Analog and Digital Sensor Control setup instructions. I/O Setup for Expanded Mode PerformanceAlert™ I/O Summary • 13...
-
Page 20: Operation
Copeland , and is beyond 7.1.2. Screen 2: PF Alert Alarm Status the scope of this document. For more information, visit www.EmersonClimate.com or contact Emerson Climate PF ALERT ALARM Technologies, Inc. at 1-888-EMR-9950. STATUS: 1234567901234... -
Page 21: Screens 3 Through 6: Firmware Versions
7.1.3. Screens 3 through 6: Firmware field, enter the number of the Perfor- manceAlert™ module you wish to view. Versions Press DOWN ARROW twice. [2.00B02] PF ALERT 1-14 [2.00B02] [2.00B02] SELECT: 1 [2.00B02] [2.00B02] [2.00B02] You may only select a PerformanceAlert™ address for a module that is set to ENABLE and is communicating OFF [ with the Gateway. -
Page 22: Screen 2
7.2.1.2. Screen 2 7.2.2.1. Screens 1 and 2 ST: 00000000 LAST 10 ALARMS: OUT ST: 00000000 A1 -MOST RECENT SYS ST:0 0000 A10-PAST 24H FLAGS : 00000000 A1: 10 A2: 4 A3:6 A4 :4 This status screen shows the input, output, system, and A5:6 A6 :4 warning flag status displayed as bits. -
Page 23: Screens 12 And 13
7.2.2.3. Screens 12 and 13 7.2.2.6. Screen 18 and 19 WF0 HI DLT TRIP HISTORY: WF1 LCK ROT DAYS: C1234567 WF2 OPEN CIR OFF NNNNNNNN WF3 LOW V COUNT WF4 MMC BYPASS HISTORY: WF5 DLT OPEN OFF DAYS: C1234567 WF6 DLT SHOR OFF NNNNNNNN COUNT Screens 6 and 7 shows the current state of the warning... -
Page 24: Screen 2: Date Of Installation
7.2.3.2. Screen 2: Date of Installation 7.2.3.6. Screen 5: Setpoints DATE OF DLT TTP : 230.0 INSTALLATION: SEVERE ALERT DATE: 08-15-0 OFF TIME : 20 LO V SP: 217.0 On this screen, you may enter the date the compressor The DLT TTP is the high temperature setpoint for trip- was installed. -
Page 25: Communication Statistics
CNT will be the number of times a HIGH DISCHARGE MX: The maximum number of consecutive times an er- PROTECTION alert must occur in a single 24-hour period ror condition was detected in responses. to cause a lockout. To clear all counts on this screen, press the CANCEL If you wish to set a lockout setpoint for an alert code, key. -
Page 26: E2 Applications
E2 Applications points set up: The PerformanceAlert™ Gateway provides a means for E2 to use data from the PerformanceAlert™ modules for general logging, alarming, and control purposes. For convenience, this section will cover some of the most com- mon and useful applications of PerformanceAlert™ data in E2 applications. -
Page 27: Analog Alarms
In the Report Delay and Report Priority Of these analog points, it is not necessary to set up ge- Fields, you must decide three things: whether neric alarming on points 13 and 14. On point 15, the dis- you want a PerformanceAlert™ advisory to charge line temperature, alarming already occurs with high be an ALARM or NOTICE in the E2 Adviso- discharge causes a trip condition to occur (in Expanded... -
Page 28: Advisory Values And Priorities
When finished, the Analog Alarm Setup screen should In the example in Figure 8-5, since point #1 of the Per- formanceAlert™ gateway was named "PF COMP 1" when appear similar to Figure 8-4. Press to save changes the point was set up in Section 6.2.1., the origin of the and exit to the Input Status screen. -
Page 29: General
8.2.2.1. General 8.2.2.3. Setpoints Figure 8-8 - Analog Sensor Control Compressor Proofing - Figure 8-6 - Analog Sensor Control Compressor Proofing - General Screen Setpoints Screen In the Setpoints tab, enter 3.0 in the CUTIN field and In the Name field, enter "CMP x PRF" (where x is the address of the PerformanceAlert™... - Page 30 APPLICATION: Choose the name : SETUP. (CMPR x PROOF) you entered for the Analog Sensor Con- trol application OUTPUT: Choose COMMAND OUT Figure 8-9 - Analog Sensor Control Compressor Proofing - Inputs Screen Press to navigate to the Stage Setup Figure 8-11 - Defined Compressor Proof Output tab (Figure 8-9).
Need help?
Do you have a question about the Copeland PerformanceAlert and is the answer not in the manual?
Questions and answers