FLIR D3300 Series Quick Connection Manual
Digital video surveillance recorder
Hide thumbs
Also See for D3300 Series:
- Instruction manual (177 pages) ,
- Instruction manual (196 pages) ,
- Instruction manual (131 pages)
Table of Contents
Advertisement
Quick Links
Package Contents
Contenu de l'emballage
Contenido del paquete
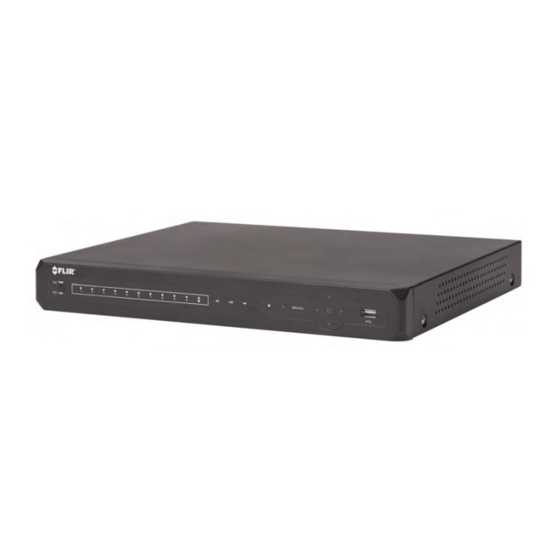
Digital Video Recorder
Enregistreur de surveillance vidéo
Grabadora de video digital
USB Mouse
Souris USB
Mouse USB
Remote Control
Télécommande
Control remoto
Power Adapter
Bloc d'alimentation
Adaptador de energía
Octopus Cable
(Optional, see manual on CD for details)
Câble pieuvre
(Facultatif, pour plus de détails, voir le manuel situé sur le CD)
Cable pulpo
(Opcional, consulte el manual en CD para obtener más detalles)
Quick Networking Guide
Network Video Surveillance Recorder
DNR200 Series
This guide will show you how to set up your system for connection over the Internet using a PC,
2
Local Connection (for PC)
Quick Start Guides
Smartphone, or Tablet.
Before You Start:
a
from www.digimerge.com on a computer in
Install CMS software for PC from the CD or
e
(default: 000000) for the NVR and click OK.
Enter the User Name (default: admin) and Password
• A router and high-speed Internet access (not included).
Make sure you have:
b
the same LAN as the NVR.
f
Click OK.
• A PC connected to the same network as your NVR.
Connection Guide for details).
• Connected the NVR to a router or switch on your network using an Ethernet cable. (See the Quick
Click Config Manager>Device Manage.
g
Click Device List. Click + next to No Group.
Mac users, please visit
www.digimerge.com
for instructions.
c
appears, click Allow.
Click Search Device. If a Windows Firewall alert
1
Find Your IP and MAC Address
d
Check the NVR and click Add Management.
h
to the display area to view.
Double-click the NVR. Click-and-drag the NVR
Press the Enter button on the front panel of the NVR
Click Search
Device
Quick Connection Guide
Click Device
DNR200 Series
or on the remote control.
Check the NVR
Click-and-drag the
NVR to the display
Click + next
List
Network Video Surveillance Recorder
Record your information below:
PACKAGE CONTENTS:
area to view
Double-click
to No Group
Guides de démarrage rapide
MAC ADDRESS
IP ADDRESS
:
:
.
-
-
.
-
.
-
-
Connecting your system
Click Add
the NVR
1
Management
Power
2
IP Cameras*
3
Mouse
4
Router*
5
Monitor/TV*
6
Power
3
Port Forwarding
Network Video Recorder (NVR)
USB mouse
4
(to PoE Ports)
Register for FLIR DDNS
(to NVR)
Manually forward ports 80 and 35000 to the NVR's IP address.
a
Open your web browser and go to:
d
Complete the System Information fields:
manual.
All routers are different. To port forward your router, please refer to your router's user
Remote control
Power adapter (x2)
http://ddns.myddns-flir.com
An example of a port forwarding screen is shown for illustration purposes:
Press the Enter button on the front panel of the NVR
• Connected the NVR to a router or switch on your network using an Ethernet cable. (See the Quick
.
:
-
• A PC connected to the same network as your NVR.
1
Before You Start:
Make sure you have:
Connection Guide for details).
Find Your IP and MAC Address
Record your information below:
-
IP ADDRESS
Mac users, please visit
:
-
.
This guide will show you how to set up your system for connection over the Internet using a PC,
• A router and high-speed Internet access (not included).
or on the remote control.
Smartphone, or Tablet.
.
-
Network Video Surveillance Recorder
Connecting your system
DNR200 Series
2
Local Connection (for PC)
www.digimerge.com
c
Check the NVR
Device
Install CMS software for PC from the CD or
Click Add
from www.digimerge.com on a computer in
the same LAN as the NVR.
PACKAGE CONTENTS:
a
Click Search
for instructions.
appears, click Allow.
d
Click Search Device. If a Windows Firewall alert
b
Click Config Manager>Device Manage.
-
Quick Networking Guide
Check the NVR and click Add Management.
Quick Connection Guide
Double-click the NVR. Click-and-drag the NVR
Double-click
Click-and-drag the
the NVR
area to view
NVR to the display
h
Network Video Surveillance Recorder
DNR200 Series
Click Device List. Click + next to No Group.
to No Group
f
Click + next
e
Click OK.
Enter the User Name (default: admin) and Password
(default: 000000) for the NVR and click OK.
g
to the display area to view.
Click Device
List
b
Click Create Account.
Ethernet Extension Cable*
manual.
MAC ADDRESS
All routers are different. To port forward your router, please refer to your router's user
An example of a port forwarding screen is shown for illustration purposes:
Manually forward ports 80 and 35000 to the NVR's IP address.
EXAMPLE
3
An automatic port forwarding wizard is available from www.digimerge.com.
Client
35000
HTTP
35000
80
80
Port Forwarding
NOTE:
NOTE: It may take up to
OR
**See reverse to add cameras from your LAN.
1
IP Cameras*
Ethernet Extension Cable*
and transmit video to your NVR.
Power
1 minute for cameras to start up
(to PoE Ports)
For suppo r t , visit
Connect to LAN**
2
CD
Connect to PoE
USB mouse
c
DDNS Domain Name:
Complete the Account Information fields
details (optional).
the Warranty Information with your purchase
with your personal information. Complete
w ww. d i g i merg e.co m
4
12
Register for FLIR DDNS
Management
Open your web browser and go to:
a
Record your
http://ddns.myddns-flir.com
b
information here:
DDNS User Name:
Click Create Account.
DDNS Password:
Information in this document is subject to change without
*Not included/sold separately.
HDMI cable
(includes software & manual)
Network Video Recorder (NVR)
Remote control
Quick Start Guides
Power adapter (x2)
Ethernet cable
notice. As our products are subject to continuous improvement,
f
Digimerge Technologies Inc., a FLIR company, and our subsidiaries
reserve the right to modify
prices, without notice and without incurring any obligation.
product design, specifications and
E&OE © 2013 FLIR / DIGIMERGE. All rights reserved.
12
Power
company or business
your choice).
6
information will be sent to you at the email
(to NVR)
VGA*
OR
ON
HDMI
Mouse
3
Monitor/TV*
Router*
5
4
of your NVR (press the
DNR200 Series Quick Connection Guide - English - R1
panel to find the MAC
Complete the System Information fields:
Select your product
name, or anything of
e
DDNS connection
Product License:
(i.e. your name, your
URL Request:
Choose a URL for your
Enter button on the
address.
model from the
d
click Create New Account. Your Account
(i.e. DNR200).
drop down menu
Once the information has been entered,
<Product Code>-
Address you used in Step c.
<MAC Address>:
Product License
Locate the MAC address
remote control or front
NOTE: It may take up to
1 minute for cameras to start up
Product License
model from the
Select your product
Product License:
DDNS connection
URL Request:
Choose a URL for your
(i.e. your name, your
of your NVR (press the
Locate the MAC address
<MAC Address>:
<Product Code>-
EXAMPLE
Ethernet cable
Quick Start Guides
and transmit video to your NVR.
drop down menu
(i.e. DNR200).
name, or anything of
your choice).
company or business
Enter button on the
panel to find the MAC
remote control or front
Guías de inicio rápido
c
Complete the Account Information fields
e
Once the information has been entered,
address.
HTTP
80
80
(includes software & manual)
CD
12
the Warranty Information with your purchase
with your personal information. Complete
Connect to PoE
Connect to LAN**
OR
information will be sent to you at the email
click Create New Account. Your Account
Client
35000
35000
12
details (optional).
Address you used in Step c.
OR
Record your
f
DDNS User Name:
HDMI
VGA*
NOTE:
An automatic port forwarding wizard is available from www.digimerge.com.
information here:
DDNS Password:
DDNS Domain Name:
ON
Fo r s up port, v is i t
ww w.digime rge.co m
notice. As our products are subject to continuous improvement,
Information in this document is subject to change without
prices, without notice and without incurring any obligation.
reserve the right to modify
Digimerge Technologies Inc., a FLIR company, and our subsidiaries
product design, specifications and
E&OE © 2013 FLIR / DIGIMERGE. All rights reserved.
*Not included/sold separately.
**See reverse to add cameras from your LAN.
DNR200 Series Quick Connection Guide - English - R1
CD (includes software and manual)
CD (logiciel et manuel inclus)
CD (incluye software y manual)
Fo r s u p p ort, visi t
Po u r ob t e ni r d u s o u tien , vi si tez l 'ad resse
Para o b te n e r as is te ncia , v is ite
w w w. fl ir securi ty. com/p ro
Information in this document is subject to change without notice. As our products are subject to continuous improvement, Digimerge
Technologies Inc., a FLIR company, and our subsidiaries reserve the right to modify product design, specifications and prices, without notice
and without incurring any obligation. E&OE © 2014 FLIR Systems, Inc. All rights reserved.
Les informations contenues dans ce document sont indiquées sous réserve de modifications sans préavis. Nos produits étant sans cesse
améliorés, Digimerge Technologies Inc., une entreprise de FLIR et ses filiales se réservent le droit de modifier la conception du produit, les
caractéristiques et les prix sans préavis et sans aucune obligation. E&OE © 2014 Flir Systems, Inc. Tous droits réservés.
La información en este documento está sujeta a cambios sin previo aviso. Ya que nuestros productos están sujetos a mejoras continuas,
Digimerge Technologies Inc., una compañía de FLIR, y nuestras filiales se reservan el derecho de modificar el diseño del producto, las
especificaciones y precios, sin aviso y sin incurrir en ninguna obligación. E&OE © 2013 FLIR Systems, Inc. Todos los derechos reservados.
Quick Connection Guide
Guía de conexión rápida
Guide de connexion rapide
Connecting your system / Connecter votre système / Conectar el sistema :
Cameras**
1
Caméras**
Cámaras**
Extension Cable*
Câble d'extension*
Cable de extensión*
* Not included/sold separately.
** To take advantage of 960H recording resolution, it is recommended that you connect 960H capable cameras to the DVR.
* Non inclus/vendus séparément.
** Pour profiter de la résolution d'enregistrement 960H, il est recommandé de brancher des caméras compatibles 960H avec le DVR.
* No está incluido/se vende por separado.
** Para aprovechar la resolución de grabación de 960H, se recomienda conectar cámaras compatibles con 960H al DVR.
Série / Series / D3200/3300 Series
Digital Video Surveillance Recorder
Enregistreur numérique de vidéosurveillance
Grabadora de video digital para vigilancia
Monitor/Television*
2
3
Moniteur/TV*
Monitor/Televisor*
HDMI*
OR
VGA*
Router*
Mouse
Power
4
5
Routeur*
Puissance
Souris
Router*
Energía
Mouse
4-channel model shown. Other models may have different port configurations.
4 modèles de canaux (illustrés). Les autres modèles peuvent avoir des configurations de port différentes.
Se muestra el modelo de 4 canales. Otros modelos pueden tener diferentes configuraciones de puerto.
D3200/D3300 Series Quick Connection Guide - Trilingual - R3
ON
Advertisement
Table of Contents

Related Manuals for FLIR D3300 Series


Summary of Contents for FLIR D3300 Series
- Page 1 Les informations contenues dans ce document sont indiquées sous réserve de modifications sans préavis. Nos produits étant sans cesse améliorés, Digimerge Technologies Inc., une entreprise de FLIR et ses filiales se réservent le droit de modifier la conception du produit, les caractéristiques et les prix sans préavis et sans aucune obligation.
- Page 2 NTP, voir configuración del horario de verano (4, 9, 16 / 25 / 32) Time Protocol. le manuel inclut sur le CD. y el protocolo de hora de red. D3200/D3300 Series Quick Connection Guide - Trilingual - R3...
Need help?
Do you have a question about the D3300 Series and is the answer not in the manual?
Questions and answers
Where to get wireless remote control for D330 4000 digital security recorder and a Info CD. I have inherit system with the building and it works. Some things are missing. Thanx