Table of Contents
Advertisement
Quick Links
Download this manual
See also:
Operator's Manual
Advertisement
Table of Contents

Related Manuals for Mitsubishi Electric SmartD90-EV


Summary of Contents for Mitsubishi Electric SmartD90-EV
- Page 1 SMART PHOTO PRINTER MODEL SmartD90-EV USER'S GUIDE Version V1.5.2.0...
-
Page 2: Table Of Contents
TABLE OF CONTENTS Introduction Introduction Basics Construction of compositions Operation Easy Print Service Fun Print Service Sharing SmartD90EV HotFolders with Samba FTP Service #Hashtag print service Settings Login to the maintenance web application as administrator ... -
Page 3: Introduction
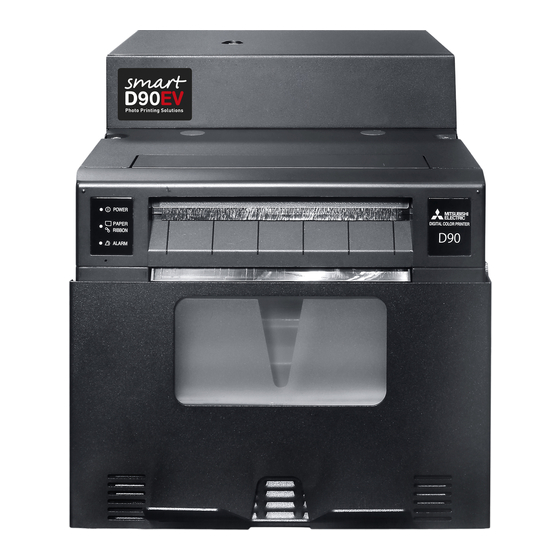
INTRODUCTION The SmartD90EV is a new concept of photo printer system designed to offer an outstanding user experience while print your camera shoots, memories, and any instant moment taken at any event: Private parties, ceremonies, corporate events, … The system consists of the multi format dye sublimation photo printer CP-D90DW combined with a powerful small computer. -
Page 4: Basics
BASICS The SmartD90EV software offers two different built in printing services based on web technology than can be selected and setup from the maintenance application, that is also based on web technology and provided by the internal web server. The built in printing web services available are the EasyPrint service and the FunPrint service. The SmartD90EV also offers printing services from external applications, like the Kiosk Print app available for Android and iOS Smartphones and Tablets, high end photo cameras, and other applications and systems developed by authorized third parties. -
Page 5: Construction Of Compositions
CONSTRUCTION OF COMPOSITIONS Each one of the input HotFolders has its own image constructor parameters. The image processor uses these parameters to build the image to be printed. The construction of the image is based on a canvas concept. The SmartD90EV’s image processor creates a solid surface base on where the different layers that will create the final image are painted following a certain order. - Page 6 CONSTRUCTION OF COMPOSITIONS When a specific area is defined for the image, it will be processed and fitted according to the canvas format Landscape canvas Portrait canvas Portrait canvas Portrait image Portrait image Landscape image Canva Canva Canva Landscape canvas Landscape image Canva ...
- Page 7 CONSTRUCTION OF COMPOSITIONS Main parameters to construct the image: Text: Disable/Enable, Color, Size, Shadow, Background, horizontal and vertical position Clip Arts: Select built in Clip Art images. Frame: Disable / Enable. If enabled, then select the type of frame ( *.png file) ...
-
Page 8: Operation
OPERATION Easy Print Service Easy Print provides a quick and easy way of printing stored images from mobile phones and tablets (iOS and Android). This service feature and functions are: • Import custom frames to add to the photo • Quick print service •... - Page 9 OPERATION Easy Print2 After selecting photo: 3. Click “Print” button to upload the image to the SmartD90EV. Press “Back” to re-select photo. 4. The image will be immediately uploaded to the system. Printing will begin shortly 5. Once the image has been uploaded the user will get an order ref number that can be used for validation purposes.
-
Page 10: Fun Print Service
OPERATION Fun Print Service Fun Print allows selection of up to 6 images from your mobile device and place them in a pre-format template. Can preview and edit each image before printing. The feature and functions are: • Up to 6 images per print •... - Page 11 OPERATION...
-
Page 12: Sharing Smartd90Ev Hotfolders With Samba
OPERATION Sharing SmartD90EV Hotfolders with Samba The SmartD90EV implements Samba (SMB) protocol to share its internal HotFolders. It makes very easy create a network connection between computers (MAC, Windows, Linux) and the SmartD90EV and then send the file images stored in these devices by simply “Click” ->”Drag” and “Drop” the files into the HotFolders. -
Page 13: Ftp Service
OPERATION Ftp service The SmartD90EV has built in ftp server that allows image file transfer from several types of wireless devices and applications, like photo cameras, smartphones, computers, …. Therefore, ftp can be used to send the image files from these devices supporting ftp to the SmartD90EV HotFolders. -
Page 14: Hashtag Print Service
OPERATION #Hashtag print service From V1.5, the SmartD90EV has a built in app that searches in internet for images labeled with a specific #Hashtag on social network like Instagram or Twitter, download the images found and print them. The #Hashtag service works under license. To setup the SmartD90EV with #Hashtag service you will need: 1. -
Page 15: Settings
SETTINGS Log in 1. Go to your Smartphone Wi-Fi settings and select the SmartPhotoPrinter SSID: #PhotoPrint 2. Launch the browser (Chrome, Safari, Opera, … ) and open the SmartPhotoPrinter maintenance web: http://192.168.110.1/maintenance/admin Default values: • admin • admin... -
Page 16: Start Maintenance
SETTINGS Start maintenance web application • System ID: Shows the unique system ID • System ver: Software version installed in the equipment. In this case, V1.4 • System: Shows the status for the print service: Ready: The SmartPhotoPrinter is ready to print Stopped: The print Service is stopped and the SmartPhotoPrinter cannot print Error: The SmartPhotoPrinter cannot print. -
Page 17: Top Menu
SETTINGS Top menu • The enabled items of the “Top Menu” depend on the system status. When the system is in “Ready” condition, most of the items are disabled to avoid that the Smart Photo Printer settings are changed. Items with dark grey background are disabled. System: Stopped System:... - Page 18 SETTINGS Top menu : System ready ORDER INFO Order Number: It shows the order ID number. Order Date: The system date and clock when the order was received. To set up system date and clock go to: Top Menu -> System Setting -> date &...
- Page 19 SETTINGS System Info Statistics: Shows a report of all the services ordered between the selected dates grouped by type of service Application Info: Show information about the software versions of each printing service component: Editing Processor, Print Module Lite, Easy Print, Fun Print, Maintenance. ...
-
Page 20: Hotfolder Setting
SETTINGS Hotfolder setting Stop Service to access this item The HotFolder Setting item displays the basic settings for each one of the existing HotFolders. To edit the settings of a specific HotFolder, click on its ID Hotfolders ID 101 to 120 are used for Easy print service. ... - Page 21 SETTINGS Hotfolder setting: Text Setting Stop Service to access this item Enable / Disable: Set Enable to add text on the print outs. Text: Input text field. The system has some functions to add an the name of the file, dates, or an index. These functions must be written between curly brackets: {NAME} = image file name {S_DATE}=the date the photo was taken.
-
Page 22: Print Setting
SETTINGS Print setting Stop Service to access this item Auto Resume: Enable/Disable Auto Delete: If Enable, then delete the image files sent to the SmartD90EV once they have been printed. Model: Printer device model (CP-D90DW) Print Mode: Default printing mode ... -
Page 23: Service Setting
SETTINGS Service setting Stop Service to access this item Enable / Disable: Enable or Disable both EasyPrint and FunPrint services. Mode: Selects one of the listed modes: System: Enable/Disable the max number of copies during an event ... - Page 24 SETTINGS Service setting Stop Service to access this item Easy Print setup Sets the hotfolder for Easy Print service Import: Displays the frames available to be imported at the following route: USB memory device root:\\Smartp\easyprint\frame\ Delete: Delete the selected frames. System frames can not be deleted.
-
Page 25: System Setting
SETTINGS System setting Stop Service to access this item Internal Wi-Fi (AP): • SSID: Sets the SSID name for the print service applications. Default name is “#PhotoPrint” • Pass: Sets a Password for the Wi-Fi connection. If blank, then password is disabled. Password must have 8 char min. -
Page 26: Additional Setting
SETTINGS Additional Settings Stop Service to access this item FTP service FTP service • • Enable/Disable the ftp Enable/Disable the ftp service service • • User: Sets a user name for User: Sets a user name for the ftp service the ftp service •... -
Page 27: Maintenance
SETTINGS Maintenance Stop Service to access this item Original photo/Finished photo Export: It allows export to an USB memory device both the print orders and the original images sent to the SmartD90. A new folder named with the SmartD90 ID will be created. -
Page 28: Frame Layout Setup
SETTINGS Frame Layout Setup Stop Service to access this item The Frame Layout Setup function launches a guide to setup the fun print Service. • FunPrint Layout setting starts the 7 steps setup for Funprint. -
Page 29: Appendix
Appendix How to customize Fun Print web frontend Log in the maintenance web application, “Stop the service”, an go to the “Top menu”. Then follow the steps shown below to customize the Fun print web user frontend. Change the values of each ítem to customize the colors for background, text,... -
Page 30: Smartd90Ev Upgrade Procedure
Appendix SmartD90EV Upgrade procedure 1.- Download the zip file containing V1.5 from: http://www.messec.net -> Download 2.- Copy the downloaded “SP_v1500.zip” file in a USB pen drive under the route: root:// SmartpUpdate/SP_v1500.zip (Keep Upper and Lower case letters as indicated. Otherwise it won’t work). 3.- Switch Off the SmartD90... - Page 31 Appendix SmartD90EV Upgrade procedure 4.- Attach the USB Pen drive to a free SmartD90 USB port. 5.- . Switch On the SmartD90 and wait for about 10min. 6.- . Log into the maintenance web and check version There is no any indication of the upgrade progress, or indication that the upgrade has finished.
-
Page 32: How To Check If The Smartd90Ev Has Internet Access
Appendix How to check if the SmartD90EV has Internet access Some of the SmartD90EV services need proper Internet access. The access must be setup from the System Settings Wi-Fi (USB /LAN) settings. The SmartD90EV do not provide “free” access to Internet, but only to the DNS domains needed by the services to work. -
Page 33: Frequent Tasks
Appendix Frequent tasks TASKS PROCEDURE Check media condition Maintenance (admin) -> Start Service (if system is not ready) -> Top Menu -> Printer Info (Type of media, remaining copies) Change web print service Maintenance (admin) -> Stop Service -> Top Menu -> Service Setting ->... - Page 34 on the “Edit”” button -> Click on the “Enable/Disable” toggle button to set “Enable” Click “Set” button to apply and save the changes Go back to Start page and “start” the service. Apply print order validation Maintenance (admin) -> Stop Service -> Top Menu -> HotFolder Setting ->...
-
Page 35: System Recovery
Appendix System recovery If the system doesn’t start, admin password is forgotten, or any other issue that requires a system recovery, follow these steps to restore the system to factory condition: 1.- Download the zip file named NUC USB 1.2.zip (Recovery SmartPhotoPrinter) from: http://www.messec.net ->... - Page 36 Appendix System recovery 3.- Switch Off the SmartD90 4.- Attach the USB Pen drive to a free SmartD90 USB port. 5.- . Switch On the SmartD90 and wait for about 10min. 6.- . Log into the maintenance web and check.
-
Page 37: Frame Specification
Appendix Frame Specification Easy Print Layout & Frame Chart... - Page 38 Appendix Frame Specification Fun Print Layout & Frame Chart...
- Page 39 Appendix Frame Specification Sample: Type 26, Fun Print_5x15(2x6”) frame Sample: Type 11, Fun print_15x8,9(6x3,5”) frame...
-
Page 40: Setting Up A #Hashtag Print Service
Appendix Setting up a #Hashtag print service 1.- Setup the SmartD90 to get Internet access. You can setup a Wireless or Wired connection. To setup the SmartD90: Log in to the SmartD90 settings From the Start page, click “stop service”, select Top menu and System settings. - Page 41 Appendix Setting up a #Hashtag print service To setup a wired connection to the network that will provide Internet access: LAN cable between SmartD90 and router Router that provides Internet If the router doesn’t provide DHCP, then disable DHCP at the SmartD90 system settings and type the IP provided by the router.
- Page 42 Appendix Setting up a #Hashtag print service 2.- Enable the #Hashtag service: If not logged, Log in to the SmartD90 settings. From the Start page, click “stop service” if the system is not stopped, select Top menu and Additional settings ...
- Page 43 Appendix Setting up a #Hashtag print service 3.- Register your #Hashtag service license and setup a #Hashtag print service event : Go to the software license management platform: https://www.mecloudprinter.com Sign in if you already have an account or create a new account by clicking “Register” from the top bar menu: ...
- Page 44 Appendix Once you have register your license, a new Item will appear on the top menu bar. Click on “#Hashtag Console” button to add the printer and setup your #Hashtag event.
-
Page 45: Glossary
• Other brand, product, and service names are trademarks or registered trademarks of their respective companies. • Product appearance in this manual does not imply that Mitsubishi Electric Corporation intends to make it available in all countries where the company and its subsidiaries operate.
Need help?
Do you have a question about the SmartD90-EV and is the answer not in the manual?
Questions and answers