Table of Contents
Advertisement
Quick Links
Advertisement
Table of Contents

Related Manuals for Gram GEC Series


Summary of Contents for Gram GEC Series
- Page 1 OPERATION MANUAL SERIES GEC Models GEC-6 GEC-15 GEC-30 REV. 1A9M06...
-
Page 2: Specifications
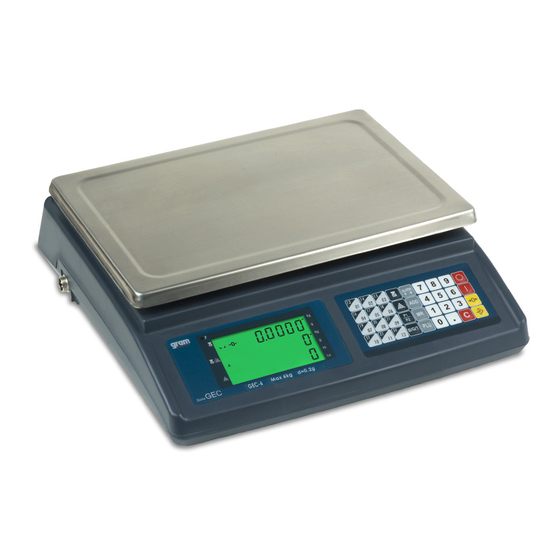
ENGLISH SPECIFICATIONS LCD, height 14.5mm Display 6/7/7 (Unit weight / Weight / Total pieces) Pan size (mm) 245 x 355 (W x H) Dimensions 387 x 365 x 117(W x L x H) (mm) Net weight (kg) 3.7kg Operation 0 ℃ to +40℃ temperature Less than 85% Power... -
Page 3: Display And Keyboard
DISPLAY AND KEYBOARD LCD Display Ø Weight display Unit weight display Ø Total pieces display Indicates that battery voltage is low, the battery must be charged. Indicates that display shows the net weight, after making a tare. Indicates that weight is stable. Indicates that the scale is in zero point, if you are not using the tare function. -
Page 4: Keyboard Description
Indicates the PLU number. Indicates the accumulated weighing. Indicates that the high limit of a weight or number of pieces has been configured. Indicates that the low limit of a weight or number of pieces has been configured. KEYBOARD DESCRIPTION To turn off the scale. -
Page 5: Counting Pieces Function
Numerical keys and decimal point to introduce data. Key to delete data Press this key to activate the alarm in high / low limits function. Press this key to make weighing accumulations. Press this key to view the total weight accumulated or the total number of pieces accumulated. - Page 6 2. Press the the unit weight will change. 3. If the key is not pressed in 4 seconds, the entered value will be deleted. Sampling introduction through number of pieces – Method 1 1. Place a number of pieces on the weighing pan. 2.
- Page 7 4. Remove the pieces from the weighing pan. The unit weight will be automatically calculated. Note: If the scale is connected to an auxiliary platform (B) and the weighing mode is in B position (auxiliary platform) ), after pressing the key, the input sampling will continue automatically in mode A (scale) Sampling introduction through number of pieces –...
- Page 8 4. Press the PLU key to confirm and save. The message will stop flashing. Example To input the unit weight of a piece of 0.5 g: Press: 1. Press the PLU key, the message will flash. 2. Press the desired PLU key, for example: , the PLU indicator will show 3 then the symbol will flash.
- Page 9 Recall of PLUs Recall of a direct PLUs (keys 1 – 24) l In normal weighing mode, press PLU key once (1 – 24) to access PLU (bottom key) l Press again the same PLU key to access to PLU (top key) Example: 1.
- Page 10 WEIGHING ACCUMULATIONS M+ 1. Place a weight on the weighing pan and input his weight, press the M+ key. When the scale gives a beep and the display shows the ACC message, the data will be automatically stored. 2. Remove the weight from the weighing pan and place another one on the pan.
-
Page 11: Other Functions
OTHER FUNCTIONS LIMITS WEIGHT 1. Press the ALARM key. The display PCS will show the message 2. The display PIECE WEIGHT shows the high limit configuration for a number of pieces. Input the high limit value using the numerical keys. 3. - Page 12 INTRODUCTION OF TARE VALUE (Through the keyboard) 1. In weighing mode, input the Tare value using the numerical keys (The unit weight is grams) 2. Press the key to confirm and save. (If this key is not pressed in 4 seconds, the entered value will be automatically deleted) Note: It is not possible to input a Tare value that exceeds the capacity of the scale.
-
Page 13: Auto Turn-Off
4. Select the menu CAL 2, press the to access to configuration of auxiliary platform (B) 5. Select the menu CAL 3, press the to access to print configuration 6. Select the menu CAL 4, press the to access to calibration configuration. - Page 14 2. BACKLIGHT Display Descriptions b.LiGHt Backlight disabled b.LiGHt Backlight enabled. b.LiGHt Automatic Backlight. AUto 3. rE.tArE – REPETITION OF THE TARE Display Descriptions rE.tArE Tare repetition disabled rE.tArE Tare repetition enabled 4. rE.SAnP – AUTO-SAMPLING Display Descriptions rE.SAnP Auto-sampling function disabled rE.SAnP Auto-sampling function enabled 5.
-
Page 15: Zero Tracking
Hi.bEEP High Limit alarm. Sound format: continuous long ALArn beeps. . LonG 6. Lo bEEP – ALARM OF LOW LIMIT Display Descriptions Low limit alarm disabled Lo.bEEP ALArn Low Limit alarm. Sound format: continuous short Lo.bEEP beeps. ALArn SHort Low Limit alarm. Sound format: continuous long Lo.bEEP beeps. -
Page 16: Unit Weight
9. UNIT WEIGHT Display Descriptions Unit Configuration of unit weight in lb. Configuration of unit weight in kg Unit 1000g 10. ACCUMULATION OF WEIGHINGS Display Descriptions NPluS Press the M+ key to accumulate the weight Add Pr and print out the results. NPluS Press the M+ key to print out the results only (in this parameter, the Total key is disabled). - Page 17 Display Descriptions Configuration of the auxiliary platform resolution (d) b.d= in grams. xxxxx Min. d is 1 gram. GrAN Max. d is 65535 grams. 3. Configuration of stability level - auxiliary platform (B) - Display Descriptions Configuration of the stability level of the auxiliary b.StAbL...
- Page 18 5. Configuration of the value of the calibration weight Display Descriptions The first row shows the AD value, the second row shoes the calibration weight (Unit: grams) and XXXXXX the third row shows “b.Pnt.CAL”. XXXXXXX b.Pnt.CAL The default calibration weight value is 1000 g. Use the numerical keypad to enter the desired value.
- Page 19 PAritY Set parity to 7-n-2. 7-n-2 PAritY Set parity to 8-n-1. 8-n-1 3. Printout Display Descriptions Print Press the M+ key to print out the result of a weighing. PrESS Press the C key within MR mode to print out the result of the accumulation of weighings and the accumulated total.
- Page 20 4. Peripherals Display Descriptions rENOtE Connection to an LP-50 thermal printer. LP50 rENOtE Connection to a PC for data transmission. CALIBRATION PROCEDURE (CAL 4) Remove the JP3 jumper before proceeding to calibration. In the Calibration menu, press the C key to navigate between the different options.
- Page 21 Make sure that the weighing pan is empty. When the AD value is stable, press key. 3. Configuration of the value of the calibration weight. Display Descriptions The first row shows the AD value, the second row XXXXXX shoes the calibration weight (Unit: grams or lb/1000) XXXXX and the third row shows “Pnt.CAL”.
- Page 22 Note: The capacity will be shown in the display in kg. or lb. according to the weighing unit configured in the CAL 1 menu. 2. Zero-point calibration Display Descriptions XXXXX The first row shows the AD value, the second row shows “0”...
- Page 23 5. CALIBRATION WITH MAXIMUM CAPACITY Display Descriptions The unit viewed in the display varies according g Lb/1000 to the default unit. The first row shows the AD value, the second row XXXXX XXXXX shows the maximum capacity value (Unit: grams 6000 3000 or lb/1000) and the third one shows the “Pnt 3.”...
- Page 24 RS232C BI-DIRECTIONAL OUTPUT CONFIGURATION Configuration This section is only applicable in models with RS-232C data output. PRINT FORMAT 1. Print when a key is pressed Setting Press M+ Press the C key in MR mode Print COUNTING 1 : (1) To subtract the result PrESS ---------------------- of a single weighing...
-
Page 25: Entering Commands
Print Piece Weight: ALL.1 <Weight format3> Pieces Count : <Count format> Print ALL.2 <Weight format> Print StAbLE.2 Print PrESS No print out. Print ENTERING COMMANDS The scale can be controlled via the following commands: Basic commands: PLUxx PLU selection. Performing a Tare. T123.456 The default tare value is 123.456. -
Page 26: Warranty
This scale is covered by a warranty against all manufacturing and material defects for a 1-year period counting from the date of delivery. During this period, GRAM PRECISION SL will take care of repairing the scale. This warranty does not include any damage caused by misuse, overloading or not having followed the recommendations described in this manual (particularly the recommendations of the MAINTENANCE TIPS section).
Need help?
Do you have a question about the GEC Series and is the answer not in the manual?
Questions and answers