Table of Contents

Related Manuals for Ace Plus EX-G007


Summary of Contents for Ace Plus EX-G007
-
Page 1: User Manual
ACE PLUS CORP. EX-G007 HDMI over Single CAT5 Extender User Manual Page 1 of 8 Headquarters : 9F-2., No. 190 Sec. 2 Jung Shing Rd.,Hsin-dian, Taipei, Taiwan 231 TEL: +886-2-2912-4201 FAX: +886-2-2912-3164 Website: www.ace-plus.com... -
Page 2: Safety And Notice
However, like all electronic equipments, the EX-G007 should be used with care. Please read and follow the safety instructions to protect yourself from possible injury and to minimize the risk of damage to the unit. - Page 3 ACE PLUS CORP. E X - G 0 7 6 B E X - G 0 0 7 T X E X - G 0 7 6 A E X - G 0 0 7 R X Features State-of-the-art Silicon Image (founder of HDMI) chipset embedded for upmost compatibility and reliability HDMI 1.2a compliant...
- Page 4 ACE PLUS CORP. Specifications & Package Contents Model Name EX-G006 EX-G009 EX-G007 EX-G007-RX Technical EX-G006-TX EX-G006-RX EX-G009-TX EX-G009-RX EX-G007-TX EX-G076A Role of usage Transmitter [TX] Receiver [RX] Transmitter [TX] Receiver [RX] Transmitter [TX] Receiver [RX] HDMI compliance HDMI 1.3c HDMI 1.2a...
-
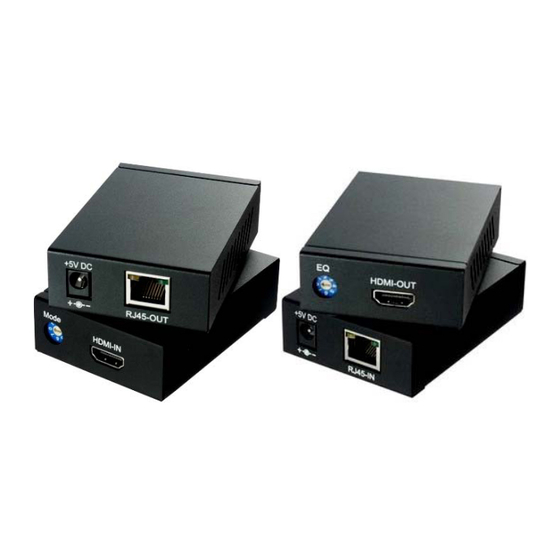
Page 5: Panel Descriptions
ACE PLUS CORP. Panel Descriptions Front View — Transmitting Unit EX-G007-TX Mode HDMI-IN HDMI-IN: Connect to a HDMI source with a HDMI M-M cable here Mode: 0 = HDMI mode with surround sound audio output 1 = HDMI mode with stereo audio output... -
Page 6: Hardware Installation
4. Make sure your CAT-5/5e/6 LAN cable is tightly connected and not loose. 5. Plug in 5V DC power cord to the power jack of the receiving unit EX-G007-RX. 6. Plug in 5V DC power cord to the power jack of the transmitting unit EX-G007-TX. -
Page 7: Edid Learning
1. Turn on EX-G007-TX. 2. Turn the Mode of EX-G007-TX counterclockwise from 0 (for surround sound) or 1 (for stereo) to 7. 3. Use a HDMI cable to connect EX-G007-TX & the display (better not connect to video source). The LED on the RJ-45 of EX-G007-TX will dim and light again, which indicates the EDID learning process is finished. -
Page 8: Limited Warranty
Please use EIA/TIA-568-B termination (T568B) at any time Limited Warranty The SELLER warrants the EX-G007 HDMI over Single CAT5 Extender to be free from defects in the material and workmanship for 1 year from the date of purchase from the SELLER or an authorized dealer.
Need help?
Do you have a question about the EX-G007 and is the answer not in the manual?
Questions and answers