COVANA Legend User Manual
Hide thumbs
Also See for Legend:
- Owner's manual (97 pages) ,
- Installation manual (66 pages) ,
- User manual (23 pages)
Table of Contents
Advertisement
Advertisement
Table of Contents

Related Manuals for COVANA Legend


Summary of Contents for COVANA Legend
- Page 1 2019 Revision 0 WINTERIZING USER MANUAL 2019-01-15 C.A. 232866...
-
Page 2: Table Of Contents
TABLE OF CONTENTS TABLE OF CONTENTS ............................. 2 CONGRATULATIONS ON THE PURCHASE OF YOUR NEW COVANA COVER..........3 SAFETY ..................................4 Safety information ..............................4 Avoiding the risk of electrocution ..........................5 LABELING ................................. 6 GLOSSARY ................................8 QUICK START-UP INSTRUCTIONS ........................10 USING THE ESCAPE HATCH ..........................11... -
Page 3: Congratulations On The Purchase Of Your New Covana Cover
In fact, registering your COVANA cover allows us to quickly reach you in the unlikely event a safety notice was to be issued. Your product and safety are a top priority for us at COVANA. -
Page 4: Safety
Failure to observe this instruction will void the A COVANA cover should only be operated by an warranty and product certification. adult. This appliance can be used by children aged 8... -
Page 5: Avoiding The Risk Of Electrocution
Do not roll the COVANA cover onto its side or slide it on its side. This will damage the siding. After removing any part, always place it in a safe... -
Page 6: Labeling
LABELING WARNING Removing any labels from the COVANA cover will void product certification. All labels should always remain visible. It is the owner’s responsibility to ensure these labels are always visible and should never be removed. Key operating diagram, located on the Risk of electrocution warning, key switch. - Page 7 Key switch warning, located on the key switch Electrical information, located on the key switch cable Do not step on cover label, located of end C-Channels of the COVANA cover Do not step symbol, Maintenance information, located located on AC control box on one of the C-Channels.
-
Page 8: Glossary
Figure 2 AC control box The AC control box powers and controls the lifting mechanism of the COVANA cover. (ACoperated model only) Figure 3 Battery pack The battery pack is a sealed case where the two 12 V batteries are located. - Page 9 The sleeve is an aluminum case for the lifting mechanism. Figure 8 Key switch The key switch is used to operate the COVANA cover. Figure 9 The top plate is a cover that is installed on the sleeve assembly. It protects the lifting mechanism from debris.
-
Page 10: Quick Start-Up Instructions
8) The key will automatically return to center/off position when released. 9) Remove the key when finished operating the COVANA cover. Store the key in a secure place. WARNING Users must bring the control key in the swim spa with them to prevent any unauthorized operation of the cover. -
Page 11: Using The Escape Hatch
1) Do not at any point put your weight on the escape hatch as it may hinder the person trapped below. 2) Use the COVANA key inside the slot located in the white centre part of the handle. (Figure 12) Figure 12 3) Turn the handle until the key falls. -
Page 12: Battery Charging (For Battery-Operated Models Only And Emergency-Battery Backup)
4) Wait for the green light to appear to indicate that the charging process is complete. (Time may vary for charging) WARNING Only use the provided charger to charge the batteries. Do not charge the battery when connected to the COVANA cover. Completely remove the battery and replace it with the second battery provided. Note: You can leave the battery connected to the charger since it will stop charging automatically when the battery is fully charged. -
Page 13: Winterizing The Legend Cover
0) Clean the COVANA cover completely to remove any dust, greasy residue or any other foreign contaminants. 1) Prepare the swim spa for closure by following the spa manufacturer's winterization instructions. 2) Completely close the COVANA cover on the spa. Ensure the seal touches the whole perimeter of the swim spa. -
Page 14: Periodic Maintenance Table
PERIODIC MAINTENANCE TABLE Your COVANA Cover was designed to provide years of trouble-free enjoyment. As with any appliance, problems may occasionally occur that require the expertise of an authorized COVANA service technician. Before calling for service, please refer to the Troubleshooting section. Always retain your original sales receipt for future reference. -
Page 15: Technical Specifications
TECHNICAL SPECIFICATIONS 3.5” (8.9 cm) Side elevation dimensions The travel is electronically set to 60’’ (150 cm). Add the swim spa height to the travel to have COVANA your maximum height. maximum elevation is 120” (300 cm) Swim spa height may vary and must be within these measurements: Maximum height 63’’... -
Page 16: Frame And Foot Print
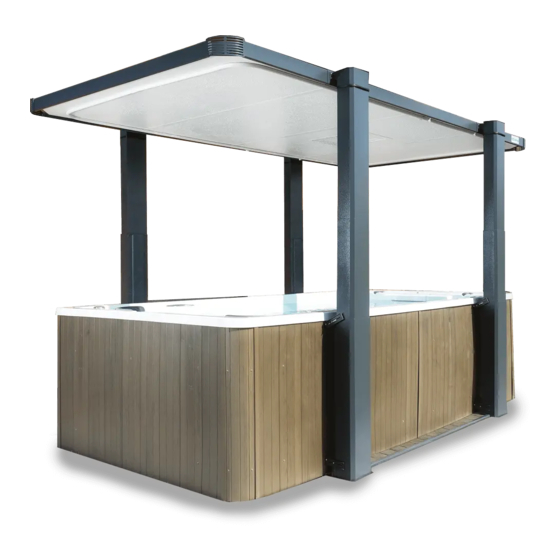
Frame and foot print Figure 16 TECHNICAL SPECIFICATIONS USER MANUAL... -
Page 17: Electrical Specifications (For Ac-Operated Model)
10 A single-pole GFCI (not included) Continuous current draw: 1.5 A WARNING COVANA does not allow any modifications of the electrical system. COVANA reserves the right to void the warranty if any modification is done without its specific approval. Electrical specifications (For Battery-operated model) -
Page 18: Operating Limitations
Maximum weight on the cover 200 lb. (90 kg) (evenly distributed)* * The load specification for the LEGEND cover is a provision for environmental outcomes, typically some snow or damp leaves that could accumulate on the cover. General specifications Lifting speed 2.5”/sec (6.35 cm/s) -
Page 19: Troubleshooting
Check if any electrical cables are damaged or pinched. mode. Check the breaker panel. Posts are frozen. Remove all debris from top of COVANA cover. COVANA cover Cover is obstructed. Check if any posts are obstructed. -
Page 20: Warranty
THREE (3) MONTHS † from the original date of purchase † Please note: The COVANA warranty is deemed effective no later than 12 months following the date on which the unit was shipped from COVANA’s factory in Drummondville, Canada. WARRANTY USER MANUAL... - Page 21 PERFORMANCE In the event of a defect covered by this limited warranty, notify your COVANA dealer as soon as possible to obtain service, and use all reasonable means to protect the COVANA Product from further damage. Upon proof of purchase, an authorized dealer will correct the defect subject to the terms and conditions contained in this limited warranty.
- Page 22 COVANA nor the dealer. COVANA’s only obligation shall be to repair or replace defective parts that do not conform to the warranty. COVANA shall not be liable for any injury, loss or damage, direct or consequential, arising out of the inability to use the Product.
-
Page 23: Appendix
APPENDIX USER MANUAL APPENDIX... -
Page 24: Washing The Legend Cover
Washing the LEGEND cover Cleaning the LEGEND cover is essential to maintain and keep your cover in good running condition. Clean your cover as needed or when dirt, debris or leaves are present. We also recommend cleaning your cover before and after winterization. -
Page 25: Post Greasing Procedure
#2 Robertson screw Post greasing procedure This unit will require following greasing maintenance to ensure peak performance. The internal jacks require yearly greasing. Early Fall is the best time. Use of “Mobil Epic EP MOLY Grease” is recommended for hot and cold climates. Ideally, a sprayable grease or an equivalent low- temperature synthetic grease. - Page 26 Figure 20 8) Inspect the post’s cables and chains for signs of deterioration. If that’s the case, please call your local COVANA dealer immediately. 9) Cycle the system up and down and see if any Greasing zone further grease should be applied.
- Page 27 (This page intentionally left blank) USER MANUAL APPENDIX...
- Page 28 Contact your local authorized COVANA dealer for all service-related issues. Made in Canada by COVANA, a division of the Canimex group. www.covana.com PATENTED CANADA 2,532,429 US 11/162,557 UK 0515168.3 AUSTRALIA 2006200251 The information in this manual was accurate at the time of print. The manufacturer reserves the right to change or improve its product without prior notice.
Need help?
Do you have a question about the Legend and is the answer not in the manual?
Questions and answers