Table of Contents
Advertisement
Quick Links
Advertisement
Table of Contents

Subscribe to Our Youtube Channel
Related Manuals for Bose SOUNDCOMM B40


Summary of Contents for Bose SOUNDCOMM B40
- Page 1 S O U N D C O M M B 4 0 H E A D S E T...
- Page 2 • Remove the headset immediately if you experience a warming sensation or loss of audio. • Do NOT use the headset as an aviation communication headset. • Do NOT use the headset if they emit any loud unusual noise. If this happens, turn the headset off and contact Bose customer service.
- Page 3 Serial number: ____________________________________________________________________ Model number: ____________________________________________________________________ Please keep your receipt with your owner’s guide. Now is a good time to register your Bose product. You can easily do this by going to http://global.Bose.com/register Date of Manufacture: The eighth digit in the serial number indicates the year of manufacture; “8” is 2008 or 2018.
-
Page 4: Table Of Contents
CON T E NTS WHAT’S IN THE CARTON Contents ..........................6 HEADSET COMPONENTS Headset ..........................HOW TO WEAR THE HEADSET Fit the headset ......................... 8 Adjust the headset fit.................... 8 MICROPHONE Adjust the microphone ....................9 Move the microphone assembly (dual headset only) ........10 HOW TO WEAR THE CONTROL MODULE (OPTIONAL) Use the belt clip ....................... - Page 5 CON T E NTS CON T E NTS BATTERIES Install the batteries ......................17 Battery life ........................ 17 HEADSET STATUS Battery Status ........................18 CARE AND MAINTENANCE Store the headset ......................19 Clean the headset ......................20 Replacement parts and accessories ................ 21 Replacement Instructions ..................
-
Page 6: Contents
Bose SoundComm B40 Headset Belt pack bracket Belt clip (single earcup or dual earcup) NOTE: If any part of the product is damaged, don’t use it. Contact your authorized Bose dealer or Bose customer service. Visit: worldwide.Bose.com/Support/B40 E N G... -
Page 7: Headset Components
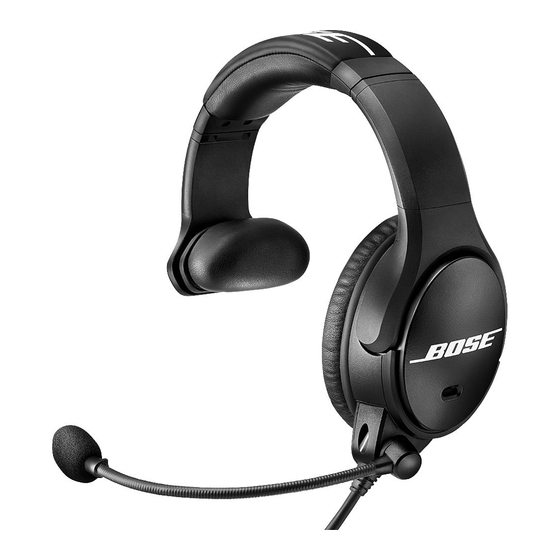
HEADSET COMP O NE NTS HEADSET Headband Earcup Ear cushion Side pad Microphone assembly (boom microphone and cable) Control module Clothing clip 4-pin XLRF or 5-pin XLRM connector NOTES: Left earcup model pictured. Dual earcup headset pictured on page 6. E N G... -
Page 8: How To Wear The Headset
HOW TO WEA R T H E H E A DS ET FIT THE HEADSET As you put the headset on, adjust each earcup so its cushion is completely over your ear. You should feel an even, gentle pressure all around each ear. NOTE: Make sure you wear the headset in the correct orientation. -
Page 9: Microphone
MICRO P H ON E ADJUST THE MICROPHONE Microphone placement is important for clear communications. NOTE: On the dual headset, the microphone assembly comes attached to the left earcup. To move the microphone to the other earcup, see page 10. 1. -
Page 10: Move The Microphone Assembly (Dual Headset Only)
MI CRO P H ON E MICRO P H ON E MOVE THE MICROPHONE ASSEMBLY (DUAL HEADSET ONLY) The dual earcup headset has a reversible microphone assembly that can be worn on the left or right side of the headset. 1. - Page 11 MI CRO P H ON E 5. Align and attach the microphone assembly to the connectors on the preferred earcup. CAUTION: Do NOT force the connectors or the earcup may be damaged. Earcup connectors Microphone assembly 6. On the microphone assembly base, tighten the two screws until the assembly is secure to the headset.
-
Page 12: How To Wear The Control Module (Optional)
HOW TO WEAR THE CONT R OL MO D U L E (O P T I O NA L ) USE THE BELT CLIP 1. Align the dual lock tab on the belt clip to the dual lock tab on the control module. Dual lock tabs Attaches to your belt or clothing... -
Page 13: Use The Belt Pack Bracket
H OW TO W EA R THE CONT R OL MO DU L E (O P T I O NA L) HOW TO WEAR THE CONT R OL MO D U L E (O P T I O NA L ) USE THE BELT PACK BRACKET Attach the bracket to your radio/belt pack 1. -
Page 14: Attach The Control Module To Your Radio/Belt Pack
H OW TO W EA R THE CONT R OL MO D U L E (O P T I ON A L ) ATTACH THE CONTROL MODULE TO YOUR RADIO/BELT PACK 1. Align the dual lock tab on the control module with the dual lock tab on the belt pack bracket. -
Page 15: Disconnect The Control Module
H OW TO W EA R THE CONT R OL MO D U L E (O P T I ON A L ) DISCONNECT THE CONTROL MODULE 1. On the XLR connector, press down on the metal tab and gently pull the cable away from the belt pack. -
Page 16: Acoustic Noise Cancellation
ACOU STIC NO I S E CANC E L L AT IO N POWER ON On the top of the control module, push the Power switch away from the battery light. Battery light The battery light glows red for three seconds then shows the battery status (see page 18). -
Page 17: Batteries
BATT E RI E S INSTALL THE BATTERIES 1. On the top of the control module, twist the cap to the left (counter-clockwise) to open the battery compartment. Battery cap 2. Insert the two AA alkaline batteries into the battery compartment. Match the H and z symbols on the batteries with the H and z markings on the control module. -
Page 18: Headset Status
HEA DSET STAT U S BATTERY STATUS The Battery light is located on the top of the control module, next to the Power switch. Battery light LIGHT ACTIVITY BATTERY STATUS Blinking green Full charge Blinking red (slow) Medium charge (10 hours or less remaining) Blinking red (fast) Low charge (2.5 hours or less remaining) E N G... -
Page 19: Care And Maintenance
CAR E AN D M AI NT E NA N C E STORE THE HEADSET The headset should be stored in the supplied carry case. 1. Rotate the microphone assembly up, so the microphone gently rests next to the headband. 2. -
Page 20: Clean The Headset
• Do NOT use electric heaters or blowers to dry the earcup inner screen. screens (scrim) • Do NOT attempt to remove, replace, repair, or clean this component. If the screen appears damaged or worn out, contact Bose customer service. Microphone Wipe the windscreen using a damp cloth and mild soap. windscreen... -
Page 21: Replacement Parts And Accessories
CAR E AN D M AI NT E NA N C E REPLACEMENT PARTS AND ACCESSORIES Replacement parts and accessories can be ordered through Bose customer service. Visit: worldwide.Bose.com/Support/B40 WARNING: Do NOT attempt to disassemble or service the inside of the earcups or other parts of the headset. - Page 22 CAR E AND M A I N T E N AN C E CAR E AND M A I N T E N AN C E NOTE: Replacement instructions are also provided with the ear cushion replacement kit. 1. Gently pull the ear cushion up and away from the earcup. 2.
-
Page 23: Serial Number Location
The headset is covered by a limited warranty. Visit our website at global.Bose.com/warranty for details of the limited warranty. To register your product, visit global.Bose.com/register for instructions. Failure to register will not affect your limited warranty rights. E N G... -
Page 24: Headset Specification
TECHNI CAL IN FORM AT I ON HEADSET SPECIFICATION HEADSET HEADSET INPUT SENSITIVITY ABSOLUTE MAX VARIANT IMPEDANCE @1mW @1kHz POWER RATING* Monaural 4-pin XLR 120 ohm ± 10% 107 ± 3db SPL 500 mW (single earcup) Monaural 4-pin XLR 80 ohm ± 10% 104 ±... -
Page 25: On Head Weight
TECHNI CAL I N FORMAT I ON ON HEAD WEIGHT Dual earcup: 12.7 oz. Single earcup: 10 oz. CABLE LENGTH Headset to control module: 4 feet 10 inches Control module to XLR connector: 10 inches HEADSET VARIANTS 4-pin XLRF 5-pin XLRM Pin 1 Microphone Low Pin 1... -
Page 26: Troubleshooting
• Check that the connection to your radio/belt pack is secure. WARNING: Do NOT use the headset if it emits a loud squeal or other loud noise. Contact Bose customer service if the headset emits any loud or unusual noise. - Page 27 Make sure the headset ear cushions, internal ear cup foams and scrims are dry. If not, air dry all parts and retry the headset. If the problem persists, contact Bose customer service. Low rumbling sound Check that the seal between the ear cushion skirt and the earcup fit with the headset properly and there aren’t any gaps.
- Page 28 ©2018 Bose Corporation, 100 Mountain Road, Framingham, MA 01701-9168 USA AM826111-0010 Rev. 00...
Need help?
Do you have a question about the SOUNDCOMM B40 and is the answer not in the manual?
Questions and answers