Advertisement
Available languages
Available languages
Quick Links
Stock # MS18-03-1011-02
If you have any questions regarding assembly or if parts are missing, DO NOT return this item to the
store where it was purchased. Please call our customer service number and have your instructions
and parts list ready to provide the model name, part name or factory number:
Pacific Standard Time: 8:30 a.m. - 4:30 p.m., Monday - Friday
Or visit our web site 24 hours a day, 7 days a week for product assistance at
THIS INSTRUCTION BOOKLET CONTAINS IMPORTANT SAFETY INFORMATION.
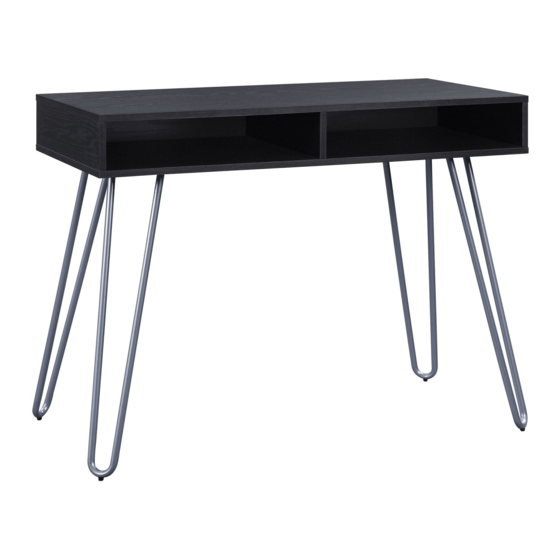
Hairpin Desk
# MS18-03-1011-03
# MS98-020-096-01
ADULT ASSEMBLY REQUIRED
www.whalenstyle.com
Or e-mail your request to parts@whalenfurniture.com
PLEASE READ AND KEEP FOR FUTURE REFERENCE.
Date 2018-06-06 Rev. 0001-A Factory: HESLTD
Black and Sliver
White and Gold
Natural
866-942-5362
LOT NUMBER:
DATE PURCHASED:
/
/
Advertisement

Related Manuals for Whalen Mainstays MS18-03-1011-02


Summary of Contents for Whalen Mainstays MS18-03-1011-02
- Page 1 LOT NUMBER: DATE PURCHASED: Hairpin Desk Stock # MS18-03-1011-02 Black and Sliver # MS18-03-1011-03 White and Gold # MS98-020-096-01 Natural ADULT ASSEMBLY REQUIRED If you have any questions regarding assembly or if parts are missing, DO NOT return this item to the store where it was purchased.
-
Page 2: Special Note
M A X I M U M R E C O M M E N D E D W E I G H T L O A D S MANUFACTURER: Whalen Furniture Manufacturing CATALOG: Hairpin Desk MODEL # MS18-03-1011-02 / MS18-03-1011-03 / MS98-020-096-01 MADE IN CHINA MAXIMUM LOAD 200 lb. - Page 3 IMPORTANT Before you begin: Open, identify and count all parts prior to assembly. Lay out parts on a flat and non- abrasive surface. You will need the parts identified on page 4 of this instruction manual. NOTE: IT IS VERY IMPORTANT TO USE GLUE WITH DOWELS. EXCESS GLUE CAN BE WIPED OFF WITH DAMP CLOTH.
- Page 4 Parts and Hardware List Please read completely through the instructions and verify that all listed parts and hardware are present before beginning assembly. A- Top Panel (Qty. 1) B- Fixed Shelf (Qty. 1) C- Back Panel (Qty. 1) D- Left Side Panel (Qty. 1) E- Right Side Panel (Qty.
- Page 5 Assembly Instructions Cam Bolt (6 used in this step) ② 1. Unpack the unit and confirm that you have all the hardware and required parts. Assemble the unit on a carpeted floor or the empty carton to avoid any scratch. 2.
- Page 6 Assembly Instructions M8 x 30 mm Wood Dowel Cam Lock (6 used in this step) (6 used in this step) ③ ① 3. Glue two Wood Dowels (3) into the inner holes of the Side Panels (D and E) and Partition Panel (F) respectively and attach them to the Top Panel (A) by engaging six Cam Locks (1) (Refer to page 3 on Cam Lock system operation supplement).
- Page 7 Assembly Instructions 4. Slide the Back Panel (C) into the grooves between the Side Panels (D and E) until fully inserted into the Top Panel (A).
- Page 8 Assembly Instructions M8 x 30 mm Wood Dowel M4 x 50 mm Screw ⑦ (6 used in this step) (9 used in this step) ③ 5. Glue six Wood Dowels (3) into the inner holes on the vertical Panels (D, E and F). Position the Fixed Shelf (B) onto the inserted Wood Dowels (3) and fasten it in place with nine 50 mm Screws (7).
- Page 9 Assembly Instructions 1/4" x 5/8” Bolt Flat Washer Floor Leveler Lock Washer (12 used in this step) (12 used in this step) (4 used in this step) (12 used in this step) ⑥ ⑤ ④ ⑨ 6. Attach four Legs (G) to the Fixed Shelf (B) with the 5/8” Bolts (4) and the Washers (5 and 6). 7.
- Page 10 Assembly Instructions Cam Lock Cover (6 used in this step) ⑧ 8. Stand the assembled unit upright. 9. In case of uneven floors, adjust the floor levelers at the bottom of the Legs (G) to level the unit. 10. Plug the Cam Lock Covers (8) onto the visible Cams Locks to conceal the Cams.
-
Page 11: Quality Guarantee
Should this product be defective in workmanship or materials or fail under normal use, we will repair or replace it for up to one (1) year from date of purchase. Every Whalen Furniture product is designed to meet your highest expectations. We guarantee that you will immediately see the value of our fine furniture. - Page 13 NÚMERO de LOTE: FECHA de COMPRA: Escritorio con patas de horquilla Serie # MS18-03-1011-02 Negro y plata # MS18-03-1011-03 Blanco y dorado # MS98-020-096-01 Natural ENSAMBLE REQUERIDO POR ADULTO Si tienen alguna pregunta acerca del ensamble o si alguna parte está faltante, no retorne esté producto a la tienda donde lo compró.
- Page 14 M Á X I M O P E S O R E C O M E N D A D O FABRICANTE: Whalen Furniture Manufacturing CATALOGO: Escritorio con patas de horquilla MODELO # MS18-03-1011-02 / MS18-03-1011-03 / MS98-020-096-01 HECHO EN CHINA MÁXIMA CARGA 200 lb.
- Page 15 IMPORTANTE Antes de comenzar: Abra, identifique y cuente todas las partes antes del ensamble. Coloque las piezas sobre una superficie plana y no abrasiva. Tendrá que las partes identificadas en la página 4 de este manual de instrucciones. NOTA: ES MUY IMPORTANTE PARA EL USO DE GOMA CON LOS PERNSO DE MADERA. EL. EXCESO DE PEGAMENTO SE PUEDE LIMPIAR CON UN PAÑO HÚMEDO.
- Page 16 Lista de partes y material de ferretería Por favor lea completamente las instrucciones y verifique que estén todas las partes antes de iniciar el ensamblado. A- Panel superior (Cant. 1) B- Estante fijo (Cant. 1) C- Panel posterior (Cant. 1) D- Panel lateral izquierdo (Cant.
-
Page 17: Instrucciones De Ensamble
Instrucciones de ensamble Perno de leva (6 usados en este paso) ② 1. Desempaquete la unidad y confirme que tiene todas las piezas y herramientas necesarias. Ensamble la unidad en un suelo alfombrado o en la caja de cartón vacía para evitar rayones. 2. - Page 18 Instrucciones de ensamble Pasador de madera M8 x 30 mm Bloqueo de leva (6 usados en este paso) (6 usados en este paso) ③ ① Pegue los pasadores de madera (3) en los orificios interiores de los paneles laterales (D y E) y el panel divisorio (F) respectivamente y conéctelos al panel superior (A) usando seis bloqueos de leva (1) (Consulte la página 3 sobre el suplemento de operación del sistema de bloqueo de leva).
- Page 19 Instrucciones de ensamble 4. Deslice el panel posterior (C) en las ranuras entre los paneles laterales (D y E) hasta insertarlo por completo en el panel superior (A).
- Page 20 Instrucciones de ensamble Pasador de madera M8 x 30 mm Tornillo M4 x 50 mm (6 usados en este paso) (9 usados en este paso) ⑦ ③ 5. Pegue seis pasadores de madera (3) en los orificios interiores de los paneles verticales (D, E y F). Posicione el estante fijo (B) en los pasadores de madera insertados (3) y ajústelo en su lugar con nueve tornillos de 50 mm (7).
- Page 21 Instrucciones de ensamble Pernos de 1/4" x 5/8" Arandela plana Nivelador de piso Arandela de sujeción (12 usados en este paso) (12 usadas en este paso) (4 usados en este paso) (12 usadas en este paso) ⑥ ⑤ ④ ⑨ 6.
- Page 22 Instrucciones de ensamble Cubierta de bloqueo de leva (6 usadas en este paso) ⑧ 8. Coloque la unidad ensamblada en posición vertical. 9. En caso de suelos irregulares, ajuste los niveladores de piso en la parte inferior de las patas (G) para nivelar la unidad.
-
Page 23: Mantenimiento Y Cuidados
Si esté producto tiene algun defecto de ensamble o material, o si tiene alguna falla en uso normal, nosotros lo repararemos o lo remplazaremos hasta por un año a partir de la fecha de compra. Todo producto de Whalen Furniture es diseñado para alcanzar sus expectativas más altas. Nosotros le garantizamos que inmediatamente podrá...
Need help?
Do you have a question about the Mainstays MS18-03-1011-02 and is the answer not in the manual?
Questions and answers