Table of Contents
Advertisement
Quick Links
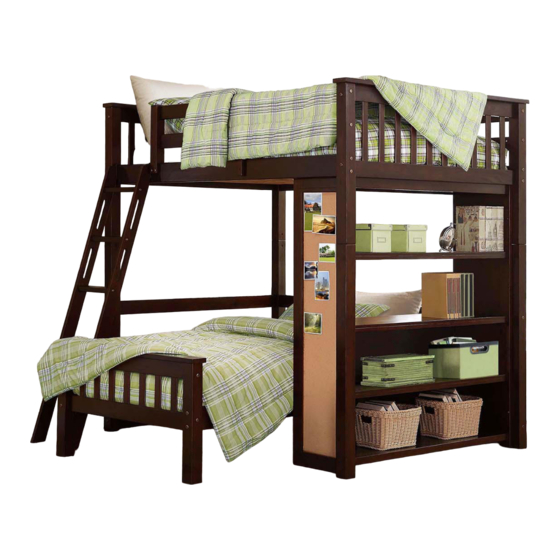
Emily Full over Twin Loft Bunk Bed with Bookshelf
If you have any questions regarding assembly or if parts are missing, DO NOT return this item to the
store where it was purchased. Please call our customer service number and have your instructions
and parts list ready to provide the model name, part name or factory number:
Or visit our web site 24 hours a day, 7 days a week for product assistance at
THIS INSTRUCTION BOOKLET CONTAINS IMPORTANT SAFETY INFORMATION.
Stock # M50814
ADULT ASSEMBLY REQUIRED
Pacific Standard Time: 8:30 a.m. - 4:30 p.m., Monday - Friday
Or e-mail your request to parts@whalenfurniture.com
PLEASE READ AND KEEP FOR FUTURE REFERENCE.
Date 2015-12-19 Rev. 1 Factory: JIYIFO
866-942-5362
www.whalenstyle.com
LOT NUMBER:
DATE PURCHASED: /
/
Advertisement
Table of Contents

Related Manuals for Whalen Emily Full over Twin Loft Bunk Bed with Bookshelf


Summary of Contents for Whalen Emily Full over Twin Loft Bunk Bed with Bookshelf
- Page 1 LOT NUMBER: DATE PURCHASED: / Emily Full over Twin Loft Bunk Bed with Bookshelf Stock # M50814 ADULT ASSEMBLY REQUIRED If you have any questions regarding assembly or if parts are missing, DO NOT return this item to the store where it was purchased. Please call our customer service number and have your instructions...
- Page 2 Should this product be defective in workmanship or materials or fail under normal use, we will repair or replace it for up to one (1) year from date of purchase. Every Whalen Furniture product is designed to meet your highest expectations. We guarantee that you will immediately see the value of our fine furniture.
- Page 3 TO HELP PREVENT SERIOUS OR FATAL INJURIES FROM ENTRAPMENT OR FALLS • Follow the information on the warnings appearing on the upper bunk end structure and on the carton. Do not remove warning label from bed. • Always use the recommended size mattress or mattress support, or both, to help prevent the likelihood of entrapment or falls.
- Page 4 Parts and Hardware List Please read completely through the instructions and verify that all listed parts and hardware are present before beginning assembly. A- Lower Footboard Front Post B- Lower Footboard Back Post C- Lower Headboard Front Post (Qty. 1) (Qty.
- Page 5 Parts and Hardware List Please read completely through the instructions and verify that all listed parts and hardware are present before beginning assembly. S- Upper Mattress Support Slats T- Left Ladder Support U- Right Ladder Support (Qty. 1) (Qty. 1) (Qty.
- Page 6 Parts and Hardware List Please read completely through the instructions and verify that all listed parts and hardware are present before beginning assembly. YF- Bookshelf Middle Upper Shelf YG- Bookshelf Top Shelf YH- Bookshelf Back Panel (Qty. 1) (Qty. 1) (Qty.
- Page 7 BOOKSHELF ASSEMBLING Ø8 x 30 mm Wood Dowel Ø1/4” x 32 mm Bolt (10 used in this step) (10 used in this step) ⑧ ④ 1. Unpack the units and confirm that you have all hardware and required parts. 2. Locate the Bookshelf Right Side Panel (YB) on a level and protected surface with the threaded inserts facing up.
- Page 8 BOOKSHELF ASSEMBLING YC YD YE 4. Slide two Back Panels (YH) into the grooves between the lower three shelves (YC, YD and YE) until fully inserted into the Bookshelf Right Side Panel (YB).
- Page 9 BOOKSHELF ASSEMBLING Ø1/4” x 32 mm Bolt (10 used in this step) ④ Ø8 x 30 mm Wood Dowel (10 used in this step) ⑧ 5. Repeat the same procedure to attach the Bookshelf Left Side Panel (YA) at the opposite end. Make sure that the Back Panels (YH) fit securely into the groove of Side Panel (YA).
- Page 10 SINGLE BED ASSEMBLING Ø10 x 50 mm Wood Dowel Ø6.5 mm x 48 mm Tapping Bolt (4 used in this step) (8 used in this step) ⑦ ⑥ NOTE: Please follow the instructions carefully to insure a safe and sturdy bed. Do not fully tighten the bolts until all rails and guardrails are attached.
- Page 11 SINGLE BED ASSEMBLING Ø6.5 mm x 100 mm Tapping Bolt Ø10 x 50 mm Wood Dowel (8 used in this step) (8 used in this step) ⑤ ⑦ 9. Insert four 50 mm Wood Dowels (7) into the large holes of Single Bed Headboard Cross Assembly (XF) at both ends.
- Page 12 SINGLE BED ASSEMBLING XA XB XC XD Ø1/4” x 110 mm Bolt Barrel Nut (8 used in this step) (8 used in this step) ① ⑫ 11. Insert two Barrel Nuts (12) into each end of the Single Bed Mattress Side Rails (XH). Be sure that the cross slot on the Barrel Nut faces out and the threaded hole points towards the entry of the bolt along the rail.
- Page 13 SINGLE BED ASSEMBLING Ø4 mm x 35 mm Screw (14 used in this step) ⑨ 13. Lay out Single Bed Mattress Support Slats (XI) onto the strips on the Mattress Side Rails (XH). Make sure that the end slats located close to the Lower Posts. Insert and screw the 35 mm Screws (9) into the countersunk holes on each slat.
- Page 14 UPPER BUNK ASSEMBLING Ø10 x 50 mm Wood Dowel Ø6.5 mm x 48 mm Tapping Bolt (4 used in this step) (8 used in this step) ⑦ ⑥ 14. Align and attach one Upper Cross Assembly (K) to one Upper Cap Rail (L) using two 50 mm Wood Dowels (7) and four 48 mm Tapping Bolts (6).
- Page 15 UPPER BUNK ASSEMBLING Ø6.5 mm x 100 mm Tapping Bolt Ø10 x 50 mm Wood Dowel (8 used in this step) (8 used in this step) ⑤ ⑦ 16. Insert four 50 mm Wood Dowels (7) into the end holes of the Upper Cross Assembly with warning label (K).
- Page 16 UPPER BUNK ASSEMBLING Ø10 x 50 mm Wood Dowel (4 used in this step) ⑦ Barrel Nut Ø1/4” x 110 mm Bolt (12 used in this step) (12 used in this step) ① ⑫ 18. Insert the 50 mm Wood Dowels (7) into the drilled large holes of Long Guardrail (P) at both ends. Attach two Long Guardrails (P) and the Upper Mattress Side Rail (N) between Upper Posts (F and H) using eight 110 mm Bolts (1) and eight Barrel Nuts (12), as shown above.
- Page 17 UPPER BUNK ASSEMBLING Ø4 mm x 35 mm Screw (26 used in this step) ⑨ 20. Lay out the Upper Mattress Support Slats (S) between the wood stoppers on the Ladder Side Rail (M) and the Upper Mattress Side Rail (N). Insert and screw 35 mm Screws (9) into the countersunk holes on each slat.
- Page 18 UPPER BUNK ASSEMBLING Ø10 x 50 mm Wood Dowel (4 used in this step) ⑦ BARREL NUT (4 used in this step) ⑫ Ø1/4” x 110 mm Bolt Ø1/4” x 38 mm Bolt (4 used in this step) (2 used in this step) ③...
- Page 19 UPPER BUNK ASSEMBLING Ø4 mm x 30 mm Screw (6 used in this step) ⑩ 23. With the pilot holes as a guide, align and attach one Guardrail Support (R) to the center of the Long Guardrails (P) and the Upper Mattress Side Rail (N) by using three 30 mm Screws (10) through the countersunk holes and screw into place.
- Page 20 LOWER BUNK ASSEMBLING Ø6.5 mm x 100 mm Tapping Bolt Ø10 x 50 mm Wood Dowel (4 used in this step) (4 used in this step) ⑤ ⑦ 25. Insert four 50 mm Wood Dowels (7) into the end holes of two Lower Side Rails (I) and attach them between the Lower Posts (A and B) with four 100 mm Tapping Bolts (5).
- Page 21 LOWER BUNK ASSEMBLING Ø6.5 mm x 48 mm Tapping Bolt (6 used in this step) ⑥ 26. Align and attach the Lower Headboard Front Post (C) to the Bookshelf Left Side Panel (YA) by inserting three 48 mm Tapping Bolts (6) through the pre-drilled holes on the Side Panel (YA) and screw into the post.
- Page 22 LOWER BUNK ASSEMBLING Ø6.5 mm x 100 mm Tapping Bolt Ø10 x 50 mm Wood Dowel (4 used in this step) (8 used in this step) ⑤ ⑦ 28. Insert eight 50 mm Wood Dowels (7) into the end large holes of two Lower Back Rails (J). Attach the Back Rails (J) between the Lower Back Posts (B and D) by using four 100 mm Tapping Bolts (5).
- Page 23 ASSEMBLY OF THE BUNK BED Ø1/4” x 45 mm Bolt (8 used in this step) ② Bed Connector Pin (4 used in this step) ⑪ 29. Now, place the two assembled bunks where you want to place your loft bed. 30.
- Page 24 ASSEMBLY OF THE BUNK BED Ø6.5 mm x 48 mm Bolt (2 used in this step) ⑥ 32. Fasten the Bookshelf Side Panels (YA and YB) to the Upper Headboard Posts (G and H) by inserting two 48 mm Tapping Bolts (6) through the pre-drilled holes and securely screw into the posts.
- Page 25 ASSEMBLY OF THE LADDER Ø6.5 mm x 48 mm Bolt Ø10 x 50 mm Wood Dowel (10 used in this step) (10 used in this step) ⑥ ⑦ 33. Insert the 50 mm Wood Dowels (7) into the large holes of Ladder Steps (V) at both ends. Attach Left and Right Ladder Supports (T and U) to the Ladder Steps (V) using the 48 mm Tapping Bolts (6).
- Page 26 ASSEMBLY OF THE LADDER Ø4 mm x 19 mm Screw (2 used in this step) ⑬ 34. Hook the Ladder securely over the top of the Ladder Side Rail (M), between the Upper Footbard Front Post (E) and the Front Guardrail Post (Q) in the opening provided. Secure the Ladder Hooks in place by using two 19 mm Screws (13).
- Page 27 ASSEMBLY INSTRUCTIONS 35. Position the assembled Single Bed against the Lower Back Rails (J) for space saving. As shown above.
-
Page 28: Care And Maintenance
Care and Maintenance Use a soft, clean cloth that will not scratch the surface when dusting. Use of furniture polish is not necessary. Should you choose to use polish, test first in an inconspicuous area. Using solvents of any kind on your furniture may damage the finish. Never use water to clean your furniture as it may cause damage to the finish.
Need help?
Do you have a question about the Emily Full over Twin Loft Bunk Bed with Bookshelf and is the answer not in the manual?
Questions and answers