
Related Manuals for Lantronix PremierWave


Summary of Contents for Lantronix PremierWave
- Page 1 PremierWave Embedded System on Module User Guide Part Number 900-579 Revision G March 2017...
-
Page 2: Intellectual Property
Toll Free: 800-526-8766 Phone: 949-453-3990 Fax: 949-453-3995 Technical Support Online: www.lantronix.com/support Sales Offices For a current list of our domestic and international sales offices, go to the Lantronix web site at www.lantronix.com/about/contact. PremierWave® EN Embedded System on Module User Guide... -
Page 3: Disclaimer
Lantronix shall have no liability whatsoever to any user for any damages, losses and causes of action (whether in contract or in tort or otherwise) in connection with the user’s access or usage of any of the information or content contained herein. -
Page 4: Table Of Contents
Accessing Web Manager ___________________________________________________ 24 Device Status Page ________________________________________________________ 25 Web Manager Components _________________________________________________ 26 Navigating Web Manager ___________________________________________________ 27 5: Network Settings Network 1 Status __________________________________________________________ 30 Network 1 (eth0) Interface Settings ____________________________________________ 30 PremierWave® EN Embedded System on Module User Guide... - Page 5 Static Routes _________________________________________________________ 55 To Configure Gateway Static Route Settings _________________________________ 55 DHCP Server _________________________________________________________ 56 To Configure Gateway DHCP Server Settings ________________________________ 56 Static Lease Listing ____________________________________________________ 56 Routing Protocols ______________________________________________________ 57 PremierWave® EN Embedded System on Module User Guide...
- Page 6 Connecting Multiple Hosts _______________________________________________79 Host List Promotion ____________________________________________________ 80 Disconnect Mode ______________________________________________________ 80 To Configure Tunnel Disconnect Mode Settings ______________________________ 80 Modem Emulation ______________________________________________________ 81 To Configure Tunnel Modem Emulation Settings ______________________________ 82 PremierWave® EN Embedded System on Module User Guide...
- Page 7 Public Key Infrastructure ____________________________________________________ 98 TLS (SSL) _______________________________________________________________ 98 Digital Certificates _________________________________________________________ 99 Trusted Authorities ________________________________________________________ 99 Obtaining Certificates ______________________________________________________ 99 Self-Signed Certificates _____________________________________________________ 99 Certificate Formats ________________________________________________________ 99 OpenSSL _______________________________________________________________ 100 PremierWave® EN Embedded System on Module User Guide...
- Page 8 IP Sockets __________________________________________________________ 114 To View the List of IP Sockets ___________________________________________ 114 Ping _______________________________________________________________ 114 To Ping a Remote Host ________________________________________________ 115 Traceroute __________________________________________________________ 115 To Perform a Traceroute _______________________________________________ 115 Log ________________________________________________________________ 116 PremierWave® EN Embedded System on Module User Guide...
- Page 9 To View or Configure Bridge Settings _____________________________________ 127 15: Security in Detail Public Key Infrastructure ___________________________________________________ 129 TLS (SSL) ______________________________________________________________ 129 Digital Certificates ________________________________________________________ 129 Trusted Authorities _______________________________________________________ 129 Obtaining Certificates _____________________________________________________ 130 Self-Signed Certificates ____________________________________________________ 130 PremierWave® EN Embedded System on Module User Guide...
- Page 10 Scientific Calculator ___________________________________________________ 138 Appendix C: Compliance Appendix D: USB-CDC-ACM Device Driver File for Windows Hosts Creating a USB-CDC-ACM Device Driver File __________________________________ 142 Installing the USB-CDC-ACM Device Driver File ________________________________ 145 PremierWave® EN Embedded System on Module User Guide...
-
Page 11: List Of Figures
List of Figures Figure 2-1 PremierWave EN Unit Product Label ________________________________________ 20 Figure 4-1 Device Status Page ______________________________________________________ 25 Figure 4-2 Components of the Web Manager Page ______________________________________ 26 Figure 16-1 Uploading New Firmware _______________________________________________ 133 PremierWave® EN Embedded System on Module User Guide... -
Page 12: List Of Tables
Table 5-30 Routing Protocol Settings ________________________________________________ 57 Table 5-31 Virtual IP Settings ______________________________________________________ 58 Table 5-32 Adding a Virtual IP _____________________________________________________ 58 Table 5-33 DDNS Configuration ____________________________________________________ 59 Table 5-34 VPN Configuration _____________________________________________________ 60 PremierWave® EN Embedded System on Module User Guide... - Page 13 Table 11-7 Upload Certificate Settings ______________________________________________ 105 Table 11-8 Certificate and Key Generation Settings____________________________________ 106 Table 12-1 File Statistics_________________________________________________________ 109 Table 12-2 File Display Settings ___________________________________________________ 109 Table 12-3 File Modification Settings _______________________________________________ 110 PremierWave® EN Embedded System on Module User Guide...
- Page 14 Table 13-4 XML Exporting Configuration ____________________________________________ 122 Table 13-5 Exporting Status ______________________________________________________ 123 Table 13-6 Import Configuration from Filesystem Settings ______________________________ 124 Table 14-1 Bridge Settings _______________________________________________________ 127 Table 17-1 Short and Long Name Settings___________________________________________ 136 PremierWave® EN Embedded System on Module User Guide...
-
Page 15: 1: Using This Guide
Purpose and Audience This guide provides the information needed to configure, use, and update the Lantronix® PremierWave® EN embedded system on module (SOM). It is intended for software developers and system integrators who are embedding this product into their designs. -
Page 16: Additional Documentation
Instructions for getting the PremierWave evaluation board device up System on Module Quick Start and running. PremierWave Embedded Information needed to use the PremierWave on the evaluation board. System on Module Evaluation Board User Guide DeviceInstaller™ Utility Online Instructions for using the Windows® operating system-based utility to Help locate the embedded device server and to view its current settings. -
Page 17: 2: Introduction
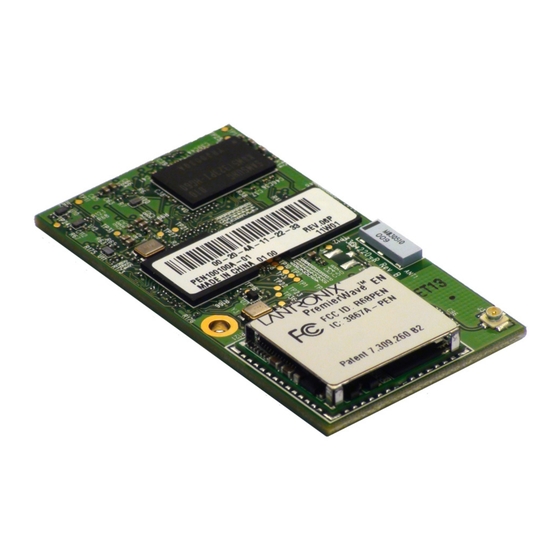
Introduction The PremierWave EN embedded system on module is a complete network-enabling solution in a 30 (1.181) X 55 (2.165) X 6.45 (0.248) package. This compact system on module empowers original equipment manufacturers (OEMs) to go to market quickly and easily with Ethernet and/or wireless networking and web page serving capabilities built into their products. -
Page 18: Applications
2: Introduction Applications The PremierWave EN embedded system on module is suitable for these application scenarios: ATM machines CNC controllers Data collection devices Universal Power Supply (UPS) management unit Telecommunications equipment Data display devices ... -
Page 19: Configuration Methods
The hardware address is also referred to as the Ethernet address, physical address, or MAC address. The first three bytes of the Ethernet address are fixed and identify the unit as a Lantronix product. The fourth, fifth, and sixth bytes are unique numbers assigned to each unit. Sample hardware address: ... -
Page 20: Product Information Label
address is 00-80-A3-14-1B-18 and the WLAN address is 00-80-A3-14-1B-19. Figure 2-1 PremierWave EN Unit Product Label Bar Code MAC Address Revision Part Number Manufacturing Country of Origin Date Code & Manufacture PremierWave® EN Embedded System on Module User Guide... -
Page 21: 3: Using Deviceinstaller
3. When DeviceInstaller starts, it will perform a network device search. To perform another search, click Search. 4. Expand the PremierWave folder by clicking the + symbol next to the folder icon. The list of available Lantronix PremierWave EN devices appears. -
Page 22: Device Detail Summary
Description Name Shows “PremierWave EN”. Displays one of the names the PremierWave EN device will send to the DHCP Device Name DHCP server if it is configured to obtain an address in this manner. Configurable field. Enter a group to categorize the PremierWave EN unit. - Page 23 3: Using DeviceInstaller Current Settings Description Supports Configurable Pins Shows True, indicating configurable pins are available on the PremierWave EN embedded device server device server. Supports Email Triggers Shows True, indicating email triggers are available on the PremierWave embedded device serverdevice server.
-
Page 24: 4: Configuration Using Web Manager
1. Open a standard web browser. Lantronix supports the latest versions of Internet Explorer, Mozilla Firefox, Safari or Chrome web browsers. 2. Enter the IP address or hostname of the PremierWave EN unit in the address bar. The IP address may have been assigned manually using DeviceInstaller (see the PremierWave EN Embedded System on Module Quick Start Guide) or automatically by DHCP. -
Page 25: Device Status Page
The Device Status page is the first to appear after you log into Web Manager. The Device Status page also appears when you click Status in the menu bar in Web Manager. Figure 4-1 Device Status Page PremierWave® EN Embedded System on Module User Guide... -
Page 26: Web Manager Components
The Logout button is available on any web page. Logging out of the web page forces re-authentication the next time the web page is accessed. Logout Links to Items to button configure subpages Header Menu Bar Footer Information Configuration and/or Status Area and Help Area PremierWave® EN Embedded System on Module User Guide... -
Page 27: Navigating Web Manager
Note: There may be times when you must reboot the PremierWave EN device for the new configuration settings to take effect. The chapters that follow indicate when a change requires a reboot. Anytime you reboot the unit, this operation will take some time to complete. - Page 28 System Lets you reboot device, restore factory defaults, upload new firmware, and change the device long and short names. Terminal Lets you change current settings for a terminal. PremierWave® EN Embedded System on Module User Guide...
- Page 29 Lets you view, edit, delete and create a WLAN profile on a device. WLAN Quick Connect Lets you change configuration settings for the Quick Connect. Lets you export XML configuration and status records, and import XML configuration records. PremierWave® EN Embedded System on Module User Guide...
-
Page 30: 5: Network Settings
Network Settings The Network Settings show the status of the PremierWave EN device interface/link and lets you configure the settings on the device. Interface settings are related to the configuration of the IP and related protocols. Link settings are related to the physical link connection, which carries the IP traffic. - Page 31 DHCP Client Select to turn On or Off. At boot up, after the physical link is up, the PremierWave EN unit will attempt to obtain IPv4 settings from a DHCP server and will periodically renew these settings with the server.
-
Page 32: To Configure Network 1 Interface Settings
Select to enable of disable the IPv6 state. IPv6 DHCP Client Select to turn On or Off. At boot up, after the physical link is up, the PremierWave unit will attempt to obtain IPv6 settings from a DHCPv6 server and will periodically renew these settings with the server. -
Page 33: Network 1 (Eth0) Link Settings
Best Effort: Bandwidth allocation is minimum 10%. Background: Bandwidth allocation is minimum 5% and has the lowest priority. Table 5-3 shows the network QoS settings that can be configured including adding new filters. PremierWave® EN Embedded System on Module User Guide... -
Page 34: To Configure Network 1 Qos Settings
1 > QoS > Configuration. Using the CLI To enter the eth0 QoS command level: enable -> config -> if 1 -> qos Using XML Include in your file: <configgroup name="qos" instance="eth0"> PremierWave® EN Embedded System on Module User Guide... -
Page 35: Network 1 (Eth0) Failover
5: Network Settings Network 1 (eth0) Failover The PremierWave EN embedded system on module provides network failover, in the form of a "dead remote host reachability" mechanism (essentially a ping against a known host). If the remote host is determined to be not reachable, the device will failover to the Wi-Fi interface. If the remote host is determined to be reachable, the device will failback to the Ethernet interface. -
Page 36: Network 2 (Wlan0) Interface Settings
Local IPv6 address and DHCPv6 IPv6 address. This is the auto configuration address provided by the IPv6 router. Off: will not display auto configured IPv6 address in CLI or WebUI. PremierWave® EN Embedded System on Module User Guide... -
Page 37: To Configure Network 2 Interface Settings
The SmartRoam utility monitors the signal strengths of all in-range access points belonging to the Extended Service Set (ESS) to which the PremierWave EN is currently connected. When an AP is found with a signal strength which is significantly greater than that of the currently associated AP, the SmartRoam utility automatically switches to the new AP. -
Page 38: Network 2 (Wlan0) Link Settings
Select to enable or disable. To Configure Network 2 Link Settings Using Web Manager To modify network 2 wlan0 interface information, click Network on the menu and select Network 2 > Link > Configuration. PremierWave® EN Embedded System on Module User Guide... -
Page 39: Network 2 (Wlan0) Qos
Click the checkbox to the left of any existing QoS filter to be deleted and click the Submit button. Filter type Select the filter type from the drop-down window: Mac Address Network Port PremierWave® EN Embedded System on Module User Guide... -
Page 40: To Configure Network 2 Qos Settings
Note: When omitting the network SSID it is still necessary to include the opening and closing quotation marks (scan “”). When the PremierWave unit is associated with an access point, scanning is only preformed on the band on which the unit is connected. -
Page 41: Table 5-12 Network 2 Link Status
Channel The channel used for the current association. IP Address The IP address assigned to the PremierWave device. RSSI A measure of the power level of the received radio signal in dBm, specifically the RSSI of the currently associated AP averaged over time. -
Page 42: To View Wlan Link Scan And Status Information
<statusgroup name=" scan"> Network 2 (wlan0) Failover The PremierWave EN embedded system on module provides wlan0 failover, in the form of a "dead remote host reachability" mechanism (essentially a ping against a known host). If the remote host is determined to be not reachable, the device will failover to the Ethernet interface. If the remote host is determined to be reachable, the device will failback to the Wi-Fi interface. -
Page 43: To Configure Network 2 Failover Settings
A WLAN profile defines all of the settings necessary to establish a wireless connection with either an access point (in infrastructure mode) or another wireless client (in Adhoc mode, limited to four connections.) A maximum of eight profiles can exist on the PremierWave EN system on module at a time. All enabled profiles are active. -
Page 44: To Configure Wlan Profile Basic Settings
To Configure WLAN Profile Basic Settings Using Web Manager To view or edit an existing WLAN profile or to create a new profile, click WLAN Profiles on the menu and select an existing profile. PremierWave® EN Embedded System on Module User Guide... -
Page 45: To Configure Wlan Profile Advanced Settings
TX Power Maximum Specify the maximum transmission output power in dBm. Select the antenna the radio will use or allow PremierWave EN unit to automatically make the selection. Antenna Diversity Enabled = allows the PremierWave EN unit to select the antenna. -
Page 46: Wlan Profile Security Settings
<configitem name=”security”> WLAN Profile Security Settings The PremierWave EN system on module supports WEP, WPA, and WPA2/IEEE 802.11i to secure all wireless communication. WPA and WPA2/IEEE 802.11i are not available for Adhoc topology. The WPA2/IEEE 802.11i mode is compliant with the Robust Secure Network specified in the IEEE standard 802.11i. -
Page 47: To Configure Wlan Profile Security Settings
This configuration option becomes available only when suites, WEP, WPA or WPA2/IEEE 802.11i are selected. Note: Lantronix recommends using a passphrase of 20 characters or more for maximum security. Spaces and punctuation characters are permitted. Note: The passphrase input is not the same as ASCII input (as used on some products.) ASCII is translated directly into hexadecimal bytes according to the... -
Page 48: Table 5-18 Additional Wep Settings For Wlan Profile
ASCII is translated directly into hexadecimal bytes according to the ASCII table, while a possibly larger passphrase is hashed into a key and provides better security through a larger range of key values. PremierWave® EN Embedded System on Module User Guide... -
Page 49: To Configure Wlan Profile Wep Settings
IEEE802.11i specification. WEP was becoming vulnerable and finalizing the IEEE802.11i standard was still far away. WPA2 is Wi-Fi’s subset of the broad IEEE802.11i standard to enforce better interoperability. The PremierWave EN system on module is compliant with both WPA2 and IEEE802.11i. - Page 50 SSL configuration that is able to verify the RADIUS server’s certificate. In case of EAP-TLS, also a certificate and matching private key need to be configured to authenticate the PremierWave EN device to the RADIUS server. For more information about SSL certificates see TLS (SSL) on page 129.
-
Page 51: To Configure Wlan Profile Wpa And Wpa/Ieee802.11I Settings
Users can test the network connection before adding it to the pool of WLAN profiles. Table 5-20 WLAN Quick Connect WLAN Quick Connect Description Settings Network Name (search field) Enter a network name and click Scan to search for a network. PremierWave® EN Embedded System on Module User Guide... -
Page 52: To Configure Wlan Quick Connect
Settings Scan “<network SSID>” Perform a scan for devices within range of the PremierWave . Including the optional network SSID limits the scan to devices configured with the specified network SSID. Omitting the network SSID performs a scan for all devices in range. -
Page 53: Wan
Click Add after adding new MAC address filter information. To Configure Gateway WAN Settings Using Web Manager To modify gateway WAN information, click Gateway on the menu and select Configuration > WAN. PremierWave® EN Embedded System on Module User Guide... -
Page 54: Port Forwarding
If this value is not specified, the packets are forwarded to same port or pot range. Optional field. Add (button) Click Add after adding new new forwarding rule information. PremierWave® EN Embedded System on Module User Guide... -
Page 55: To Configure Gateway Port Forwarding Settings
Click Add after adding new route information. To Configure Gateway Static Route Settings Using Web Manager To modify gateway static route information, click Gateway on the menu and select Configuration > Static Routes. PremierWave® EN Embedded System on Module User Guide... -
Page 56: Dhcp Server
The device also provides the ability to pre-assign specific IP addresses to connected devices using static leases. This would ensure that the connected device (identified by the MAC address) always gets the same IP address even while using DHCP. PremierWave® EN Embedded System on Module User Guide... -
Page 57: Routing Protocols
Click Add after adding new static lease information. Routing Protocols The PremierWave EN system on module allows the configuration of routing protocols. Routing protocols specify how routers communicate with each other, disseminating information that enables the selection of routes between any two nodes on a computer network. Routing algorithms determine the specific choice of route. -
Page 58: To Configure Gateway Routing Protocol Settings
Virtual IP is a means to map an externally visible IP address to LAN-side IP addresses. PremierWave units will support creating up to three virtual IP address mappings by creating loop back interfaces and publishing this information via the routing protocols. -
Page 59: Ddns
To enter the gateway command level: enable -> config -> gateway Using XML Include in your file: <configgroup name = "virtual ip"> DDNS The PremierWave EN embedded system on module displays and allows configuration of the DDNS. Table 5-33 DDNS Configuration DDNS Settings Description State Select to enable or disable the DDNS state. -
Page 60: Vpn
5: Network Settings The PremierWave EN embedded system on module provides the option to configure a virtual private network (VPN) to extend a private network across a public network. Data may be sent and received across a shared or public network as if directly connected to the private network, while benefiting from the functionality, security and management policies of the private network. -
Page 61: To Configure Vpn Settings
To view or configure VPN information, click VPN in the menu. Using the CLI To enter the VPN command level: enable -> config -> vpn Using XML Include in your file: <configgroup name = "vpn"> PremierWave® EN Embedded System on Module User Guide... -
Page 62: Gre Settings
5: Network Settings GRE Settings GRE tunneling is available on the PremierWave embedded system on module, providing more capabilities than IP-in-IP tunneling. For example, it supports transporting multicast traffic and IPv6 through a GRE tunnel. Table 5-35 GRE Settings GRE Settings... -
Page 63: 6: Action Settings
Actions can be configured for alarms and reports available in the PremierWave EN embedded system on module. Alarms and Reports The PremierWave EN updates the action settings page to display and configure the alarms. The following alarm and report actions are available in PremierWave EN device: Eth0 link state change ... -
Page 64: To Configure Action Settings
To enter on scheduled reboot command level: enable -> config -> action -> on scheduled reboot Using XML Include in your file: <configgroup name = "action" instance = "eth0 link state change"> PremierWave® EN Embedded System on Module User Guide... -
Page 65: Python
PremierWave platform easier because PremierWave products have an FTP server through which to upload files into the file system. Applications The PremierWave EN embedded system on module supports the ability to install and uninstall user-defined Python scripts and packages and will include the following: python libpython{version}.so... -
Page 66: To Configure Application Settings
Run on startup Check the Run on startup checkbox within a particular script to have it run upon the (checkbox) start up of the PremierWave unit. Uncheck the checkbox to disable automatically running the unit upon startup. Run on shutdown... -
Page 67: 7: Line And Tunnel Settings
USB protocol, and the line speed (Baud Rate) will be "as fast as conditions permit". When the PremierWave EN USB device port is cabled to a host, it will identify itself with the industry standard USB vendor ID of 0x0525 and product ID of 0xa4a7. -
Page 68: Line Settings
0, 1, 2, 3, etc. Caution: Under Linux, if the /dev/ttyACMx device is in use when the PremierWave EN unit is rebooted, some terminal programs under Linux will automatically disconnect while others will not. If a terminal program... - Page 69 By default, the delay is four character periods at the current baud rate (minimum 1 msec). Threshold Set the number of threshold bytes which need to be received in order for the driver to forward received characters. PremierWave® EN Embedded System on Module User Guide...
-
Page 70: To Configure Line Command Mode
Using the CLI To enter Line 1 command level: enable -> line 1 Using XML Include in your file: <configgroup name="line" instance="1"> Include in your file: <configgroup name="serial command mode" instance="1"> PremierWave® EN Embedded System on Module User Guide... -
Page 71: Tunnel Statistics
Line Settings information here is display only. Go to the section, To Configure Line Settings Line Command Mode to modify these settings. Protocol information here is display only. Go to the section, To Configure Protocol Line Command Mode to modify these settings. PremierWave® EN Embedded System on Module User Guide... -
Page 72: To Configure Tunnel Serial Settings
Set the timeout value, in milliseconds, after the first character is received on the serial line, before data is sent on the network. Valid range is 1 to 30000 milliseconds. Default is 1000. This setting becomes available when the Timeout mode is selected. PremierWave® EN Embedded System on Module User Guide... -
Page 73: To Configure Tunnel Packing Mode Settings
2 is 10002, and so on for the number of serial lines supported. Serial data can still be received while waiting for a network connection, keeping in mind serial data buffer limitations. PremierWave® EN Embedded System on Module User Guide... -
Page 74: Table 7-5 Tunnel Accept Mode Settings
Specify the text or hexadecimal AES key for decrypting incoming data for a TCP AES connection. TCP Keep Alive Idle Time Enter the time, in milliseconds, the PremierWave EN module waits during a silent TCP connection before checking if the currently connected network device is still on the network. - Page 75 Select an email profile number to which an email notification will be sent upon the establishment of an accept mode tunnel. Email on Disconnect Select an email profile number to which an email notification will be sent upon the disconnection of an accept mode tunnel. PremierWave® EN Embedded System on Module User Guide...
-
Page 76: To Configure Tunnel Accept Mode Settings
(TCP or UDP). When established, Connect Mode is always on. Enter the remote station as an IPv4 or IPv6 address or DNS name. The PremierWave EN device will not make a connection unless it can resolve the address. -
Page 77: Table 7-6 Tunnel Connect Mode Settings
(after the TCP Initial Keep Alive Probe) to send before closing the connection if no response is received. Valid values are between 1 and 16. Blank the display field to restore the default. PremierWave® EN Embedded System on Module User Guide... - Page 78 Set whether the serial Line data buffer is flushed upon a new network connection. Choices are: Flush Serial Data Enabled = serial data buffer is flushed on network connection Disabled = serial data buffer is not flushed on network connection (default) PremierWave® EN Embedded System on Module User Guide...
-
Page 79: Connecting Multiple Hosts
If more than one host is configured, a Host Mode option appears. Host Mode controls how multiple hosts will be accessed. For the PremierWave device, the Connect Mode supports up to 32 hosts. Hosts may be accessed sequentially or simultaneously: Sequential –... -
Page 80: Host List Promotion
To configure the Disconnect Mode for a specific tunnel, click Tunnel in the menu and select Tunnel 1 -> Disconnect Mode. Using the CLI To enter the Tunnel 1 Disconnect command level: enable -> tunnel 1 -> disconnect PremierWave® EN Embedded System on Module User Guide... -
Page 81: Modem Emulation
Some older equipment is designed to attach to a serial port and dial into a network with a modem. This equipment uses AT commands to control the connection. For compatibility with these older devices on modern networks, the PremierWave device mimics the behavior of the modem. Table 7-8 Tunnel Modem Emulation Settings... -
Page 82: To Configure Tunnel Modem Emulation Settings
Tunnel 1 -> Modem Emulation.Using the CLI To enter the Tunnel 1 Modem command level: enable -> tunnel 1 -> modem Using XML Include in your file: <configgroup name=”tunnel modem” instance=”1”> PremierWave® EN Embedded System on Module User Guide... -
Page 83: 8: Terminal And Host Settings
Applies only to Connect Mode Telnet connections, not to Accept Mode. Only disable Echo if your terminal echoes, in which case you will see double of each character typed. Default is enabled. PremierWave® EN Embedded System on Module User Guide... -
Page 84: To Configure The Terminal Network Connection
Select the protocol to use to connect to the host. Choices are: Telnet Note: SSH keys must be loaded or created on the SSH page for the SSH protocol to work. PremierWave® EN Embedded System on Module User Guide... -
Page 85: To Configure Host Settings
To configure a particular Host, click Host on the menu and select Host 1 -> Configuration. Using the CLI To enter the Host command level: enable -> config -> host 1 Using XML Include in your file: <configgroup name=”host” instance=”1”> PremierWave® EN Embedded System on Module User Guide... -
Page 86: 9: Configurable Pin Manager
Configurable Pin Manager The Configurable Pin Manager (CPM) is responsible for assignment and control of the configurable pins (CPs) available on the PremierWave EN embedded device server. There are nine configurable pins on the PremierWave EN device. You must configure the CPs by making them part of a group. A CP Group may consist of one or more CPs. -
Page 87: Cpm: Groups
Current Configuration or immediately after a new group is created. Click the X to delete the current group as desired. PremierWave® EN Embedded System on Module User Guide... -
Page 88: To Configure Cpm Settings
Using the CLI To enter the CPM command level: enable -> cpm Using XML Include in your file: name”> <configgroup name=”cp group” instance=”group Include in your file: number”> <configitem name=”cp” instance=”cp PremierWave® EN Embedded System on Module User Guide... -
Page 89: 10: Network Services
To configure DNS for cases where it is not supplied by a protocol, click Network in the menu and select Interface -> Configuration. Using the CLI To enter the DNS command level: enable -> dns Using XML Include in your file: <configgroup name=”interface” instance=”eth0”> PremierWave® EN Embedded System on Module User Guide... -
Page 90: Ftp Settings
10: Network Services FTP Settings The FTP protocol can be used to upload and download user files, and upgrade the PremierWave EN embedded system on module firmware. A configurable option is provided to enable or disable access via this protocol. -
Page 91: To View Or Configure Syslog Settings
Syslog Settings Description (continued) Specify the minimum level of system message the PremierWave device should log by selecting from the drop-down menu. This setting applies to all syslog facilities. Severity Log Level The drop-down list in the Web Manager is in descending order of severity (e.g., Emergency is more severe than Alert.) -
Page 92: To Configure Http Settings
To configure HTTP settings, click HTTP in the menu and select Configuration. Using the CLI To enter the HTTP command level: enable -> config -> http Using XML Include in your file: <configgroup name=”http server”> PremierWave® EN Embedded System on Module User Guide... -
Page 93: To Configure Http Authentication
Select On or Off for RSS feed to be written to a file (cfg_log.txt) and to be available across reboots. The default setting is off. Max Entries Set the maximum number of log entries. Only the last Max Entries are cached and viewable. PremierWave® EN Embedded System on Module User Guide... -
Page 94: To Configure Rss Settings
Specify a system location for the SNMP setting. Lantronix MIB File Click the Lantronix MIB file name to save and load it into the MIB browser and trap receiver. This is the base MIB file for Lantronix products. Load or compile this file first. -
Page 95: To Configure Snmp Settings
Include in your file: <configgroup name=”snmp”> Discovery The current statistics and configuration options for device discovery, including UPnP query port are available for the PremierWave EN embedded system on module. Table 10-8 Discovery Settings Discovery Description Query Port Server... -
Page 96: Smtp Settings
Enter the email address to which the email alerts will be copied. Multiple addresses are separated by semicolon (;). Reply To Enter the email address to list in the Reply-To field of the email alert. PremierWave® EN Embedded System on Module User Guide... -
Page 97: To View, Configure, And Send Email
To send an email, click Email in the menu and select Email 1 -> Send Email. Using the CLI To enter Email command level: enable -> email 1 Using XML Include in your file: <configgroup name=”email” instance=”1”> PremierWave® EN Embedded System on Module User Guide... -
Page 98: 11: Security Settings
In proving its own authenticity, the PremierWave EN embedded system on module will use its own "personal" certificate. In verifying the authenticity of the other party, the PremierWave EN device will use a "trusted authority"... -
Page 99: Digital Certificates
PEM. Certificate and key can be in the same file or in separate files. Additionally, the key can be either be encrypted with a password or left in the clear. However, PremierWave EN embedded system on module currently only accepts separate PEM files, with the key unencrypted. -
Page 100: Openssl
-in sbr_certkey.sbrpvk -nodes -out sbr_certkey.pem The sbr_certkey.pem file contains both certificate and key. If loading the SBR certificate into an PremierWave EN embedded system on module as an authority, you will need to edit it: 1. Open the file in any plain text editor. -
Page 101: Ssh Settings
Configuration is required when the PremierWave EN device is either (1) the SSH server or (2) an SSH client.. The SSH server is used by the CLI (Command Mode) and for tunneling in Accept Mode. -
Page 102: Ssh Client Known Hosts
In Web Manager, you can also browse to the public DSA key to be uploaded.If authentication is successful with the key, no password is required. Add/Edit (key) Click the Add/Edit button after setting the information for SSH Client: Authorized Users. PremierWave® EN Embedded System on Module User Guide... -
Page 103: Ssh Client Users
The SSH Client Users are used by all applications that play the role of an SSH Client. Specifically Tunneling in Connect Mode. To configure the PremierWave EN embedded system on module as an SSH client, an SSH client user must be both configured and also exist on the remote SSH server. -
Page 104: To Configure Ssh Settings
XML command strings of this chapter are to be replaced with a user-specified name. Create a New Credential After creating a new credential, you can either establish your credential through Certificate and Key Generation Upload Certificate. PremierWave® EN Embedded System on Module User Guide... -
Page 105: To Create A New Credential
Upload Certificate SSL certificates identify the PremierWave EN embedded system on module to peers, and can be used with some methods of wireless authentication. Certificate and key pairs can be uploaded to the PremierWave EN unit through either the CLI or XML import mechanisms. Certificates can be identified on the PremierWave EN embedded system on module by a name provided at upload time. -
Page 106: Certificate And Key Generation
Certificate and Key Generation The PremierWave EN embedded system on module can generate self signed certificates and their corresponding keys. This can be done for both the rsa and dsa certificate formats. Certificates can be identified on the PremierWave EN unit by a name provided at generation time. -
Page 107: To Configure An Existing Ssl Credential
The format of the authority certificate can be PEM or PKCS7. PEM files must start with “-----BEGIN CERTIFICATE-----” and end with “-----END CERTIFICATE-----”. Some Certificate Authorities add comments before and/or after these lines. Those need to be deleted before upload. PremierWave® EN Embedded System on Module User Guide... - Page 108 To enter the Trusted Authorities command level: enable -> ssl -> trusted authorities Using XML Include in your file: <configgroup name=”ssl”> and <configitem name=”trusted authority” instance =”1”> and <configitem name=”intermediate authority” instance=”1”> PremierWave® EN Embedded System on Module User Guide...
-
Page 109: 12: Maintenance And Diagnostics Settings
Filesystem Settings Use the file system to list, view, create, upload, copy, move, remove, and transfer files. The PremierWave EN embedded system on module uses a flash file system to store files. Statistics The filesystem statistics page displays statistics and current usage information of the flash filesystem. -
Page 110: To Display Files
Format the file system and remove all data. File Transfer Files can be transferred to and from the PremierWave EN device via the TFTP protocol. This can be useful for saving and restoring XML configuration files. Files can also be uploaded via HTTP. -
Page 111: To Transfer Or Modify Filesystem Files
This value typically fills the Time To Live in the IP header. SNMP refers to this value as "ipDefaultTTL". Enter the number of hops to be transmitted before the packet is discarded. PremierWave® EN Embedded System on Module User Guide... -
Page 112: To Configure Ip Protocol Stack Settings
Using XML Include in your file: <configgroup name=”icmp”> To View ICMP Protocol Stack Settings Using Web Manager To view ICMPv6 protocol settings, click Protocol Stack in the menu and select ICMPv6. PremierWave® EN Embedded System on Module User Guide... -
Page 113: Arp Settings
To configure ARP protocol settings, click Protocol Stack in the menu and select ARP. Using the CLI To enter the command level: enable -> config -> arp Using XML Include in your file: <configgroup name=”arp”> PremierWave® EN Embedded System on Module User Guide... -
Page 114: Diagnostics
12: Maintenance and Diagnostics Settings Diagnostics The PremierWave EN embedded system on module has several tools for diagnostics and statistics. Various options allow for the configuration or viewing of IP socket information, ping, traceroute, memory, and processes. Hardware To View Hardware Information Using Web Manager To view hardware information, click Diagnostics in the menu and select Hardware. -
Page 115: To Ping A Remote Host
Traceroute Here you can trace a packet from the PremierWave EN embedded system on module to an Internet host, showing how many hops the packet requires to reach the host and how long each hop takes. If you visit a web site whose pages appear slowly, you can use traceroute to determine where the longest delays are occurring. -
Page 116: Log
To view memory information, click Diagnostics in the menu and select Memory. Using the CLI To enter the command level: enable -> device, show memory Using XML Include in your file: <statusgroup name=”memory”> PremierWave® EN Embedded System on Module User Guide... -
Page 117: Processes
12: Maintenance and Diagnostics Settings Processes The PremierWave EN device shows all the processes currently running on the system. It shows the Process ID (PID), Parent Process ID (PPID), user, CPU percentage, percentage of total CPU cycles, and process command line information. -
Page 118: To Specify Clock Setting Method
Using the XML Include in your file: <configgroup name="clock"> System Settings The PremierWave EN embedded system on module system settings allow for rebooting the device, restoring factory defaults, uploading new firmware and updating a system’s short and long name. Note: Anytime you reboot the unit, this operation will take some time to complete. -
Page 119: To Reboot Or Restore Factory Defaults
12: Maintenance and Diagnostics Settings System Settings Description Upload new firmware to the PremierWave unit by clicking Choose File to Upload New Firmware browse to the new firmware file, and click Upload button to upload the chosen file to the system. The device automatically reboots upon the installation of new firmware. -
Page 120: 13: Management Interface Settings
The Command Line Interface settings allow you to control how users connect to and interact with the command line of the PremierWave EN embedded system on module. It is possible to configure access via the Telnet and SSH protocols, in addition to general CLI options. -
Page 121: Telnet Settings
<configgroup name=”Telnet”> <configitem name=”state”> <configitem name=”authentication”> SSH CLI Settings The SSH settings control CLI access to the PremierWave EN device over the SSH protocol. Table 13-3 SSH Settings SSH Settings Description SSH State Select to enable or disable CLI access via SSH. -
Page 122: To Configure Ssh Settings
It can also be modified and imported to update the configuration on this PremierWave EN unit or another. The XML data can be dumped to the screen or exported to a file on the file system. -
Page 123: To Export Configuration In Xml Format
Export (button) Click Export after selecting the XML: Export Status settings. To Export in XML Format Using Web Manager To export configuration format, click XML in the menu and select Export Status. PremierWave® EN Embedded System on Module User Guide... -
Page 124: Xml: Import Configuration
Import Configuration from Description Filesystem Settings Filename Enter the name of the file on the PremierWave unit (local to its filesystem) that contains XCR data. Lines to Import Select filter instances to be imported in the line, serial, tunnel and terminal groups. -
Page 125: To Import Configuration In Xml Format
Using Web Manager To import configuration, click XML in the menu and select Import Configuration. Using the CLI To enter the XML command level: enable -> xml Using XML Not applicable. PremierWave® EN Embedded System on Module User Guide... -
Page 126: 14: Bridging
4. Create the corresponding WLAN Profile(s) under WLAN Profiles. At this point, it is a good idea to ensure that the PremierWave EN device can connect to your wireless network, before enabling bridging. Check your WLAN settings by continuing with the following steps: 5. -
Page 127: Bridging Operation
To view the Bridge status, click Bridge on the menu, select a particular bridge and click Status. To configure Bridge settings, click Bridge on the menu, select a particular bridge and click Configuration. PremierWave® EN Embedded System on Module User Guide... - Page 128 Using the CLI To enter the Bridge command level: enable -> config -> bridge 1 enable - > config -> bridge br0 Using XML Include in your file: <configgroup name=”bridge” instance=”br0”> PremierWave® EN Embedded System on Module User Guide...
-
Page 129: 15: Security In Detail
In proving its own authenticity, the PremierWave EN device server will use its own "personal" certificate. In verifying the authenticity of the other party, the PremierWave EN unit will use a "trusted authority" certificate. -
Page 130: Obtaining Certificates
PEM. Certificate and key can be in the same file or in separate files. Additionally, the key can be either be encrypted with a password or left in the clear. However, the PremierWave EN device currently only accepts separate PEM files, with the key unencrypted. -
Page 131: Steel Belted Radius
-in sbr_certkey.sbrpvk -nodes -out sbr_certkey.pem The sbr_certkey.pem file contains both certificate and key. If loading the SBR certificate into PremierWave EN system on module as an authority, you will need to edit it: 1. Open the file in any plain text editor. -
Page 132: 16: Updating Firmware
16: Updating Firmware Obtaining Firmware Obtain the most up-to-date firmware and release notes for the unit from the Lantronix Web site (www.lantronix.com/support/downloads/) or by using anonymous FTP (ftp://ftp.lantronix.com/). Devices upgrading from existing firmware version 7.8 needing Python support will need to include a two-step upgrade process. -
Page 133: Figure 16-1 Uploading New Firmware
2. Click Browse (under the Upload New Firmware heading) to browse to the firmware file. 3. Select the file and click Open. 4. Click Upload to install the firmware on the PremierWave EN unit. 5. Click OK in the confirmation popup which appears. The firmware will be installed and the device will automatically reboot afterwards. -
Page 134: Loading New Firmware Through Ftp
16: Updating Firmware Loading New Firmware through FTP Firmware may be updated by sending the file to the PremierWave EN embedded system on module over an FTP connection. The destination file name on the PremierWave EN unit must have a "firmware.rom" type of format. The device will reboot upon successful completion of the firmware upgrade. -
Page 135: 17: Branding The Premierwave En Device
The Web Manager files are hidden and are incorporated directly into the firmware image but may be overridden by placing the appropriate file in the appropriate directory on the PremierWave EN unit file system. Web Manager files can be retrieved and overridden with the following procedure: 1. -
Page 136: Short And Long Name Customization
17: Branding the PremierWave EN Device Short and Long Name Customization You can customize the short and long names in your PremierWave EN embedded system on module. The names display in the CLI show command and in the System web page in the Current Configuration table. -
Page 137: Appendix A: Lantronix Technical Support
Appendix A: Lantronix Technical Support Lantronix offers many resources to support our customers and products at http://www.lantronix.com/support. For instance, you can ask a question, find firmware downloads, access the FTP site and search through tutorials. At this site you can also find FAQs, bulletins, warranty information, extended support services and product documentation. -
Page 138: Appendix B: Binary To Hexadecimal Conversions
Accessories -> Calculator. 1010 2. On the View menu, select Scientific. The scientific 1011 calculator appears. 1100 3. Click Bin (Binary), and type the number you want to convert. 1101 1110 1111 PremierWave® EN Embedded System on Module User Guide... - Page 139 Appendix B: Binary to Hexadecimal Conversions Figure B-2 Windows Scientific Calculator 4. Click Hex. The hexadecimal value appears. Figure B-3 Hexadecimal Values in the Scientific Calculator PremierWave® EN Embedded System on Module User Guide...
-
Page 140: Appendix C: Compliance
FCC ID: R68PEN IC ID: 3867A-PEN Japan IDs: 006WWC0244, 006XWA0019, 006YWA0009 Manufacturer's Contact Lantronix, Inc. 7535 Irvine Center Drive, Suite 100 Irvine, CA 92618 USA Tel: 949-453-3990 Fax: 949-453-3995 PremierWave® EN Embedded System on Module User Guide... - Page 141 5805 Active Passive 5825 Active Passive Note: The PremierWave does not support 40 Mhz bandwidth channels. Country codes are not available to the end user. Last updated for Ganges driver version 3.2.12. PremierWave® EN Embedded System on Module User Guide...
-
Page 142: Appendix D: Usb-Cdc-Acm Device Driver File For Windows Hosts
Windows Hosts A linux-cdc-acm.inf file may be used to enable Windows to recognize the USB-CDC-ACM connection to the USB device port of the PremierWave EN embedded system on module. Creating a USB-CDC-ACM Device Driver File 1. Create the linux-cdc-acm.inf file on the Windows host somewhere using the contents provided below. - Page 143 ServiceBinary=%12%\USBSER.sys ;-------------------------------------------------------------------- Vista-64bit Sections ;-------------------------------------------------------------------- [DriverInstall.NTamd64] include=mdmcpq.inf CopyFiles=DriverCopyFiles.NTamd64 AddReg=DriverInstall.NTamd64.AddReg [DriverCopyFiles.NTamd64] USBSER.sys,,,0x20 [DriverInstall.NTamd64.AddReg] HKR,,DevLoader,,*ntkern HKR,,NTMPDriver,,USBSER.sys HKR,,EnumPropPages32,,"MsPorts.dll,SerialPortPropPageProvider" [DriverInstall.NTamd64.Services] AddService=usbser, 0x00000002, DriverService.NTamd64 [DriverService.NTamd64] DisplayName=%SERVICE% ServiceType=1 StartType=3 ErrorControl=1 ServiceBinary=%12%\USBSER.sys ;-------------------------------------------------------------------- Vendor and Product ID Definitions ;-------------------------------------------------------------------- PremierWave® EN Embedded System on Module User Guide...
- Page 144 For Windows 7 installation, it is recommended to manually install the driver before plugging in the USB cable to the PremierWave EN device port. This can be done by installing a legacy driver for a COM port, with the Have Disk... option.
-
Page 145: Installing The Usb-Cdc-Acm Device Driver File
8. Click Have Disk and browse to and select the linux-cdc-acm.ini file and click Next. 9. Reboot your device after Windows finishes installing the drivers. Once rebooted, the USB serial drivers are successfully installed and available to use. PremierWave® EN Embedded System on Module User Guide...
Need help?
Do you have a question about the PremierWave and is the answer not in the manual?
Questions and answers