
Related Manuals for Wellis WZ00081


Summary of Contents for Wellis WZ00081
- Page 1 Napoli shower panel INSTRUCTION MANUAL Napoli Duschpaneel BEDIENUNGSANLEITUNG Colonne de douche Napoli MODE D´EMPLOI Napoli zuhanypanel HASZNÁLATI UTASÍTÁS WZ00081...
- Page 3 500mm 200mm...
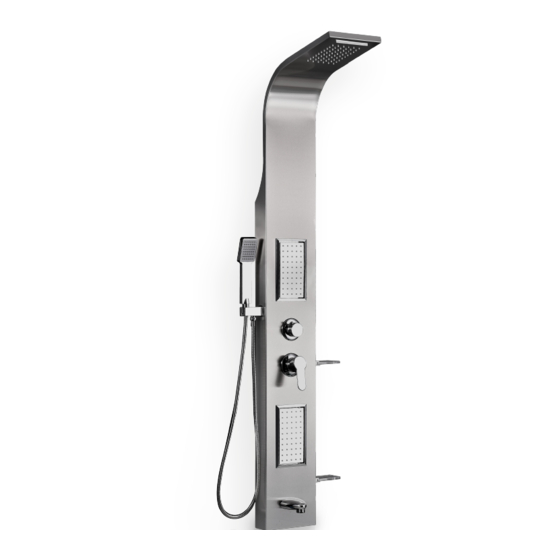
- Page 4 . Function I. Function . Water fall . Shower Head 1. Water fall . Body jets 2. Shower Head 3. Body jets . Diverter 4. Diverter . Mixer 5. Mixer 6. Spout . Spout 7. Hand shower . Hand shower...
-
Page 5: Part List
ts List ase unpack and inspect all packages and components carefully, and ke sure they are complete. Examine for shipping damage. If some ts are damaged or missing, notify your dealer immediately. Parts List Part list Parts List Please unpack and inspect all packages and components carefully, and make sure they are complete. -
Page 7: Wall Mounting
Wall-mounting Wall-mounting NOTE! Before drilling any holes for fixing your Wall-mounting shower panel ensure thatthere are no hidden cables or pipework within the wall. N o t e ! Before drilling any holes for fixing your shower panel ensure that N o t e ! Before drilling any holes for fixing your shower panel ensure that there are no hidden cables or pipework within the wall. - Page 8 Wall-mounting Dimensions Dimensions Choose a suitable place to install the shower panel, adjust the shower Choose a suitable place to install the shower panel, adjust the shower panel’s Choose a suitable place to install the shower panel, adjust the shower panel’s panel’s vertical position based on the user’s height and your sanitary vertical position based on the user’s height and your sanitary room.
- Page 9 50mm H: Cold water - ½” connection M: Hot water - ½” connection Construction and installation of a floor drain is obligatory! The dimensions given are indicative only and may vary due to the manufacturing technology of the product. By +-1 centimetres.
- Page 10 . Function I.Funktionen . Water fall . Shower Head 1. Wasserfall . Body jets 2. Duschkopf 3. Körperdüsen . Diverter 4. Schalter . Mixer 5. Mischer 6. Ausguss . Spout 7. Handbrause . Hand shower...
- Page 11 ts List ase unpack and inspect all packages and components carefully, and ke sure they are complete. Examine for shipping damage. If some ts are damaged or missing, notify your dealer immediately. Parts List Zubehör Parts List Please unpack and inspect all packages and components carefully, and Bitte alle Packungen und Komponenten sorgfältig auspacken und überprüfen.
- Page 13 Wandbefestigung Wall-mounting NOTE! Bevor Sie Löcher für die Montage Ihres Wall-mounting Duschpaneels in die Wand bohren, stellen Sie sicher, dass es keine versteckten Kabel N o t e ! Before drilling any holes for fixing your shower panel ensure that N o t e ! oder Rohrleitungen hinter der Wand gibt.
- Page 14 Maße Dimensions Wählen Sie einen geeigneten Platz, um das Duschpaneel aufzubauen. Dimensions Dimensions Stellen Sie die Duschwand in vertikale Positionr basierend auf der Choose a suitable place to install the shower panel, adjust the shower panel’s Choose a suitable place to install the shower panel, adjust the shower panel’s Choose a suitable place to install the shower panel, adjust the shower panel’s Dimensions Körpergröße des Nutzers und Ihrem Sanitärraum auf.
- Page 15 50mm H: Kaltes Wasser - ½” Verbindung M: Heißes Wasser - ½” Verbindung Bau und Installation eines Bodenablaufs ist obligatorisch! Die angegebenen Maße sind nur Richtwerte und können aufgrund der Herstellungstechnologie des Produkts um +-1 Zentimeter variieren.
- Page 16 . Function I. Fonctions . Water fall . Shower Head 1. Cascade . Body jets 2. Pomme de douche 3. Jets massants . Diverter 4. Inverseur . Mixer 5. Mitigeur 6. Jet . Spout 7. Pommeau de douche . Hand shower...
- Page 17 ts List ase unpack and inspect all packages and components carefully, and ke sure they are complete. Examine for shipping damage. If some ts are damaged or missing, notify your dealer immediately. Parts List Pièces Parts List Please unpack and inspect all packages and components carefully, and make sure they are complete.
-
Page 19: Fixation Au Mur
Fixation au mur Wall-mounting Attention! Veuillez vous assurer qu´il n´y a pas de Wall-mounting câbles cachés ou de tuyauterie à l´intérieur du mur avant de percer les trous. N o t e ! Before drilling any holes for fixing your shower panel ensure that N o t e ! Before drilling any holes for fixing your shower panel ensure that there are no hidden cables or pipework within the wall. - Page 20 Dimensions Dimensions Dimensions Dimensions Choisissez un emplacement approprié où installer la colonne de Choose a suitable place to install the shower panel, adjust the shower panel’s Choose a suitable place to install the shower panel, adjust the shower panel’s douche. Ajustez la position verticale de la colonne de douche en Choose a suitable place to install the shower panel, adjust the shower panel’s Dimensions vertical position based on the user’s height and your sanitary room.
- Page 21 50mm H: Eau froide - Lien ½ “ M: Eau chaude - Lien ½ “ La réalisation et l’installation d’un siphon de sol sont obligatoires ! Les dimensions sont données à titre indicatif et peuvent varier de +/-1 centimètre en fonction de la technologie de fabrication du produit.
- Page 22 . Function I. Funkció . Water fall . Shower Head 1. Vízesés . Body jets 2. Zuhanyfej 3. Felső vízsugár . Diverter 4. Zuhanyátkapcsoló . Mixer 5. Mixer 6. Vízköpő . Spout 7. Kézizuhany . Hand shower...
- Page 23 ts List ase unpack and inspect all packages and components carefully, and ke sure they are complete. Examine for shipping damage. If some ts are damaged or missing, notify your dealer immediately. Parts List Alkatrész lista Parts List Please unpack and inspect all packages and components carefully, and make sure they are complete.
- Page 25 Wall-mounting Wall-mounting Megjegyzés! Mielőtt lyukat fúrna a falba a zuhanypanel Wall-mounting beszereléséhez, bizonyosodjon meg róla, hogy nincsen mögött kábel vagy cső. N o t e ! Before drilling any holes for fixing your shower panel ensure that N o t e ! Before drilling any holes for fixing your shower panel ensure that there are no hidden cables or pipework within the wall.
- Page 26 Méretek Dimensions Dimensions Dimensions Válassza ki a zuhanypanel felszereléséhez megfelelő helyet. A panel Choose a suitable place to install the shower panel, adjust the shower panel’s Choose a suitable place to install the shower panel, adjust the shower panel’s Choose a suitable place to install the shower panel, adjust the shower panel’s függőleges felszerelését a felhasználó...
- Page 27 50mm H: Hidegvíz - ½”-os kiállás M: Melegvíz - ½”-os kiállás Padlóösszefolyó kiépítése kötelező! A megadott méretek tájékoztató jellegűek, a termék gyártási technológiájából adódóan eltérőek lehetnek. +-1 cm.
Need help?
Do you have a question about the WZ00081 and is the answer not in the manual?
Questions and answers