Advertisement
Available languages
Available languages
Quick Links
Ergo Black/White
EN
INSTRUCTION GUIDE
Ergo Black/White
DE
Montageanleitung
Receveur de douche Ergo Black/White
FR
instructions de montage
Ergo Black/White zuhanytálca
HU
SZERELÉSI ÚTMUTATÓ
Tava de duș Ergo Black/White
RO
instrucțiuni de asamblare
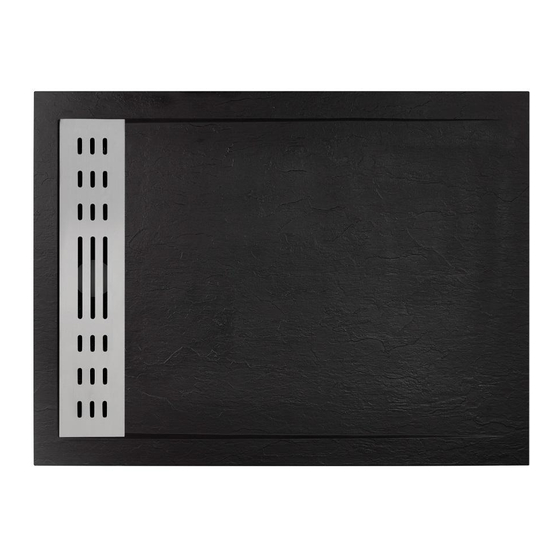
Shower tray
Duschwanne
WC00497
WC00496
WC00495
WC00494
Advertisement

Related Manuals for Wellis ERGO 120


Summary of Contents for Wellis ERGO 120
- Page 1 Shower tray Ergo Black/White INSTRUCTION GUIDE Duschwanne Ergo Black/White Montageanleitung Receveur de douche Ergo Black/White instructions de montage Ergo Black/White zuhanytálca SZERELÉSI ÚTMUTATÓ WC00497 Tava de duș Ergo Black/White WC00496 instrucțiuni de asamblare WC00495 WC00494...
-
Page 2: Important Notice
IMPORTANT NOTICE! Read the installation instructions carefully before installing the tray! ATTENTION! The sizes listed can have a tolerance of +/-4mm.Check the tray size before installation. And protect the tray with a plastic or cardboard throughout the installa- tion process Guidelines for the maintenance of the tray The best way to clean and maintain the tray is to use soapy water with a neutral PH. - Page 3 Waste is not included drain...
- Page 4 Ensure that the location of the shower tray is firm, level,and clean Ensure level of mix at front is deep enough to fill the cavity under the tray. Lay a 5:1 sand & cement mix It is essential the front of the tray is fully to help level/support the tray supported.
-
Page 5: Installation
Installation surface mounted (classic), surface mounted flush with floor Flexible Flexible Tiles silicone Tiles silicone Flexible silicone surface mounted surface mounted (classic) flush with floor Prepare the screed in a professional manner using lean mortar. Fill any gaps in the tray with sand and cement (lean mortar), making sure not to place the material on the edges. - Page 6 Silicone Sealant Waste is not included When wet, the surface of the majority of shower trays will show and increase in the potential for slipping. This is particularly the case when soap, shampoo, bath oil, etc. are used.
-
Page 8: Wichtiger Hinweis
WICHTIGER HINWEIS Lesen Sie vor der Installation der Duschwanne sorgfältig diese Anlei- tung ACHTUNG! Die aufgelisteten Grössen können eine Toleranz von +/-4 mm auf- weisen. Überprüfen Sie vor der Installation die Wannengrösse. Und schützen Sie beim gesamten Installationsprozess die Wanne mit Plastik oder Pappe. Richtlinien für die Pflege der Wanne Die beste Möglichkeit zur Reinigung und Pflege der Wanne ist die Verwendung von Seifenwasser mit einem neutralen PH-Wert. - Page 9 Abfall ist nicht eingeschlossen wasserablauf...
- Page 10 Der Installationsort der Duschwanne muss fest, eben und sauber sein. Stellen Sie sicher, dass die Mischung vorne tief genug ist, um den Hohlraum Verlegen Sie ein 5:1 Sand- und unter der Wanne zu füllen. Es ist Zementgemisch,um die Wanne zu wichtig, dass die Wanne vorne komplett ebnen/unterstützen.
- Page 11 INSTALLATION Aufputzmontage (klassisch), Unterputzmontage FLEXIBLES FLEXIBLES SILIKON SILIKON FLIESEN FLIESEN FLEXIBLES SILIKON AUFPUTZMONTAGE UNTERPUTZMONTAGE (KLASSISCH) Bereiten Sie den Estrich professionell mit Mörtel vor. Füllen Sie die Lücken in der Wanne mit Sand und Zement (Mörtel) und legen Sie das Material nicht auf die Kanten. Nach dem Anschluss und Testen des Ab- flusses muss die Wanne korrrekt ausgerichtet sein und die Ränder müssen mit Silikon...
- Page 12 Silikondi- chtung Abfall ist nicht eingeschlossen Im nassen Zustand zeigt die Oberfläche der meisten Duschwannen und erhöht das Rutschpotential. Dies ist insbesondere dann der Fall, wenn Seife, Shampoo, Badeöl usw. verwendet werden.
-
Page 14: Remarque Importante
REMARQUE IMPORTANTE Lisez attentivement les instructions d’installation avant d’installer le ATTENTION! Les dimensions indiquées peu- vent avoir une tolérance de +/-4 mm. Vérifiez la dimension du bac avant l’installation. Et protégez le bac avec du plastique ou carton durant le processus d’installation Directives pour la maintenance du bac La meilleure façon de nettoyer et de maintenir le bac est d’utiliser de l’eau savonneuse avec un PH neutre. - Page 15 Eaux usées non indiquées drainage...
- Page 16 Assurez-vous que l’emplacement du bac à douche est solide, à niveau et propre. Assurez-vous que la mise à niveau du mélange devant est suffisante pour rem- Déposez un mélange 5 pour 1 de plir la cavité sous le bac. Il est essentiel sable &...
- Page 17 INSTALLATION surface montée (classique), surface montée avec l’évacuation au sol SILICONE SILICONE FLEXIBLE CARREAUX SILICONE FLEXIBLE FLEXIBLE CARREAUX surface montée (classique) surface montée avec l’évacuation au sol Préparez le pavé de manière professionnelle en utilisant du mortier mince. Remplissez tous les espacement dans bac avec du sable et du ciment (mortier mince), en étant sûr de ne pas placer de matière sur les bords.
- Page 18 Mastic silicone Eaux usées non indiquées Lorsqu’elles sont mouillées, la surface de la majorité des receveurs de douche présente et augmente le potentiel de glissement. C’est partic- ulièrement le cas lorsque du savon, du shampoing, de l’huile de bain, etc. sont utilisés.
-
Page 20: Fontos Figyelmeztetés
FONTOS FIGYELMEZTETÉS! Figyelmesen olvassa el a telepítési utasításokat mielőtt felszerelné a tálcát! FIGYELEM! A felsorolt méretek +/- 4 mm- es eltéréssel rendelkezhetnek. Ellenőrizze a tálca méretét a telepítés előtt. A telepítés során óvja a tálcát műanyaggal vagy kartonpapírral Irányelvek a tálca karbantartásához A semleges pH-jú... - Page 21 Nem tartalmaz túlfolyót lefolyó...
- Page 22 Győződjön meg, hogy a zuhanytálca szilárd, egyenes és tiszta helyen van! Rakjon le egy 5:1 homok-ce- Győződjön meg, hogy a keverék szintje elöl elég ment keveréket, hogy a tálca mély ahhoz, hogy a tálca alatti üreget kitöltse. egyenes szintben / alátámasz- Fontos, hogy a tálca eleje teljesen alátámasztott tott legyen legyen.
- Page 23 Telepítés felületszerelt (klasszikus), felületszerelt (zuhanyfolyóka egy szinten a padló- zattal) Flexibilis Flexibilis Csempék szilikon Csempék szilikon Flexibilis szilikon felületszerelt felületszerelt (zuhanyfolyóka (klasszikus) egy szinten a padlózattal) Készítse el az esztrichet szakszerűen habarcs felhasználásával. A tálcán lévő hézagokat töltse ki homokkal és cementtel (habarcs) úgy, hogy az anyag ne kerüljön a szegélyekre.
- Page 24 Szilikon Tömítés Nem tartalmaz túlfolyót Ha a zuhanytálca felszíne vizes, akkor az megnövekedett csúszász- veszéllyel jár. Ez főleg akkor igaz, ha szappant, sampont, fürdőolajt stb. használunk.
-
Page 26: Notă Importantă
Notă importantă! Citiți cu atenție instrucțiunile de montare înainte de a instala tava! ATENȚIE! Mărimile listate pot avea o toleranță de +/- 4mm. Verificați mărimea tăvii înainte de instalare. Protejați tava cu o bucată de plastic sau de carton de-a lungul procesului de montare. - Page 27 Deșeurile nu sunt incluse Scurgerea...
- Page 28 Asigurați-vă că locația pentru tava de duș este fermă, nivelată, și curată. Asigurați-vă că nivelul de amestec în Acoperiți cu un amestec de 5:1 față este suficient de adânc pentru a nisip cu ciment pentru a ajuta umple golurile de sub tavă.. nivelarea/susținerea tăvii.
- Page 29 INSTALAREA suprafața instalată (clasic), suprafața instalată la nivelul podelei Silicon Silicon Gresie flexibil Gresie flexibil Silicon flexibil suprafață instalată suprafață instalată (clasic) la nivelul podelui Pregătiți șapa într-un mod profesionist folosind mortar moale. Umpleți golurile din tavă cu nisip și ciment (mortar moale), asigurându-vă...
- Page 30 Silicon Etanșant Deșeurile nu sunt incluse Când umedă, suprafața majorității tavilor de duș vor indica și crește potențialul de alunecare. Acesta este cazul mai ales când sunt folosite produse ca săpun, șampon, ulei de baie etc.
Need help?
Do you have a question about the ERGO 120 and is the answer not in the manual?
Questions and answers