
Related Manuals for Gree GK-H03NH3AS


Summary of Contents for Gree GK-H03NH3AS
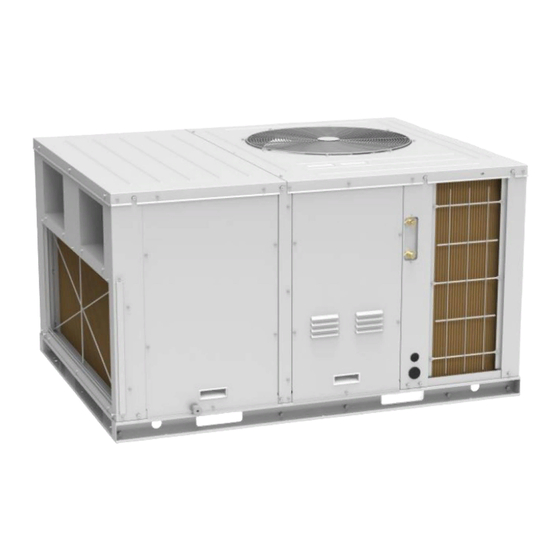
- Page 1 Owner's Manual Original Instructions Air Conditioners Rooftop Packaged Models: GK-H03NH3AS GK-H5.5NH3AS GK-H5.5NH3AF GK-H10NH3AF GK-H15NH3AF...
- Page 2 To Users Thank you for selecting Gree’s product. Please read this instruction manual carefully before installing and using the product, so as to master and correctly use the product. In order to guide you to correctly install and use our product and...
- Page 3 (7) The final right to interpret for this instruction manual belongs to Gree Electric Appliances Inc. of Zhuhai. Exception Clauses...
-
Page 4: Table Of Contents
Contents 1 Safety Notices (Please be sure to abide) ......... 1 2 Product Introduction ..............4 2.1 Nominal Operating Condition ............4 2.2 Operating Range ................4 3 Pre-installation Instruction............5 3.1 Checking Product Received ............5 3.2 Standard Accessory Parts ............. 5 3.3 Before Beginning Installation ............ -
Page 5: Safety Notices (Please Be Sure To Abide)
Rooftop Packaged 1 Safety Notices (Please be sure to abide) SPECIAL WARNING: Be sure to comply with national gas regulations. Do not pierce or burn. Do not use means to accelerate the defrosting process or to clean, other than those recommended by the manufacturer. Be aware that refrigerants may not contain an odor. - Page 6 Rooftop Packaged WARNING (1) This product can’t be installed at corrosive, inflammable or explosive environment or the place with special requirements, such as kitchen. Otherwise, it will affect the normal operation or shorten the service life of the unit, or even cause fire hazard or serious injury. As for above special places, please adopt special air conditioner with anti-corrosive or anti-explosion function.
- Page 7 Rooftop Packaged WARNING (17) When installing or re-installing the air conditioner, please keep the refrigerant circuit away from substances other than the specified refrigerant, such as air. Any presence of foreign substances will cause abnormal pressure change or even explosion, resulting in injury. NOTICE (1) Do not put a finger or other objects into the air inlet or air return grill.
-
Page 8: Product Introduction
Rooftop Packaged 2 Product Introduction GREE rooftop packaged units provide a wide capacity range from 3 to 15 Ton. These units are completely assembled, piped and wired at the factory to provide one-piece shipment and rigging. Each unit is pressurized with a holding charge of Refrigerant-410a for storage and shipping. -
Page 9: Pre-Installation Instruction
Rooftop Packaged 3 Pre-installation Instruction 3.1 Checking Product Received Upon receiving the product, check any damage from transportation. Shipping damage is the responsibility of the carrier. Verify the model number, specifications and accessories are correct prior to installation. The distributor or manufacturer will not accept claims from dealers for transportation damage or installation of incorrectly shipped units. -
Page 10: Installation Instructions
Rooftop Packaged Replacement parts for this product are available through your contractor or local distributor. 4 Installation Instructions 4.1 Physical Dimension GK-H03NH3AS GK-H5.5NH3AS, GK-H5.5NH3AF... - Page 11 Rooftop Packaged GK-H10NH3AF GK-H15NH3AF Dimension (mm) GK-H03NH3AS 815 1450 1120 70 98 417 94 916 60 155 215 719 178 GK-H5.5NH3AS 815 1450 1120 70 98 417 94 916 65 190 144 866 105 GK-H5.5NH3AF 815 1450 1120 70 98 417 94 916 65 190 144 866 105...
-
Page 12: General Information
Rooftop Packaged 4.2 General Information Model Power Supply Model Name Refrigerant Function Climate type V, Ph, Hz Heat 220-240V, GK-H03NH3AS R410A Pump 1Ph, 50/60Hz Heat 220-240V, GK-H5.5NH3AS R410A Pump 1Ph, 50/60Hz Heat 220-240V, GK-H5.5NH3AF R410A Pump 3Ph, 60Hz Heat 220-240V,... -
Page 13: Crane Way
Rooftop Packaged 4.4 Crane Way (1) When removing the unit, two ropes are needed to hang the unit along the four ways. (2) In order to avoid the extrusion, between the ropes should be add something to protect the unit (e.g. batten). (3) Please use M12 to tight the support fundus. - Page 14 Rooftop Packaged GK-H03NH3AS, GK-H5.5NH3AS, GK-H5.5NH3AF Note: Above diagrams may be different from actual model. GK-H03NH3AS, GK-H5.5NH3AS, GK-H5.5NH3AF Installation Clearances DIMENSION inch (Minimum) 1100 1100 1100...
-
Page 15: Installation Of Condensate Pipe
Rooftop Packaged GK-H10NH3AF, GK-H15NH3AF Note: Above diagrams may be different from actual model. GK-H10NH3AF, GK-H15NH3AF Installation Clearances DIMENSION inch (Minimum) 1000 1500 1100 1100 1830 4.6 Installation of Condensate Pipe (1) After the unit is installed, it is required to check the level of the whole unit. The unit must be placed horizontally to ensure the unit in proper function. - Page 16 (6) P is the absolute pressure inside the unit. The unit of the pressure is Pa. (7) After the electrical installation is completed, carry out the testing of the drainage system. Model Name Drain Connection Size(mm) GK-H03NH3AS GK-H5.5NH3AS GK-H5.5NH3AF GK-H10NH3AF GK-H15NH3AF 4.7 Adjust the Tightness of the Belt (Only above 10...
- Page 17 Rooftop Packaged hours. After one week running, the tightness of the belt should be adjusted again, we should routinely check it every 1-2 months; also ensure the test results complying with the following table. (3)The adjustment of the tightness of the belt is shown in the following figure. Loosen screws fixing motor on the base, move motor along the direction of arrow as shown in the picture, and then fix the screw again.
-
Page 18: Electrical Installation
Min. Capability Sectional Sectional Power Supply Model Name of Air Area of Area of (V, Ph, Hz) Switch(A) Earth Power Wire(mm Cord(mm 220-240V,1Ph, GK-H03NH3AS 50/60Hz 220-240V,1Ph, GK-H5.5NH3AS 10.0 10.0 50/60Hz 220-240V,3Ph, GK-H5.5NH3AF 10.0 10.0 60Hz 220-240V,3Ph, GK-H10NH3AF 10.0 10.0 60Hz... - Page 19 Rooftop Packaged d) Screw cross the circle and fix it on the terminal board. WARNING! If the power line or the signal line is defective, use the special coil to replace ①. Before connecting lines, read the voltages of the relevant parts on the nameplate.
-
Page 20: Electrical Connections-Supply Voltage
Rooftop Packaged ⑩. The null line of power input must be connected to the “N” section of the terminal board! A wrong connection will cause the damage of unit! 5.3 Electrical Connections-Supply Voltage (1) Air-conditioning unit with single-phase power supply. 1) Remove the Electric Box Cover of the unit. -
Page 21: Wiring Diagram
The NULL LINE of power input MUST be connected to the “N” section of the terminal board! A WRONG CONNECTION will cause the DAMAGE of unit! 5.4 Wiring Diagram GK-H03NH3AS, GK-H5.5NH3AS GK-H5.5NH3AF, GK-H10NH3AF, GK-H15NH3AF 6 Maintenance To protract the life of the air-conditioning unit, check and maintain the unit regularly with a qualified service person. -
Page 22: Trial Run
Rooftop Packaged you should clean the air filter frequently (once every two weeks). (2) Cleaning the Outdoor Heat Exchanger Outdoor heat exchanger must be cleaned regularly, at least once every two months. You can clean the surface with vacuum cleaner or nylon brush, please do not wash it with water. -
Page 23: Troubleshooting
Rooftop Packaged (4) witch on power supply and press the ON/OFF button to start operation. 8 Troubleshooting If your air-conditioning unit suffers from abnormal operation or failure, please first check the following points before repair. Failure Possible cause Solution Connect the power The power supply does not connect supply or change two or improper phase sequence. -
Page 24: Unit Function
Rooftop Packaged 9 Unit Function 9.1 Setting of Double Indoor Room Sensors This series of Rooftop Packaged Unit has two indoor room sensors. One is located at the air intake of the unit and the other one is located inside the wire controller. - Page 25 Rooftop Packaged Number Error code Error Remarks Capacity code error Outdoor memory chip error Electric box sensor error Compressor overload protection Overloading IPM protection DC fan motor error Drive desynchronizing protection Activation failure Compressor phase sequence protection Compressor stalling protection Power protection Indoor and outdoor mismatch 4-way valve direction changing...
- Page 26 Rooftop Packaged Number Error code Error Remarks Defrosting Oil return pfc protection ODU jumper cap failure DRED1 mode DRED2 mode DRED3 mode Water overflow protection Emergency Stop(Fire alarm) Error Number Error Remarks code Fan DC busbar under voltage protection Fan DC busbar over voltage protection Fan AC current protection (input side) Fan IPM module protection Fan PFC abnormality...
- Page 27 Rooftop Packaged Error Number Error Remarks code Fan AC input voltage abnormality Fan driver board environment temperature sensor malfunction Fan AC contactor protection or input zero crossing error Note: These error codes only show on “88” display of the main board. Note: When the unit is connected with the wired controller, the error code will be H6 shown on it.
Need help?
Do you have a question about the GK-H03NH3AS and is the answer not in the manual?
Questions and answers