Table of Contents
Advertisement
Available languages
Available languages
AIR CONDITIONING SYSTEMS
• USER'S MANUAL
• ΕΓΧΕΙΡΙΔΙΟ ΧΡΗΣΗΣ
• MANUAL UTILIZATORULUI
• BENUTZERHANDBUCH
ENGLISH | ΕΛΛΗΝΙΚΑ | ROMANA | DEUTSCH
WALL MOUNTED UNIT
MODELS:
MFVI-09WFI/MFVO-09
MFVI-12WFI/MFVO-12
MFVI32XP-12WFI/MFVO-12
MFVI32-09WFI/MFVO32-09
MFVI32-12WFI/MFVO32-12
MFVI32-18WFI/MFVO32-18
MFVI32-24WFI/MFVO32-24
Advertisement
Chapters
Table of Contents

Related Manuals for INVENTOR MFVI-09WFI


Summary of Contents for INVENTOR MFVI-09WFI
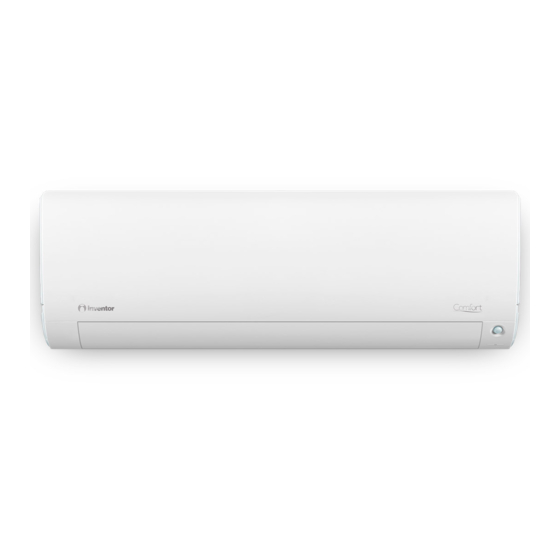
- Page 1 AIR CONDITIONING SYSTEMS WALL MOUNTED UNIT • USER’S MANUAL • ΕΓΧΕΙΡΙΔΙΟ ΧΡΗΣΗΣ • MANUAL UTILIZATORULUI • BENUTZERHANDBUCH MODELS: MFVI-09WFI/MFVO-09 MFVI-12WFI/MFVO-12 MFVI32XP-12WFI/MFVO-12 MFVI32-09WFI/MFVO32-09 MFVI32-12WFI/MFVO32-12 MFVI32-18WFI/MFVO32-18 MFVI32-24WFI/MFVO32-24 ENGLISH | ΕΛΛΗΝΙΚΑ | ROMANA | DEUTSCH...
- Page 2 Read the precautions in this manual This appliance is filled with R32. carefully before operating the unit. Keep this manual where the user can easily nd it. WARNING: · Do not use means to accelerate the defrosting process or to clean, other than those ·...
-
Page 3: Table Of Contents
Contents PARTS AND FUNCTIONS ....................OPERATION ......................... INDOOR UNIT INSTALLATION .................... MAINTENANCE ........................CAUTIONS ..........................TROUBLE SHOOTING ...................... -
Page 4: Parts And Functions
Parts and Functions Indoor Unit Remote controller 1. QUIET button Display board Inlet 2. I FEEL button (inside) 3. MODE button 4. HEALTH button QUIET Inlet grille 5. TEMP+/- button 6. SWING left/right button HEALTH MODE I FEEL AIRFLOW 7. ECOSENSOR button HEALTH SLEEP TURBO... -
Page 5: Operation
Operation LOCK/LIGHT/RESET/ Clock set EXTRA FUNCTION Load the battery or press LOCK Button the"RESET" button LOCK RESET It is used to lock buttons and LCD display. Press “ ” or “ ” to LIGHT Button set the time QUIET LIGHT HEALTH Turn on and off the indoor display. - Page 6 Operation AUTO,COOL,HEAT,DRY,FAN Mode Note Operation In AUTO mode, the air conditioner will automatically select Cool or Heat operation according to room AUTO temperature. When FAN is set to AUTO, the air con- ditioner automatically adjusts the fan speed accord- ing to room temperature. Unit start COOL Cooling only...
- Page 7 Operation I FEEL Operation HEALTH Operation Press HEALTH button Press I FEEL button HEALTH 1.For each press, is displayed. 1. Only for COOLING, HEATING or Air conditioner starts the health AUTO mode(other modes cannot be function operation. implemented). 2.Press HEALTH button twice, 2.
- Page 8 Operation Comfortable SLEEP Temp. setting Unit stop Before going to bed, you can simply 1 hr Decreases 2 º press the SLEEP button. 1 hr Decreases 2 º 3 hrs Press SLEEP button SLEEP 3 hrs Rises 1 º SLEEP SLEEP Operation Mode operation starts...
- Page 9 Operation HEALTH AIRFLOW Operation QUIET/TURBO Operation Press QUIET button QUIET Set health airflow function HEALTH AIRFLOW You can use this function when silence is 1.Press the button of HEALTH AIR- needed for rest or reading. FLOW, and the appears on the For each press, is displayed.
- Page 10 Operation SWING Operation NOTE: Up and down air flow direction 1. When humidity is high, condensate water might occur at air outlet if all vertical louvers are adjusted to left or right. 2. It is not advisable to keep horizontal flap at downward posi- tion for a long time in COOL or DRY mode, otherwise, con- densate water might occur.
- Page 11 Operation ECO SENSOR Operation TIMER Operation Set Clock correctly before starting Timer operation. You can let unit start Press ECO SENSOR button ECOSENSOR or stop automatically at the following times: Before you wake up in the morn- For each press, it changes as follows: ing, get back from outside or after you cancel fall asleep at night.
- Page 12 Operation Loading of the battery ON/OFF operation and test operation Remove the battery cover; ON/OFF Operation: ●Use this operation only when the remote controller is defective or lost, and with function of emergency running, air conditioner can run automatically for a while. ●When the emergency operation switch is pressed, the "Pi"...
- Page 13 UV-C Lamp This appliance contains a UV-C lamp. Refer to the maintenance instructions prior to opening the appliance. Eye or skin irritation may result from direct exposure to the UV-C lamp, do not look and/or touch the UV-C lamp directly. Be certain that there is no power supply to the unit before removing the air filter and/or installing it for cleaning and/or maintenance.
- Page 14 56°C Sterilization The 56°C Sterilization function can only be activated through the mobile application Inventor Control. When 56°C Sterilization function is activated, the air conditioner will operate as below: 1st Stage: The air conditioner will start with the Self Clean function in order to remove the dirt.
- Page 15 Make sure that the router is close to the air conditioner for unhindered pairing prossess and wireless operation. Step 1: Download and install the “Inventor Control” application from the Google Play Store or IOS App Store. Step 2: Select “Register” to create a new Step 3: To add the device, select “My...
- Page 16 Connect to the WiFi with name (SSID) password. Press Confirm supply and turn it on. Set the “U-AC-XXXX”. Return to Inventor Control once connected. to proceed. The pairing air conditioner to Cooling process may take some Mode, Low Fan Speed and time.
- Page 17 IMPORTANT INFORMATION REGA- EUROPEAN REGULATIONS RDING THE REFRIGERANT USED CONFORMITY FOR THE MODELS Climate:T1 Voltage:230V Contains fluorinated greenhouse gases All the products are in conformity with the following European provision: - 2014/53/EU(RED) 1+2= - 2014/517/EU(F-GAS) - 2009/125/EC(ENERGY) This product contains fluorinated greenhouse gases. Do not vent into the atmosphere.
-
Page 18: Indoor Unit Installation
Indoor Unit Installation Necessary Tools for Installation Power Source Torque wrench Driver Before inserting power into receptacle, check the voltage without (17mm,22mm,26mm) Nipper fail. Pipe cutter Hacksaw The power supply is the same as the corresponding nameplate. Flaring tool Hole core drill Install an exclusive branch circuit of the power. - Page 19 Indoor Unit Installation [ Left Left-rear piping ] Fitting of the Mounting Plate and Positioning of the wall Hole In case of left side piping, cut away, with a nipper, the lid for left piping. When the mounting plate is first fixed In case of left-rear piping, bend the pipes according to the piping direction to the mark of hole for left-rear piping which is marked on proper leveling...
- Page 20 e r r o e r r o When connecting the cable after installing the indoor unit 1. Insert from outside the room cable into left side of the wall Lean Crack hole, in which the pipe has already existed. 2.
-
Page 21: Maintenance
Maintenance For Smart Use of The Air Conditioner Remote Controller Indoor Body Setting of proper room Do not block the air inlet temperature or outlet wipe the air conditioner by using a Proper temperature soft and dry cloth.For serious stains, use a neutral detergent diluted with Do not usewater,wipe the controller water.Wring the water out of the... -
Page 22: Cautions
Cautions WARNING Please call Sales/Service Shop for the Installation. Do not attempt to install the air conditioner by yourself because improper works may cause electric shock, fire, water leakage. WARNING Check proper When abnormality such as burnt-small found, Use an exclusive immediately stop the operation button and power source installation of the... -
Page 23: Trouble Shooting
Trouble shooting Cautions Before asking for service, check the following Do not obstruct or cover the ventilation grille of the air first. conditoner.Do not put fingers or any other things into the inlet/outlet and swing louver. This appliance is not intended for use by persons (including children) Phenomenon Cause or check points with reduced physiced, sensory or mental capabilities or lack of... - Page 24 All the pictures in the manual are for explanatory purposes only. The actual shape of the unit you purchased may be slightly different, but the operations and functions are the same. The company may not be held responsible for any misprinted information. The design and the specifications of the product for reasons, such as product improvement, are subject to change without any prior notice.
- Page 25 - please also check your spam folder. sent to your email STEP 5 Additional Details Additional Details Inventor warranty is now valid! Subscribe to Inventor's Newsletter to Inventor's Newsletter...
- Page 26 R32. 1,2m H07RN-F. R32)
- Page 27 ........................................................................................................................................................................................................................................................................................................................
- Page 28 Εξαρτήματα και Χρήση Τηλεχειριστήριο Εσωτερική Μονάδα πλήκτρο Είσοδος Πίνακας ενδείξεων πλήκτρο (εσωτερικό) πλήκτρο πλήκτρο QUIET Γρίλλια πλήκτρο εισόδου HEALTH MODE I FEEL AIRFLOW πλήκτρο Διακόπτης HEALTH SLEEP TURBO πλήκτρο Έξοδος ασφάλειας πλήκτρο Φίλτρο Οριζόντιο πτερύγιο Οριζόντια λεπίδα ενεργοποίηση ειδικής (εσωτερικά) (προσαρμογή...
- Page 29 Λειτουργία LOCK/LIGHT/RESET/EXTRA Ρύθμιση CLOCK (Pολογιού) FUNCTION Τοποθετήστε τις μπαταρίες ή LOCK πλήκτρο πατήστε το κουμπί “RESET” Για να κλειδώσει τα πλήκτρα και την LCD οθόνη. LOCK RESET LIGHT πλήκτρο Πατήστε “ ” ή “ ” για να βάλετε τη σωστή ώρα.Κάθε Ενεργοποιήστε...
- Page 30 Λειτουργία AUTO, COOL, HEAT, DRY και FAN Κατάσταση Σημείωση λειτουργία Λειτουργίας Κατά τη λειτουργία AUTO, το κλιματιστικό θα επιλέξει αυτόματα τα επίπεδα ψύξης ή θέρμανσης ανάλογα με τη θερμοκρασία δωματίου. Όταν ο AUTO ανεμιστήρας ορίζεται σε κατάσταση AUTO, το Έναρξη μονάδας κλιματιστικό...
- Page 31 Λειτουργία I FEEL λειτουργία HEALTH λειτουργία Πατήστε το πλήκτρο Πατήστε το πλήκτρο I-FEEL. HEALTH HEALTH. 1. Με κάθε πάτημα, εμφανίζεται το 1. Ενεργοποιείται μόνο στις λειτουργίες και το κλιματιστικό εκκινεί ψύξης, θέρμανσης και στην τη λειτουργία HEALTH. αυτόματη λειτουργία (δεν είναι διαθέσιμη...
- Page 32 Λειτουργία SLEEP Ρύθμιση Η μονάδα Θερμοκρασίας σταματάει Μείωση κατά 2°C πλήκτρο. 1 ώρα 1 ώρα Μείωση κατά 2°C 3 ώρες 3 ώρες SLEEP 1°C 'Ανοδος ανά πλήκτρο. η SLEEP η SLEEP λειτουργία σταματάει λειτουργία αρχίζει Σε HEAT κατάσταση QUIET 1 ώρα μετά την έναρξη της λειτουργίας HEALTH MODE I FEEL...
- Page 33 Λειτουργία HEALTH AIRFLOW QUIET/TURBO Πατήστε το πλήκτρο QUIET Η ρύθμιση της HEALTH AIR- HEALTH QUIET. AIRFLOW FLOW Μπορείτε να χρησιμοποιήσετε αυτή τη 1.Πατήστε το πλήκτρο της HEALTH AIR- λειτουργία όταν θέλετε ησυχία για να FLOW, και η ένδειξη θα εμφανιστεί ξεκουραστείτε, να...
- Page 34 Λειτουργία SWING Μια συμβουλή: Πάνω και κάτω κατεύθυνση ροής 1. Όταν η υγρασία είναι υψηλή, συμπύκνωμα νερού μπορεί να αέρα τρέξει από την έξοδο αέρα εάν όλες οι κάθετες περσίδες έχουν προσαρμοστεί προς τα δεξιά ή προς τα αριστερά. Με κάθε πάτημα του πλήκτρου...
- Page 35 Λειτουργία ECO SENSOR TIMER την ώρα πλήκτρο ECOSENSOR πλήκτρο, από Ακύρωση την έξοδο σας TIMER TIMER TIME TIMER ON QUIET QUIET QUIET TIMER HEALTH HEALTH HEALTH MODE I FEEL MODE MODE I FEEL I FEEL AIRFLOW AIRFLOW AIRFLOW Follow και θα HEALTH SLEEP TURBO...
- Page 36 Λειτουργία ON/OFF λειτουργία και Τοποθέτηση των μπαταριών λειτουργία ελέγχου Λειτουργία Έκτακτης ανάγκης: Ανοίξτε το κάλυμμα των μπαταριών; ●Χρησιμοποιήστε αυτή τη λειτουργία μόνο όταν το τηλεχειριστήριο δεν λειτουργεί ή έχει χαθεί. Με τη λειτουργία της έκτακτης ανάγκης, το κλιματιστικό μπορεί να τρέξει...
- Page 37 Λάμπα UV-C Η συσκευή περιέχει λάμπα UV-C. Ανατρέξτε στις οδηγίες συντήρησης πριν ανοίξετε την συσκευή. Απευθείας έκθεση στην λάμπα UV-C μπορεί να προκαλέσει ερεθισμό του δέρματος ή των ματιών, μην κοιτάτε ή/και ακουμπάτε την λάμπα UV-C απευθείας. Βεβαιωθείτε ότι δεν υπάρχει παροχή...
- Page 38 Αποστείρωση 56°C Η λειτουργία αποστείρωσης 56°C μπορεί να ενεργοποιηθεί μόνο μέσω της εφαρμογής Inventor Control. Όταν η λειτουργία αποστείρωσης 56°C είναι ενεργοποιημένη, το κλιματιστικό θα λειτουργήσει ως εξής: 1ο Στάδιο: Το κλιματιστικό θα ενεργοποιήσει την λειτουργία αυτοκαθαρισμού για να απομακρύνει σκόνη που έχει συσσωρευτεί επάνω στο στοιχείο. Συγκεκριμένα, η μονάδα θα...
- Page 39 Βεβαιωθείτε ότι το ρούτερ είναι κοντά στο κλιματιστικό για απρόσκοπτη σύνδεση και ασύρματη λειτουργία. Βήμα 1: Κατεβάστε και εγκαταστήστε την εφαρμογή Inventor Control από το Google Play Store ή το IOS APP Store. Βήμα 2: Επιλέξτε “Register” για την δημιουργία...
- Page 40 ρυθμίσεις του κινητού σας. Συνδεθείτε στο δίκτυο με εισαγάγετε τον κωδικό και ενεργοποιήστε το. όνομα “U-AC-XXXX”. Όταν συνδεθείτε, επιστρέψτε στην πρόσβασης. Πατήστε Ρυθμίστε το κλιματιστικό Inventor Control. Confirm για να σε λειτουργία Cooling, συνεχίσετε. Η διαδικασία Low ταχύτητα ανεμιστήρα σύζευξης ενδέχεται να...
- Page 41 Climate : T1 Voltage: 230V - 2014/53/EU(RED) - 2014/517/EU(F-GAS) - 2009/125/EC(ENERGY) - 2010/30/EU(ENERGY) - 2006/1907/EC(REACH) RoHS :R32 2011/65/ GWP*:675 GWP= (global warming potential) RoHS ) WEEE 2012/19/EU ( . . Wi-Fi...
- Page 42 , 22 , 26 (17,19 09K 12K ø 6.35x0.8mm ø 9.52x0.8mm ø 6.35x0.8mm ø 12.7x0.8mm ø 9.52x0.8mm ø 15.88x1.0mm Τα μοντέλα υιοθετούν HFC ψυκτικό R32. Χρειάζεται προσοχή όταν σηκώνετε τον σωλήνα αποστράγγισης Περισσότερο από 15εκ. Κατεύθυνση σωλήνα Πίσω αριστερά Περισσότερο Πίσω...
- Page 43 A=170mm C=130mm 9K/12K 60mm 60mm Ø Ø (25/35) D=47mm D=47mm C=165mm A=195mm B= Ø60mm B= Ø60mm (50) A=218mm C=151mm 60mm Ø 60mm Ø (71) D=38.5mm D=38.5mm , “ “, 60 mm, Agraffe ·...
- Page 44 wewn trzna · · 4G 1,0 mm EEPROM· EEPROM EEPROM· H05RN-F H07RN-F. · T.3.15A/250VAC ( · · R410A 0~0,5 mm 1,0~1,5 mm 1,5~2,0mm...
- Page 45 40 C,...
- Page 46 ΠΡΟΕΙΔΟΠΟΙΗΣΕΙΣ...
- Page 47 swishing : D.B/W.B 3 ℃ /2 ℃ : D.B/W.B 21℃ /15℃ :D.B/W.B 4 ℃ /26℃ : D.B -20 ℃ :D.B 27℃ : D.B 1 ℃ : D.B/W.B 24℃ /18℃ : D.B ℃ :D.B/W.B 24℃ /18℃ :D.B -20℃ (INVERTER) COOL DRY. .
- Page 48 Όλες οι εικόνες στο παρόν εγχειρίδιο εξυπηρετούν επεξηγηματικούς σκοπούς. Το προϊόν που προμηθευτήκατε μπορεί να εμφανίζει ορισμένες διαφορές ως προς το σχήμα, ωστόσο οι λειτουργίες και τα χαρακτηριστικά παραμένουν ίδια. Η εταιρεία δεν φέρει ευθύνη για τυχόν τυπογραφικά λάθη. Ο σχεδιασμός και οι προδιαγραφές του...
- Page 49 Παρακαλούμε ελέγξτε και τον φάκελο με τα Ανεπιθύμητα εισερχόμενα. Διεύθυνση email* mail* κατοχύρωσης στο email σας ΒΗΜΑ 5 Έχετε υποβάλει επιτυχώς την εγγύηση του προϊόντος Inventor! Να εγγραφώ στο newsletter της Inventor στο newsletter της Inventor * Απαραίτητο πεδίο εδίο...
- Page 50 Va rugam cititi acest manual, inainte de Cititi avertizarile din acest manual a folosi aerul conditionat. Pastrati acest cu grija, inainte de a folosit aparatul. manual pentru referinte viitoare. Aceasta unitate contine agent frigorific R32. Pastrati acest manual unde utilizatorul il gaseste usor. ATENTIE: Nu folositi mijloace pentru a accelera procesul de decongelare sau de curatare, altele decat cele recomandate de producator.
- Page 51 Continut Componente si functii ........................2 Operare ............................. 3 Instalarea unitatii interioare ......................14 Intretinere ............................18 Avertizari ............................19 Depanare ............................20...
-
Page 52: Componente Si Functii
Componente si Functii Unitate interna Telecomanda 1. Tasta QUIET Admisie de aer Panou afisaj (interior) 2. Tasta I FEEL 3. Tasta MODE 4. Tasta HEALTH QUIET Grilaj de 5. Tasta TEMP+/- admisie 6. Tasta SWING stanga/ HEALTH MODE I FEEL AIRFLOW dreapta HEALTH... - Page 53 Functii BLOCARE/LUMINA/RESETARE/ Setare ceas FUNCTIE EXTRA Incarcati bateria si apasati Buton LOCK butonul „RESET”. LOCK RESET Folosit pentru a bloca butoanele si afisajul LCD al telecomenzii. Apasati “ ” sau “ ” pentru a seta ora corecta Buton LIGHT QUIET LIGHT HEALTH MODE...
- Page 54 Functii AUTO, RACIRE, INCALZIRE, Modul Nota USCARE, VENTILARE Operatiune In modul AUTO, aparatul de aer conditionat va se- lecta automat functionarea Racire sau Incalzire in functie de temperatura camerei. Cand ventilatorul AUTO este setat pe AUTO, aparatul de aer conditionat ajusteaza automat viteza ventilatorului in functie de ON/OFF Pornirea unitatii temperatura camerei.
- Page 55 Functii Functia I FEEL Functia HEALTH Apasati butonul Apasati butonul I FEEL HEALTH HEALTH 1. Numai pentru modul RACIRE, 1.Pentru fiecare apasare, este afi- INCALZIRE sau AUTO (alte moduri sat. Aerul conditionat incepe sa func- nu pot fi implementate). tioneze in functia de sanatate. 2.
-
Page 56: Operare
Functii Functia somn confortabil setarea temperaturii unitatea se opreste Inainte de a merge la culcare, puteti 1 ora scade cu 2 º apasa pur si simplu butonul SLEEP iar unitatea va functiona in modul SLEEP si 1 ora va aduce un somn profund. scade cu 2 º... - Page 57 Functii Functia HEALTH AIRFLOW Functia SILENT/TURBO Apasati butonul QUIET QUIET Setati functia de flux de aer HEALTH AIRFLOW pentru un aer curat Puteti utiliza aceasta functie atunci cand este nevoie de liniste pentru odihna sau 1. Apasati butonul HEALTH AIR- citit.
- Page 58 Functii Functia SWING Functia ECO SENSOR Directia fluxului de aer in sus si in jos Apasati butonul ECO SEN- ECOSENSOR Pentru fiecare apasare, setarea se schimba, dupa cum urmeaza: anuleaza Pentru fiecare apasare a butonului, directia fluxului de aer de pe telecomanda este afisata dupa cum urmeaza, in functie de QUIET QUIET...
- Page 59 Functii Functia TIMER Setarea ceasului. Setati corect ceasul inainte de a incepe functionarea temporizatoru- lui. Puteti lasa unitatea sa pornea- sca sau sa se opreasca automat la urmatoarele ore: Inainte de a va trezi dimineata, intoarceti-va de afara sau De fiecare data cand butonul este apasat, setarea timpului creste dupa ce ati adormit noaptea.
- Page 60 Functii Incarcarea bateriei Functionare ON/OFF si functionare de testare Scoateti capacul de protectie al bateriilor; Operatiunea ON/OFF: ●Folositi aceasta operatiune doar cand telecomanda este defecta sau pierduta. Pentru operatiuni Urgente, a se folosi pentru o perioada limitata. ●Cand intrerupatorul de operatiune de urgenta este apasat, un sunet se va auzi o singura data, cee ace inseamna inceputul acestei Incarcati bateriile confor, ilustratiei.
- Page 61 Lampa UV-C Acest aparat contine o lampa UV-C. Consultati instructiunile de intretinere inainte de a deschide aparatul. Poate rezulta iritarea ochilor sau a pielii prin expunerea directa la lampa UV-C; nu priviti si/ sau nu atingeti lampa UV-C in mod direct. Asigurati-va ca unitatea nu este conectata la energie electrica inainte de a soate filtrul de aer si/sau a-l instala pentru curatare si/sau intretinere.
- Page 62 Functia de sterilizare la 56° C Sterilizarea la 56° C poate fi activata doar prin intermediul aplicatiei Inventor Control. Atunci cand functia de sterilizare la 56° C este activata, aparatul de aer conditionat va functiona dupa cum urmeaza: Etapa 1: Aparatul de aer conditionat va incepe cu functia de autocuratare pentru a indeparta murdaria.
- Page 63 Asigurati-va ca router-ul este aproape de aparatul de aer conditionat pentru a nu aparea probleme in procesul de imperechere a aplicatiei cu aparatul A/C. Pasul 1: Descarcati si instalati aplicatia “Inventor Control” din Google Play Store sau din iOS App Store.
- Page 64 Wi-Fi (SSID) “U-AC-XXXX”. Apoi trebuie sa a continua. Procesul de si porniti unitatea. Setati va intoarceti la meniul “Inventor Control” o data ce v-ati imperechere poate dura aparatul pe modul “COOL”, conectat cu succes.
- Page 65 INFORMATII IMPORTANTE CU PRIVIRE LA CERTIFICAT DE CONFORMITATE TIPUL DE AGENT FRIGORIFIC FOLOSIT EUROPEAN PENTRU ACESTE MODELE Climat: T1 Voltaj: 230 V efect de sera reglementate Declaratie conformitate Toate produsele sunt in conformitate cu urmatoarele dispozitii europene: 2014/53/EU (RED) 1+2= 2014/517/EU (F-GAS) 2009/125/EC (ENERGY) 2010/30/EU (ENERGY)
-
Page 66: Instalarea Unitatii Interioare
Instalarea unitatii interioare Instrumente necesare pentru instalare Sursa de energie Surubelnita Cheie dinamometrica Cleste (17, 22 si 26 mm) tensiunea fara a se defecta. Fierastrau Freza de teava Burghiu cu miez Instrument de ardere corespunzatoare. Cheie (17, 19 si 26 mm) Cutit Detector de scurgeri Banda de masurare... - Page 67 Instalarea unitatii interioare Fixarea placii de montare și pozitionarea gaurii in perete Instalarea unitatii interne Trasarea conductei Ø60mm [Conducta din spate] Ø60mm Ø60mm otel. banda adeziva 2. Asigurati-va inca o data ca nivelul corespunzator al placii, [Stanga • Conducta spate stanga] In cazul tubulaturii din partea stanga, taiati cu ajutorul unui butuc, capacul pentru conductele din stanga.
- Page 68 4G1.0mm 4G1.0mm Instrument pentru Conectarea cablului electric a unitatii interne/externe Instrument de flacara conventional flacara pentru R410A Scoaterea capacului de cablare Piulita cu aripi Tip clatci Tip clatci (tipul rigid) (tip Imperial) 4G1.0mm Indepartati capacul terminalului in coltul din dreapta 0~0.5mm 1.0~1.5mm 1.5~2.0mm...
- Page 69 Verificarea instalarii si testarea La drenaj ■ Va rugam sa explicati clientilor modul de operare cu Indicarea Descrierea ajutorul manualului de instructiuni Analiza si diagnostic codului problemelor Defectiune la Verificati elementele pentru testare senzorul de £ Puneti marcajul P in casete temperatura al Conectarea defecta a camerei...
-
Page 70: Intretinere
Intretinere Pentru folosirea inteligenta a Aerului Conditionat cadru propice pentru NU blocati admisia de aer Telecomanda Corpul intern temperatura din camera sau evacuarea Proper Curatati aerul conditionat folosind o temperature carpa moale si uscata. Pentru pete NU folositi apa, stergeti telecomanda grave, folositi un detergent neutru cu o carpa uscata. -
Page 71: Avertizari
Avertizari Atentie Va rugam apelati la Departamentul Vanzari/Service pentru instalare. Nu incercati sa instalati aerul conditionat de dumneavoastra insiva pentru ca lucrarile improprii pot cauza soc electric, foc, risipa de apa. Atentie Cand se gasesc anomalii, precum mici arsuri, imediat opriti XXXX XXXX imediat butonul de alimentare si contactati departamentul de... -
Page 72: Depanare
Depanare Avertizari Inainte de a apela la service, verificati Nu obstructionati sau acoperiti grilajul de admisie al aerului urmatoarele aspecte intai. conditionat. Nu introduceti degetele sau alte lucruri in admisia de aer sau evacuare si fantele batante. Acest aparat nu este pentru folosirea de catre persoanele Fenomen Cauza sau puncte de reper (inclusive copii) cu capacitate fizice, senzoriale sau mentale... - Page 73 Toate imaginile din acest manual au scop pur informativ. Forma reala a produsului pe care l-ati cumparat poate fi usor diferita insa functiile si operatiile sunt aceleasi. Compania nu isi asuma nici o responsabilitate pentru greselile de tipar. Aspectul fizic si specificatiile tehnice se pot schimba fara o notificare prealabila datorita imbunatatirii continue a echipamentelor noastre.
- Page 74 Spam. Odata ce garantia a fost activata, veti primi un email de confirmare PASUL 5 Ati activat cu succes Garantia Inventor! a Newsletter-ul Inventor Abonati-va la Newsletter-ul Inventor...
- Page 75 entru a va activa mai jos lectrocasnice r-aer-conditionat-si-electrocasnice ului* de mai jos aratului* onfirmare...
- Page 76 Lesen Sie die Hinweise in diesem Handbuch sorgfältig durch, bevor Dieses Gerät ist befüllt mit R32. Sie das Gerät in Betrieb nehmen. Bewahren Sie diesem Handbuch an dem Ort, wo der Benutzer es leicht finden kann. Warnung: Verwenden Sie die Methode die Enteisung oder Reinigung nicht zu beschleunigen, wenn dies nicht vom Hersteller empfohlen sind.
- Page 77 Inhalt TEILE UND FUNKTIONEN ....................BETRIEB ..........................INSTALLATION DES INNENGERÄTS ................. WARTUNG ..........................VORSICHTSMASSNAHMEN....................FEHLERBEHEBUNG ......................
-
Page 78: Teile Und Funktionen
Bauteile und Funktionen Inneneinheit Fernbedienung 1. Taste QUIET (Ruhe) Einlass Anzeige (innen) 2. Taste I FEEL 3. Taste MODE 4. Taste HEALTH Einlassgitter QUIET 5. Taste TEMP+/- 6. Taste SWING nach links/ HEALTH MODE I FEEL AIRFLOW nach rechts Auslass Notschalter HEALTH SLEEP... - Page 79 Bedienung LOCK/LIGHT/RESET/EXTRA CLOCK-Einstellung FUNCTION Setzen sie die Batterien ein Taste LOCK oder drücken Sie Taste “RESET”. Zum Sperren der Tasten und LCD-Anzeige. LOCK RESET “ ” Drücken Sie oder Taste LIGHT “ ” um die korrekte Uhrzeit einzustellen. Schalten Sie das Innendis- QUIET Jedes drücken wird play ein und aus.
-
Page 80: Betrieb
Bedienung Bedienung der AUTO, COOL, Betriebs HEAT, DRY und FAN Anmerkung modus Im automatischen Betrieb wird die Klimaanlage den Kühl- oder Heiz-Betrieb gemäß der Zimmertem- peratur automatisch wählen. Wenn der Ventilator AUTO auf AUTO-Modus eingestellt ist, wird der Ventilator Die Einheit startet. seine Geschwindigkeit gemäß... - Page 81 Bedienung I FEEL-Bedienung HEALTH-Bedienung Drücken Sie Taste HEALTH Drücken Sie Taste I FEEL HEALTH 1.Beim Drücken angezeigt und 1. Nur für Kühlen, Heizen oder AUTO das Klimagerät startet die Gesund- Modus(andere Moduse können heit-Anionen-Funktion. nicht ausgeführt werden). 2.Drücken Sie die Taste HEALTH ein 2.
- Page 82 Bedienung Komfortabler SLEEP Eingestellte Einheit Temperatur ausschaltet Bevor Sie ins Bett gehen, können Sie die Abnimmt um 2°C Taste SLEEP einfach drücken und die 1 Stunde Einheit wird in SLEEP-Modus arbeiten 1 Stunde und ihnen zu einem guten Schlaf ver- Abnimmt um 2°C helfen.
- Page 83 Bedienung HEALTH AIRFLOW-Bedienung QUIET/TURBO-Bedienung Drücken Sie Taste QUIET QUIET Die Einstellung der Gesund- HEALTH AIRFLOW heit-Luftstro m-Funktion Sie können diese Funktion verwenden, 1.Drücken Sie die Taste Gesund- wenn Ruhe für Rast oder Lesen benötigt heit-Luftstrom, dann erscheint wird. auf der Anzeige. Es ist zu vermei- Beim Drücken zeigt die Anzeige für den, starker Luftstrom direkt an den...
- Page 84 Bedienung SWING-Bedienung Luftstrom-Richtung nach oben und ANMERKUNG: unten 1. Wenn die Feuchtigkeit hoch ist, könnte Kondenswasser auf dem Luftaustrittgitter auftreten, falls alle vertikalen Lamellen Für jedes drücken der nach links oder rechts eingestellt sind. Taste, die Luftstromsrich- tung wird auf der Anzeige 2.
- Page 85 Bedienung ECO SENSOR-Bedienung TIMER-Bedienung Stellen Sie bitte die Uhr richtig ein, Drücken Sie Taste ECO bevor Sie den Timer bedienen. Sie kön- SENSOR ECOSENSOR nen die Einheit automatisch ein- oder ECO SENSOR Betrieb:Bei ausschalten wie folgt: Bevor Sie am jedem Drücken der SEN- SOR-Taste ändert sich es wie folgt: Morgen aufwachen oder von außen zurückkommen oder nachdem Sie in...
- Page 86 Bedienung Notbetrieb und Prüfbetrieb Austausch der Batterie ON/OFF-Bedienung: Entfernen Sie die Abdeckung der Batterien; ●Bitte verwenden Sie die Bedienung nur wenn die Fernbedienung defekt oder ausgefallen ist, und das Klimagerät kann mit der Notfall- Funktion automatisch für eine Weile weiter arbeiten. ●Wenn die Taste der Notfall-Bedienung gedrückt wird, kann der Ton „Pi“...
- Page 87 UV-C Lampe Dieses Gerät enthält eine UV-C-Lampe. Lesen Sie vor dem Öffnen des Geräts die Bedienungsanleitung. Augen- oder Hautreizungen können durch direkte Exposition gegenüber der UV-C-Lampe entstehen. Schauen und/oder fassen Sie die UV-C-Lampe nicht direkt an. Stellen Sie sicher, dass das Gerät nicht mit Strom versorgt wird, bevor Sie den Luftfilter zur Reinigung und/oder Pflege ausbauen und/oder installieren.
- Page 88 56°C Sterilisation Die Sterilisationsfunktion 56°C kann nur über die mobile Anwendung Inventor Control aktiviert werden. Wenn die 56°C Sterilisationsfunktion aktiviert ist, arbeitet das Klimagerät wie unten beschrieben: 1. Stufe: Das Klimagerät startet mit der Selbstreinigungsfunktion, um den Schmutz zu entfernen.
- Page 89 Stellen Sie sicher, dass sich der Router in der Nähe der Klimaanlage befindet, um einen ungehinderten Paarungsprozess und kabellosen Betrieb zu ermöglichen. Schritt 1: Laden Sie die Anwendung “Inventor Control” aus dem Google Play Store oder dem IOS App Store herunter und installieren Sie diese Applikation.
- Page 90 Stromversorgung an va la reteaua Wi-Fi (SSID) “U-AC-XXXX”. Apoi trebuie sa Drücken Sie auf Bestätigen, und schalten Sie sie ein. va intoarceti la meniul “Inventor Control” o data ce v-ati um fortzufahren. Der Stellen Sie das Klimagerät conectat cu succes.
- Page 91 WICHTIGE INFORMATIONEN ZUM KONFORMITÄT DER MODELLE MIT EUROPÄISCHEN VERORDNUNGEN VERWENDETEN KÄLTEMITTEL Klima:TI Stromspannung:230V Alle Produkte erfüllen die folgenden europäischen Vorschriften: - 2014/53/EU(RED) - 2014/517/EU(F-GAS) 1+2= - 2009/125/EC(ENERGY) - 2010/30/EU(ENERGY) Nicht in die Atmosphäre entweichen lassen. - 2006/1907/EC(REACH) Kältemitteltyp: R32 GWP-Wert*: 675 RoHS-Richtlinie GWP = Global Warming Potential (Treibhauspotential) Die Produkte entsprechen den Vorschriften der Richtlinie 2011/65/EU...
-
Page 92: Installation Des Innengeräts
Installation des Innengeräts Erforderliche Werkzeuge Stromversorgung für die Installation Drehmomentschlüssel Vergewissern Sie sich vor dem Anschluss an die Netzsteckdose, Schraubendreher (17 mm, 22 mm, 26 mm) dass die Versorgungsspannung konstant ist. Zange Rohrschneider Die Stromversorgung ist auf dem entsprechenden Typenschild Metallsäge angegeben. - Page 93 Installation des Innengeräts [Verrohrung links, links hinten] Anbringen der Montageplatte und Positionieren der Wandbohrung Für die Rohrführung nach links entfernen Sie den Deckel für die Rohrleitung links mit einer Zange. Biegen Sie die Rohre bei einer Rohrführung nach hinten links in Beim ersten Befestigen der Montageplatte Richtung der Bohrungsmarkierung für die Rohrführung nach hinten links, die auf der Wärmeisolierung markiert ist.
- Page 94 Bei Anschluss des Kabels nach erfolgter Installation des Richtig Falsch Innengeräts 1. Führen Sie das Kabel von außerhalb des Raums durch die linke Seite der Schief Beschädigte Bördelung Riss Einseitig Zu weit außen 2. Ziehen Sie das Kabel an der Vorderseite heraus, und schließen Sie es mit ausreichender Reserve (Kabelschlaufe) an.
-
Page 95: Wartung
Wartung Intelligente Verwendung des Klimageräts Stellen Sie eine angemessene Blockieren Sie Lufteinlass und Fernbedienung Gehäuse des Innengeräts Raumtemperatur ein. Luftauslass nicht. Wischen Sie das Klimagerät mit einem Angemessene weichen und trockenen Tuch ab. Verwen- Temperatur den Sie bei hartnäckigen Flecken einen in Verwenden Sie kein Wasser. - Page 96 Vorsicht WARNUNG Versuchen Sie nicht, das Klimagerät selbst zu installieren, da eine unsachgemäße Durchführung zu Stromschlägen, Bränden und Wasserleckagen führen kann. WARNUNG Wenn Betriebsstörungen wie Brandgeruch auftreten, Verwenden Sie eine eigene Vergewissern Sie sich, dass stoppen Sie sofort den Betrieb, und wenden Sie sich an Stromversorgung mit einem der Ablauf sicher installiert ist.
-
Page 97: Fehlerbehebung
Vorsicht Fehlerbehebung Überprüfen Sie folgende Punkte, bevor Blockieren oder bedecken Sie das Lüftungsgitter des Klimageräts nicht. Stecken Sie keine Finger oder Gegenstände in den Einlass/ Sie sich an den Kundendienst wenden. Auslass und die Schwenklamellen. Dieses Gerät ist für Personen (einschl. Kinder) mit Problem Ursache und Ausgangskontrollen eingeschränkten physischen, sensorischen oder psychischen... - Page 98 RED Declaration of Conformity (DoC) Unique identification of this DoC: 20210308001 We, INVENTOR A.G. ELECTRIC APPLIANCES S.A. declare under our sole responsibility that the product: product name: Wi-Fi Module trade name: Inventor type or model: WFM-H20 relevant supplementary information: N.A.
- Page 100 AIR CONDITIONING SYSTEMS WALL MOUNTED UNIT V:3.0.072023 INVENTOR A.G. S.A.
Need help?
Do you have a question about the MFVI-09WFI and is the answer not in the manual?
Questions and answers