Table of Contents
Advertisement
Quick Links
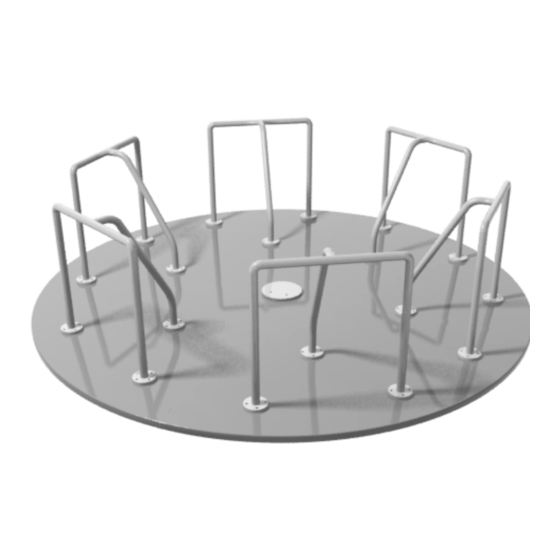
INSTALLATION DETAILS
! Recommended crew (Adult): 2-3
! Installation time: 8-12 Hours not including
concrete cure time
! User age: 5-12
! Use zone: 22' Diameter
! Weight: 990
! Actual Dimension: 120" Diameter
MAINTENANCE:
! As the owner of the playground you are
responsible for maintenance of the equipment and
play area. A maintenance schedule must be
developed and the equipment inspected frequently.
Periodic Inspections, maintenance, repair and
replacement of damaged parts is necessary for the
safe operation and use of the equipment
! A maintenance section that includes component
specific maintenance requirements is included at
the end of this document.
WARNING
Use of safety surfacing (wood mulch) in
compliance with ASTM specification
F1292 is required.
October 4, 2010
UNIT IS DESIGNED FOR 12" OF LOOSE RESILIENT
SURFACING. WOOD MULCH IS THE MANUFACTURERS
PREFERED MATERIAL.
THIS UNIT WILL NOT INSTALL ON POUR IN PLAY. UNIT
WILL ALSO NOT INSTALL OVER ANY OTHER
SURFACING THAT IS LESS THAN 12" HIGH
301-146 10' MGR
INSTALLATION INSTRUCTION
1
Advertisement
Table of Contents

Related Manuals for SportsPlay 301-146 10' MGR


Summary of Contents for SportsPlay 301-146 10' MGR
- Page 1 301-146 10’ MGR INSTALLATION INSTRUCTION INSTALLATION DETAILS ! Recommended crew (Adult): 2-3 ! Installation time: 8-12 Hours not including concrete cure time ! User age: 5-12 ! Use zone: 22’ Diameter ! Weight: 990 ! Actual Dimension: 120” Diameter MAINTENANCE: ! As the owner of the playground you are responsible for maintenance of the equipment and play area.
-
Page 2: Parts List
301-146 10’ MGR INSTALLATION INSTRUCTION PARTS LIST PART # DESCRIPTION 913-801 10’ MGR Quarter Deck 913-323 MGR Handrail 913-379 10’ MGR Post Assembly 336-046 Center Hub Disk for 10’ MGR 913-377 10’ MGR Hub Assembly 913-378 10’ MGR Support Arm 336-044 1 1/2”... - Page 3 301-146 10’ MGR INSTALLATION INSTRUCTION October 4, 2010...
- Page 4 301-146 10’ MGR INSTALLATION INSTRUCTION FOOTING INFORMATION ! Total footing depth is 36” plus the height of the surfacing which is 12” for a total height of 48”. The 36” includes 10” of blocking material, which in this case is dry concrete. So overall only 26”...
- Page 5 301-146 10’ MGR INSTALLATION INSTRUCTION October 4, 2010...
-
Page 6: Specifications
301-146 10’ MGR INSTALLATION INSTRUCTION SPECIFICATIONS INSTALLATION TIPS & TROUBLE SHOOTING ! Deck – 12ga HRPO welded steel deck ! 12” of loose fill surfacing is required for this unit. The manufacturer recommends using a certified wood ! Deck Coating – Thermoplastic fiber/chips surfacing rather than sand or pea gravel ! Handrail –... -
Page 7: Before You Begin
301-146 10’ MGR INSTALLATION INSTRUCTION BEFORE YOU BEGIN In addition to the components on the packing list you will need a shovel, concrete, magnetic level and a socket or wrench set. INSTALLATION STEPS __1. Once the desired location has been determined while keeping a 22! dia use zone in mind, dig a 36"... - Page 8 301-146 10’ MGR INSTALLATION INSTRUCTION __6. When installing the deck sections (1) make sure NOT to place tab on support arm (6) in between the deck sections, tab should fit on the inside of the flanged lide of the deck. Also, completely install all deck sections before tightening the bolts completely.
-
Page 9: Equipment Maintenance
301-146 10’ MGR EQUIPMENT MAINTENANCE Operational Finish ! Grease Merry Go Round Weekly ! Inspect all metal components for or daily in an environment that coating damage. If powder coating has sand or other small damaging needs to be repaired sand surface and materials. - Page 10 301-146 10’ MGR EQUIPMENT MAINTENANCE INSPECTION FORM ! MAKE COPIES OF THIS FORM TO USE FOR INSPECTION ! REVIEW THE “MAINTENANCE GUIDE” IN THE APPENDIX TO BETTER UNDERSTAND THE IMPORTANCE OF MAINTENANCE AND HOW TO DEVELOP A MAINTENANCE SCHEDULE. ! DOCUMENT ALL MAINTENANCE ACTIONS ON THE LIST AS WELL AS ANY NOT LISTED. ! INCLUDE DATES AND SIGNATURES Inspection Checklist Recommended...
Need help?
Do you have a question about the 301-146 10' MGR and is the answer not in the manual?
Questions and answers