Table of Contents
Advertisement
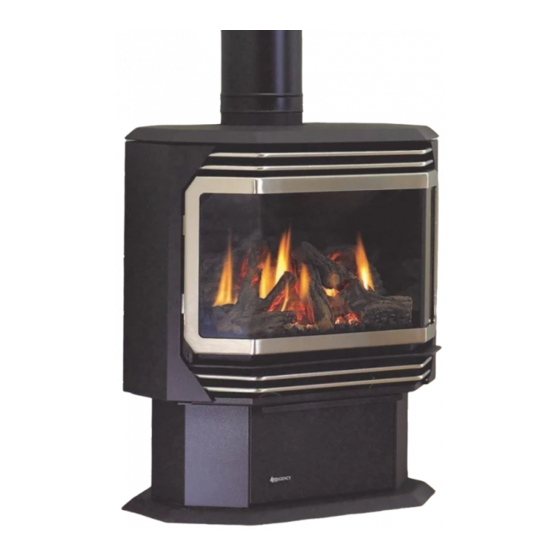
ULTIMATE™ U38E Freestanding Gas Stove
MODELS: U38E-NG11 Natural Gas
WARNING
FIRE OR EXPLOSION HAZARD
Failure to follow safety warnings exactly could result in serious
injury, death, or property damage.
- Do not store or use gasoline or other flammable vapors and liquids in the vicinity of this or any other
appliance.
- WHAT TO DO IF YOU SMELL GAS
• Do not try to light any appliance.
• Do not touch any electrical switch: do not use any phone in your building.
Leave the building immediately.
• Immediately call your gas supplier from a neighbour's phone. Follow the gas supplier's
instructions.
• If you cannot reach you gas supplier, call the fire department.
- Installation and service must be performed by a qualified installer, service agency or the gas supplier.
Tested by:
Certified to/Certifié pour: CSA 2.17-2017
919-973
FPI FIREPLACE PRODUCTS INTERNATIONAL LTD. 6988 Venture St., Delta, BC Canada, V4G 1H4
U38E-LP11 Propane
Installer: Please complete the details on the back cover
ANSI Z21.88-2017
and leave this manual with the homeowner.
CSA 2.33-2017
Homeowner: Please keep these instructions for future reference.
Owners &
Installation Manual
U38-39 Video
www.regency-fire.com
03.04.19
Advertisement
Table of Contents

Related Manuals for Regency ULTIMATE U38E


Summary of Contents for Regency ULTIMATE U38E
- Page 1 Owners & ULTIMATE™ U38E Freestanding Gas Stove Installation Manual U38-39 Video www.regency-fire.com MODELS: U38E-NG11 Natural Gas U38E-LP11 Propane WARNING FIRE OR EXPLOSION HAZARD Failure to follow safety warnings exactly could result in serious injury, death, or property damage. - Do not store or use gasoline or other flammable vapors and liquids in the vicinity of this or any other appliance.
- Page 2 Hersey/Intertek for both safety and efficiency. As it also bears our own mark, it promises to provide you with economy, comfort and security for many trouble free years to follow. Please take a moment now to acquaint yourself with these instructions and the many features of your Regency Gas Stove.
-
Page 3: Table Of Contents
If the unit is being operated in IPI (intermittent pilot) mode, neither the above instructions nor the seven day timer will apply. See the instructions in this manual and on the Lighting Instructions plate on the appliance to light or re-light the pilot. Regency U38E-11 ULTIMATE Freestanding Gas Stove... -
Page 4: Dimensions Dimensions
OPTIONAL DECORATIVE COLLAR 9 13 16 " (250mm) ALL PICTURES / DIAGRAMS SHOWN THROUGHOUT THIS MANUAL ARE FOR ILLUSTRATION PURPOSES ONLY. ACTUAL PRODUCT MAY VARY DUE TO PRODUCT ENHANCEMENTS. Regency U38E-11 ULTIMATE Freestanding Gas Stove ®... -
Page 5: Safety Label For The U38E-11
This is a copy of the label that accompanies each ULTIMATE NOTE: Regency ® units are constantly being Freestanding Gas Stove. We have printed a copy of the improved. Check the label on the unit and if contents here for your review. The safety label is located on there is a difference, the label on the unit is the the inside of the drop down pedestal door. -
Page 6: Before You Start
ANY SAFETY SCREEN, GUARD, OR CIALLY THE FIREPLACE GLASS, AND BARRIER REMOVED FOR SERVICING SHOULD STAY AWAY TO AVOID BURNS AN APPLIANCE MUST BE REPLACED OR CLOTHING IGNITION. PRIOR TO OPERATING THE APPLIANCE. Regency U38E-11 ULTIMATE Freestanding Gas Stove ®... -
Page 7: Lighting Procedure
If the unit is being operated in IPI (intermittent pilot) mode, neither the above instructions nor the seven day timer will apply. See the instructions in this manual and on the Lighting Instructions plate on the appliance to light or re-light the pilot. Regency U38E-11 ULTIMATE Freestanding Gas Stove... -
Page 8: Copy Of The Lighting Plate Instructions
Colours: Black on Grey, except for parts indicated as being Red. Punch out .25" hole top right corner where indicated. Size: 100% w- 6.52" h- 11.13" Regency U38E-11 ULTIMATE Freestanding Gas Stove ® Apr 05/16: Created decal Apr. 26/16: Added Fr. Headers/warnings... -
Page 9: Proflame Ii Remote Control Operating Instructions
(*) The receiver may be independent or integral to the IFC hearth ap- pliance control module. The receiver instruction may not be indepen- dent when part of the IFC. Figure 2: Transmitter LCD Display Fig3: Battery Figure 3: Battery Compartment compartment. Regency U38E-11 ULTIMATE Freestanding Gas Stove ® 09.29.17 919-829... - Page 10 Transmitter LCD display will only show the room temperature (Fig. 6). At the same time the Receiver will turn off the appliance. A single “beep” from the Receiver confi rms reception of the command. Figure 9 Figure 10 Regency U38E-11 ULTIMATE Freestanding Gas Stove ® 919-829 09.29.17...
- Page 11 Keys (fi g.1) to turn on, off or adjust the fan speed (fi g. 14). A single “beep” will confi rm reception of the command. Figure 17 Figure 18 Figure 13 Figure 14 Regency U38E-11 ULTIMATE Freestanding Gas Stove ® 09.29.17 919-829...
- Page 12 3rd battery is installed, then release the mode button only. 4. The screen will show either "Clr" or "Set" with the 1st mode being your option to disable or enable. Regency U38E-11 ULTIMATE Freestanding Gas Stove ® 919-829...
-
Page 13: Installer's Information
(e) A copy of all installation instructions for all Product Approved side wall horizontally vented gas fueled equipm ent, all venting instructions, all parts lists for venting instructions, and/or all venting design instructions shall remain with the appliance or equipment at the completion of the installation. Regency U38E-11 ULTIMATE Freestanding Gas Stove ®... -
Page 14: Installation
Pipe Venting Arrangement" section. d. Converting a Class-A Metal Chimney or Masonry Chimney to a Direct Vent system. 4. Install 4-AA batteries into receiver. This will enable operation of appliance manuall when in "ON" position. Regency U38E-11 ULTIMATE Freestanding Gas Stove ®... -
Page 15: Clearances To Combustibles
90 degrees. Pipe fresh air into the pedestal area by using duct pipe with a mesh grill at the outside termination. Attach the pipe to the tabs with screws. Side View Regency U38E-11 ULTIMATE Freestanding Gas Stove ®... -
Page 16: Draft Hood
For altitudes above 2000 ft. we recommend that a minimum flue height of 12 ft. is used. Flue Mounting Bracket Attach the flue mounting bracket with the enclosed screw as shown in the diagram. 6” Decorative Collar Regency U38E-11 ULTIMATE Freestanding Gas Stove ®... -
Page 17: Gas Connection
7 day period, sure tap(s) using a 5/16" ID hose. the pilot is designed to extinguish. 4. Light the pilot and turn the valve to "ON" posi- See lighting instructions for lighting pilot. tion. Regency U38E-11 ULTIMATE Freestanding Gas Stove ®... -
Page 18: Conversion Kit# 753-977 From Ng To Lp
4. Open pedestal door and remove the chain from door which will allow door to 20. The burner aeration should be set to fall. 10. Unscrew the pilot orifice with the allen 1/2" open for LP. 5. R emove 2 screws that secure the front key and replace with the LPG pilot See aeration adjustment details in the door to the unit. One screw is on the left orifice in the kit. manual. hand side and the other on the right hand side. (Left side shown). 11. Reinstall new burner orifice LPG 21. Check for proper flame appearance and stamped #50 and tighten. glow on logs. Installer Notice: These instructions must be left with the appliance. Regency U38E-11 ULTIMATE Freestanding Gas Stove ® 01.30.19 919-993... -
Page 19: Conversion To Lower Btu Rating
4) Remove burner orifice with a 1/2" wrench and discard. 11) Check operation of flame control. Check for proper flame appearance and glow on logs. 5) Reinstall new burner orifice (NG stamped Burner Orifice Regency U38E-11 ULTIMATE Freestanding Gas Stove ®... -
Page 20: Log Set Installation
Place Rear Log A on the two pins on the rear log support. Place the Left Top Log D on the pin on Log B and on top of the cut-out on Log A. Pins on Rear Log Support Cutout Regency U38E-11 ULTIMATE Freestanding Gas Stove ® 918-039b 04.05.18... - Page 21 10. Next, take the white Platinum Ember material (provided) and gently separate the layers until you have a fi ne layer to place onto the Embaglow (steel wool type media). Platinum Embers Notch 918-039b 04.05.18 Regency U38E-11 ULTIMATE Freestanding Gas Stove ®...
- Page 22 12. Test fi re to ensure proper light off (make sure fl ame fl ows smoothly from one end of burner to the other. If there is any fl ame hesitation, check that area for any blockage of the burner port. A)02-65 B)02-56 E)02-45 C)02-44 Regency U38E-11 ULTIMATE Freestanding Gas Stove ® 918-039b 04.05.18...
-
Page 23: Driftwood Log Set Installation
Place Rear Log A on the two pins on the rear log support. Place the Left Top Log D on the pin on Log B and on top of the cut-out on Log A. Pins on Rear Log Support Cutout Regency U38E-11 ULTIMATE Freestanding Gas Stove ® 919-939 10.15.18... - Page 24 10. Next, take the white Platinum Ember material (provided) and gently separate the layers until you have a fi ne layer to place onto the Embaglow (steel wool type media). Platinum Embers Notch Regency U38E-11 ULTIMATE Freestanding Gas Stove ® 919-939 10.15.18...
- Page 25 12. Test fi re to ensure proper light off (make sure fl ame fl ows smoothly from one end of burner to the other. If there is any fl ame hesitation, check that area for any burner port blockage. Regency U38E-11 ULTIMATE Freestanding Gas Stove ® 919-939...
-
Page 26: Front Door Installation
Note: The door latch may require adjust- ment as the door gasket material compresses after a few fires and after glass replacement. Turn the latch catch inward or outward to loosen or tighten. Regency U38E-11 ULTIMATE Freestanding Gas Stove ®... -
Page 27: Wiring Diagram Without Thermostat
See battery back up instructions in this manual The fan will not tacle. Do not cut or remove the operate during a power outage. grounding prong from this plug. GREY Spill Switch GREY EXTERNAL ANTENNA Regency U38E-11 ULTIMATE Freestanding Gas Stove ®... -
Page 28: Wiring Diagram With Optional Thermostat
Wiring Diagram with Optional thermostat GREY Spill Switch GREY Thermostat (Optional) (Millivolt) EXTERNAL ANTENNA Regency U38E-11 ULTIMATE Freestanding Gas Stove ®... -
Page 29: Battery Backup
3. Install 4 AA batteries ensuring they are polarity correct. See diagram 4. 2. Press down on both tabs to remove battery compartment door. See diagrams 2 and 3. 4. Reverse steps 3-1. Regency U38E-11 ULTIMATE Freestanding Gas Stove ®... -
Page 30: First Fire
A wall thermostat may be installed if desired. Con- nect the wires as per the wiring diagrams. Note: Preferable if the thermostat is installed on an interior wall. Regency offers an optional programmable thermo- ® stat but any 250-750 millivolt rated non-anticipator type thermostat that is CSA, ULC or UL approved may be used. -
Page 31: Normal Operating Sounds Of Gas Appliances
"cracking" and "ticking" sounds will be heard ING IGNITION. YOUNG CHILDREN ote: If you have an incorrect flame pattern, throughout the cycling process. SHOULD BE CAREFULLY SUPER- contact your Regency dealer for further ® instructions. VISED WHEN THEY ARE IN THE SAME ROOM AS THE APPLIANCE. -
Page 32: Aeration Adjustment
Note: Any damage due to carboning re- sulting from improperly setting the aeration controls is NOT covered under warranty. Note: Aeration Adjustment should only be performed by an authorized Regency Installer at the time of ® installation or service. Regency U38E-11 ULTIMATE Freestanding Gas Stove... -
Page 33: Maintenance Instructions
Never operate your and should only be refinished with heat resist- the stove. unit with broken glass. ant paint (not with wall paint). Regency uses ® StoveBright Paint - Metallic Black #6309. WARNING: Do not operate appliance with the glass front removed, cracked or broken. -
Page 34: Valve Replacement
6) Carefully remove the logs and lava rock. 7) At this point you should disconnect the gas at the valve. 8) Remove the burner by removing the two 1/4" hex head screws. See diagram below. Regency U38E-11 ULTIMATE Freestanding Gas Stove ®... -
Page 35: U38E-11 Main Assembly
Front Control Panel Plate 730-531 Short Side Panel Door Assy (each) 560-031 Hinge for Side Panel (each) 904-258 Side Panel Door Magnet (each) 948-255 Door Latch c/w Hook (each) (SEPARATE ILLUSTRATION ON GLASS DOOR FRONTS) Regency U38E-11 ULTIMATE Freestanding Gas Stove ®... -
Page 36: U38E-11 Burner & Log Assembly
Pilot Orifice LP #51 0.977.165 910-037 Pilot Orifice NG #30 0.977.167 911-039 Pilot Hood 753-977 Conversion Kit LP 911-093 120 Volt Power Cord (10 foot extension) 911-137 Pilot Clip *Not available as a replacement part. Regency U38E-11 ULTIMATE Freestanding Gas Stove ®... -
Page 37: U38E-11 Door Assembly
Brushed Nickel Wrap Door - Complete 101) 732-570 Door Gasket Kit 105) Ceramic Paper 107) 936-243 Glass Gasket 111) Door Frame Fibre Paper 208) 940-325/P Wrap Glass 209) 732-020 Door Mounting Bracket *Not available as a replacement part. Regency U38E-11 ULTIMATE Freestanding Gas Stove ®... -
Page 38: Warranty Warranty
FPI is not responsible for results or costs of workmanship of unauthorized FPI dealers or agents in the negligence of their service work. Revision Date: February 2019 Regency Gas Products Warranty Regency U38E-11 ULTIMATE Freestanding Gas Stove... - Page 39 Freight damages for products or parts are not covered under the terms of the warranty. Products made or provided by other manufacturers and used in conjunction with the FPI appliance without prior authorization from FPI may void this warranty. Revision Date: February 2019 Regency Gas Products Warranty Regency U38E-11 ULTIMATE Freestanding Gas Stove ®...
- Page 40 Product Registration and Customer Support: Thank you for choosing a Regency Fireplace. Regency strives to be a world leader in the design, manufacture, and marketing of hearth products. To provide the best support for your product, we request that you complete a product registration form at http://www.regency-fire.com/Customer-Care/Warranty-Registration.aspx...
- Page 41 Product Registration and Customer Support: Thank you for choosing a Regency Fireplace. Regency strives to be a world leader in the design, manufacture, and marketing of hearth products. To provide the best support for your product, we request that you complete a product registration form found on our Web Site under Customer Care within ninety (90) days of purchase.
- Page 42 Regency U38E-11 ULTIMATE Freestanding Gas Stove ®...
- Page 43 Regency U38E-11 ULTIMATE Freestanding Gas Stove ®...
- Page 44 Dealer Name & Address: ______________________________________________ ___________________________________________________________________ Installer: ___________________________________________________________ Phone #: ___________________________________________________________ Date Installed: ______________________________________________________ Serial No.: __________________________________________________________ U38-39 Video Regency is a trademark of FPI Fireplace Products International Ltd. ® Printed in Canada © Copyright 2019, FPI Fireplace Products International Ltd. All rights reserved.
Need help?
Do you have a question about the ULTIMATE U38E and is the answer not in the manual?
Questions and answers